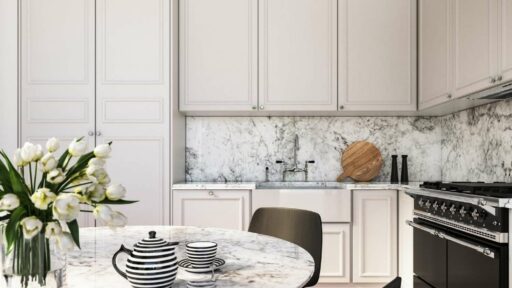

You can build shelves, trim pieces, cabinet doors, and built-in storage with basic materials, but many do-it-yourself upgrades still fall short of that polished look. What often separates a basic installation from a refined one is the attention given to the finishing work.
Small details like smooth shelf edges, neat trim joints, and clean panel recesses can make a huge difference in how finished a DIY interior project looks. Many renovators rely on woodworking routers and trimmers to shape edges, cut precise recesses, and create consistent details across cabinets, shelving, and built-in features.
Why Small Woodworking Details Matter in Interior DIY
When edges are uneven or cuts are rough, the entire project draws attention for the wrong reasons. Shelves may function perfectly, but poorly fitted trim can make the installation look far from professional.
Careful detailing changes that impression quickly. Smooth edges feel better to the touch, trim lines look deliberate, and panels sit neatly against walls and cabinets. These small improvements help furniture, shelving, and interior fittings blend seamlessly with modern décor.
Where Routers and Trimmers Are Used in Home Projects
Routers and trimmers appear in many common DIY upgrades. You might use them to round the edge of a shelf or smooth the perimeter of a wood top. They can also trim composite materials such as laminate and veneer, so surfaces look flush and uniform.
These tools also help with precision tasks. For example, you can cut hinge recesses for cabinet doors or create grooves for shelving panels. Because the tool follows guides and bits designed for specific cuts, results stay consistent and repeatable.
Edge Profiles That Improve Furniture and Shelving
Edge profiles affect how furniture feels and how it fits within a room’s design.
Round‑over edges are a popular choice for shelves and tabletops. They remove sharp corners and create a smooth look. Chamfer edges produce a clean, angled line that suits contemporary interiors. Decorative trim profiles can also add visual depth to cabinets or floating shelves, echoing the craftsmanship seen in period furniture.

Different species of wood respond uniquely to these profiles. Hardwoods like oak hold crisp chamfers, while softer woods such as pine benefit from rounded edges that reduce splintering.
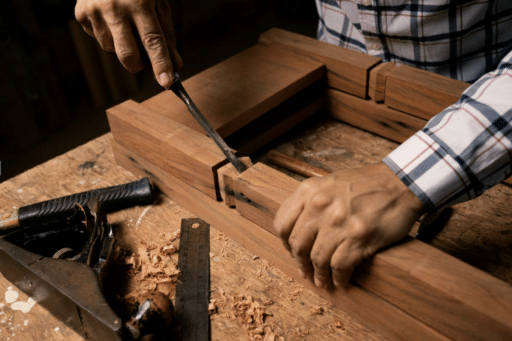
Using Precision Cuts for Cabinets and Built-Ins
Cabinet installation depends heavily on precise cuts. Hinges require recessed pockets so doors close properly, while panels must align with cabinet frames. Even small measurement errors can lead to crooked doors or visible gaps.
Clean routing helps prevent these issues. Straight bits allow you to cut accurate recesses for hardware and fittings. With neat joinery, doors hang evenly and shelves sit flat.
Increasing joint surface area also strengthens connections, keeping built‑ins stable and long‑lasting. The same precision applies to furniture construction, where accurate shaping and chair joinery ensure symmetry and strength across pieces.
Improving the Look of Trim and Decorative Features
Trim work often frames the entire interior project. Skirting boards, wall paneling, and molding pieces guide the eye across a room. If those lines look uneven, the entire design loses its impact.
Shaped trim pieces solve this problem. Routers can create decorative grooves or soften edges along molding strips. When each section follows the same profile, trim features appear consistent from wall to wall, strengthening the overall design.
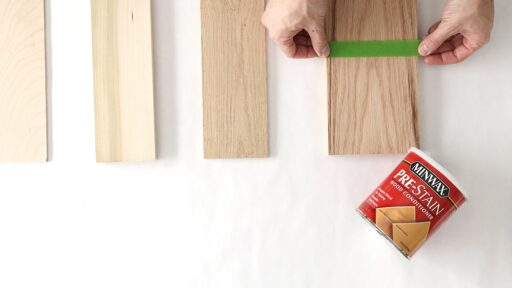
Tips for Achieving Clean Results in DIY Woodworking
Good results start with preparation. Mark your cuts clearly, secure the wood firmly, and work on a stable surface so the tool moves smoothly without slipping off the line. It also helps to use guides to keep the router on track.
Make shallow passes instead of cutting deeply in one motion to keep edges smooth and reduce strain on the tool. Pay attention to grain direction to minimize tear‑out, then test your cuts on scrap wood before working on the final piece. Patience and careful setup are essential to clean, professional-looking results.
Managing Dust and Workspace Safety
Routing wood creates a surprising amount of dust. Fine particles spread quickly across the workspace and can settle on finished surfaces. This dust also reduces visibility while you cut.
Good dust control helps prevent these problems. Use dust extraction whenever possible and maintain a tidy workspace. Protective glasses, masks, and hearing protection also keep you safe during longer projects.
Common Mistakes DIYers Should Avoid
Many beginners rush through the shaping stage. They attempt deeper cuts to save time or skip test passes entirely. Unfortunately, these shortcuts often create chipped edges or uneven profiles.
Another common mistake involves dull bits. Worn cutting edges tear wood fibers instead of slicing cleanly. Always inspect bits before starting a project. Supporting long boards properly also prevents vibration that can damage the cut.
How Finishing Details Transform the Final Result
At first, these details may seem minor. A softened shelf edge or a carefully cut recess might not stand out individually, but together they build a sense of craftsmanship across the entire room.
Consistent edges, clean recesses, and well-fitted trim elements make shelves and cabinets feel integrated with the space. Clean furniture finishes highlight these details, elevating the final product into something that feels both polished and professional.
FAQs
What is the difference between a router and a trimmer?
Routers are typically larger and designed for heavier woodworking tasks, while trimmers are smaller and easier to handle for lighter detail work and edge finishing.
Can beginners use routers safely for DIY projects?
Yes, beginners can use routers safely by starting with simple tasks, using proper guides, and making shallow passes rather than deep cuts.
Which edge profile works best for shelves?
Round-over edges are one of the most popular choices because they soften corners and create a clean, modern finish.
Do I need special bits for cabinet work?
Common bits, such as straight bits, chamfer bits, and round-over bits, are often enough for most cabinet and shelving projects.
How can I avoid rough edges when shaping wood?
Using sharp bits, making slow controlled passes, and sanding lightly after cutting can help produce smooth edges.
What safety precautions should be followed when routing wood?
Always secure the material firmly, wear eye and hearing protection, and keep your hands clear of the cutting area while operating the tool.

With a Master in Architectural Studies from University of Pennysylvania, Marwa Haydar has pioneered living spaces since 2005. Her expertise, initially honed in a prestigious architectural firm, is evident in her approach to creating environments. Marwa became part of our team in 2019 and has since been a driving force in our home improvement section, known for her practical yet stylish solutions. She’s been spearheading our design workshops since then, infusing her passion for teaching into her work. In her leisure time, Marwa enjoys exploring historic architecture and is an enthusiastic pottery hobbyist, further enriching her understanding of form and texture.