
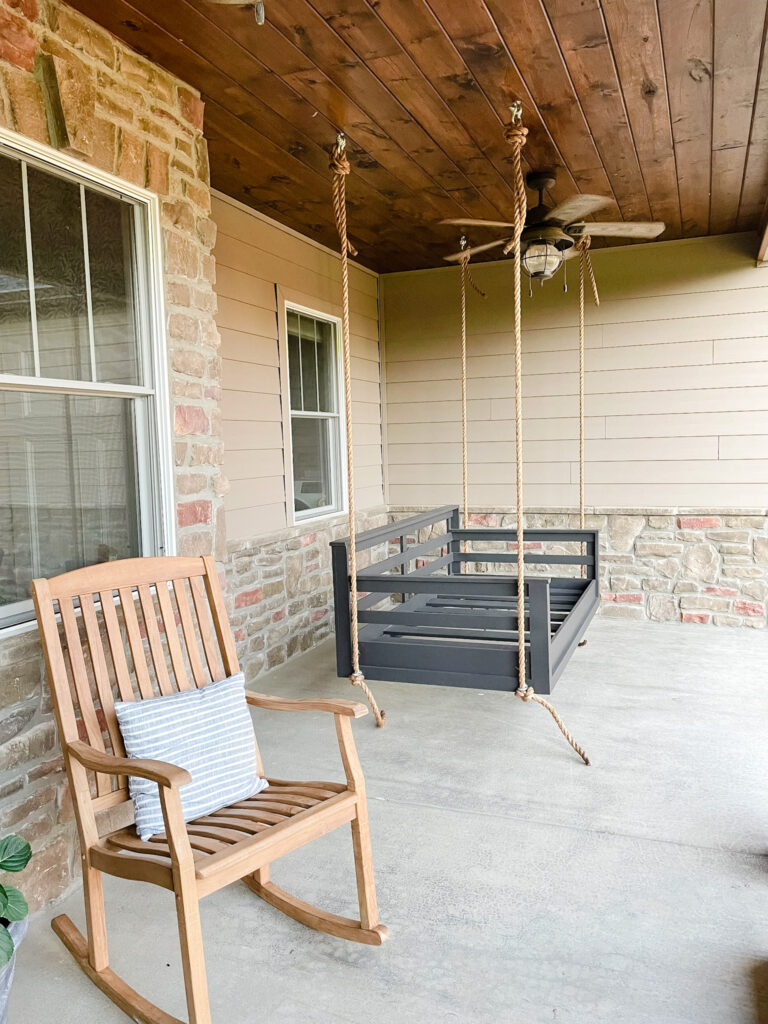
Porch bed swing plans with printable ideas are here for your next DIY quest! Porch swing beds are super easy to build, yet they are the most beautiful DIY furniture you may ever build on your own.
It definitely is not only a piece of furniture; it is the show’s topper when you have it on your porch, and additionally, this gives you the certificate of smarter and super talent from your guests.
Porch swings are the best innovation to recreate the rhythm of a lullaby for yourself. A nap with nature is priceless for enjoying the relaxation in the comfort of your home. Nothing is more precious than a safe and sound nap in a day, right?
To enjoy the luxury now, you might feel like creating a swing bed on your porch. Fine, we have covered you with every detail you need to know here and a special addition of porch bed swing plans with printable plans.
Let’s start working!
Know the Porch Bed Swing
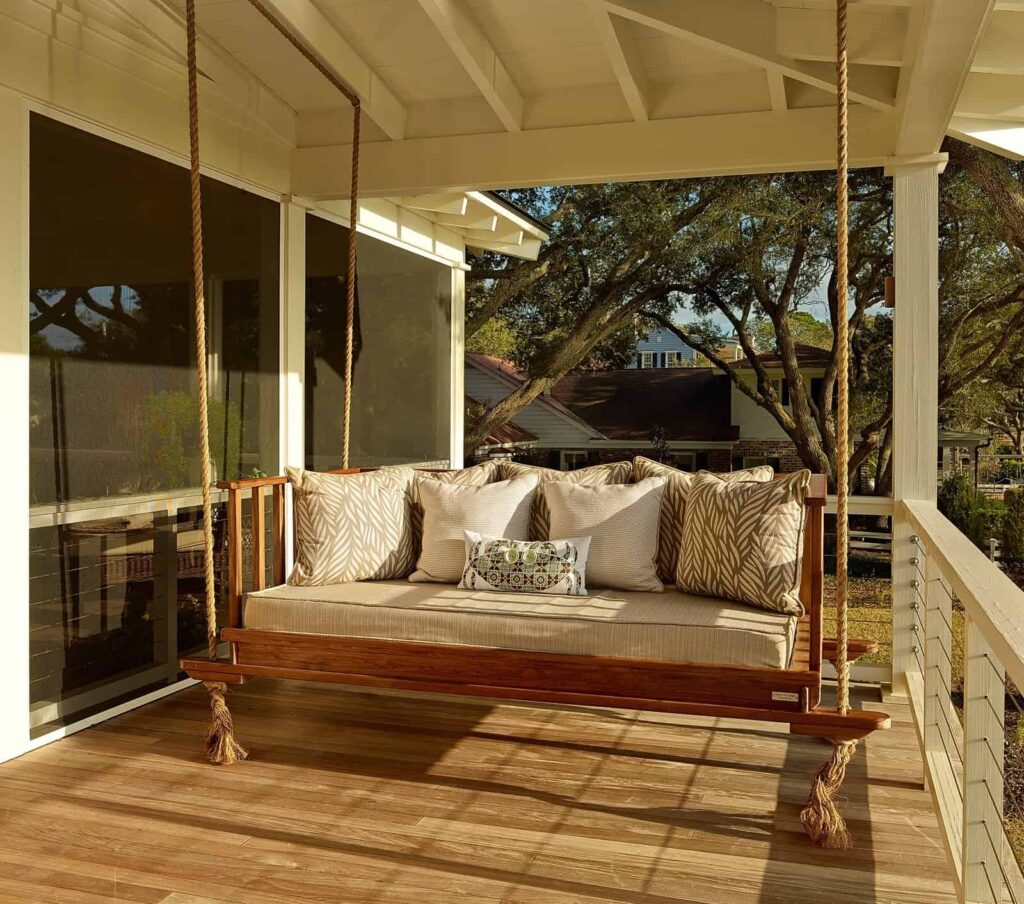
The porch bed swing is on many of our wish lists for our home or the dream house we want to own in the future. The versatility of this bed is the first priority as you can use this as a couple’s chat place in the evening tea or use it for a peaceful outdoor nap time. The options are multilevel, with the bed swing and a gorgeous makeover for your porch.
Size of The Porch Bed Swing

The size is totally dependent on your preferences. You can have it in various sizes, from a crib to a queen bed size. As we discussed above, the queen size can make it more versatile to use for many options, even though you can fit any size mattress in the standard twin-size swing.
The reason is it is not too big to get cramped with a porch or not too small to accommodate two people sitting. It is a convenient size for every house. That’s why we picked this size here to know the DIY porch bed swing plans.
Cost of a Porch Bed Swing
Before getting into the idea of building your porch bed swing, you might have searched with all possibilities for buying a ready-made porch bed swing. Now, the reason for doing it by yourself is a valued one.
Yes, these are way more costly than a comfy couch. That, too, the swing alone will cost you around $1400 – $2200. The worst part is it won’t have the mattress and rope included with the swing.
It’s not necessary to spend that much on an outdoor swing bed when you can create one with a personal touch to enhance your carpentry skills. To create it in an inexpensive way, you have to put some money into it, obviously, to arrange the necessary materials, from wood to many other elements.
Finally, it won’t have the same budget as the readily available one, but it will be a handsome amount to put into it.
DIY Porch Bed Swing Plans

While talking about the swing beds, you must have to follow the measurements and ratios with a plan. Then, only the outcome of your porch bed swing will be a great addition to your collections.
Not everyone can create a plan and work through that, and if you can, it’s well and good. You can proceed with your plan. If you don’t, it’s mandatory to purchase a porch bed swing plan before starting your DIY work on the porch swing.
The best benefit is you can get many ideas from previous DIY projects and ideas with the success stories of many people before you. By following the simple steps, you can achieve it, too.
A few porch bed swing plans to purchase are as follows.
The above plans may guide you through the journey of building the swing bed in a burdenless manner. The first one from the plank and pillows is a chargeable plan, which may cost about $15 for you to make the purchase. The second one is a free plan with simple and easy explanations to make an expert in this DIY project.
Tools and Supplies

Beginning to start the DIY carpentry work is always buying the best choice of wood for your furniture. You don’t need to be a carpenter to build a swing bed. You can do it alone or with a company; either way, it is fun and rewarding work to have many more years in the future.
So, just confirm with the wood boards that you will look it straight with your utmost attention. This is an essential criterion to look for before buying wooden boards.
Tools
- Measuring Tape
- Finishing Nailer
- Wood glue
- Miter saw
- Wood filler
- Sandpaper
- Finish nails in two sizes 1 ¼ inches and 2 inches
Supplies
Prime pine board in various sizes according to your plan.
- 1x8x8′ – 3 pieces
- 1x3x8′ – 12 pieces
- 1x4x8′ – 1 piece
- 2x3x8′ – 2 pieces
- 2x4x8′ – 1 piece
- 1x6x8′ – 4 pieces
The price of the wood boards is variable according to the location and availability. This has constant fluctuations in the price when it comes to wood.
Building The DIY Porch Bed Swing
Let’s start building our project!
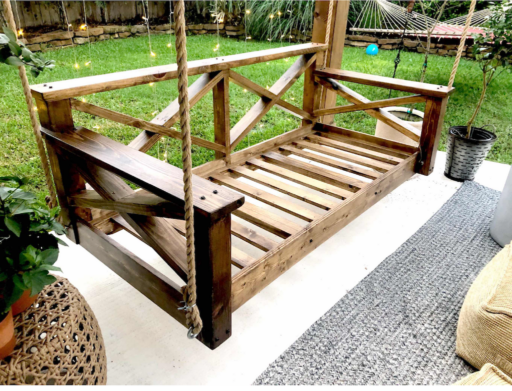
Step 1. Building The Frame
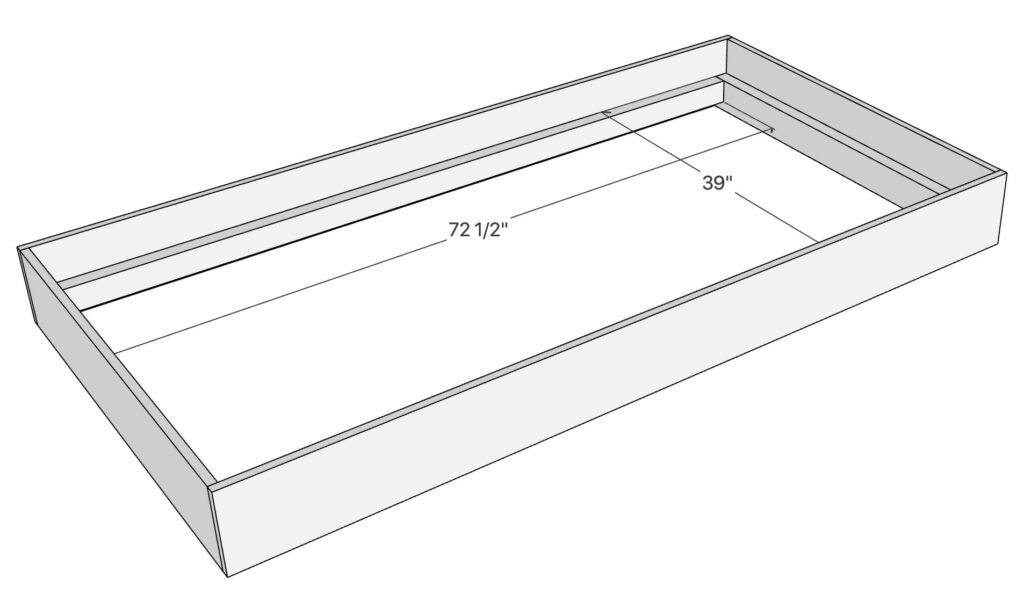
Building the swing starts with building the frame primarily. First, fix an airy, ventilated area to have a bright and energetic work time. You can use your porch, which is going to have this special piece of work.
The main bed frame is 1×8′ in size here. Take measurements from the plans, too. To join the corners, use 2″ finish nails. You need to provide some inner support with an additional frame, and this helps in the nail beds, too. The sides of the frame can have 2×4′ to give additional bulk to attach the eye screws.
Both bottoms of the 2x4s should be equaled at the bottom of the main frame. After this, you can nail the 2″ nails along with glue applying. For the back and front of the frame, use the 2x3s. Here, the top of the 2x3s should be equal to the top of the 2x4s.
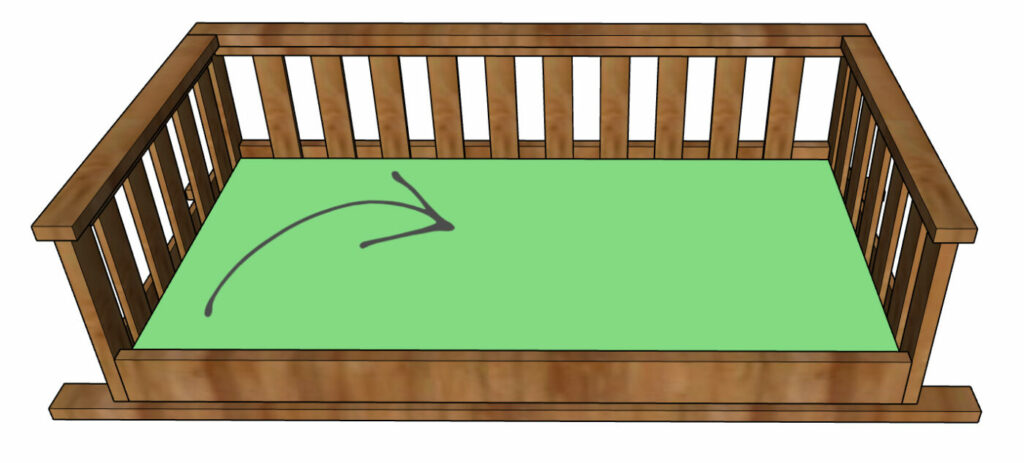
To give the slats, cut the 8x3x9 long pieces of 1×6 knotty pine with a decent space of 4 ½ inches in between them. You can nail these boards in the inner side of the frame to support the mattress spread over the swing.
Step 2. Building The Post
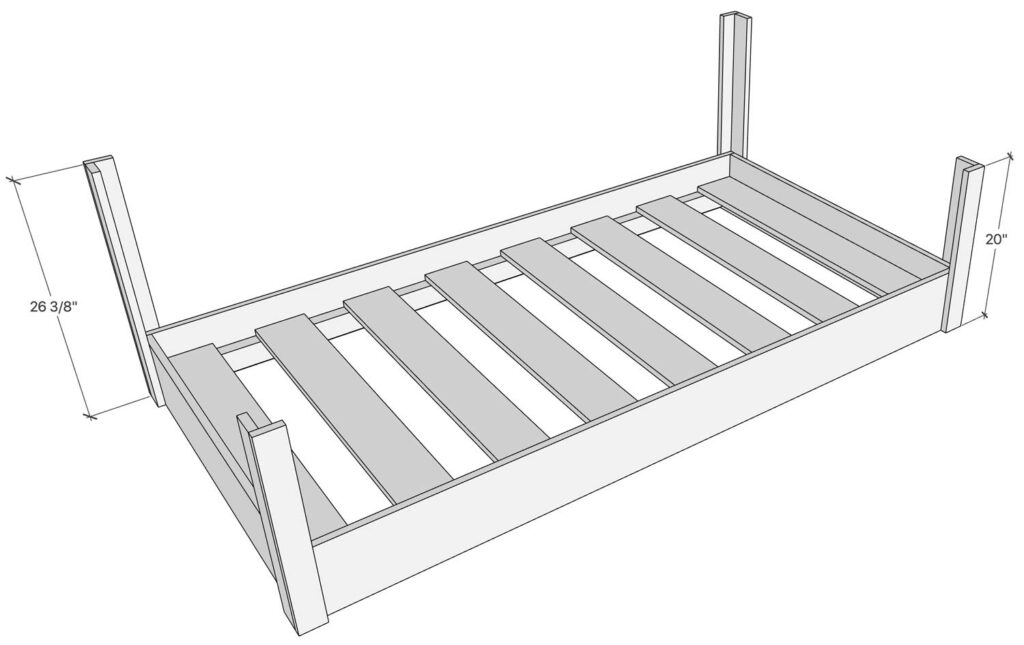
The next step is to create the posts for your bed swing. Give the 1×3 pine boards on each corner of your frame to build the posts. Make sure that each post has to be an attachment of two pieces of board.
You can attach them with wood glue. While attaching the two boards, they should be placed in an L-shaped edge for a perfect lineup. And finally, you can nail them with 2″ nails.
The posts are ready now, so you can attach them to the corners of the frame with wood glue and 1 ¼ ” nails.
Step 3. Adding The Rails

The rails are the horizontal connecting pieces that connect all the posts together. For this, you need to cut off the rails first, along with the side rails. You can get a reference from the porch bed swing plans’ illustrated images to know the space giving and length measurements.
Give some extra cutting to the armrest boards. Use the 1×3 piece for both sides of the armrest by cutting the wood board with a jigsaw to notch a section to fit the backside posts to the frame. After giving the cuts, you can start nailing the rail to finish the armrest. Also, add the boards of 1x3s to all four sides of the bottom with the 1 ¼ ” nails for a finishing touch look.
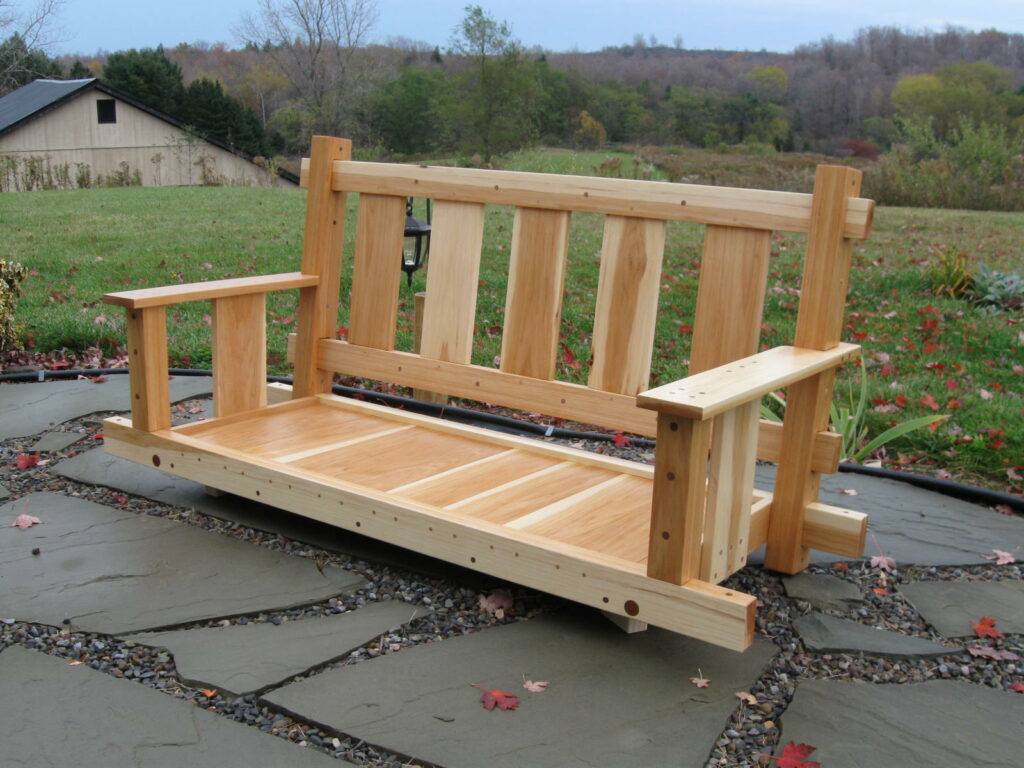
Step 4. Finishing The Porch Bed Swing Plan Work
Finishing is your choice of work, either an unfinished look with some protective coating or painting with your favorite color or staining. Final designing is your area for the personalized look that you have had inside you for so long.
Before that, fill every single hole in the swing with wood putty and sand it with sandpaper for a smooth finish. Handrails should not have any splinters in them. Finish the corners with sandpaper for a rounded corner. Staining could give a classy look if you have already used stained wood in your house in any area. This might help with coordination for your porch bed swing.
If your swing is on a covered porch, you may not need to add the protective layers, and it may not get tanned from the sun or soaked with the water with the rain. However, it is always advised to stain your exterior wood furniture to avoid any damage.
If you want your swing bed to stay on the porch for a longer period, you need to maintain it in good condition with such care. If you think that your swing might get some exposure to the sun or windy rains, you need to consider using the urethane coating at least. Protect the wood always. Even the humidity and sun can easily damage and change its properties.
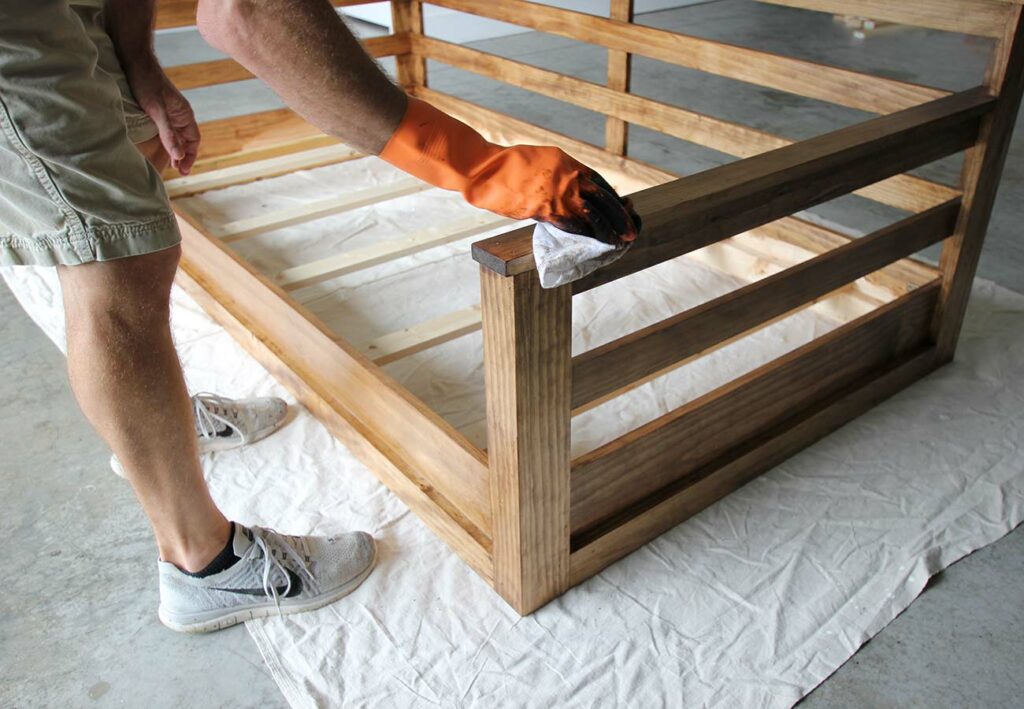
Staining The Porch Bed Swing’s Wood
Staining can be done with two coats and with the blending of two stains. This is to have the blended stain finishing in your DIY swing. In some instances, the single shelf stains are poor to give a dimension to the wooden furniture. Follow these simple steps to stain your porch bed swing.
- Completely sand the swing with 120 sandpaper.
- Wipe the Minwax Early American over the swing and remove it.
- Give a couple of hours to allow the stain to get dried completely.
- Again, sand the swing with the 120 sandpaper with gentle sanding.
- Wipe the Minwax simply white gently and remove it.
- Once again, sand the swing gently with 120 sandpaper.
- Apply the three coats of Minwax Helmsman varnish all over the swing bed.
Step 5. Attaching The Rope
The basic plan for this swing will guide you to use the ¾ ” rope to give the support. If you think this may be a skinny rope size, then you can take the 1″ rope as this won’t make a big cost difference. Hanging your porch bed swing is also your choice, and you can decide the height of the sitting level and the length of the rope you give below your swing to dangle for a Do-it-yourself touch to the swing.
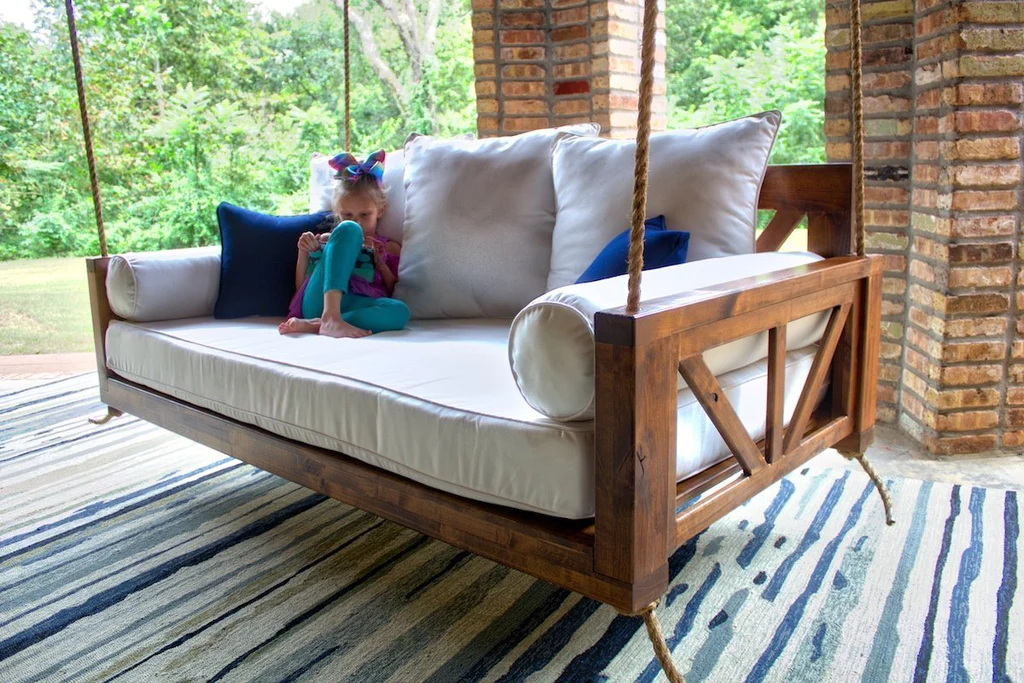
Step 6. Mattress and Covers
You can place a twin-size mattress on the swing bed to accommodate its size. Definitely, the mattress needs its mattress cover to stay away from the dust, dirt, bugs, or water from the exterior when it rains. Protect the mattress with a twin bed cover if you don’t want to cover your porch from outside exposure. This swing bed is meant to be the outside relaxation corner, so let it be on the exposure and cover your mattress with great protection.
Final Words for The Swing Bed!
A porch bed swing is the most desirable furniture for many individuals if they have enough space on their porch. This is a kind of personal space for personal care with some self-satisfying tasks for your DIY furniture-building skills. It starts with understanding the size and cost you are going to spend on this.
For design, you can follow the steps of porch bed swing plans available on the websites with detailed printable sheets. Get ready with the frame by attaching the boards of the measured sizes and give posts on corners. After that, attach the railing to the post for the arm and backrest, then finish the swing bed with your favorable method.
Are you going to give a protective layer to your swing or not? Never miss the part of giving a protective coating to a wood in a DIY project to make your furniture speak for generations.
Hope this article helped with all your doubts, so share it with your DIY-loving friends and family to help them, too!

With a Master’s in Landscape Architecture from the University of Virginia, Sophia Stephenson has dedicated the last 20 years to creating and maintaining vibrant outdoor spaces. Her professional journey started in landscape design, where she gained a reputation for innovative and sustainable approaches. Sophia became a part of our editorial team as a freelancer in 2019, offering a fresh perspective on outdoor living. Since 2020, she has been the chief for our outdoor design content, blending aesthetic appeal with environmental stewardship. In her leisure time, Sophia is a keen photographer, capturing the beauty of natural landscapes, a hobby that complements her professional expertise.