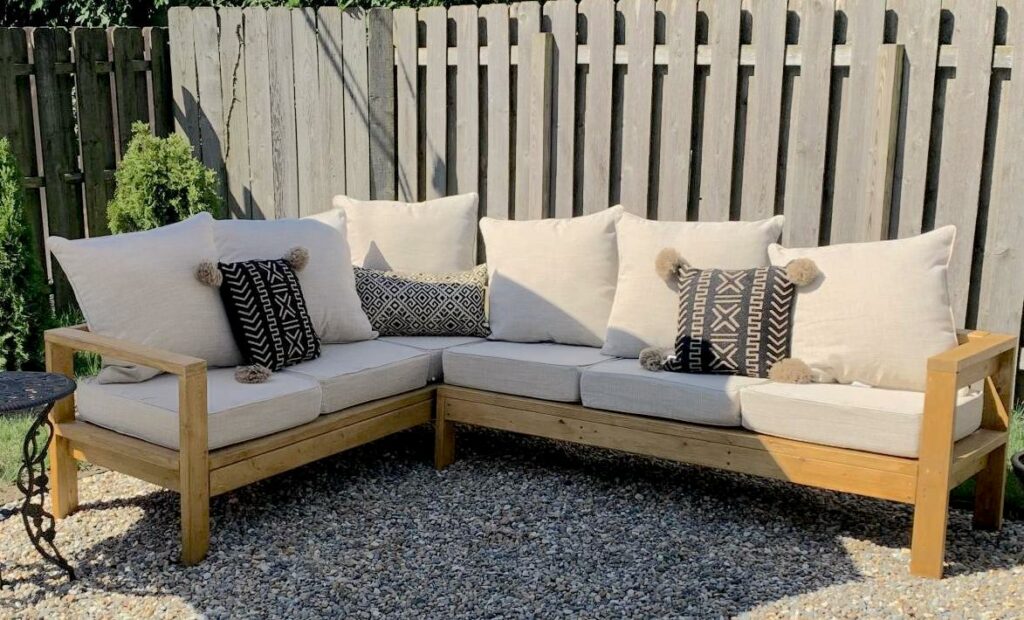
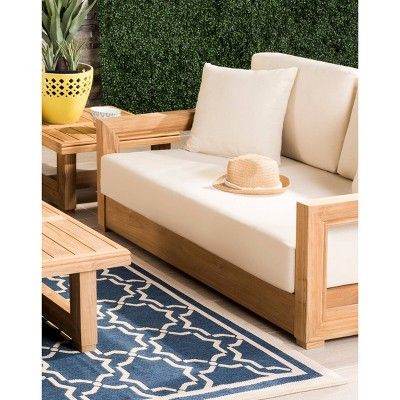
DIY outdoor couch is a startling makeover you can give to your sunroom. Whether it be a patio or deck on your balcony, this DIY furniture will create the moment. The outdoor ordinary and left-out space can be a relaxing and rejuvenating place for the breezy spring evening.
This can make a huge difference by creating an extra living space during summer evenings. When it comes to outdoor couches, every house needs a unique piece in size, shape, quality, and most definitely style; it has to fit in with your house’s interior style. That’s why you may not find your outdoor couch in a store.
A DIY outdoor couch could be your choice, and that’s what makes you want to read this. While using your outdoor space, give some extra space for the handyman in you. This step-by-step companion could clarify every single detail. Let’s begin the cutting and sawing!
What is a Perfect Outdoor Couch?
Knowing the needs and fixing your preferences with the current trend is somewhat tricky. To decide on the perfect DIY outdoor couch, you need to know and consider these features.
Style

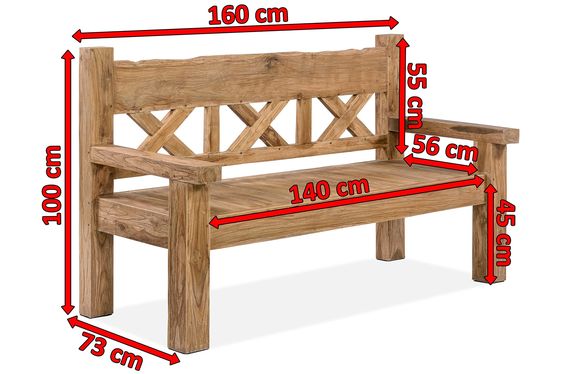
The one thing you need to keep in mind is the outdoor space is also like any other room in your house, and it should reflect your taste and style. And most importantly, it should get along with your interiors and interior furniture. Decide the model with customization by deciding the style, modern, traditional, or boho, or to depict any cultural systems. A simple and clean design can make it a gorgeous choice for any style.
Material

No offense here. The budget will be the first person to decide the material. So you might need to consider these options. For staying inside the line, you can choose dimensional lumber or pressure-treated wood, but maybe the resilience and quality are a little bit of a question here.
So, if you are looking for a durable element to stay beautiful for future generations, go for the cedar, even though the price is double when you compare it with the pressure-treated ones and five times higher than the dimensional lumber.
If you are going to stay with it for a long time and prefer a sturdy one, choose the cedar, which would be the best for a DIY outdoor couch.
Printable Plans for a DIY Outdoor Couch
Get the work done with a professional touch. You may be exercised with DIY projects for your house, yet you may need some professional touch, which is in a plan form, to guide you through the journey of doing it yourself. You can download these printable plans to have the right proportion and measurement to do without any hustle.
Tools
Materials

Pine Lumber for Framing
- 8’x2″x4″ – 10 pieces
- Choose the straight boards and avoid the knots in them. Least knots are the best for your couch.
Cedar Lumber or Pine Lumber
- 8’x2″x6″ – 6 pieces
- The pieces may vary depending on the cushion usage. If you are not going to use the cushion, then 5 pieces are enough. If you are going to use them, then you might need to give 6 pieces. The same instructions here: always choose the straight broads with less amount of knots.
Buying The Bench Cushions
There are plenty of options and colors available for your DIY outdoor couch. The main thing you need to consider here is buying the cushions before planning your couch. This decides the size of your seating space for a snug fit. First, line up the couch cushions and tie them in a rope to make measurements for the seating bench. Similarly, size cushions will make it easy for you.
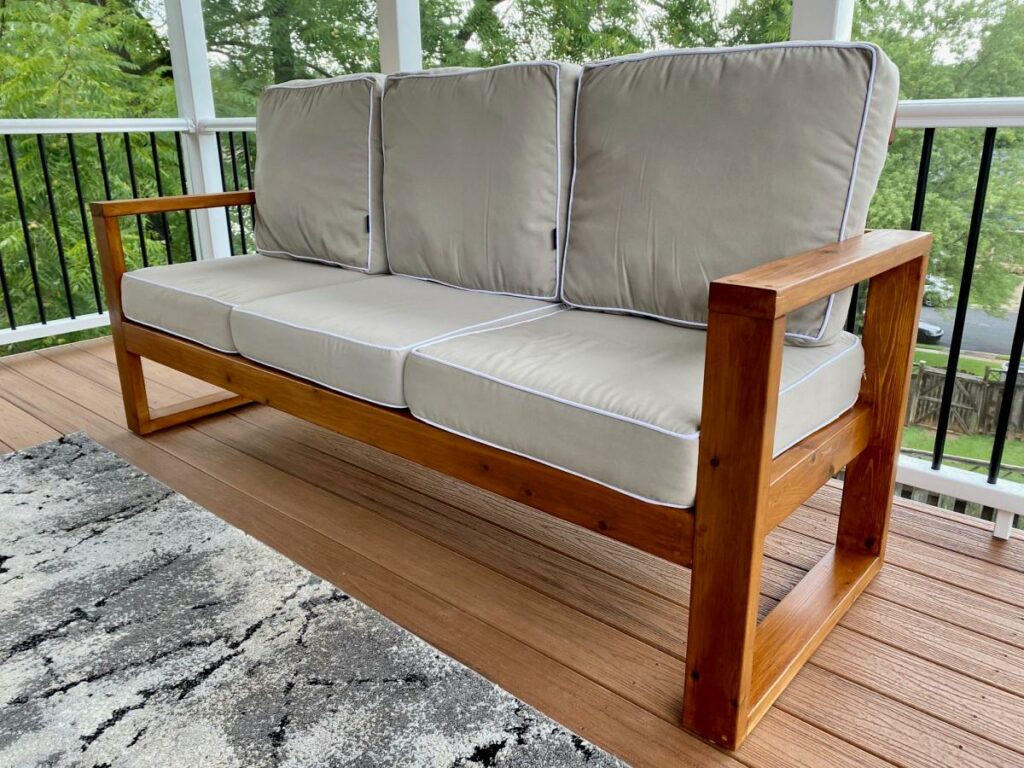
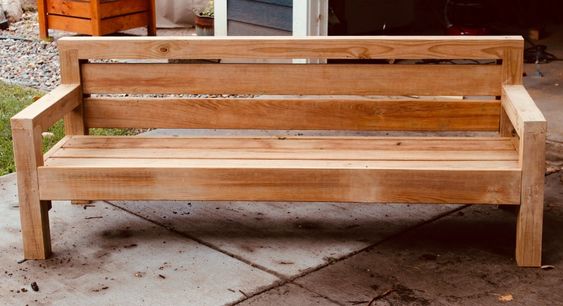
Building The DIY Outdoor Couch
This Outdoor couch is a 2×4 size to fit finely in any Outdoor space. Let’s see the step-by-step explanations for doing-it-yourself furniture!
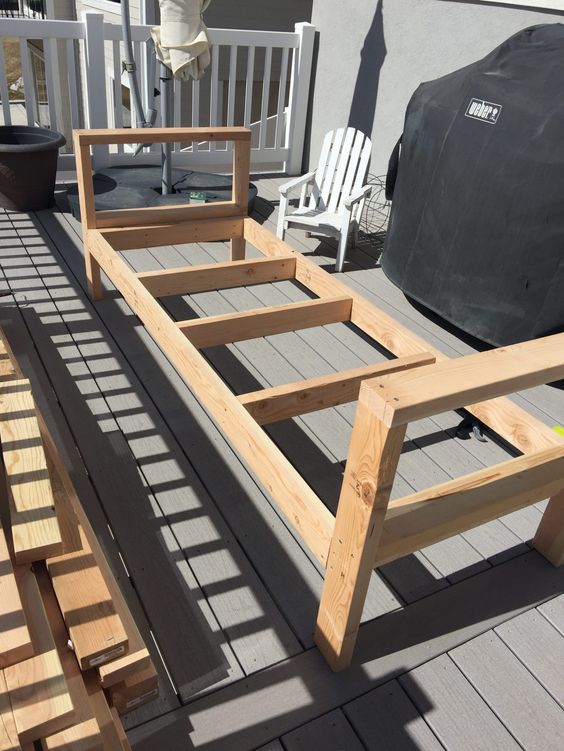
Step 1: Cutting The Boards
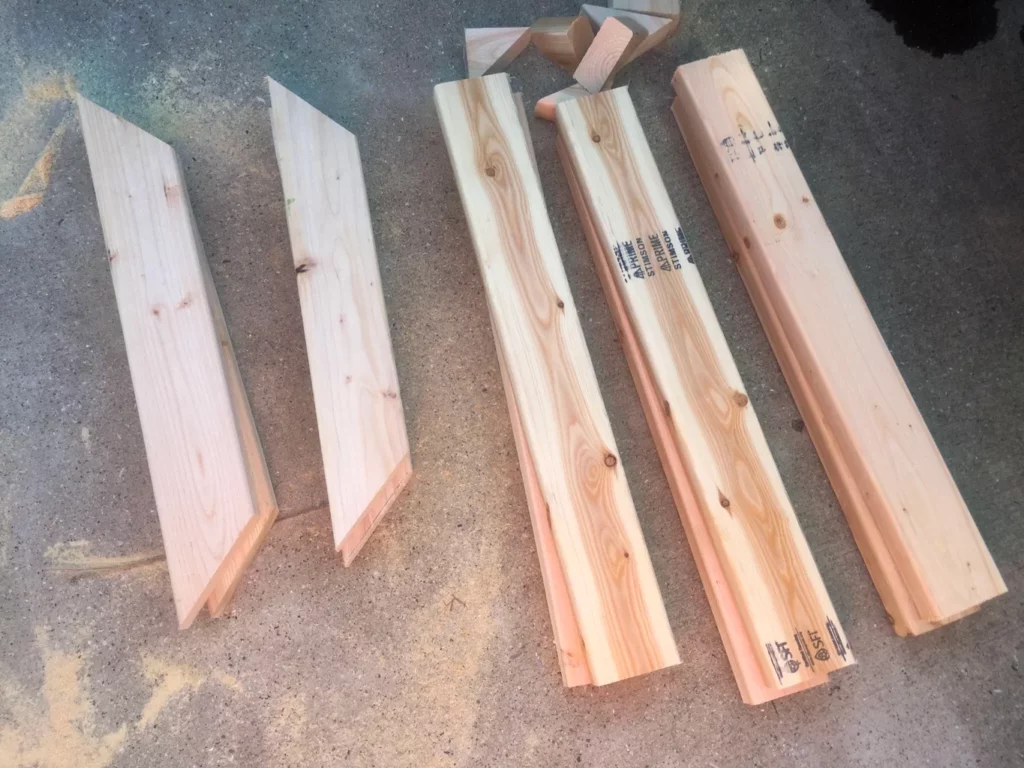
The lumber cutting is the first step in your project. Get the best lumber with minimal knots and a straight back for firmness and sturdiness. Take the 10 pieces of board and get them ready with the Miter saw.
Resaw the boards with 1 ½” with a table saw to remove the rounded corners. You can take a ¼” on each side to make it with rounded edges. After this, use a new blade to get the smoothest result while doing the resawing.
Step 2: Assembling
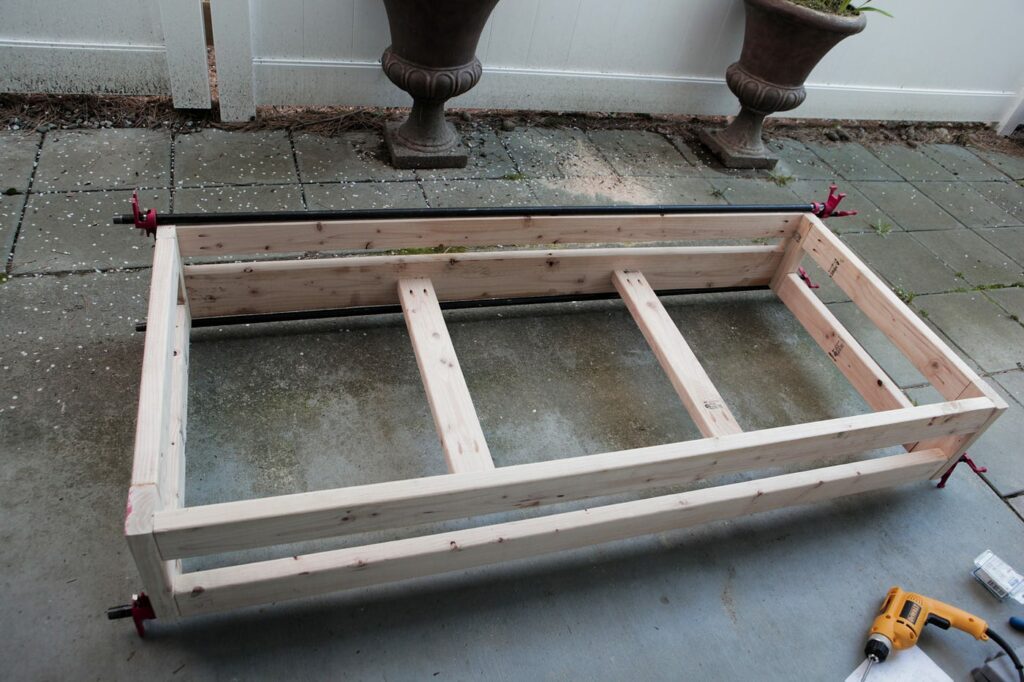
The outside square frame is joined together with the help of wood glue, a brad nailer, and also with the help of strap clamps. After this, join the 25″ board by using the wood glue and Kreg pocket holes. From inside of the square, the board should be 12″ inches away. The major aspect of this board is hiding the seat of the frame. Apply the wood glue on the holes and pockets after the wood glue dries completely. Simultaneously sand the sides of the frame with sandpaper sizes 100, 120,150.
Step 3: Building The Stretcher Of The DIY Outdoor Couch
Now, start building the stretcher for the couch. Cut two lengths of boards, 25″ and 72″. After, do the resawing for rounding the edges by making it 3″ wide. Then resaw the 25″ board for about 2 ½ ” to round the corners. Slimming the boards will give more depth and detail to the sides.
Step 4: Joining The Stretcher

For attaching the stretcher, make two Kreg pocket holes on either side of the 72″ board and attach it with wood glue to the 25″ board pieces. Place the 72″ in the center and attach them. Now you can sand the stretcher with 100,120, 150 grit paper, as it is easy to sand before assembling.
Make a couple of pocket holes on the 25″ board’s ends for attaching the stretcher to the sides of the bench. If you join the pieces upside down, the pockets can be hidden easily by turning the sides and stretcher both in upside down position. For checking this stage, the bottom of the Stretcher has to be 6 ½ inches away from the inside frame.
Step 5: Building The Seat Frame
Use the Miter saw to cut 2 72″ boards and 4 21″ boards. Do the resaw method to make it 3″ wide. You can join the 72″ and 21″ boards with Kreg pocket holes and wood glue. The two 21″ boards should be flush with the 72″ board on the corners. Other two 21″ boards are attached to measure the distance between the two 72″ boards by the measurement of 18″. After joining all six boards, give it a fine sandpaper with no.100, 120,150 grits.
Make pocket holes on either side of your seat frame to attach it to the bench sides. As usual, you can follow the upside-down attachment to have the nicest look.
Step 6: Building The Bench Back

To cut the pieces for the bench back, the measurements are one 69″ board and two 15″ boards with 45-degree angled ends, with two 72″ boards with 45-degree angled ends. Do the resaw to have it as 3″ wide.
With the help of the four pocket holes, screw the 69″ board to the 15″ board and glue them. This has to be done first to have the pocket holes go on the bottom side. After, you can clamp, glue and brad nail the other top and bottom pieces to the bench back. After the glue dries completely, you can do the sanding and unclamp it.
Step 7: Joining the Bench Back and Frame
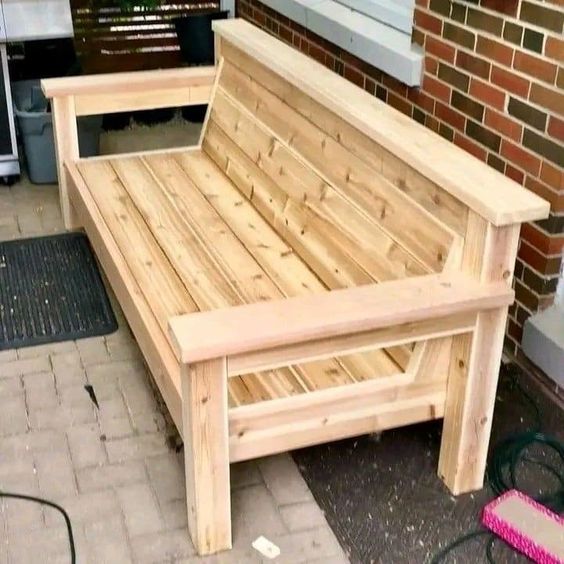
You can attach the bench back to the bench with wood glue and 2 Kreg pocket holes on either side of the bottom of the bench back. Giving the bench back mild angulation will give a more comfortable position for sitting on the couch. So, give a little bit of angle on your bench back.
Step 8. Finishing The Frame
Now, to finish the frame, fill all of your pocket holes with the wood filler. After letting it dry, start sanding it with 180 grit sandpaper. Give it a smooth sanding all over the frame.
The next part of finishing is the staining. You might need to give a staining to avoid the damage that may be caused to your DIY outdoor couch because of the sun exposure, rain, snow, or moisture from the outside. The sealer is a must to avoid all these natural issues for any wood furniture used outdoors.
Staining is absolutely your choice. If you are looking for some recommendations, the Min wax water-based stains in weathered oak are the most stunning shade to stain a DIY outdoor couch. But never go for an oil-based stain, as it may make the pine wood boards look more yellow. Always prefer using water-based stains for outdoor area furniture.
Next is the sealing of your outdoor couch. Give some waterproofing for your outdoor furniture by using Helmsman’s Spar Urethane. As this withstands the water, it can help you through the windy and rainy weather on your outdoor couch. Clearly follow the manual for the drying time, mixing of the sealer, and the necessary coating levels for the stain to give an efficient job.
If you are using cedar wood, then you need a bit more sanding to smooth it. Use the planner for this one, particularly to sand and finish with fineness before assembling. Even this is the same procedure with the pine or fir boards. Everything should be prepared and finished during the cutting period.
Step 9: Attaching the Board to The Frame

Using clamps to hold the boards in place is an essential step. You can give two corner brackets on each side along with an additional bracket in the middle. Pilot holes can be made to do this job. First, attach the brackets to the bench frame and secure the clamp for placing it by screwing.
Step 10. Attaching The Cushions
If you have a plan to use cushions on your DIY outdoor couch, this step is for you. You can use four boards across the seat below the seating bench. You can attach the boards in a ¾” gap between each other board. The materials used to secure these boards are brad nails, wood glue, and exterior screws. Brad nail holes should be closed with a matching wood color putty for a clean finish.
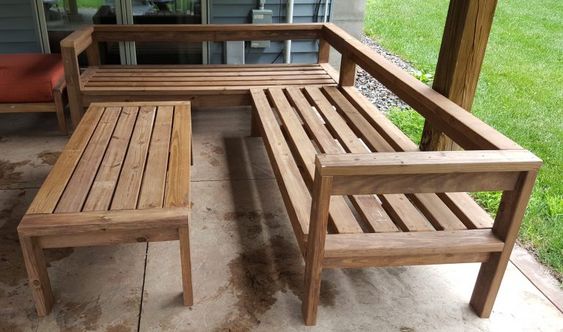
Attaching the Boards without Cushion
Are you not going to use cushions on your DIY outdoor couch? If yes, this step is for you. Use five additional boards across the bench seat. Leave a size of ⅛” on each side of the seat. All the sides should be sealed before proceeding. The gap between the boards should be ¼” wide.
Only the fifth board is cut to a size of 4 ½” wide. Sand the pieces before fixing them. You can use exterior screws, brad nails, or wood glue to attach it to the frame. The brad nail holes are sealed with the wood putty.
Concluding with a Finish!
Have you got what you have been searching for? The easy step-by-step map for a DIY outdoor couch crafting. Outdoor couches are kind of an additional decorative feature to give additional beauty to your house. If you don’t want to spend a fortune on furniture to stay in all weather conditions, then a DIY is the best idea for you.
Free printable plans for building a DIY outdoor couch could help you through this journey, or you can buy the paid plans to get the best out of you. You may not be the one who mastered carpentry. Buf these printable plans can guide you with all the necessary points to take seriously from the beginning of your DIY outdoor couch.
The major task in the couch project is cutting the boards into the correct sizes to fit them without any tiresome trials. The cutting, assembling, joining, building, and finishing of the outdoor couch can be done with a rhythm to explore. Give us your feedback after trying this guide for making your DIY outdoor couch!

With a Master’s in Landscape Architecture from the University of Virginia, Sophia Stephenson has dedicated the last 20 years to creating and maintaining vibrant outdoor spaces. Her professional journey started in landscape design, where she gained a reputation for innovative and sustainable approaches. Sophia became a part of our editorial team as a freelancer in 2019, offering a fresh perspective on outdoor living. Since 2020, she has been the chief for our outdoor design content, blending aesthetic appeal with environmental stewardship. In her leisure time, Sophia is a keen photographer, capturing the beauty of natural landscapes, a hobby that complements her professional expertise.