Building a deck by myself wasn’t just about saving money; it was about doing something I could be proud of every time I stepped outside.
Sure, I wanted to cut costs, but more than that, I wanted to take control of the process, make the choices, and learn along the way.
If you’ve ever looked at your backyard and thought, “I could do this,” then trust me, you can.
In this blog, I’ll walk you through the actual numbers, show you what I spent, what I skipped, and how much I saved by not hiring a pro.
Got a plan and a decent set of tools? You’re already halfway there.
Let’s break down the budget, avoid the guesswork, and get you closer to your own DIY deck.
Ready to build smart? Let’s get started!
What’s the Average DIY Deck Cost?
When I built my own deck, I found that most DIY projects cost between $14 and $28 per square foot, depending on the materials and the complexity of the design.
That means if you’re planning a simple 10×10 deck, you might spend anywhere from $1,400 to $2,800 on materials alone.
If you were to hire a professional instead, you’d likely pay an extra $8 to $22 per square foot just for labor.
That means doing it yourself could save you a significant amount in total.
| Deck Size | DIY Cost Range | Pro Installation Cost Range |
|---|---|---|
| 10×10 (100 sq ft) | $1,400 – $2,800 | $2,200 – $5,000+ |
| 12×16 (192 sq ft) | $2,700 – $5,400 | $4,200 – $9,000+ |
| 20×20 (400 sq ft) | $5,600 – $11,200 | $8,800 – $17,600+ |
Why the Size and Shape of the Deck Matter
Deck size plays the biggest role in determining overall cost. The larger the square footage, the more you’ll spend on materials like framing lumber, deck boards, joists, fasteners, and footings.
Even a small increase in size can noticeably affect the budget.
Simple shapes, like squares or rectangles, are generally the most cost-effective. These layouts reduce material waste and simplify the framing process.
On the other hand, custom shapes such as octagons, curves, or multi-level designs often require more planning, extra materials, and additional labor.
For anyone trying to keep costs manageable, a basic rectangular deck is the most budget-friendly starting point.
Complex designs can always be added later as an upgrade or extension once the initial deck is complete. Starting simple helps keep the project within scope and budget.
The Impact of Materials on Your Deck Building Budget
Decking materials significantly influence both initial cost and long-term maintenance. Each type comes with its own performance, appearance, and price range.
1. Pressure-Treated Wood
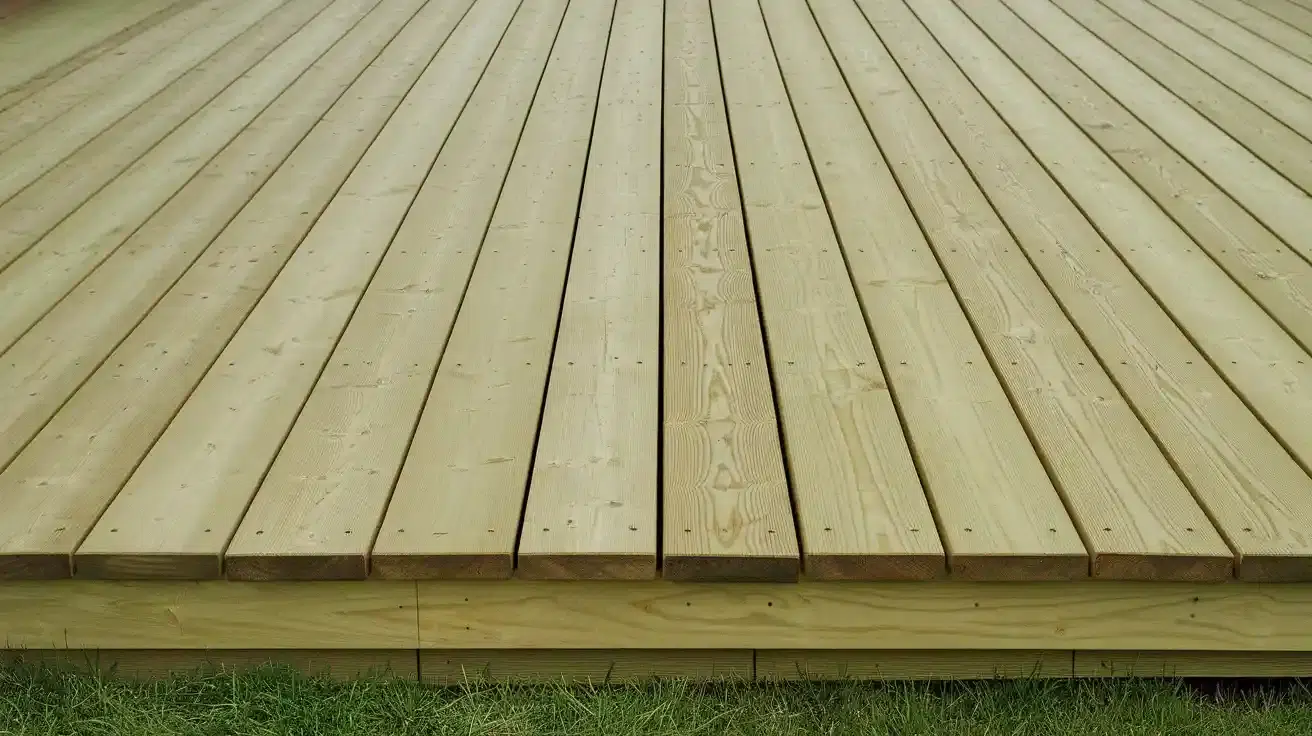
Pressure-treated wood is the most budget-friendly decking material. It is chemically treated to resist rot, mold, and insects.
Although affordable, it requires regular upkeep, such as sealing and staining, to maintain its strength and appearance, particularly in regions with harsh weather conditions.
2. Cedar
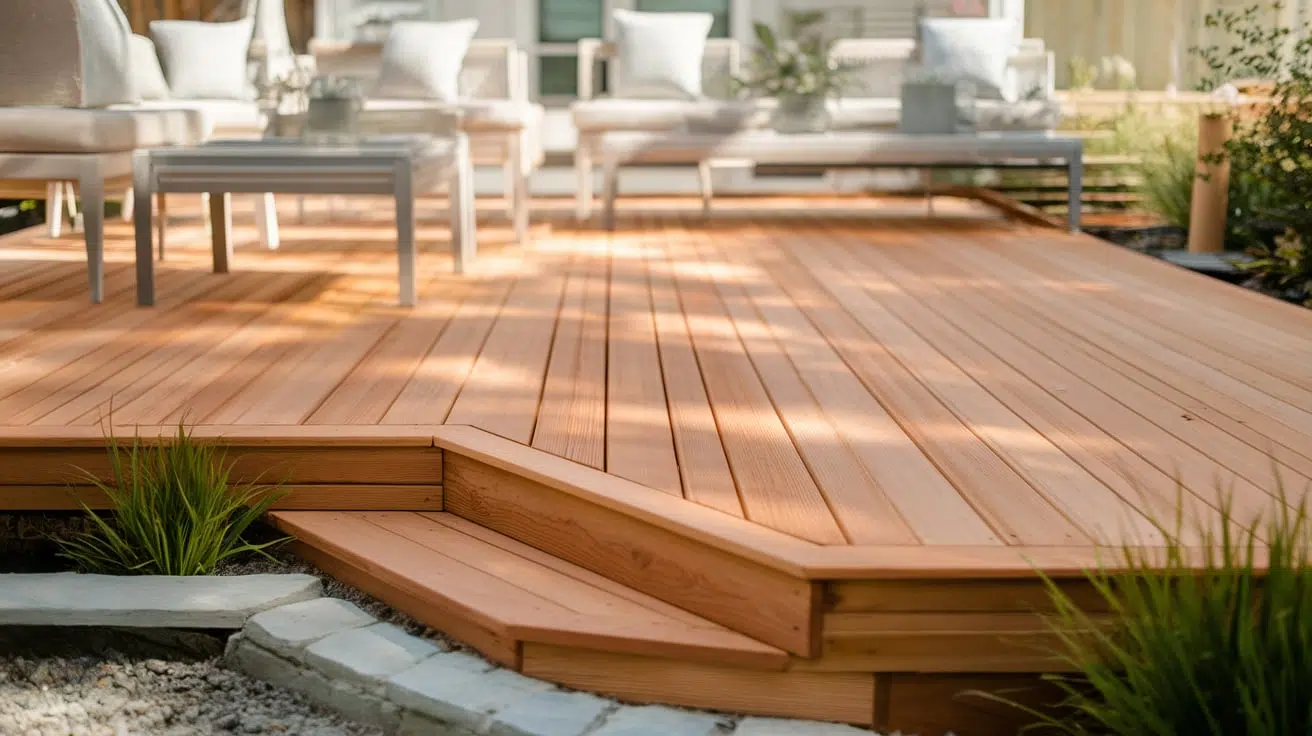
Cedar decking offers a naturally rich appearance and built-in resistance to decay and insects.
It is more expensive than pressure-treated wood and still requires periodic sealing or staining to protect it from moisture and UV damage. Cedar weathers over time, which may appeal to those preferring a rustic look.
3. Composite
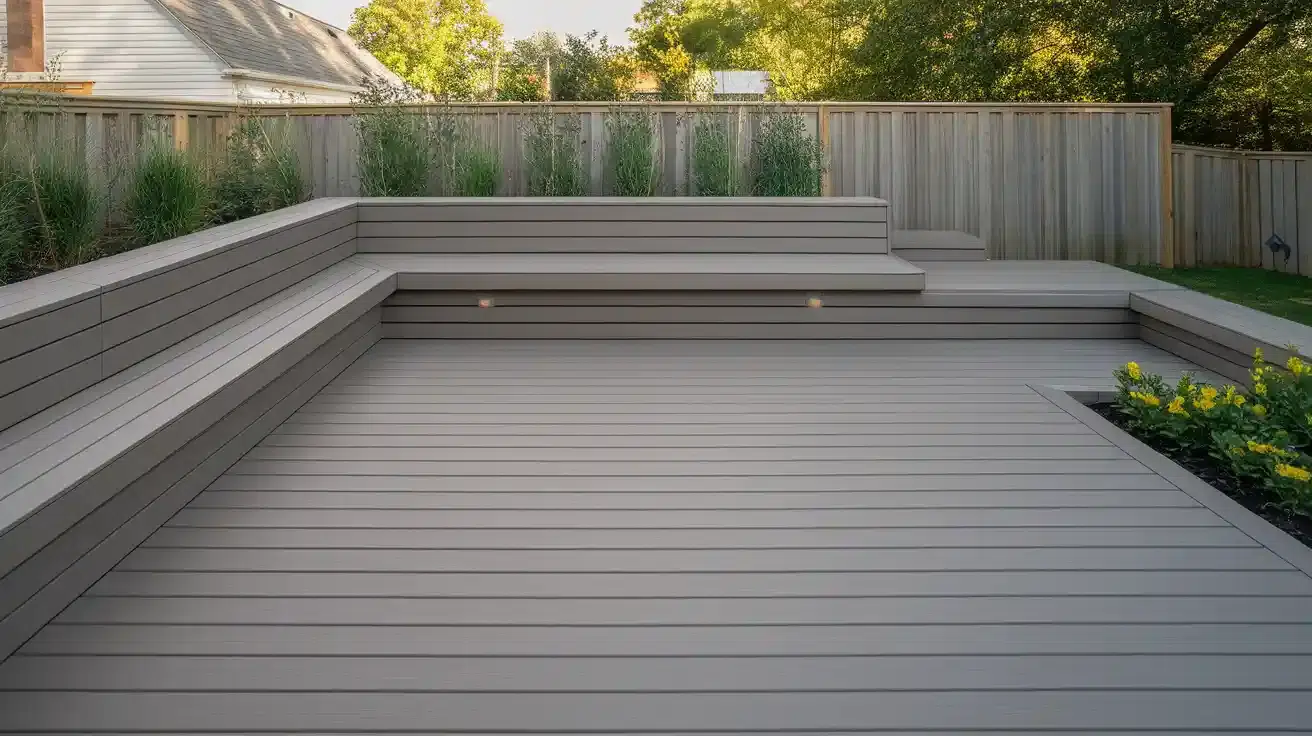
Composite decking is made from a mix of wood fibers and recycled plastics. It is highly resistant to warping, splintering, and rot.
While it carries a higher upfront cost than wood, it demands little maintenance over time. No staining or sealing is required, making it suitable for low-maintenance applications.
4. PVC
PVC decking is a synthetic option that offers excellent resistance to moisture, mold, and staining. It is lightweight and durable, making it ideal for areas with frequent rain or humidity.
Although one of the most expensive materials, PVC requires minimal upkeep and maintains its appearance for many years.
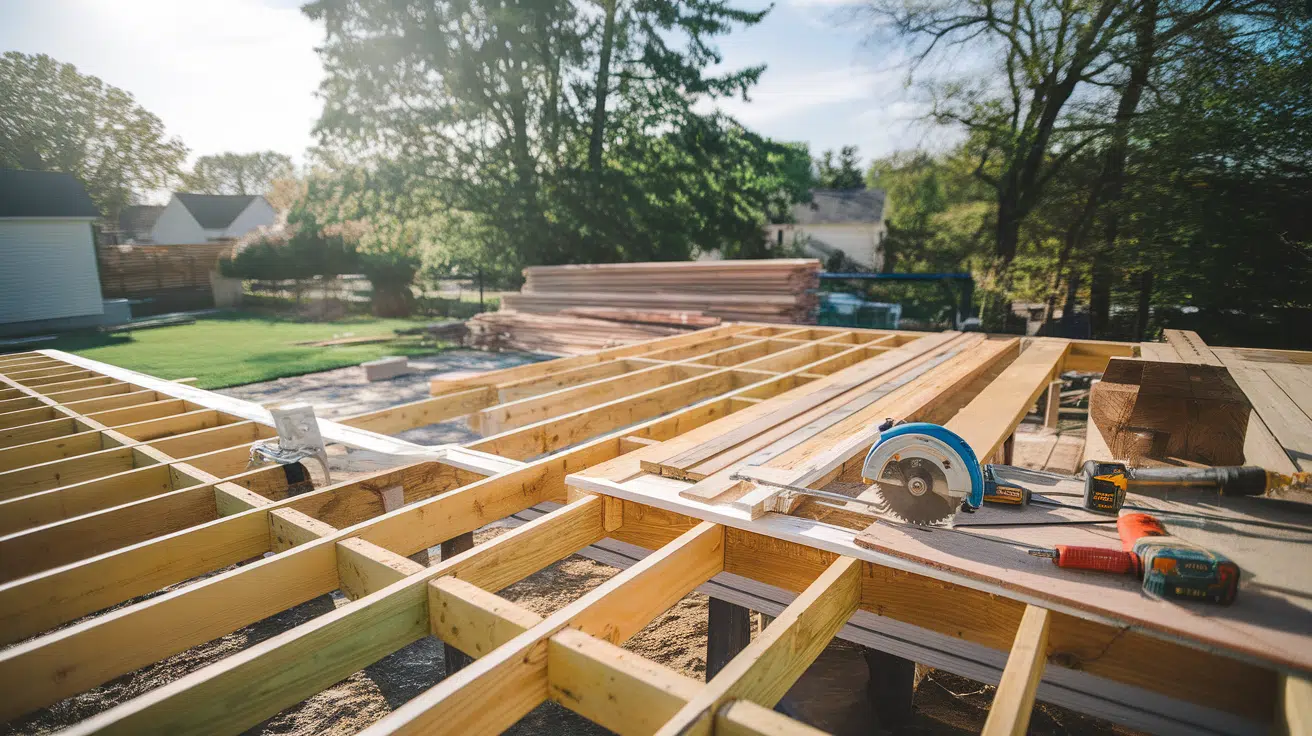
Essential Tools to Buy for Deck Building
Building a deck requires both standard and specialized tools. Some are practical to buy for long-term use, while others are more cost-effective to rent for a single project.
Tools to Buy
- Circular Saw: Ideal for straight, accurate cuts on decking and framing boards. A must-have tool for precision and speed during deck construction.
- Cordless Drill and Impact Driver: Used for drilling and driving screws into decking and joists. Essential for efficient, sturdy assembly.
- Tape Measure: Measures lumber and layouts accurately. A reliable 25-foot tape is critical for spacing and alignment.
- Speed Square: Ensures square cuts and helps mark angles cleanly on framing lumber for tight joints.
- Level: Checks for even surfaces and vertical posts. A 4-foot level ensures proper alignment and stability.
- Chalk Line: Snaps straight layout lines across joists and boards for uniform decking placement.
- Utility Knife: Cuts underlayment, wrap, and packaging. Handy through the build for trimming and light tasks.
- Carpenter’s Pencil: Marks measurements on wood clearly and resists breaking during use on rough lumber.
- Hammer: Useful for nailing joist hangers, adjusting framing, and general light-duty tasks during assembly.
- Pry Bar: Helps adjust misaligned boards or remove pieces cleanly without damaging material.
- Safety Gear : Essential for protecting hands, eyes, and ears when using saws, drills, or handling treated lumber.
Tools to Rent
- Post-Hole Digger: Ideal for digging clean, deep holes for footings and support posts by hand.
- Power Auger: Speeds up post hole digging in dense or rocky soil where manual tools are too slow.
- Plate Compactor: Compacts soil or gravel bases for ground-level decks, ensuring a solid and even foundation.
- Concrete Mixer: Mixes batches of concrete efficiently for multiple footings or piers, saving time and labor.
- Miter Saw: Offers clean, fast angled cuts for deck framing or trim; ideal to rent if not owned.
Renting vs. Buying Tools: What Makes Sense for Your Deck
| Factor | Buying Tools | Renting Tools |
|---|---|---|
| Upfront Cost | Higher, but a one-time investment | Lower initial cost per tool |
| Long-Term Value | Reusable for future projects | No long-term value or reuse |
| Storage Needed | Requires permanent storage space | No storage needed after the rental period |
| Tool Availability | Always on hand when owned | Subject to rental store availability |
| Maintenance | Owner is responsible for upkeep | Rental company handles maintenance |
| Ideal For | Common tools used frequently (drill, saw, level, etc.) | Specialized or large equipment (auger, compactor, mixer) |
Understanding Permits and Code Compliance for Deck Building
Most municipalities require a permit before starting deck construction, especially for elevated or attached structures.
Building departments typically ask for detailed plans, including measurements, structural layout, and property placement.
Permit fees usually range from $225 to $500, depending on local codes and deck size. Some areas may also require inspections at various stages of construction.
Failing to obtain a permit can lead to fines, delays, or mandatory removal of the deck. Proper planning and code compliance ensure the structure is safe, legal, and built to standard.
Checking with local authorities before beginning helps avoid costly issues later and ensures the project meets all legal requirements from the start.
Foundations and Footings: Key Support Options for Your Deck
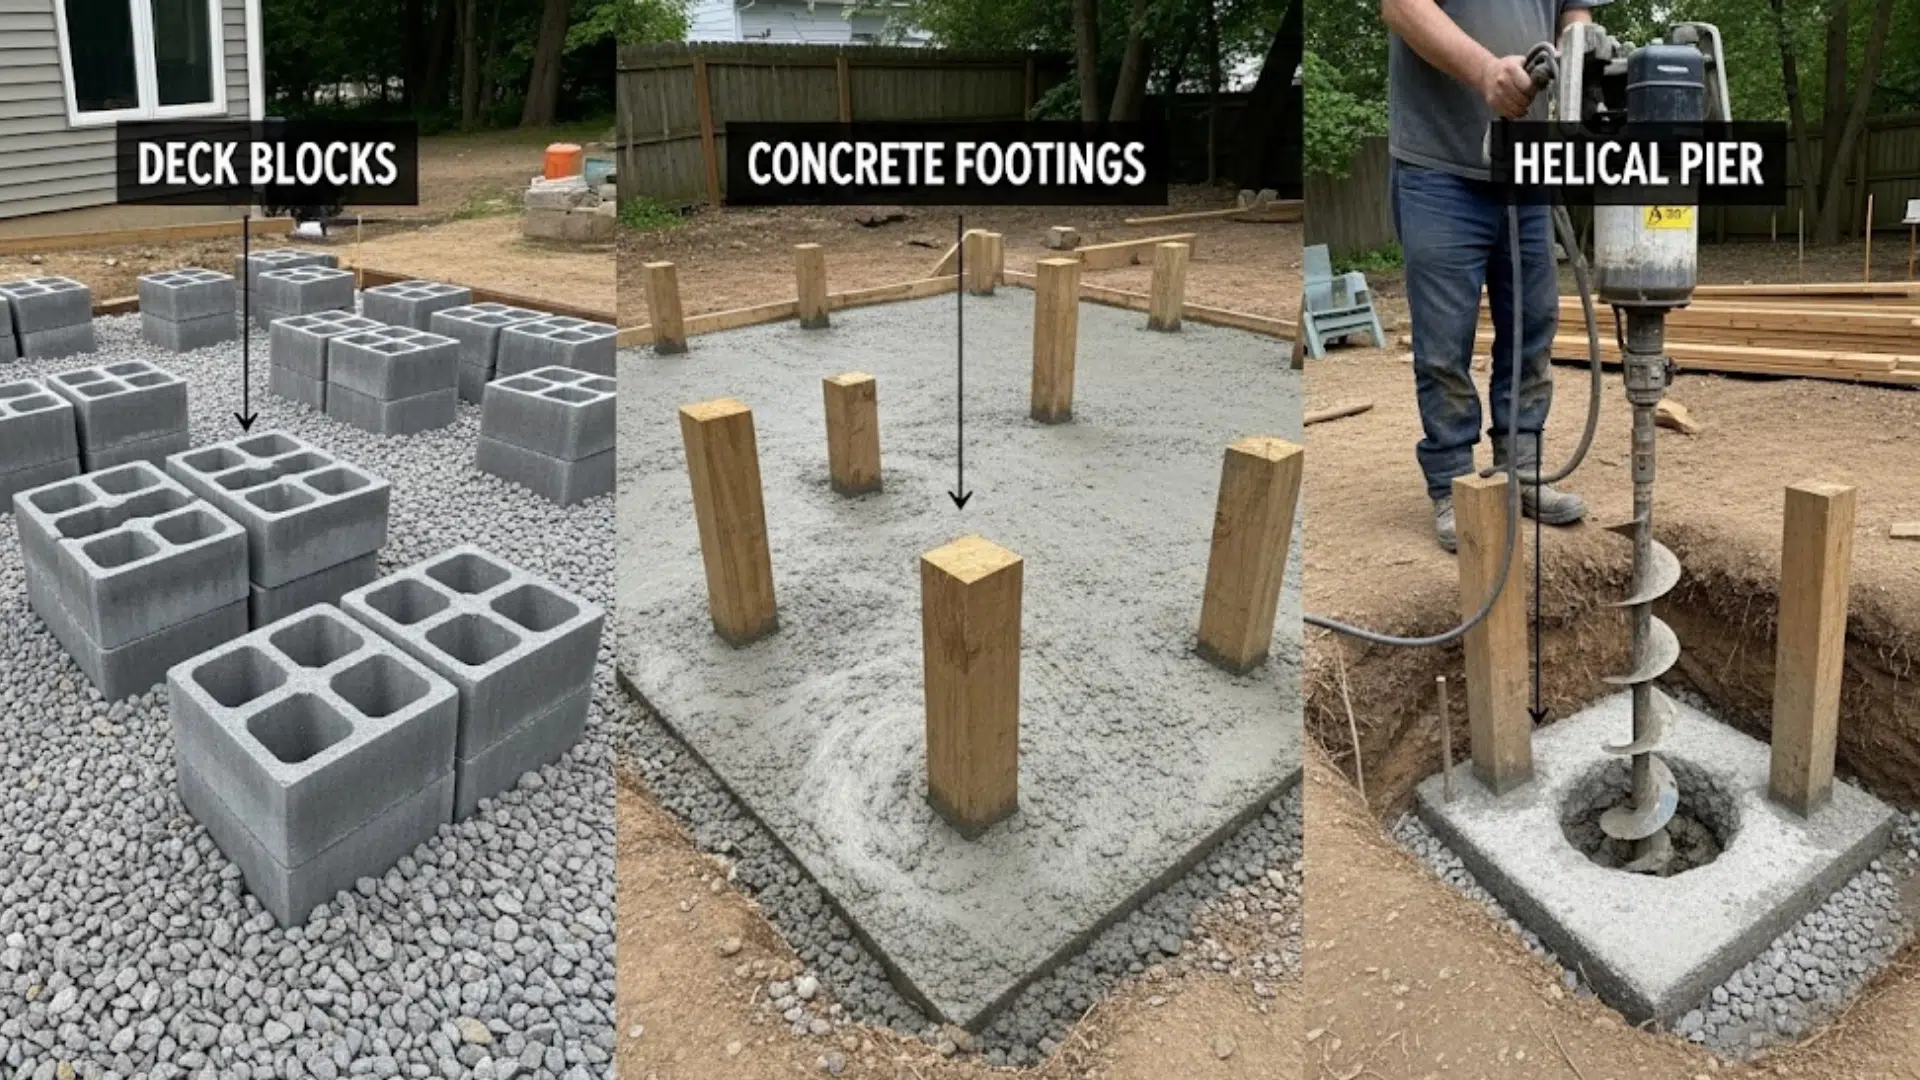
A solid foundation is essential for any deck’s safety and longevity. The right footing method depends on the deck’s height, soil type, climate, and budget. Choosing the correct type ensures the deck stays level, safe, and code-compliant over time.
1. Deck Blocks
Deck blocks cost around $8 to $15 each and are the most affordable option for ground-level decks. They sit on top of compacted soil or gravel and support beams without the need for digging or concrete.
Ideal for small, low-profile decks in areas without frost concerns, they save time and effort but aren’t recommended for raised or attached structures.
2. Concrete Footings
Concrete footings cost about $5 to $10 per footing, not including tools or concrete mix. This option involves digging below the frost line and pouring concrete to support vertical posts.
Suitable for raised or attached decks, concrete footings are strong, stable, and widely accepted by building codes. Though more labor-intensive, they provide long-term structural integrity in most climates.
3. Helical Piers
Helical piers typically cost $150 to $300 per pier, including installation. They’re screwed deep into the ground using machinery, making them ideal for unstable soils, slopes, or cold regions with frost heave.
This is a high-cost, high-performance solution used in professional projects where traditional footings aren’t practical. Helical piers offer strong support with minimal site disruption.
Railings and Stairs: Safety Features That Affect Your Deck Budget
Adding railings and stairs to a deck is more than a design choice; it’s a safety requirement for structures over 30 inches high.
These components are essential for preventing falls and ensuring easy access, but they also add a noticeable cost to the overall project.
Pressure-treated railings typically run around $25 per linear foot, covering posts, rails, and balusters. Even a simple railing layout can increase total expenses by several hundred dollars.
Stairs are another major line item. A basic three-step setup usually costs about $200, including stringers, treads, and hardware. Costs rise with added height, width, or custom features.
Both railings and stairs require precise installation and sturdy fastening to meet building code standards. Planning for these elements early in the process helps ensure safety, code compliance, and an accurate project budget.
Hidden Costs That Increase Your Deck Budget
Smaller components and finishing materials can significantly impact the total deck budget. These items are easy to overlook during planning but are essential for the deck’s safety, appearance, and durability.
| Item | Estimated Cost | Purpose |
|---|---|---|
| Deck Screws (1,200+ units) | $100 – $150 | Used for securing decking boards and framing elements |
| Joist Hangers & Brackets | $150 | Provide structural support for framing connections |
| Post Caps & Flashing | $50 | Protect posts from moisture and prevent water intrusion |
| Stain and Sealer | $50 – $70 | Protect wood from UV rays, moisture, and general weathering |
What I Spent: Total Breakdown
Below is a cost summary for a 12×16 pressure-treated wood deck based on typical DIY expenses:
| Item | Estimated Cost |
|---|---|
| Lumber | $1,700 |
| Concrete Footings | $80 |
| Fasteners & Connectors | $250 |
| Permit | $250 |
| Tools (Rented) | $100 |
| Stain & Sealer | $60 |
| Railing & Stairs | $450 |
| Total DIY Cost | $2,890 |
By comparison, hiring a contractor for the same deck could cost approximately $6,500, depending on labor rates and materials. Therefore, the estimated savings amount to about $3,600.
Conclusion
Building your own deck isn’t just a way to cut costs, it’s a chance to create something functional, personal, and long-lasting. The process takes time, patience, and effort, but the rewards can be significant.
From choosing materials to driving in the last screw, every part of the project brings hands-on satisfaction. Unexpected costs and minor setbacks are normal, but they’re manageable with careful planning.
Stick to your budget, follow local building codes, and give yourself more time than you think you’ll need.
Ask questions at your local hardware store; staff often have valuable insights and experience to share. The key is to stay organized, flexible, and focused on the end result.
Thinking of starting your deck project?
Start with a clear layout, make a detailed material list, and move step by step. Building smart saves money and builds confidence.

Holding a Master’s in Architecture from the University of Texas at Austin, Emily Rodriguez has dedicated more than two decades to the art and science of building renovation. Starting her journey in historic preservation, she developed a profound respect for blending old with new in building design. Emily became a vital part of our team in 2019, renowned for her insightful and innovative renovation tips. She has been leading our DIY home improvement series since ever since, where she shares her wealth of knowledge in turning outdated spaces into modern havens. When not engaged in writing or consulting, Emily is a passionate advocate for heritage conservation and enjoys exploring vintage architecture, a hobby that complements her professional expertise.