
Old wallpaper can make any room look dated and tired. Many homeowners feel stuck with their outdated walls because removing wallpaper seems too hard. Trust me, I get it – I’ve been there too.
Good news: you can remove wallpaper yourself with a steamer. This method is safe, effective, and won’t harm your walls when done right. No harsh chemicals needed.
This guide will show you exactly how to remove wallpaper using a steamer like a skilled professional. You’ll learn the step-by-step process, helpful tips, common mistakes to avoid, and which removal method works best for your situation.
By the end, you’ll have the knowledge to tackle this home project with confidence.
Step-by-Step Guide to Removing Wallpaper with a Steamer
Tools and Materials Needed
| Tool/Material | Description | Recommended Brands |
|---|---|---|
| Wagner Power Steamer | A steamer that uses high-temperature steam to soften and lift wallpaper. | Wagner, McCulloch, Vicks |
| Putty Knife/Joint Compound Knife | Used for scraping the wallpaper off the wall after steam softens it. | Hyde, Stanley, Warner Tools |
| Scoring Tool | Scoring tool to create small perforations in the wallpaper for steam to penetrate. | Zinsser, Rota, HomeRight |
| Drop Cloth | Protects your floors from water and debris during the removal process. | Amazon Basics, Scotch, Painter’s Supply |
| Gloves | Heat-resistant gloves to protect your hands from steam burns. | Ironclad, G & F, Home Depot |
| Bucket and Sponge | For cleaning up any adhesive residue after wallpaper removal. | O-Cedar, Scotch-Brite |
| Warm Water & Dish Soap (Dawn) | Used to clean the wall and remove excess glue after wallpaper is removed. | Dawn, Seventh Generation |
| Paper Towels | For wiping off the putty knife and steam-related messes. | Bounty, Viva, Scott |
| Garbage Bags | For disposing of wallpaper and debris. | Glad, Hefty, Simplehuman |
| Joint Compound (Optional) | To patch up any wall damage before painting. | DAP, Sheetrock, USG |
Step 1: Tear Off Top Layer
Getting started is simple. Begin by removing as much wallpaper as you can with your hands. Focus on the top vinyl layer first, as the paper backing underneath is easier to handle when wet.
If you find old caulk during this process, remove it too. This step saves time and makes the steaming process more effective.
Step 2: Score the Wallpaper (If Needed)
For stubborn sections where the top layer remains, use a scoring tool with a light touch. Small holes help the steam work better. Remember to be gentle – pressing too hard might damage your drywall.
Even if marks appear, don’t worry too much. You can fix these later with joint compound.
Step 3: Set Up Your Tools
Protection and preparation matter here. Place a drop cloth on your floor to catch water drips. Get your Wagner Power Steamer (model 705) ready – it costs about $50 and comes with two attachments.
One large piece for open areas and a smaller one for tight spots. For safety, always plug your steamer into a GFCI outlet. Fill the steamer with water and wait for it to heat up.
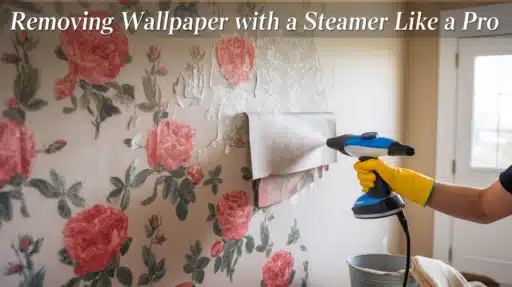
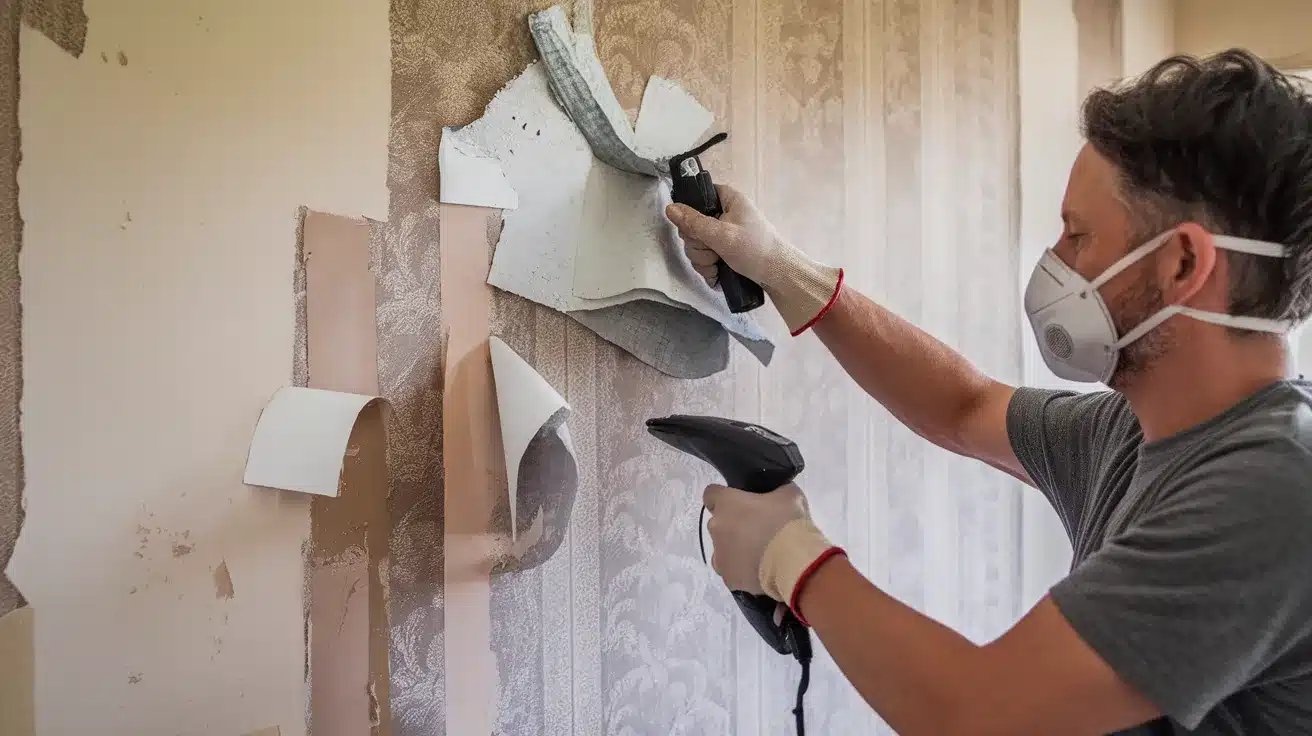
Step 4: Steam and Scrape the Wallpaper
This is where the real work begins. Hold the steamer against the wall for 10-15 seconds until the paper becomes wet. Use a 6-inch joint compound knife in your other hand to remove the softened paper.
Work in sections, moving steadily across the wall. Yes, water will run down, but your drop cloth will protect the floor. Try to steam and scrape at the same time for better results.
Step 5: Wipe Down Your Tools and Wall
Keep paper towels nearby – you’ll need them. Your putty knife will collect glue and debris as you work. Clean it often to maintain effectiveness. Be careful with the steam to avoid burns. Remove as much glue from the wall as you can during this process.
Step 6: Dispose of the Wallpaper
Timing matters for cleanup. Put the removed wallpaper in garbage bags while it’s still slightly damp. This prevents it from sticking to your drop cloth or floor. It’s a messy job, but proper disposal makes the final cleanup much easier.
Step 7: Clean the Wall After Removal
Mix one gallon of warm water with one teaspoon of Dawn dish soap. Use a grout sponge – it has two sides: rough and soft. The rough side works well for removing leftover glue. Work in circular motions, like waxing a car. This technique removes residue better than straight lines.
Step 8: Apply Joint Compound (If Necessary)
Check your walls after cleaning. If you see holes or torn latex paint, apply a skin coat of joint compound. Some walls might look good enough to prime and paint right away. Each situation is different, so assess your walls carefully before moving forward.
Video Tutorial
Watch full YouTube video on removing wallpaper with steamer by Home Repair Tutor.
Tips and Tricks for Efficient Wallpaper Removal
1. Work from Top to Bottom
Start at the ceiling line and work downward. This method prevents water marks and streaks on your cleaned sections. When you work from bottom up, drips can make the job harder and slower. Plus, working with gravity helps the steam soften the paper more effectively.
2. Keep the Steam Plate Moving
Move the steamer steadily across the wall. Holding it in one spot too long can soak the drywall and cause damage. Think of ironing clothes – you want to keep a steady pace. Small, controlled movements help the steam spread evenly through the wallpaper.
3. Use a Low Angle for Scraping
Hold your putty knife at about a 30-degree angle to the wall. This gentle approach prevents tears in the drywall paper. Press firmly but not aggressively – let the steam do most of the work. If you feel resistance, apply more steam rather than more pressure.
4. Managing Multiple Layers of Wallpaper
Take your time with multiple layers – this isn’t a race. Remove one layer at a time, starting with the top layer. Use extra steam time between layers to help separate them. Watch for spots where the layers stick together, and use your scoring tool sparingly between them.
5. Handling Difficult Wallpaper Types
Vinyl wallpaper needs scoring to let steam pass through its water-resistant surface. For textured papers, steam longer to make sure it reaches the backing. Some older papers might need extra attention – give the steam more time to work into these tough spots.
Use your putty knife to test if the paper is ready – it should come off without much force.
Comparison of Wallpaper Removal Methods
Steaming vs. Chemical Solvents
Here’s a detailed comparison table of steam and chemical removal methods:
| Factor | Steam Removal | Chemical Solvents |
|---|---|---|
| Cost | $50-100 one-time investment for steamer | $10-30 per bottle, may need multiple bottles |
| Safety | Safe with proper handling | Requires ventilation and protective gear |
| Speed | Medium – works section by section | Slow – needs time to soak in |
| Mess Level | Water drips, needs drop cloth | Less dripping, but chemical residue |
| Wall Impact | Gentle on walls when used correctly | May affect wall surface or paint |
| Reusability | Steamer can be used for other projects | Single-use chemicals |
| Prep Work | Simple setup, just needs water | Mixing solutions, protecting surfaces |
| Clean-up | Just water cleanup | Chemical residue needs neutralizing |
| Health Factors | Only water vapor | Chemical fumes, skin contact risks |
Steaming vs. Dry Stripping
Here’s how these methods compare:
| Factor | Steam Removal | Dry Stripping |
|---|---|---|
| Best For | Most wallpaper types | Loose or poorly adhered paper |
| Wall Type | Works on all wall types | Better for plaster walls |
| Time Required | Medium speed | Fast when paper is loose |
| Tool Cost | Higher initial cost | Low cost – basic tools |
| Physical Effort | Moderate effort needed | High physical effort |
| Success Rate | High for most papers | Mixed results |
| Mess Created | Wet, needs containment | Dry, easier cleanup |
| Wall Damage Risk | Low when done correctly | Higher risk of surface damage |
Conclusion
Taking down wallpaper with a steamer puts you in control of your home updates. The key steps we covered – from removing the top layer to final wall cleaning – make this task simple and manageable.
A steamer offers a safe, chemical-free way to refresh your walls. When you follow proper techniques, like working from top to bottom and letting the steam do its job, you’ll get better results with less effort. Remember to take your time, protect your floors, and keep safety in mind.
Now you can look at that wallpapered room differently. What once seemed like a tough project is just a matter of having the right tools and knowledge.
Your walls are ready for their next chapter.

Stephanie Grace, a graduate with a degree in Fine Arts from the Savannah College of Art and Design, has been inspiring DIY enthusiasts with her creative and practical guidance for over 14 years. Her career in design and crafting began in a small artisan workshop, where she developed a passion for transforming everyday materials into beautiful and functional items. Stephanie joined our website in 2018, rapidly gaining popularity for her easy-to-follow DIY tutorials and innovative project ideas. Since then, she has been the creative mind behind our DIY section, helping readers bring their artistic visions to life. Outside her professional pursuits, Stephanie enjoys pottery and urban gardening, hobbies that showcase her love for hands-on creativity and nature.