
If your walls still have outdated wallpaper, it’s time for a change. What once felt like a great design choice may now feel tired and out of place.
The good news is that removing wallpaper doesn’t require professional experience, just the right tools, a bit of patience, and a step-by-step approach. While the task might seem daunting at first, it’s entirely manageable as a DIY project.
Proper techniques can make all the difference, if you’re dealing with stubborn vintage patterns or more modern vinyl coverings.
In this guide, you’ll learn effective methods on how to remove wallpaper cleanly and safely without damaging your walls.
Get ready to turn your dated walls into a blank canvas and prepare your space for its next design chapter.
Why Removing Wallpaper Is Better Than Painting Over It?
While it might seem easier to just paint over the wallpaper, it can cause more issues than it solves.
Removing wallpaper creates a cleaner surface, ensures better adhesion, prevents future issues like bubbles, and allows you to address any hidden wall problems.
Here’s why taking the time to strip that old wallpaper is absolutely worth it:
- Smoother Finish: Removing the wallpaper gives you a clean, smooth base, ensuring a more professional-looking paint job without imperfections showing through.
- Better Paint Bond: Paint adheres much more effectively to a bare, properly prepared wall than wallpaper, which helps prevent common problems like peeling or flaking down the line, keeping your walls looking freshly painted for much longer.
- No Surprise Bubbles: Removing the wallpaper prevents bubbling, a common issue when painting over it. Moisture from the paint can weaken old adhesive, causing bubbles or peeling.
- Find Hidden Problems: Damage or decay is not uncommon under wallpaper. Whether it’s plaster cracks or water stains, removing the paper lets you spot and fix these concerns before sealing them under layers of paint.
- Longer-Lasting Results: Although removing wallpaper requires a bit more effort upfront, it pays off in the long run. Well-prepared walls ensure that your new paint job lasts much longer, maintaining its fresh appearance for years to come.
With the right preparation, you’ll achieve a professional result that’s both beautiful and durable. It gives you control over the final result, improves durability, and sets the stage for a beautifully updated space.
Identifying Wall Type

Different wall materials react differently to moisture, pressure, and removal techniques. Knowing your wall type helps you choose the right removal method and prevents unnecessary damage.
1. Drywall: The Modern Standard
Common in homes built after the mid-20th century, drywall has a smooth surface and a slightly hollow sound when tapped. It’s inexpensive, easy to install, and typically finished with a paper facing that’s ideal for paint or wallpaper.
While drywall is affordable and quick to install, its paper surface makes it absorbent. During wallpaper removal, avoid oversaturating the material with water or solution, as this can soften or damage it.
2. Plaster: The Sturdy Classic
Known for their strength and charm, plaster walls are common in older homes and feel rock-solid to the touch. They’re usually built over wooden lath and may have soft curves or light surface texture.
Naturally more moisture-resistant than drywall, plaster handles wallpaper removal well but may develop cracks over time but its tendency to crack and the complexity of repairs can be a challenge.
3. Paneled Walls: The Character Accent
Typically found in older or rustic-style interiors, paneled walls feature visible seams and surfaces that mimic wood grain or have a smooth, artificial finish.
Handle with care during wallpaper removal; too much moisture may damage the surface or cause layers to lift.
With a clear understanding of your wall type, you can approach wallpaper removal with confidence, choosing the most appropriate method for each surface.
Supplies Required: Tools and Materials
Removing wallpaper is a task that requires both precision and preparation. The key to a smooth wallpaper removal process is having the right materials on hand before you start.
| TOOL/MATERIAL | PURPOSE | ESTIMATED COST |
|---|---|---|
| 5-inch rigid putty knife | Scraping and prying up wallpaper | $5 – $10 |
| Wallpaper scoring tool | Perforating wallpaper for better solution soak | $7 – $15 |
| Pressure sprayer | Applying removal solution evenly | $15 – $30 |
| White vinegar or fabric softener | Homemade wallpaper removal solution ingredients | $3 – $8 |
| Safety goggles | Protecting eyes from spray and debris | $7 – $15 |
| Painter’s plastic tarp and tape | Floor protection and securing coverings | $13 – $26 |
| Ladder | Reaching higher sections of the wall | $30 – $60 |
| Clean wet rag | Wiping down adhesive residue | $2 – $5 |
Ultimately, the total estimated cost for the supplies needed to remove wallpaper ranges from $82 – $169.
Items like scrapers, scoring tools, and spray bottles are all easy to find at your local hardware store, making the process easier.
Having ensured all the tools and materials are on hand before you start will make the wallpaper removal process go much smoother and faster.
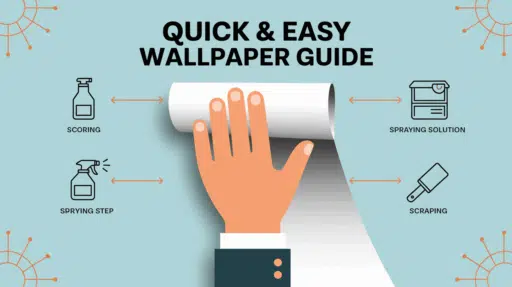
Step-by-Step Guide on How to Remove Wallpaper
With a few essential tools and some patience, you can strip away old wallpaper and prepare your walls for a fresh new look.
This easy-to-follow guide simplifies the process down into manageable steps, helping you out with your question of how to remove wallpaper efficiently without damaging your walls.
Step 1: Prepare The Room

Start by protecting your floors with a plastic painter’s tarp, securing it with painter’s tape.
Turn off the power at the breaker box and cover the outlets with tape to prevent water damage. Gather your tools and wear safety goggles to keep the process safe and mess-free.
Step 2: Loosen The Wallpaper

Use a rigid putty knife to lift the edges of the wallpaper. If you’re lucky, it might peel off in large sheets.
For stubborn spots, lightly run a wallpaper scoring tool over the surface to allow your removal solution to penetrate the adhesive.
Step 3: Apply The Removal Solution

Mix a solution of either hot water and vinegar or hot water and fabric softener in a pressure sprayer. Spray the wall generously, covering sections about four feet wide.
Let the solution sit for two to three minutes to loosen the adhesive beneath the wallpaper.
Step 4: Remove The Wallpaper

Once the solution has set, use your scraper to lift the wallpaper from the wall. Place large pieces directly into a garbage can.
For any remaining stubborn or dried areas, reapply the solution, wait a few minutes, and continue scraping until clean.
Step 5: Clean And Prep The Walls

After removing the wallpaper, spray the wall again to tackle any leftover adhesive. Scrape off the softened glue, then wipe the surface clean with a damp rag.
Once dry, apply an oil-based primer to prepare the wall for painting or a new wallpaper design.
Video Tutorial – Watch How It’s Done
For more information, check out this video tutorial by HGTV
Tips for Wallpaper Removal
The key to successful wallpaper removal is patience and using the right technique for your specific situation. Here are some time-tested tips to make your project go smoothly:
- Score stubborn wallpaper with a scoring tool before applying any solution to help moisture penetrate
- Work in manageable sections of about 3×3 feet rather than tackling an entire wall at once
- Apply removal solutions from bottom to top to prevent drips from creating dry streaks
- Keep solutions warm for maximum effectiveness—reheat as needed throughout the project
- Allow sufficient soaking time (usually 10-15 minutes) before attempting to scrape
Remember that wallpaper removal is rarely a quick process. Taking your time with proper preparation will ultimately save you hours of frustration and wall repairs.
Summing It Up
As you gather your tools, prepare your space, and read our blog post explaining how to remove wallpaper, remember that you’re not just removing wallpaper; you’re finding new possibilities for your home.
The perfect wallpaper might not exist, but it’s the one you have made with utmost attention and care. It reflects your style and changes your space into a sanctuary.
Each pattern and color choice tells a story, creating an atmosphere that feels uniquely yours. So, take your time, enjoy the process, and don’t hesitate to involve family or friends for extra help.
If you’re interested in more DIY projects for your home, feel free to click here and explore our collection of easy weekend makeovers and step-by-step renovation tutorials.

Stephanie Grace, a graduate with a degree in Fine Arts from the Savannah College of Art and Design, has been inspiring DIY enthusiasts with her creative and practical guidance for over 14 years. Her career in design and crafting began in a small artisan workshop, where she developed a passion for transforming everyday materials into beautiful and functional items. Stephanie joined our website in 2018, rapidly gaining popularity for her easy-to-follow DIY tutorials and innovative project ideas. Since then, she has been the creative mind behind our DIY section, helping readers bring their artistic visions to life. Outside her professional pursuits, Stephanie enjoys pottery and urban gardening, hobbies that showcase her love for hands-on creativity and nature.