Looking for a simple craft project that adds instant charm to any space without breaking the bank?
DIY tassel garland is your perfect solution for creating beautiful decorations in just minutes.
These colorful, fluffy decorations are made by cutting and shaping materials into hanging strands that dance with movement.
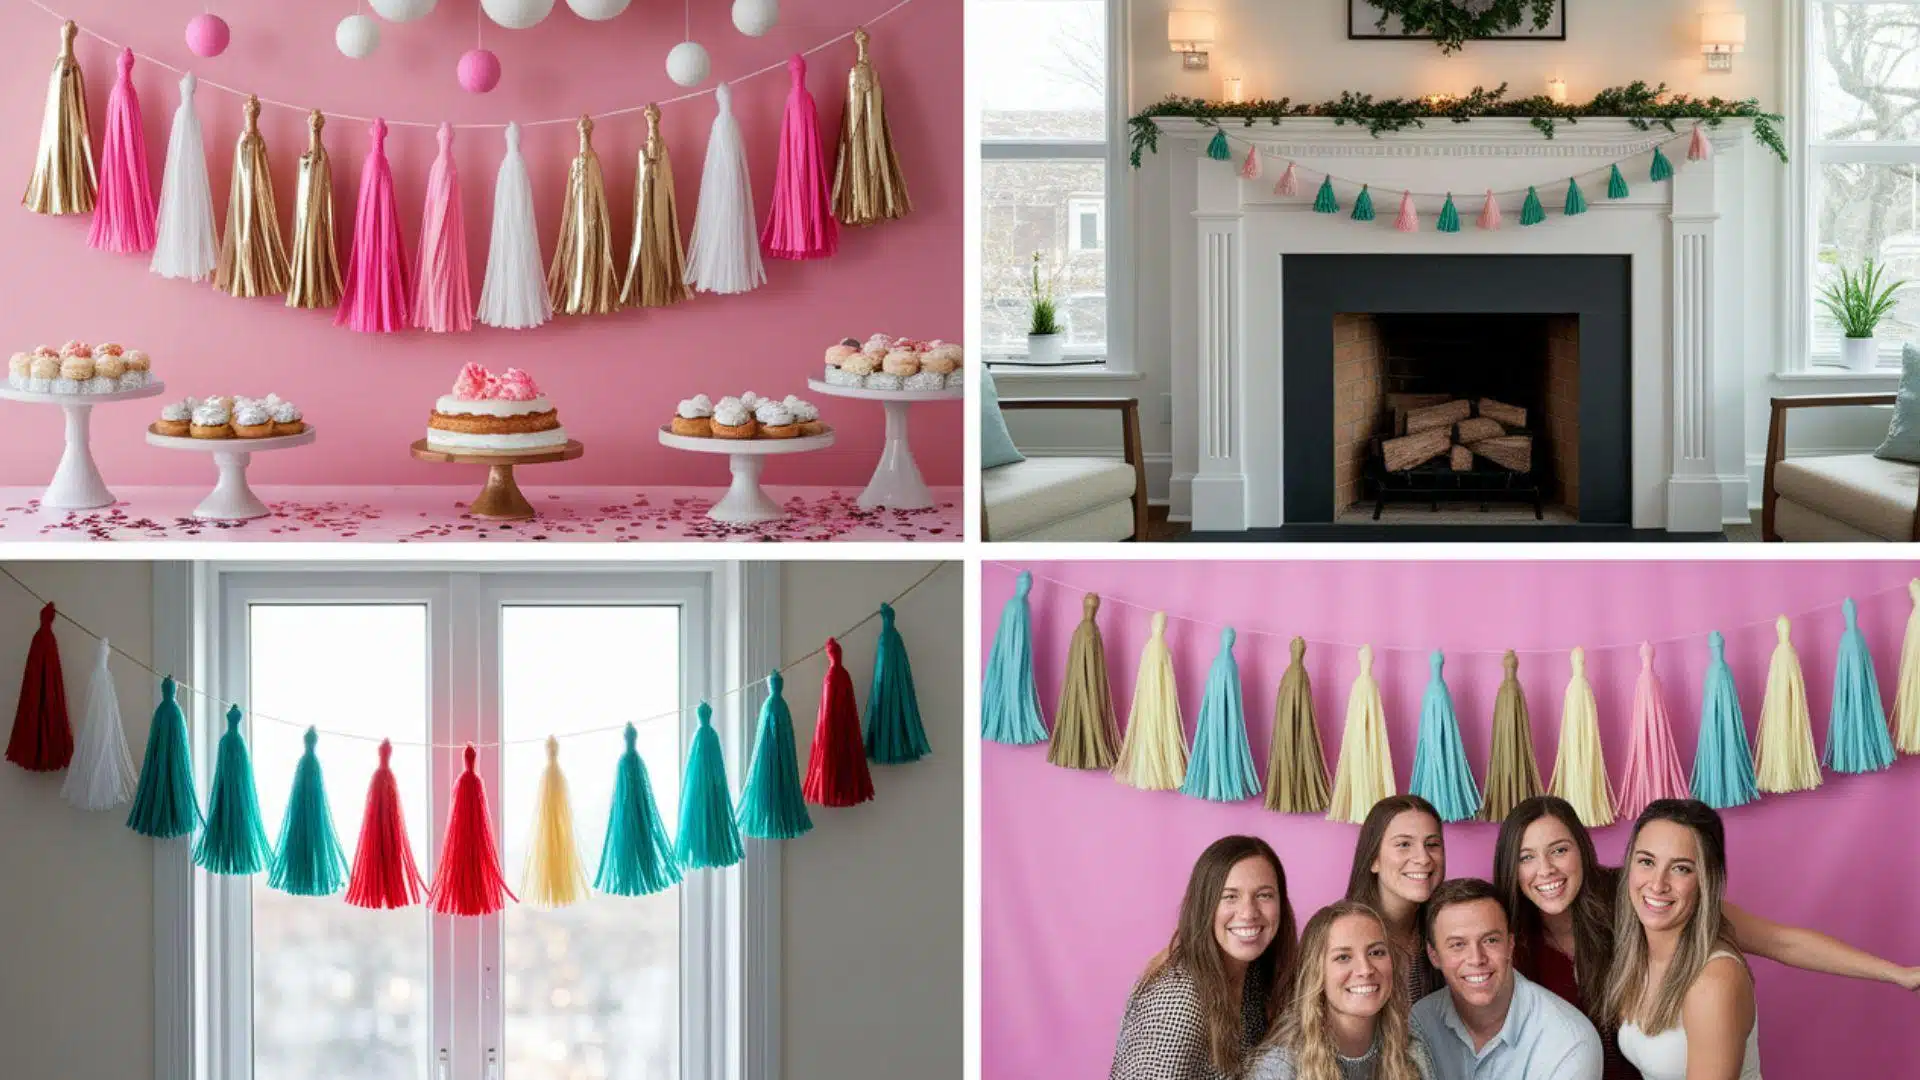
People love using DIY tassel garlands for birthday parties, baby nurseries, weddings, and trendy wall decor that adds a touch of classiness to any room.
This craft is ideal for beginners because it requires no special skills, just basic supplies like scissors and a bit of creativity.
You can customize colors, sizes, and styles to match any theme or personal taste perfectly.
The best part is watching something so simple turn into gorgeous decorations that everyone will admire and ask about.
Why You Should DIY Tassel Garland?
Making your tassel garland gives you complete control over colors, sizes, and styles for any occasion.
You can create exactly what you want for just a few dollars, rather than paying more for store-bought versions.
Want pink and gold for a birthday party or fall colors for Thanksgiving?
The process feels relaxing and therapeutic as you create something beautiful with your hands.
Kids love helping with this project, making it a perfect bonding activity for the whole family.
You’ll feel proud when guests compliment your lovely decorations and ask where you bought them.
Additionally, you can create extras to give as thoughtful, handmade gifts that friends will truly treasure.
Ready to find what you can create with just a plastic tablecloth and scissors?
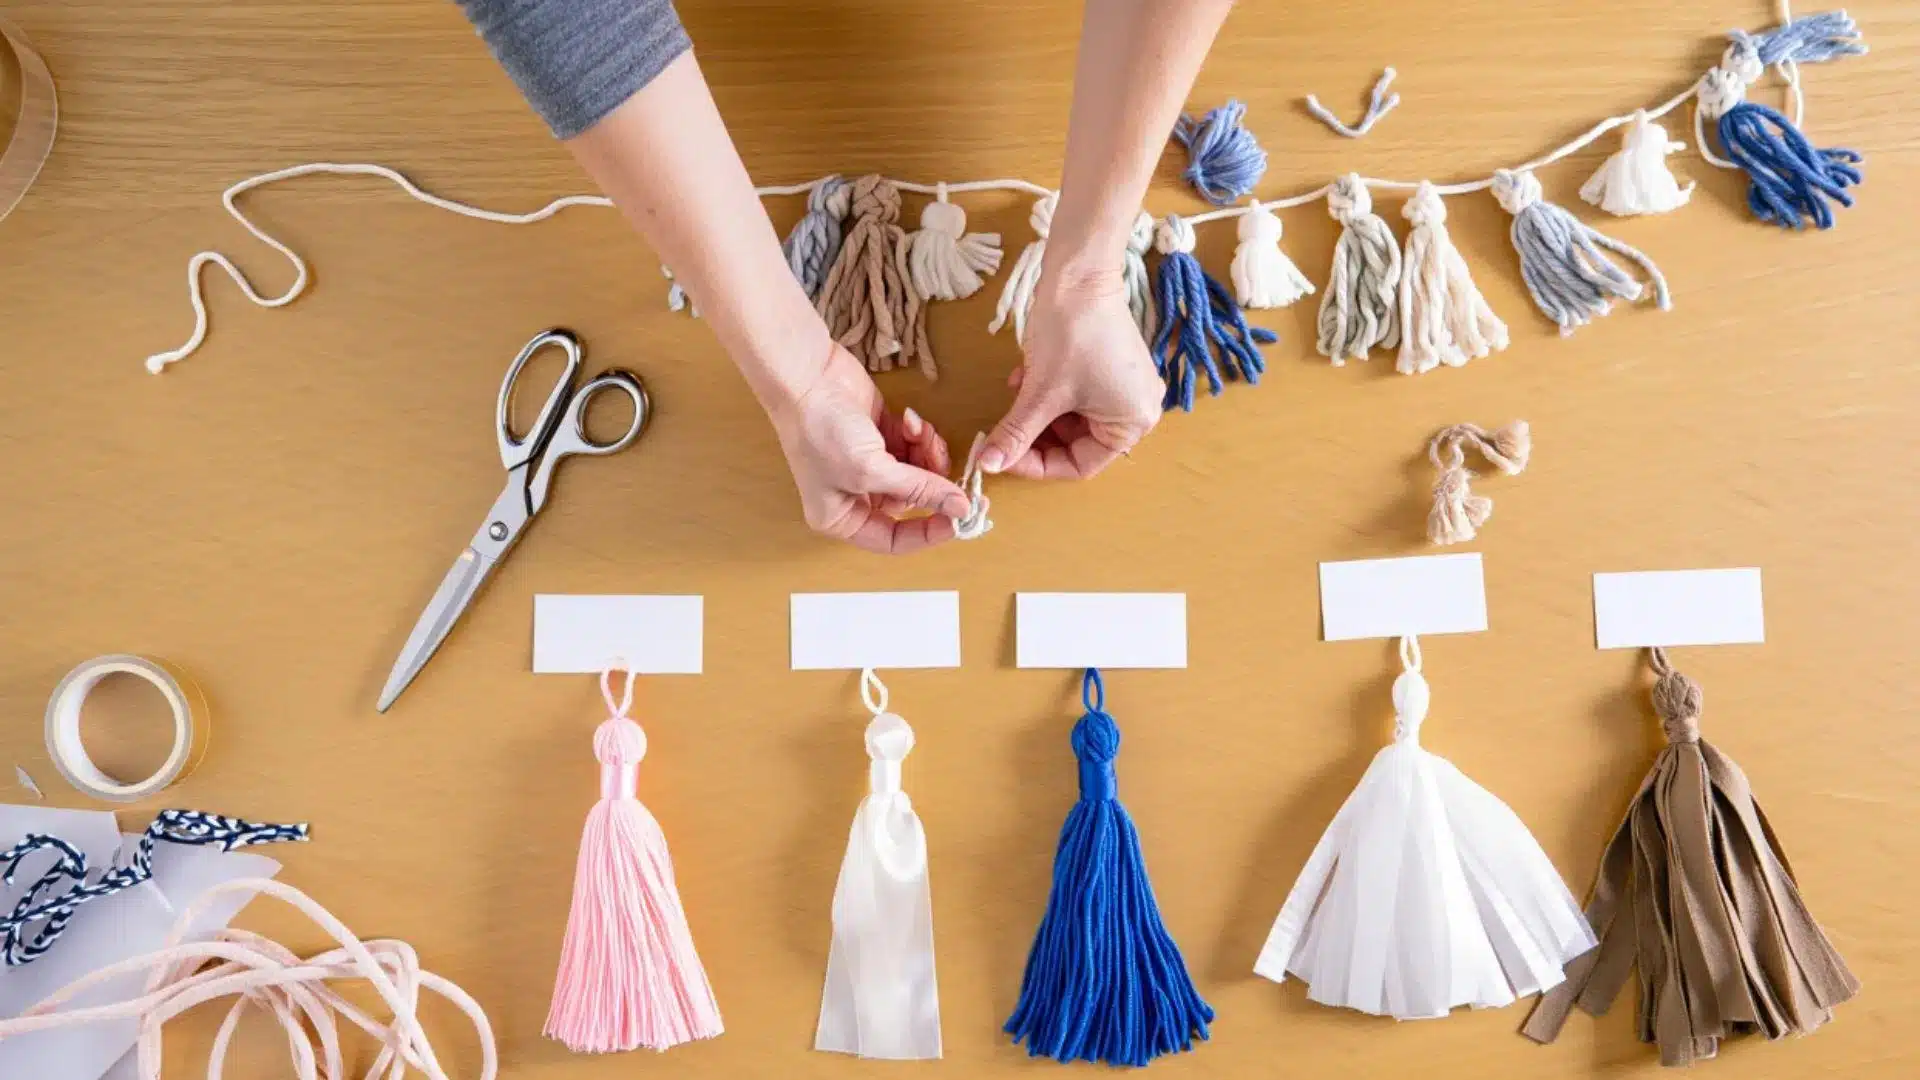
Choosing Your Color Scheme and Style
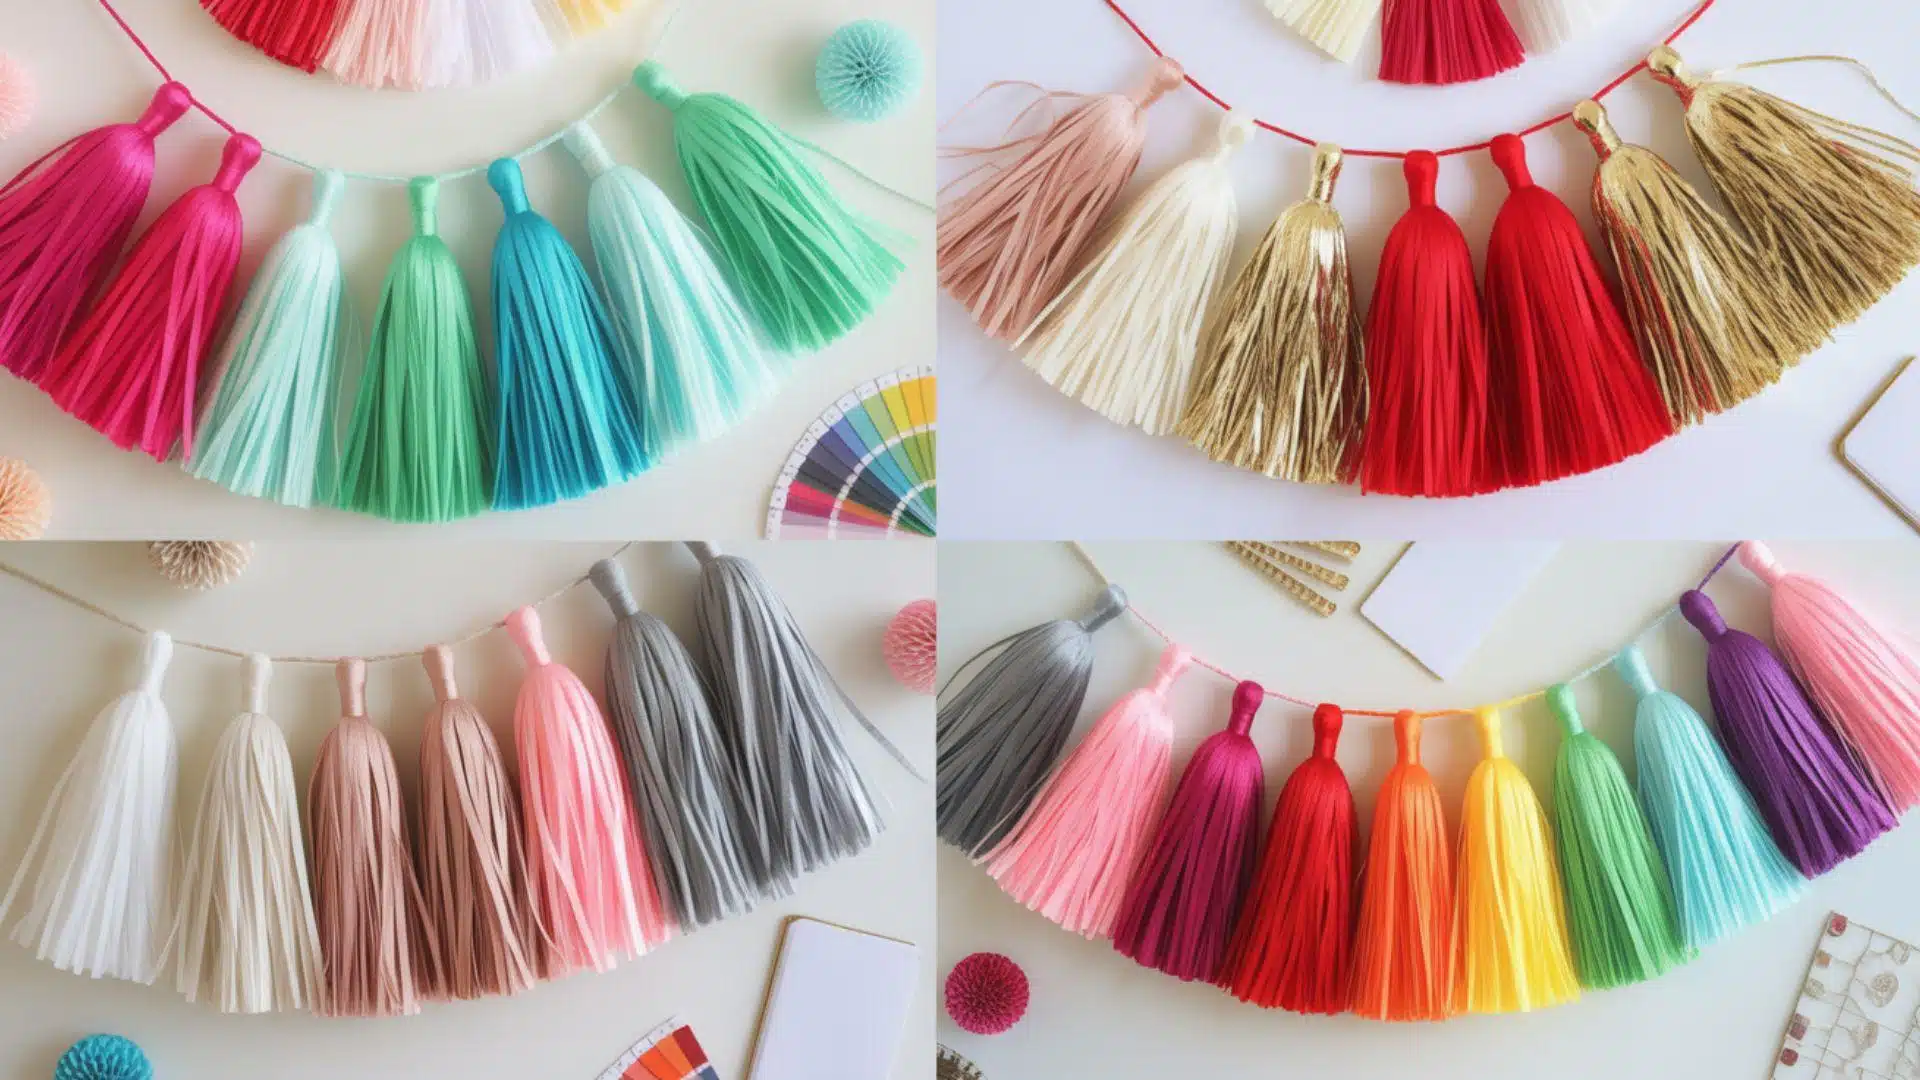
Start by considering your event or space when selecting tassel colors.
Birthday parties look amazing with bright, fun colors like hot pink and turquoise.
Baby showers shine with soft pastels, such as mint green and blush pink.
Holiday garlands pair best with classic combinations, such as red and gold, for Christmas. Match your tassel sizes to your space as well.
Large tassels make bold statements in big rooms, while mini tassels work perfectly for intimate gatherings.
Try mixing different textures, such as cotton and metallic threads, for added visual interest.
Neutral colors, such as cream and gray, blend beautifully with any existing decor.
Rainbow schemes bring instant joy to kids’ rooms and playful spaces.
Materials You’ll Need for The Project
If you’re planning to make a DIY tassel garland using a plastic tablecloth, it helps to know the basic cost.
Below is a quick look at the estimated prices for the materials.
Most of these items are affordable and readily available at local stores or online.
| MATERIAL | ESTIMATED COST (USD) |
|---|---|
| Plastic tablecloth | $1.25 – $7.99 |
| Sharp scissors | $5 – $15 |
| Ruler (optional) | $2.29 – $5.99 |
| Washi tape or regular tape | $1 – $4 |
You may already have some of these items at home, which can help lower your total cost.
Even if you’re buying everything new, this is still a budget-friendly craft project with fun, colorful results.
Total Estimated Material Cost Range
Low end (if you already own scissors and a ruler): $2.25 – $11.99
If buying everything new: $9.54 – $32.98
NOTE: These costs may vary depending on your location, current market conditions, time of year, and material availability in your area.
Step-By-Step Guide for Making a Tassel Garland
Making tassel garland is easier than you might think and takes just five simple steps.
You’ll convert a basic plastic tablecloth into beautiful decorative tassels in about 30 minutes.
Each step builds on the last, so you’ll have a gorgeous garland ready to hang before you know it.
NOTE: Always supervise children while cutting materials and handle scissors with care during this project.
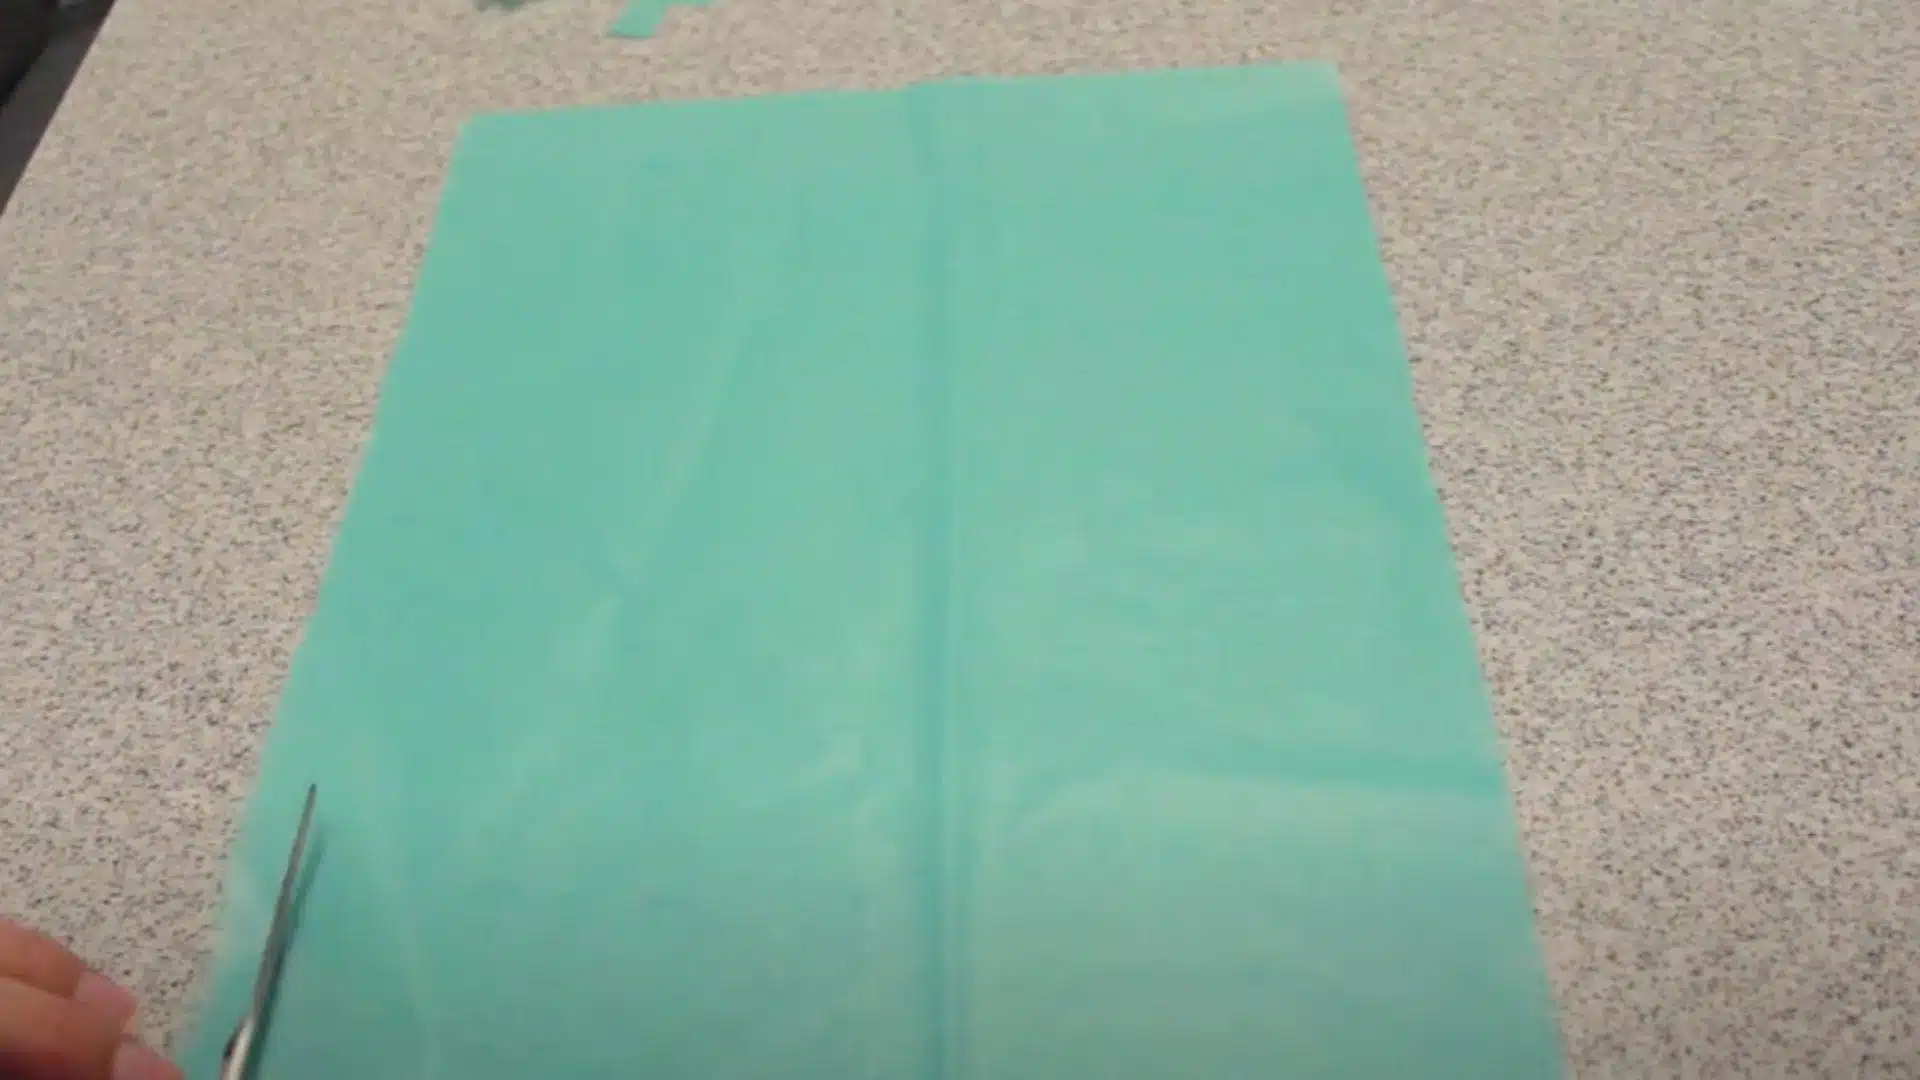
STEP 1: Open and Cut the Tablecloth
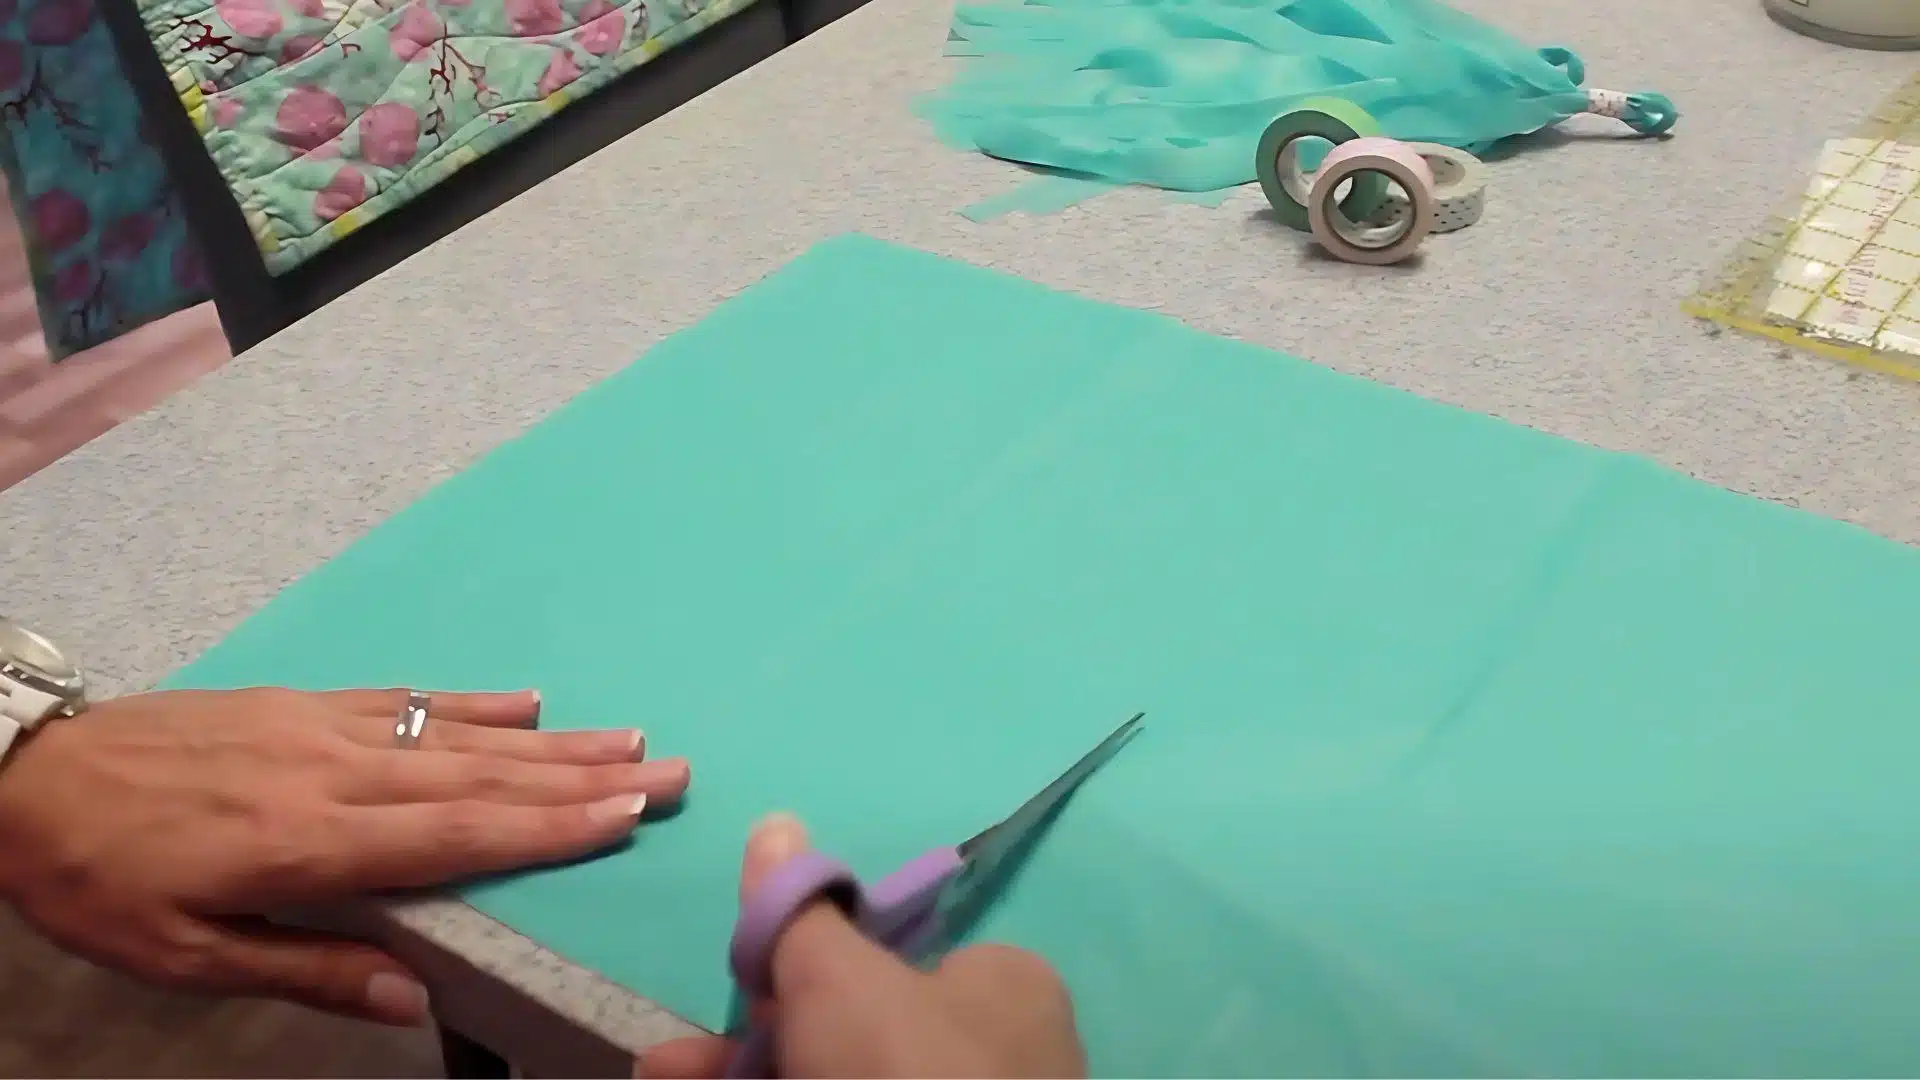
Start by opening up your plastic tablecloth.
Keep it folded the way it came in the package.
Measure about 10 inches from one end and cut across.
Don’t worry if it’s not perfect; get close.
You’ll end up with a long strip.
Open that strip and use the center crease as a guide to cut it in half again.
Creative Shortcuts
- Skip the ruler, eyeball the 10 inches for speed.
- Use the crease line to cut straight without needing to measure.
- Keep half of the piece aside for later use.
STEP 2: Fold and Prep for Fringe Cuts
Please take one of your half pieces and fold it back along the crease.
This makes it easier to cut strips.
Ensure it’s flat and aligned.
Use your fingers to smooth it down and get it ready for cutting.
Creative Shortcuts
- Fold it tightly so it doesn’t slide while cutting.
- Stack two pieces if making extras, saves time.
- Use binder clips to hold it still if needed.
STEP 3: Cut Fringe Strips
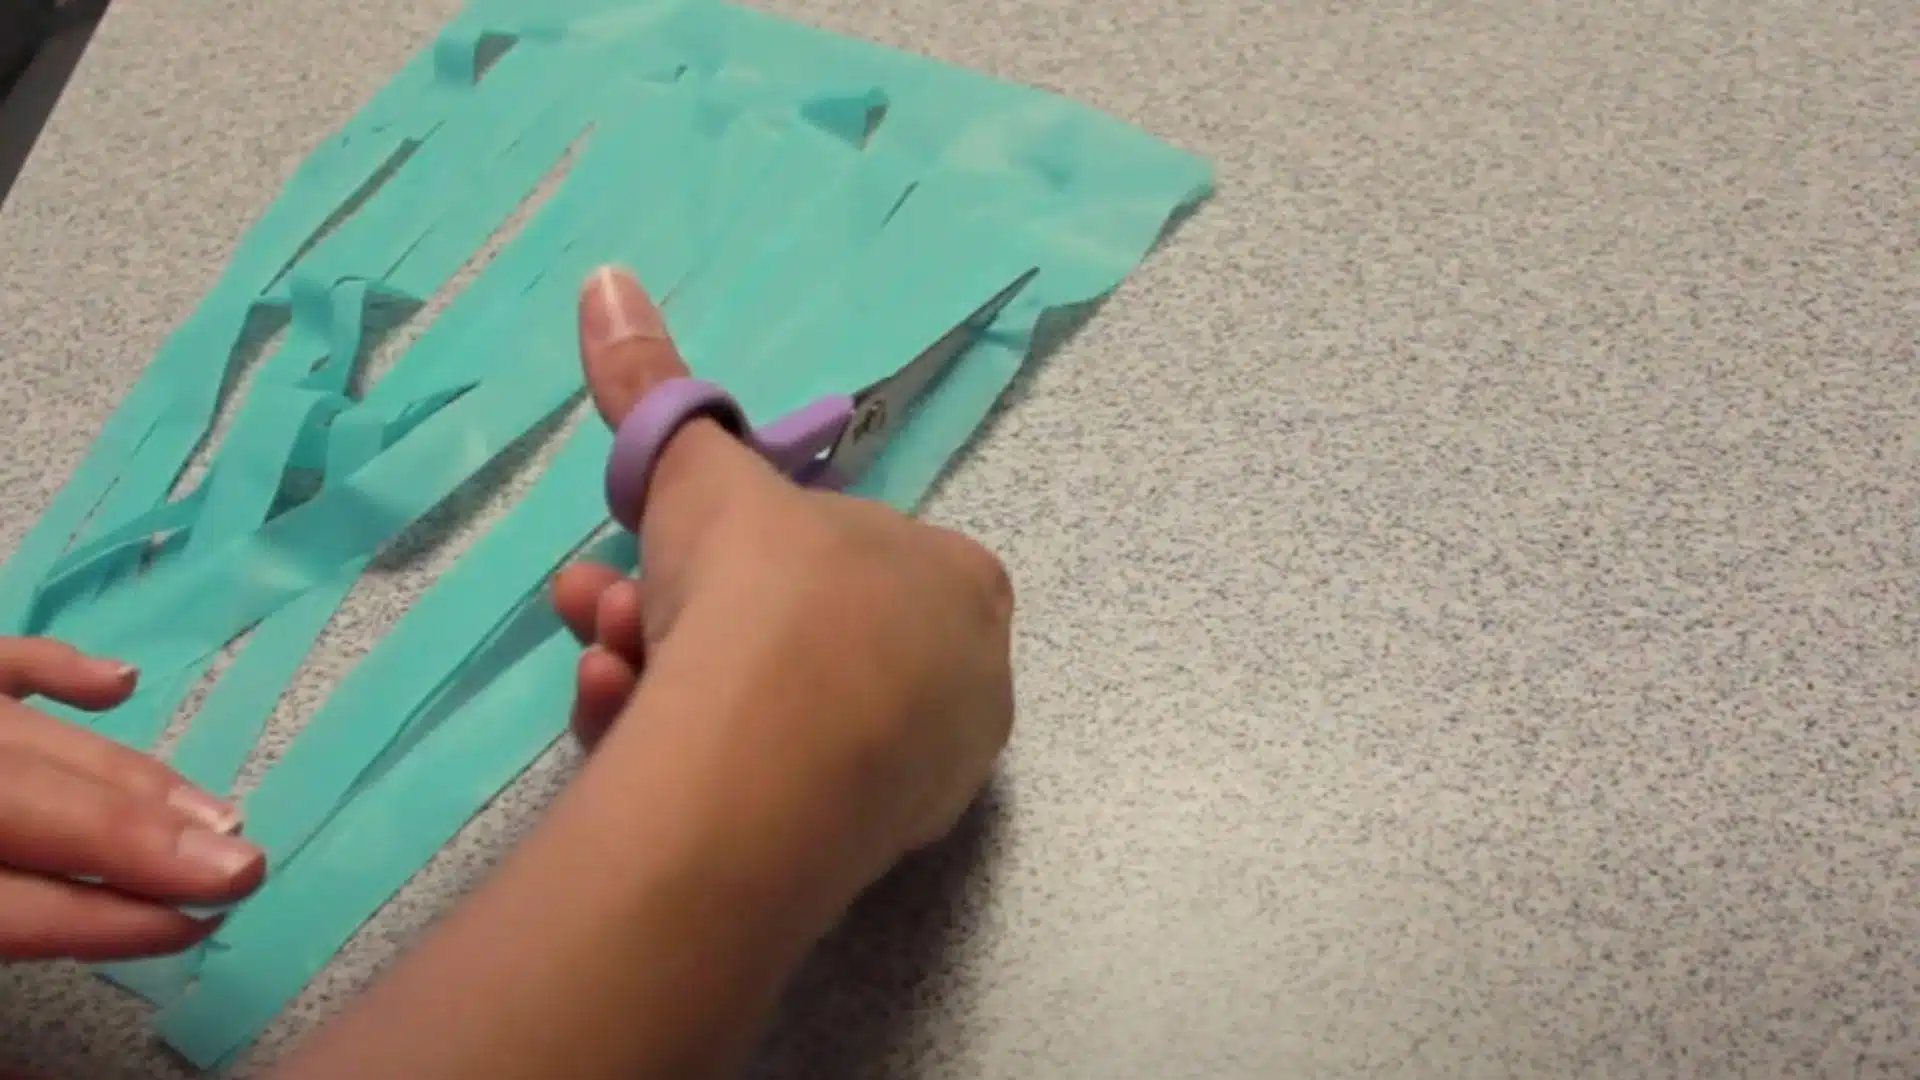
Use your scissors to cut strips along the length, approximately ½ to 1 inch wide.
Leave 1–2 inches uncut at the top to keep the strips together.
Keep your scissors steady, and if you’re making multiple cuts, hold the piece with one hand and slide the scissors with the other in a single motion.
Creative Shortcuts
- Don’t stress the size, random cuts look cool too.
- Double up layers and cut two at once.
- Use extra-sharp scissors to glide through the material more quickly.
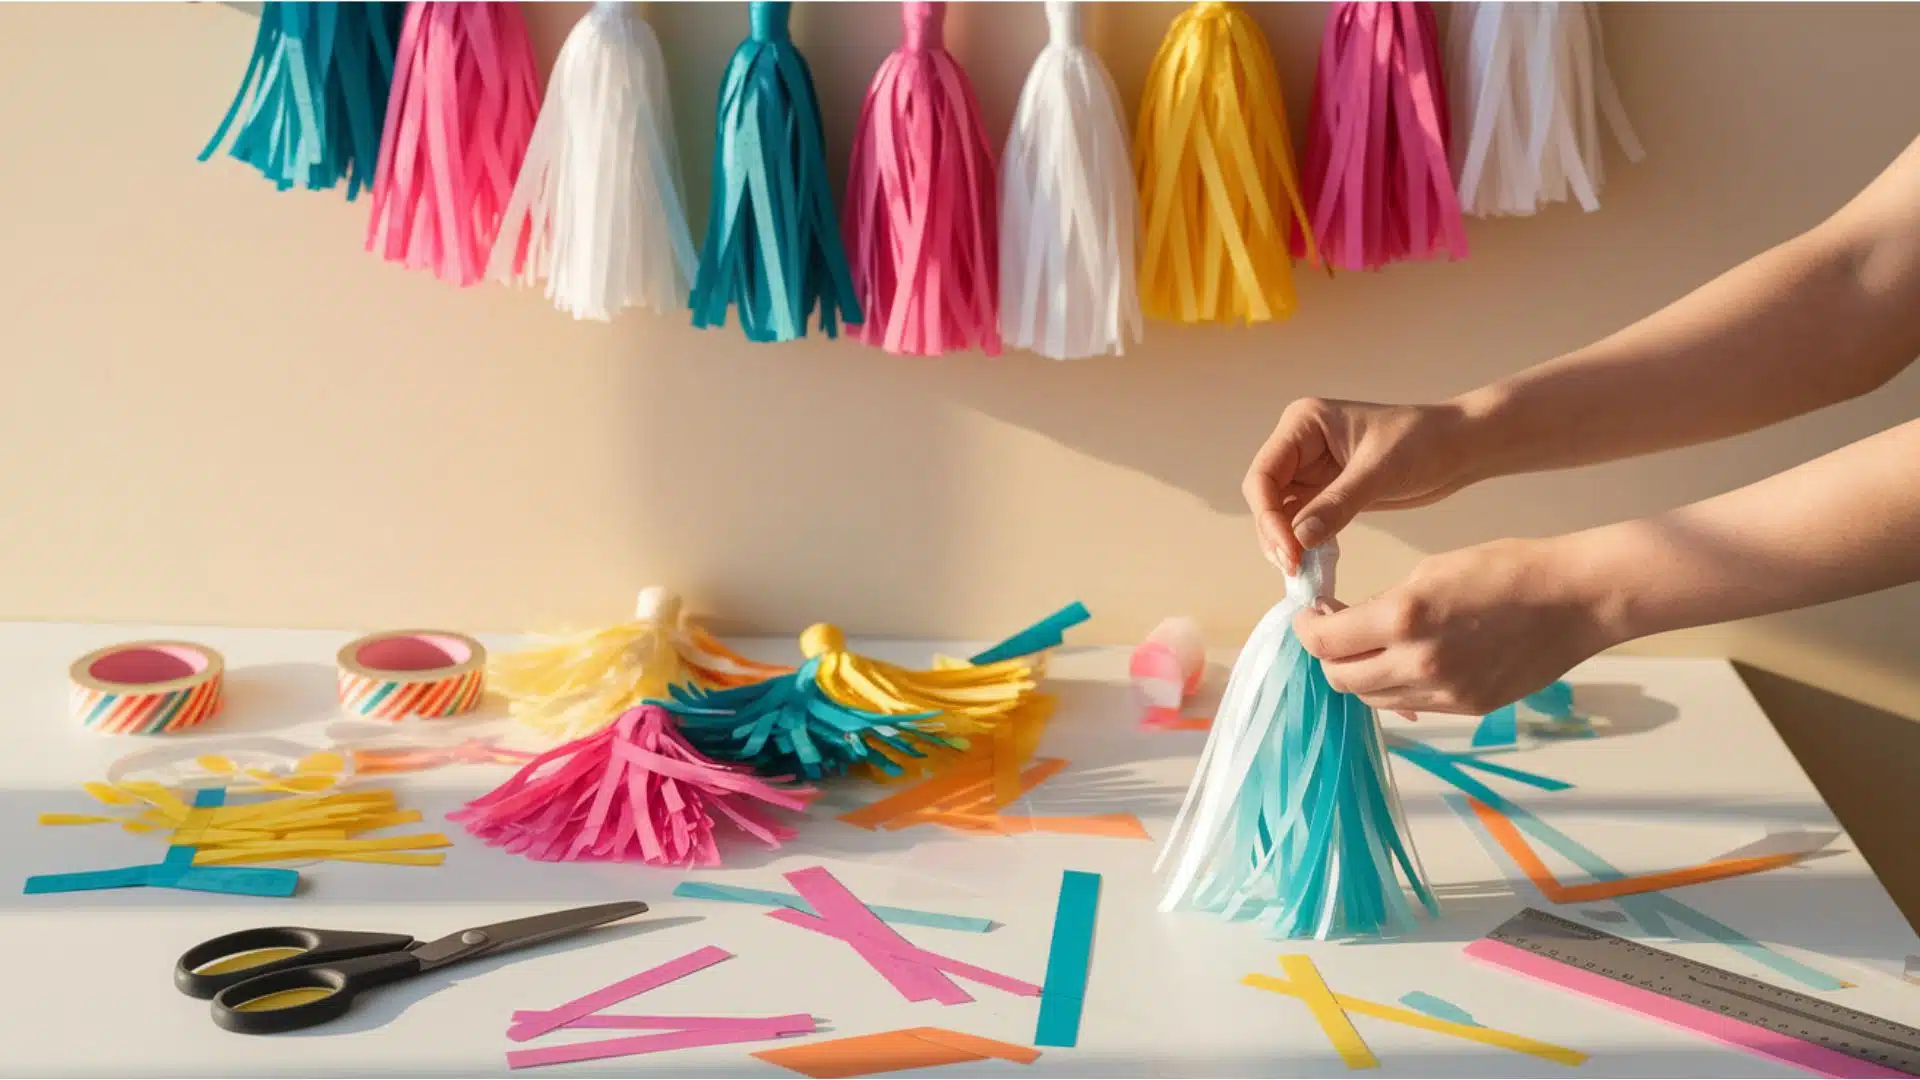
STEP 4: Roll and Fan Out the Tassel
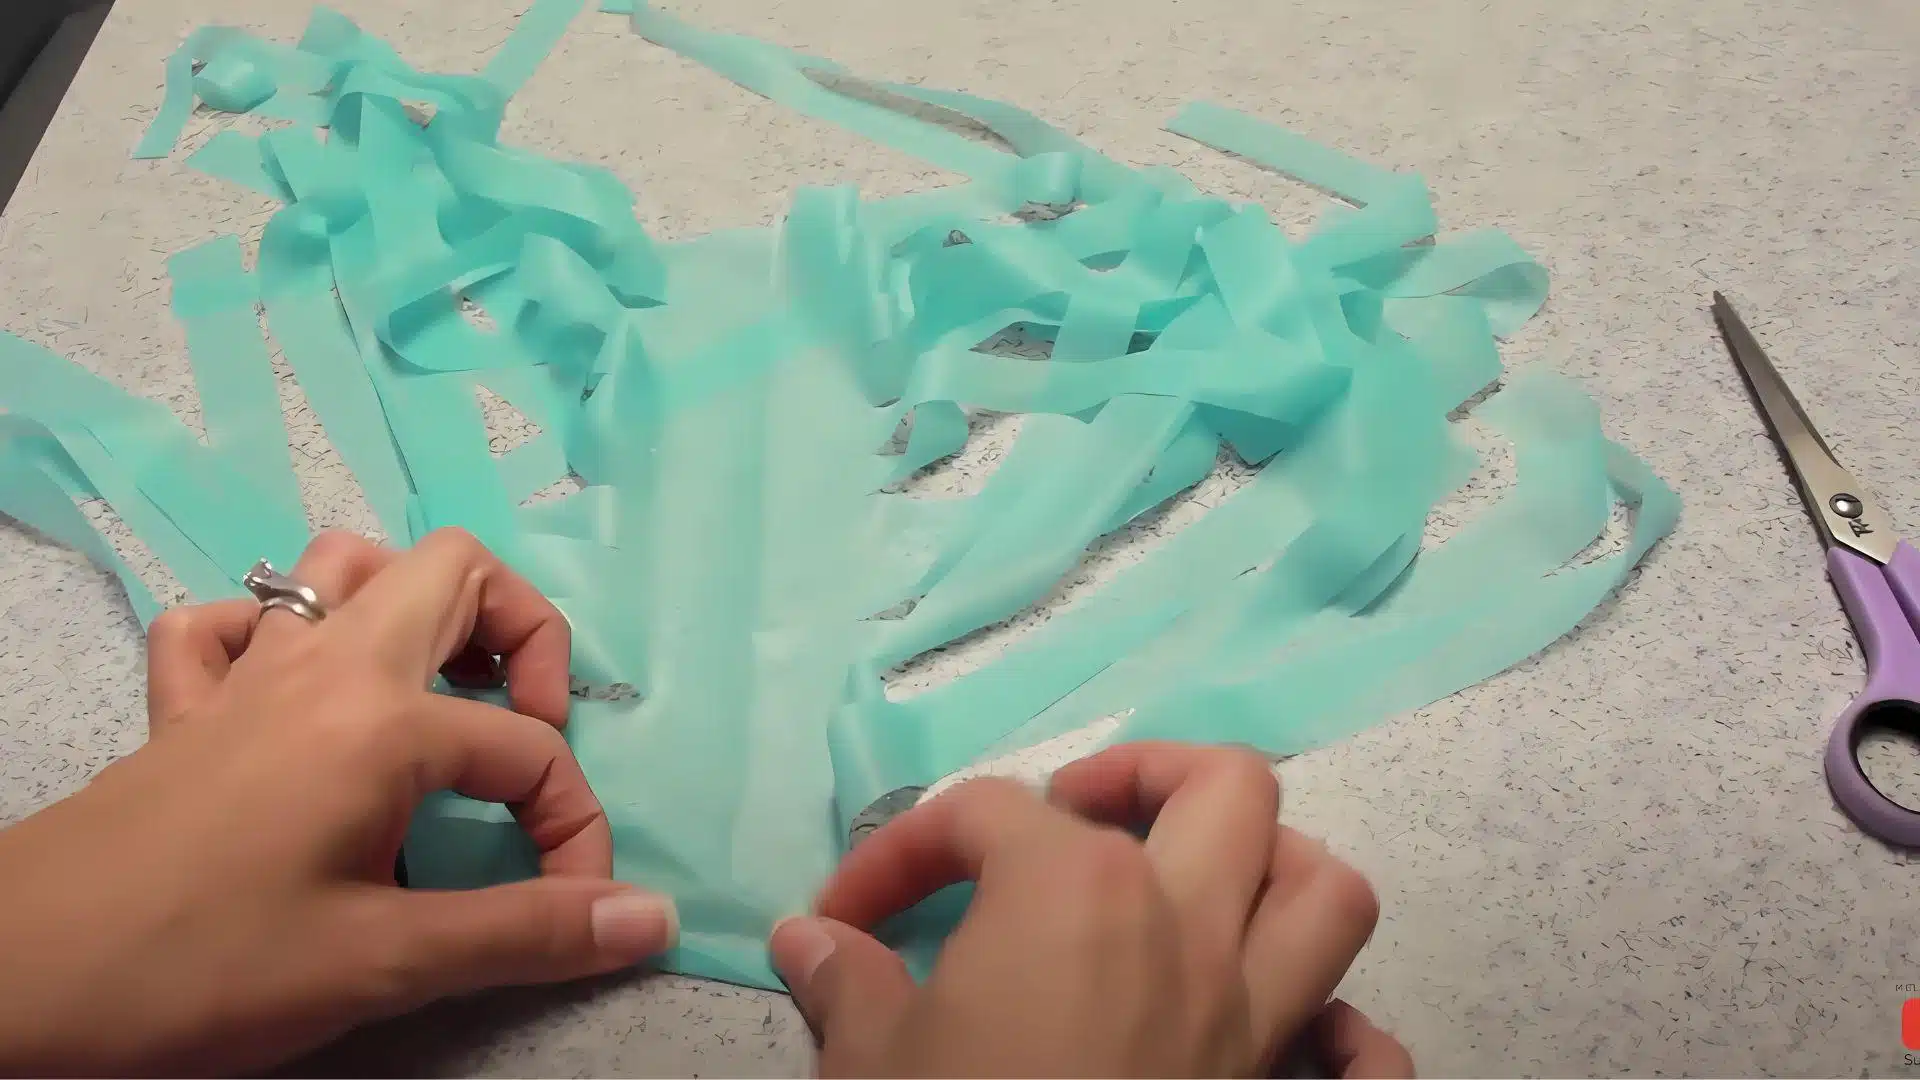
After you’ve cut your fringe, gently shake it out and fan the strips so they separate.
Lay it flat and start rolling from one end to the other, keeping it tight in the middle.
Give the rolled part a little shake to fluff it out and bring life to your tassel.
Creative Shortcuts
- Shake the fringe first; it separates better.
- Roll tightly so it doesn’t unravel later.
- Do this while watching TV, it’s that simple!
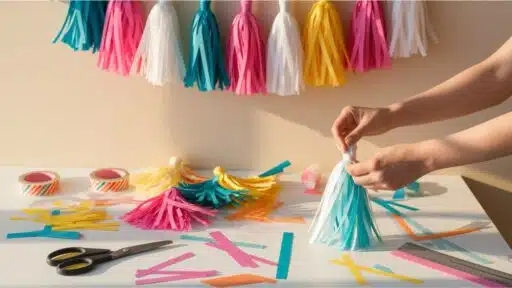
STEP 5: Twist, Loop, and Tape
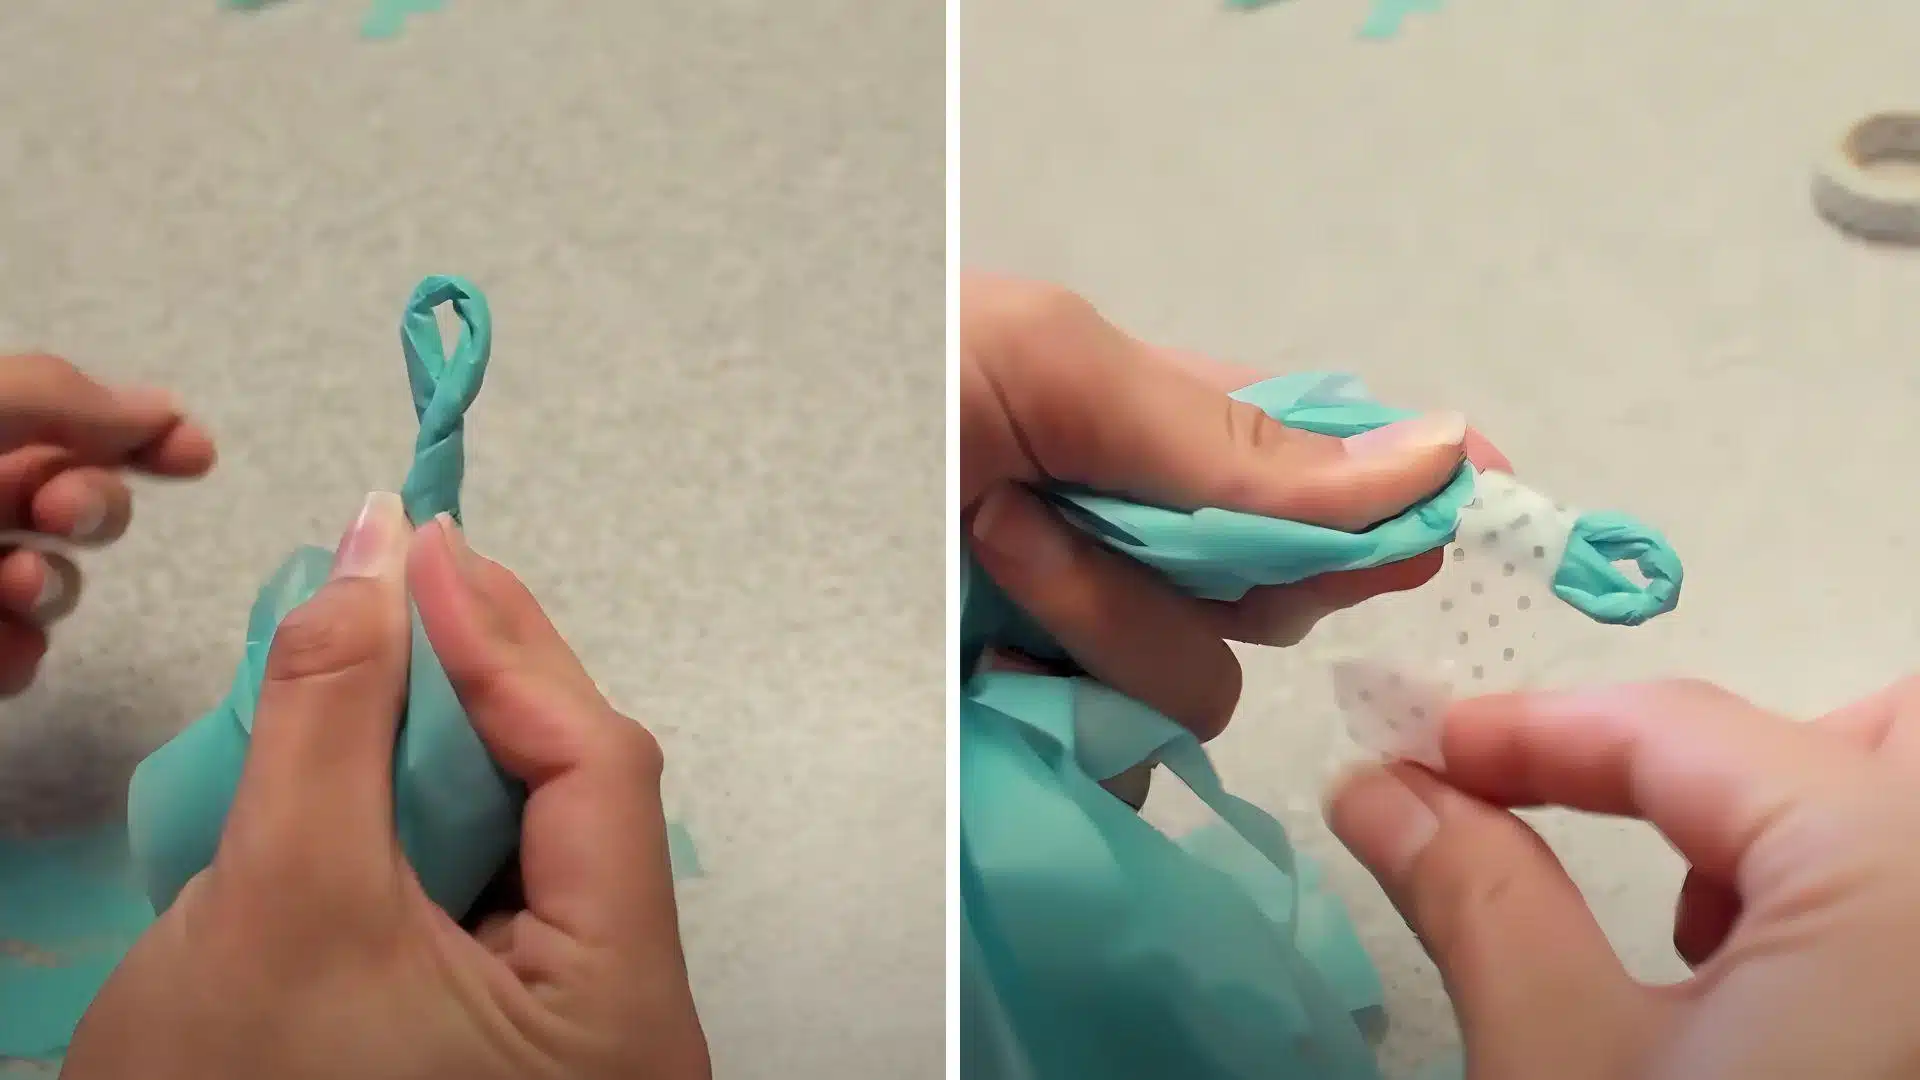
Now take the center part where you rolled and twist it to form a loop.
Keep twisting until it feels tight.
Use some washi tape or any strong tape to hold the loop in place.
You’re done!
Just slide the loop onto a string or ribbon and hang your tassels wherever you want.
Creative Shortcuts
- Use fun washi tape to match your theme.
- Tighten the loop to keep it secure.
- Mix colors for a festive look, go wild!
Watch How it’s Done: DIY Tassel Garland
For a detailed explanation, check out the video tutorial by Melanie Ham
Creative Variations You Can Try
Once you master the basic technique, you can get creative with different sizes and combinations.
Make tiny tassels using the same steps, but cut smaller pieces for adorable cupcake toppers or greeting cards.
Go big with jumbo tassels by using wider tablecloth sections for stunning party backdrops that wow your guests.
Try mixing your tassels with pom-poms or fabric strips on the same string for unique texture combinations.
You can also layer different colored tassels together before taping to create ombre effects.
Make seasonal versions using holiday colors or match your home decor with neutral tones.
The possibilities are unlimited when you start experimenting with materials and sizes.
Other Materials You Can Use Instead
Don’t have a plastic tablecloth handy, or want to try something different?
You can make stunning tassel garlands using materials you probably already have around the house.
Each material creates a unique look and texture for your decorations.
- Ribbon Tassel Garland – Cut satin or grosgrain ribbons into strips and gather them at the top with matching thread for graceful, flowing tassels perfect for weddings.
- Tissue Paper Kit Tassels – Layer colorful tissue paper sheets, cut into fringe, then twist and secure for lightweight, fluffy tassels that catch light beautifully.
- Yarn Tassel Garland – Wrap yarn around cardboard, tie at the top, and cut the bottom loops for classic, cozy tassels with rich texture and warmth.
- Fabric Strip Tassels – Use old t-shirts, cotton fabric scraps, or burlap cut into strips for rustic, boho-style tassels with natural movement and charm.
The best part about trying different materials is discovering which ones work best for your style and budget.
Have you spotted any materials around your home that could be used to make amazing tassels?
Best Places to Use Tassel Garlands
Tassel garlands work beautifully in almost any space, from special events to everyday home decor.
The key is choosing the right size and colors that match your setting.
| LOCATION | BEST USES | SIZE | COLORS |
|---|---|---|---|
| Parties | Backdrops, dessert tables | Medium-Jumbo | Theme colors |
| Home | Mantels, shelves, cribs | Mini-Medium | Neutrals |
| Seasonal | Holiday decor, windows | Any | Traditional |
| Photos | Event backdrops | Jumbo | Coordinated |
Start with one location and see how it changes your space.
You might find yourself making garlands for every room in your house once you see the results.
Storage and Reuse Tips
Proper storage keeps your handmade garlands looking fresh and ready for the next celebration.
Think of it as building your personal decoration stash that saves money every time you reuse it.
- Keep tassels from tangling by wrapping the entire garland loosely around a cardboard tube or empty wrapping paper roll before storing.
- Store garlands in clear plastic bins or large ziplock bags, allowing you to easily see the colors and styles you have without digging through boxes.
- Label each storage container with fun names, such as “Birthday Brights” or “Holiday Magic,” to make finding the right garland feel like treasure hunting.
- Hang garlands on closet rods or hooks if you have space, since this prevents crushing and keeps them ready for instant decorating.
- Create a garland inventory list on your phone with photos so you remember what you have before making new ones for events.
With proper storage, your tassel garlands become a growing collection that friends will envy.
Soon, you’ll be the go-to person everyone asks for party decorating advice and inspiration.
Final Thoughts
Creating your DIY tassel garland proves that beautiful decorations don’t need to be complicated or expensive.
You’ve learned how easy it is to change a simple plastic tablecloth into stunning decorations in under an hour.
From choosing perfect color combinations to storing creations for future celebrations, every step builds your confidence as a crafter.
The joy of making something beautiful with your hands while saving money makes this project incredibly rewarding.
If you’re decorating for birthdays, holidays, or adding charm to your home, DIY tassel garland delivers impressive results every time.
Don’t wait to start your first project and discover how addictive this simple craft becomes.
Please share your experiences in the comments below; it’ll be exciting to know about your creative tales!
If you’re interested in more DIY Projects content, click here and explore other blogs that you might enjoy.

James McLaren, with a rich background in architecture from the University of Manchester, has been contributing his expertise to the world of creative construction and home innovation for over 20 years. His journey began as a project manager for a leading construction firm, where he honed his skills in bringing complex designs to life. James joined our platform as a freelancer in 2019, quickly becoming a favorite for his insightful and practical advice. He has been a pivotal force to our wing ever since, bringing our readers a blend of technical know-how and creative flair. Beyond his professional life, James is an avid woodworker and enjoys restoring vintage furniture, a hobby that complements his professional insights beautifully.