The first time a storm hit my roof, I didn’t think much of it until days later, when water started dripping through my ceiling.
By then, it had already caused more damage than I expected. That experience taught me the hard way how important it is to inspect your roof as soon as the skies clear.
Now, I never wait. I know exactly what signs to look for, how to document the damage for insurance, and when it’s time to call in a pro.
In this blog, I’ll walk you through every step from quick visual checks to filing a claim, so you can act fast and avoid costly repairs.
If you’ve just been through a storm, grab a notepad and let’s get started. And if questions arise, feel free to ask; I’ve got you covered!
Why Storm Damage Isn’t Always Obvious
Storm damage isn’t always easy to spot. After wind or hail, many expect missing shingles, but some damage is subtle and hidden from view.
Wind can lift shingles just enough to break the seal underneath, creating weak points for water to enter over time.
Hail may leave dents that weaken shingles without cracking them. These soft spots often lead to leaks later.
Flying debris can damage flashing or vents without moving them out of place. Gutters may shift slightly, affecting water flow.
These small issues add up. Without a close inspection, by ladder, drone, or roofer, they often go unnoticed until interior water damage appears.
Things to Do After the Storm Passes
Don’t rush to fix things right away. Focus on spotting issues and documenting them. Quick action matters, but safety and proper records come first.
- Inspect from the ground first: Walk around your home and look for visible damage to the roof, gutters, and yard. Use binoculars for a closer look.
- Check for fallen debris: Look for tree limbs, broken branches, or anything that may have impacted your roof during the storm.
- Look inside for leaks: Inspect your attic, ceilings, and walls for new water stains, drips, or signs of moisture.
- Take clear photos of the damage: Document everything with photos, even minor issues. These will be helpful for insurance or contractor evaluations.
- Stay off the roof: Avoid climbing up, especially if the surface is wet or unstable. Leave that to a professional if needed.
Signs of Roof Damage to Look For
Storm damage isn’t always easy to see, but small issues can lead to big problems over time. Knowing what to check helps you catch damage early and avoid costly repairs later.
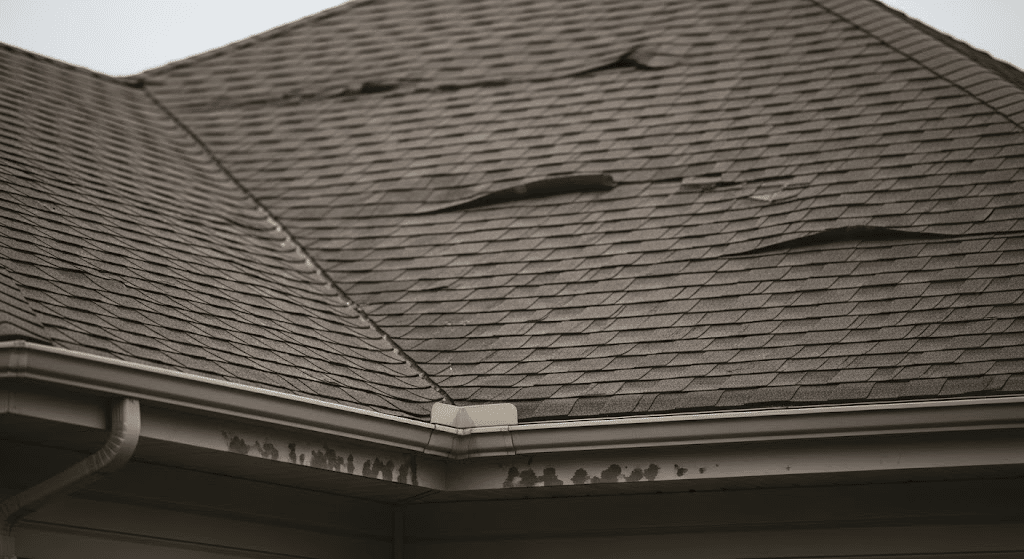
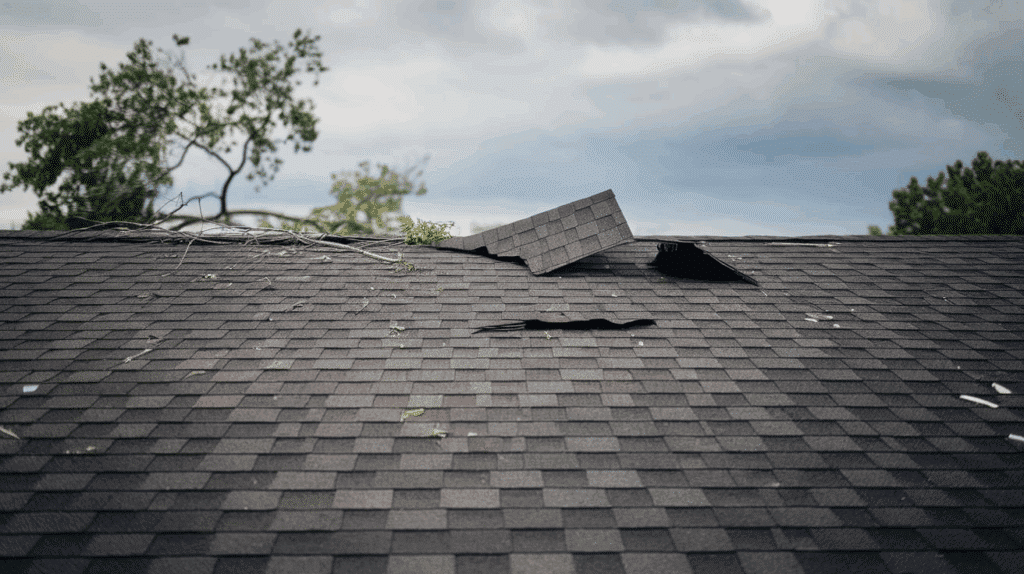
1. Missing or Lifted Shingles
Strong winds can rip shingles off entirely or lift their edges without removing them.
Lifted shingles may look fine from the ground, but are no longer sealed, allowing water to seep underneath.
This creates weak points that lead to hidden leaks.
Even a few missing shingles can leave the roof deck exposed and vulnerable to rot, mold, and more extensive water damage if not addressed quickly.
2. Cracked or Bruised Shingles
Hail and debris can cause surface cracks or leave dark, bruised spots on asphalt shingles.
While they might not cause immediate leaks, these damaged areas compromise the shingle’s protective layer.
Over time, UV rays and moisture speed up deterioration, shortening the roof’s lifespan.
Cracks can also widen during future storms, making small issues grow into more serious repair needs if left untreated.
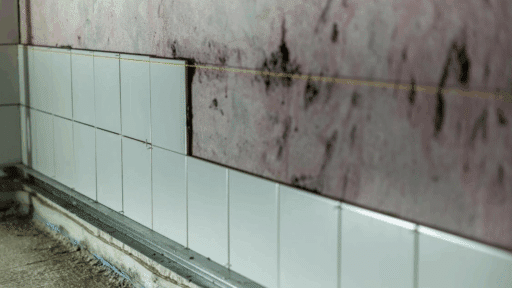
3. Damaged Flashing and Roof Edges
Flashing protects roof joints, valleys, and penetrations like vents or chimneys.
Storms often bend, loosen, or completely detach flashing, especially along roof edges or where materials meet.
Even a small gap in flashing can let in rainwater and cause leaks behind walls or in the attic.
It’s essential to inspect these areas carefully, as damage here can be easily overlooked but often leads to significant internal issues.
4. Gutter and Downspout Issues
After a storm, check for dented, detached, or overflowing gutters. Gutters clogged with debris or partially pulled away from the house can’t guide water properly.
This can lead to pooling along the roofline or foundation, increasing the risk of leaks and erosion.
Damaged downspouts may also send water in the wrong direction, saturating walls or landscaping where it doesn’t belong. Clean and realign as needed.
What to Check Inside the Attic or Ceiling?
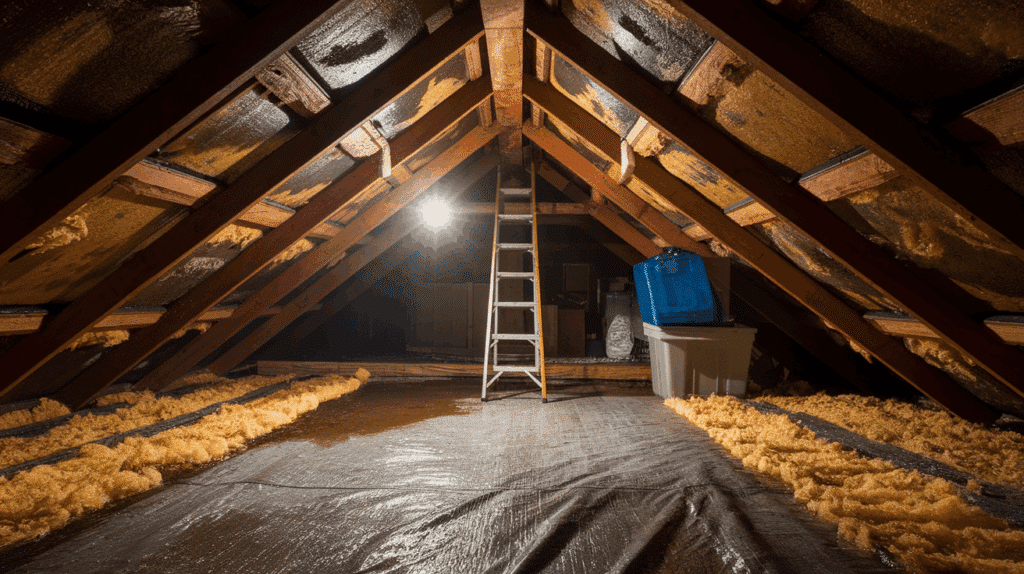
After a storm, don’t just check the roof outside. The first signs of trouble often show up inside, start by looking in the attic and on upper ceilings, especially after wind, hail, or heavy rain.
- Water Stains or Discoloration: Look for dark spots or streaks on wood beams, drywall, or insulation; these often signal roof leaks after a storm.
- Damp or Sagging Insulation: Wet insulation is a strong sign of water intrusion and may lead to reduced energy efficiency and mold growth.
- Dripping Water or Moisture Trails: Check for active leaks or dried water trails around vents, rafters, and nails, especially near roof penetrations.
- Musty or Moldy Smells: A stale or damp odor in the attic usually means moisture has lingered long enough to promote mold growth.
- Warped or Soft Wood: Rafters or roof decking that feel soft, warped, or show signs of swelling may indicate prolonged water exposure.
When to Call a Professional Roofer
After checking your roof and attic, even small signs of damage should make you think about calling a pro. Roofing problems can get worse fast, so acting early can save time and money.
- You see missing shingles or loose materials like flashing or vents.
- Water stains appear on ceilings or in the attic, even if they seem small.
- There are dents or cracks from hail or flying debris.
- You suspect hidden damage, like a punctured underlayment or soft decking.
- Your roof is too steep or high to safely inspect on your own.
- You’re unsure about what you see and want a trained eye to confirm the condition.
- You want to prevent bigger repairs later by catching damage early.
How to Document Roof Storm Damage
Before making repairs or filing a claim, it’s important to document roof storm damage clearly and thoroughly.
1. Take Clear, Well-Lit Photos: Capture wide shots and close-ups of all visible damage, including missing shingles, debris, and interior water stains.
2. Document Inside and Outside: Photograph both exterior roof damage and interior issues like attic leaks, ceiling stains, or wet insulation.
3. Record the Storm Details: Write down the date, time, and duration of the storm. Save weather alerts, news reports, or radar screenshots if available.
4. List All Affected Areas: Create a written list of damage, including specific locations like flashing, vents, or gutters, to help during repair estimates.
5. Keep a Backup of All Records: Save copies of your photos, notes, and receipts digitally and in print in case your insurance company or contractor needs them.
Filing an Insurance Claim for Roof Damage
Once you confirm storm damage, start by reviewing your homeowners’ insurance policy.
Look for coverage limits, deductibles, and exclusions for wind, hail, or water damage.
Next, contact your insurer to report the issue and start the claim.
Send clear photos, a damage summary, and receipts for any temporary repairs. If a contractor gave you an estimate, include that too.
An adjuster will likely visit to inspect the damage. Try to be there to point out concerns. Keep copies of all paperwork and notes from phone calls.
Acting fast helps you get full coverage and speeds up the repair process.
Safe Temporary Fixes for Storm Damage
While waiting for professional repairs, some simple fixes can help prevent further damage.
- Cover Exposed Areas with a Tarp: Secure a waterproof tarp over missing shingles or holes using wood strips or roofing nails to keep rain out temporarily.
- Use Buckets to Catch Drips Indoors: Place containers under active leaks to protect flooring and furniture. Move valuables away from affected areas.
- Seal Small Cracks with Roofing Tape: If safe to access, apply roofing tape to seal minor cracks or gaps around vents or flashing until repairs are made.
- Stay Off the Roof When Wet or Unstable: Never climb on a roof that’s slippery, steep, or structurally compromised. Wait for a professional to assess it safely.
Steps to Help Prevent Future Roof Damage
While you can’t prevent storms, you can reduce the risk of roof damage. A little preparation now can save a lot of stress later.
- Schedule Routine Roof Inspections: Have your roof professionally inspected at least once a year, especially before the start of storm season, to catch issues early.
- Upgrade to Impact Windows and Doors: Roof damage during storms often originates with internal pressurization due to blown-out windows. Maintaining the integrity of the building envelope prevents cascading damage and keeps your roof secure, protecting you.
- Trim Overhanging Branches: Remove or cut back tree limbs near the roof to prevent breakage or impact damage during high winds.
- Clear Gutters and Downspouts: Make sure water flows freely off the roof by cleaning out leaves, debris, and blockages before and after storms.
- Upgrade to Impact-Resistant Shingles: If replacing your roof, consider shingles rated for wind, hail, or storm protection to reduce future damage.
- Keep a Storm Prep Kit Handy: Store tarps, roofing tape, a ladder, and gloves in an easy-to-access spot so you’re ready to act fast after a storm.
Conclusion
Storm damage doesn’t always hit like a wrecking ball. Sometimes, it’s just a missing shingle or a tiny drip in the attic. But I’ve learned that those small issues can spiral into major repairs if you wait too long.
The sooner you inspect, document, and call for help, the better your chances of avoiding expensive surprises down the line.
Even if things look okay from the ground, a hidden leak might already be working its way in.
Don’t wait for a ceiling stain to show up; be proactive and protect your investment.
If you’re not sure where to begin, I’ve got a checklist I use after every big storm.
Drop your questions in the comments or reach out, I’m happy to help you get ahead of the damage.

James McLaren, with a rich background in architecture from the University of Manchester, has been contributing his expertise to the world of creative construction and home innovation for over 20 years. His journey began as a project manager for a leading construction firm, where he honed his skills in bringing complex designs to life. James joined our platform as a freelancer in 2019, quickly becoming a favorite for his insightful and practical advice. He has been a pivotal force to our wing ever since, bringing our readers a blend of technical know-how and creative flair. Beyond his professional life, James is an avid woodworker and enjoys restoring vintage furniture, a hobby that complements his professional insights beautifully.