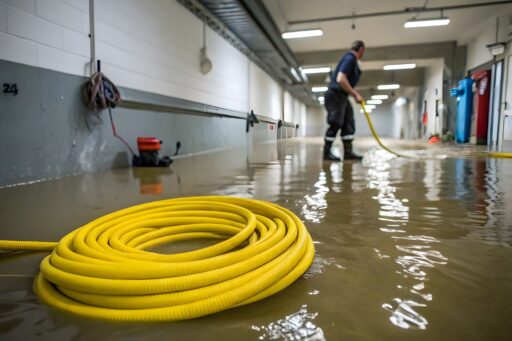

The water is gone, but the damage isn’t over. Your basement might look dry now, but hidden moisture can turn into mold, rot, and costly repairs down the road. After a flood, your basement becomes vulnerable to future water problems that can destroy your home’s foundation and ruin everything you store below ground.
Most homeowners think the hard part is over once they pump out the water and throw away the damaged items. The truth? Water damage creates weak spots in your basement walls and floor that invite water back in. Without proper waterproofing, you’re setting yourself up for another disaster.
In this guide, we’ll cover how to assess flood damage, choose the right waterproofing method, and complete the job properly. Read on for the details
Start with Cleanup and Drying
Before anything else, remove all items from the basement. Focus on removing porous items like carpets, drywall, and cardboard, since they trap moisture and encourage the growth of mold and mildew.
After the bulk of the water is gone, set up a dehumidifier and let it run for several days. This helps reduce humidity levels and speeds up the drying process. Don’t overlook tucked-away areas such as crawl space corners, where water often lingers unnoticed.
Inspect your water heater and any other exposed appliances if the flood was extensive. Even a small leak left untreated can lead to serious moisture problems over time, so it’s crucial to catch those issues early.
This is the best time to contact a waterproofing professional. Look for someone with experience in flood recovery and basement moisture control. A reputable service, such as Waterproofing PD or other local providers, can assess hidden damage, recommend effective solutions, and guide you through the next steps to prevent future water issues.
Inspect for Hidden Damage
After the basement is completely dry, carefully examine the walls and floors. Watch for cracks or signs of water seepage, even if they seem minor. Hairline cracks in the surface can still let water inside and lead to long-term damage.
Use a flashlight to check for stains, bulging areas, or peeling paint. These could signal past leaks or ongoing moisture issues. It’s also essential to look closely around the foundation wall. Water pressure from the outside can force its way through joints or weak spots, leaving clues like warped surfaces or damp patches behind.
As you move through the area, inspect drain pits and any connections to the drain pipe. These areas often get overlooked, but they can be common paths for water to enter if they’re damaged or blocked.
Seal Cracks and Gaps
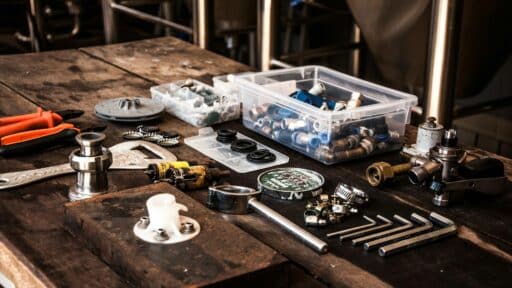
After your inspection, seal any cracks or gaps you found. These openings can let water in and lead to further damage. Use hydraulic cement for larger cracks in the concrete. It sets fast and expands as it cures, forming a solid seal on basement walls.
For smaller surface cracks, apply waterproof sealant or masonry filler. These products help stop moisture from seeping through and protect the area. Check the corners where the walls meet the floor. Water often enters through these seams, so sealing them is a key step before moving on.
Apply Waterproof Coating
After sealing, apply a waterproofing coating to the walls and floors. Products like waterproof paint or liquid rubber help block moisture and reduce basement dampness.
For bare concrete, clean the surface with muriatic acid first. This helps the coating stick and last longer. Once dry, add a vapor barrier for extra protection. It helps manage moisture and improves overall basement conditions.
Improve Exterior Drainage
Interior repairs may help control water once it enters, but keeping it out begins outside your home. Clear your gutter system to stop overflow, and use downspout extensions to move water away from the foundation.
Inspect your exterior drain tile and footing drains. These systems relieve pressure on basement walls and direct water away from your home. If water keeps pooling near the foundation, stronger action may be needed. An underground drainage system can help manage runoff and reduce flood risk.
Install or Upgrade a Sump Pump
A working sump pump helps remove water during heavy rain. If you don’t have one, install a system with a battery backup so it runs during power outages.
For those with an existing pump, check for clogs or signs of failure. If it didn’t activate during the flood, consider a replacement. You can also pair the pump with a water-guard basement waterproofing system. It helps direct water to the pump before it reaches the floor.
Finish With a Dehumidifier
Waterproofing alone doesn’t always solve lingering moisture issues. A dehumidifier helps manage the air in your basement and controls humidity. This step is beneficial in areas where damp conditions return even after repairs.
Some models are built specifically for basements, so be sure the one you choose can handle the size of the space. Units that are too small may run constantly without making much difference.
Aim for humidity levels below 50 percent to reduce the risk of mold and mildew. Consistent use of a dehumidifier can help create a drier, healthier environment in the long run.
Conclusion
Flood cleanup doesn’t end once the water is gone. Without proper waterproofing, your basement remains at risk for mold, moisture, and more serious damage later. Each step discussed can help prevent future problems and keep your home protected.
Take the time to fix weak spots, install or upgrade essential systems, and control indoor humidity. These efforts restore your basement and give you peace of mind when the next storm hits.

Tommy Hardy, an alumnus of the Georgia Institute of Technology with a degree in Mechanical Engineering, has been a go-to figure in residential upkeep and innovation for over 18 years. His career commenced in a leading home appliance manufacturing company, where he mastered the intricacies of household systems. Joining our platform in 2020, Tommy quickly became a reader favorite for his practical and easy-to-follow guides. He took the helm of our DIY section in 2019, consistently delivering content that empowers homeowners. Beyond his professional pursuits, Tommy is a passionate gardener and enjoys woodworking, skills enhancing his hands-on approach to home care.