Are you ready to turn your barndominium into a cozy, stylish home without breaking the bank? You’re in the right place!
Barndominiums offer the perfect canvas for creative, budget-friendly interior design that combines rustic charm with modern comfort.
In this post, you’ll find out practical and affordable interior ideas that prove you don’t need a fortune to create a space you love.
From clever DIY projects to innovative shopping strategies, these tips will help you stretch every dollar while achieving the look you want.
The beauty of barndominium design lies in its forgiving nature – imperfections often add character rather than detract from the overall appeal.
Why Choose a Budget-Friendly Barndominium Interior?
Barndominiums naturally lend themselves to cost-effective design. The open floor plans reduce material needs, high ceilings create visual impact without expensive finishes, and the industrial bones of the structure can serve as built-in design elements.
Plus, the flexible layout means you can adapt spaces as your needs change, making smart investments that grow with your family.
Even if you’re building new or renovating an existing space, these budget-conscious approaches will help you create a home that feels both personal and polished.
Consider incorporating reclaimed materials and DIY-friendly finishes to stretch your dollar further while adding unique personality to each room.
Cheap Barndominium Interior Design Ideas
Now let’s get into the heart of this guide – proven ideas that deliver maximum style impact for minimal cost.
Each suggestion includes specific materials, estimated costs, and practical tips homeowners can implement right away. Readers don’t need to tackle all at once; they can choose the ones that speak to their style and start there.
1. Stained Concrete Floors
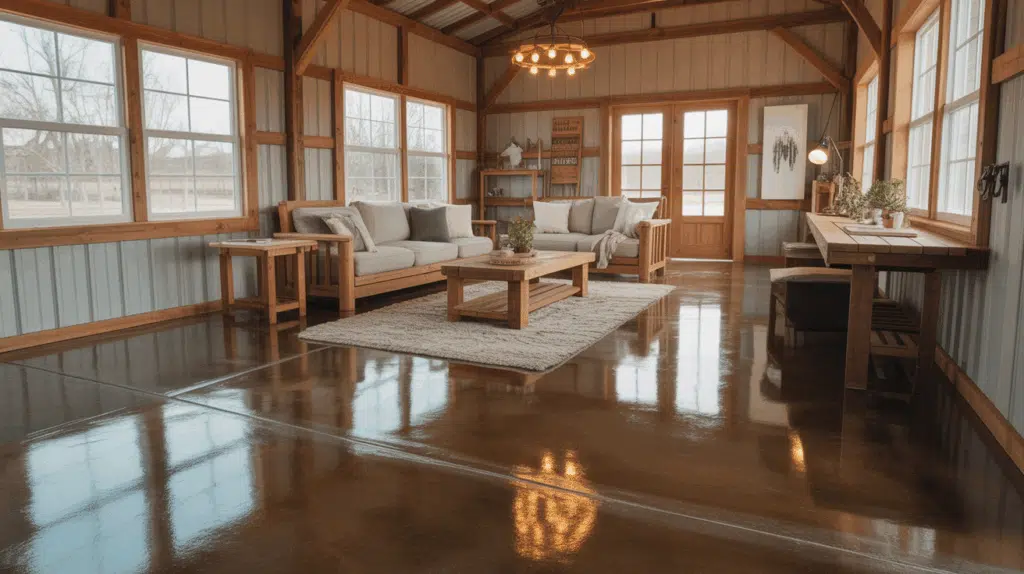
Skip expensive flooring and embrace polished concrete. A simple stain treatment costs a fraction of traditional flooring while delivering a sleek, modern look that’s easy to maintain.
Choose warm gray or earthy brown tones to complement your barndo’s rustic character. Most homeowners can complete this project over a weekend for under $3 per square foot, compared to $8-15 for hardwood or tile.
Pro Tip: Test stain colors on a small, hidden area first.
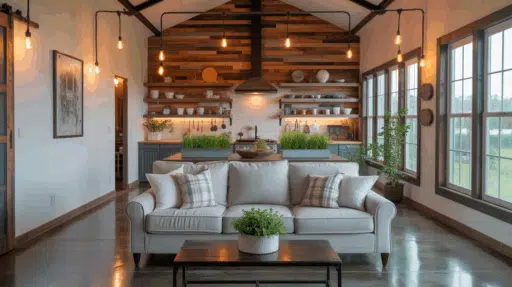
2. Reclaimed Wood Accent Walls
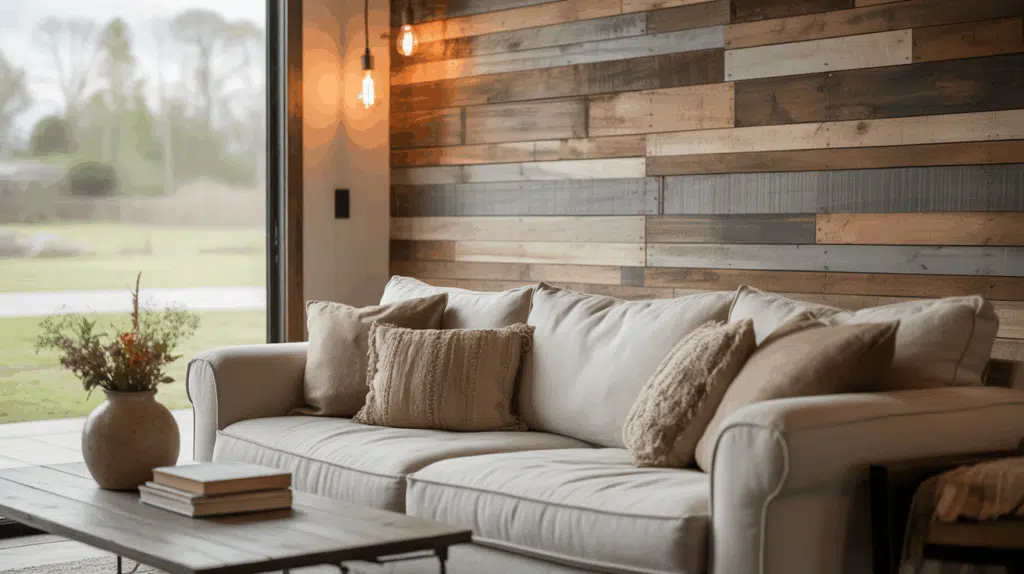
Hunt for weathered barn wood, old fencing, or shipping pallets to create stunning accent walls. The natural patina and character marks tell a story while adding texture and warmth.
Sand lightly and seal for protection while preserving that authentic, lived-in appeal. Focus on one statement wall rather than entire rooms to maximize impact while controlling costs.
Pro Tip: Check with local farmers, construction sites, or furniture manufacturers for free or cheap wood.
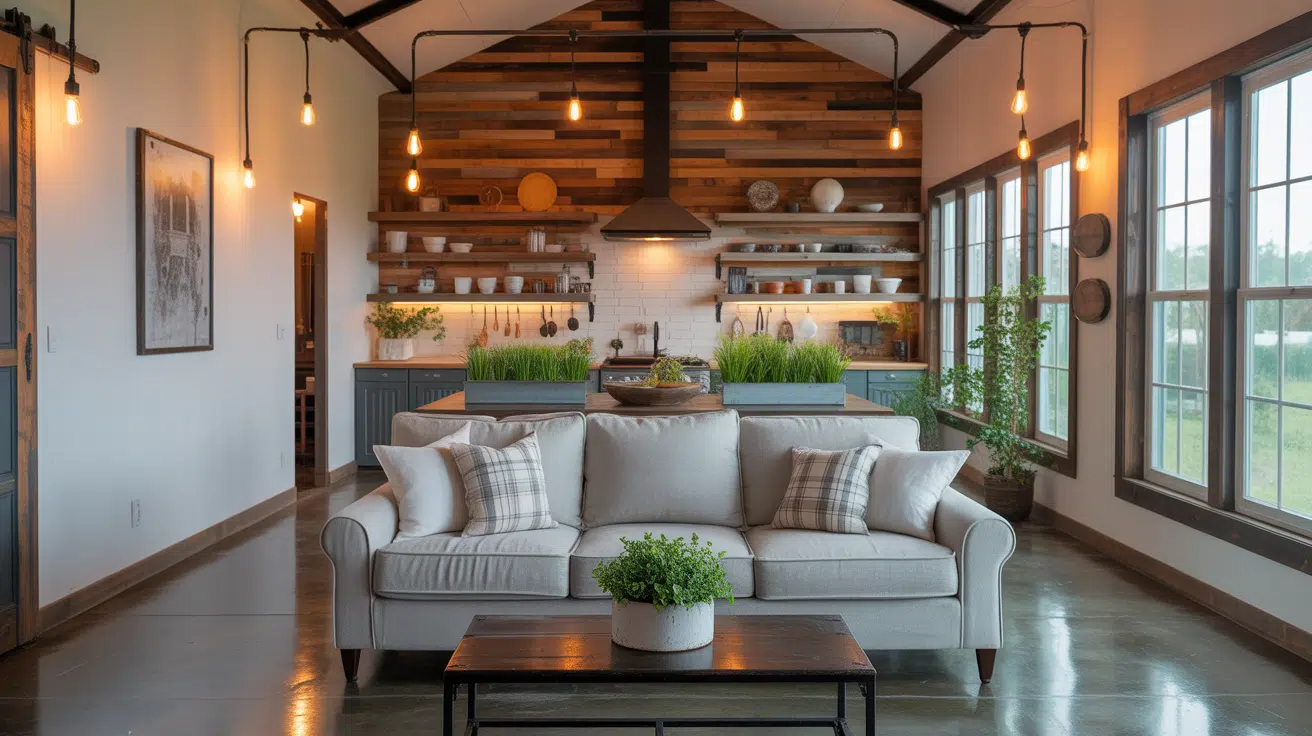
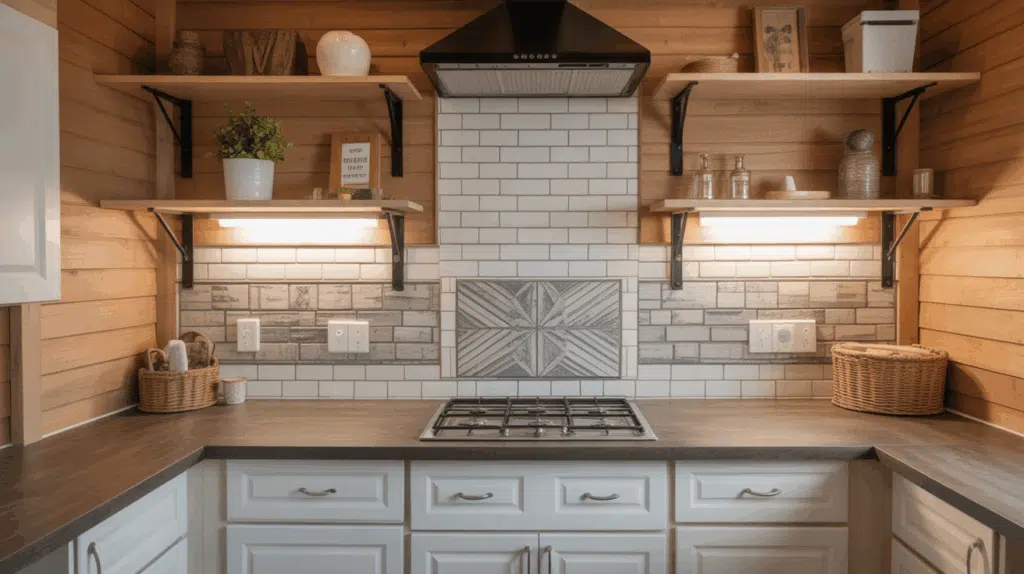
3. Open Shelving in the Kitchen
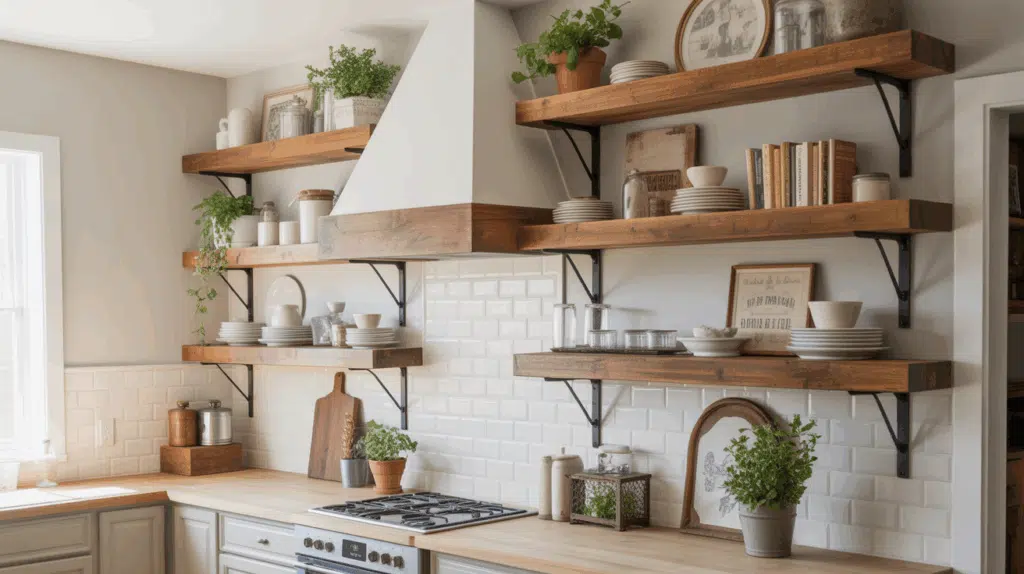
Consider replacing upper cabinets with open shelves made from reclaimed wood or metal brackets with thick boards. This approach costs significantly less than custom cabinetry while showcasing your dishes and creating an airy, farmhouse feel.
Install shelves 15-20 inches apart for optimal storage and visual balance. The key is keeping displayed items organized and dust-free, so choose pieces you use regularly or truly love looking at.
Pro Tip: Use furniture-grade plywood cut to size at the hardware store for professional-looking shelves.
4. Industrial Light Fixtures
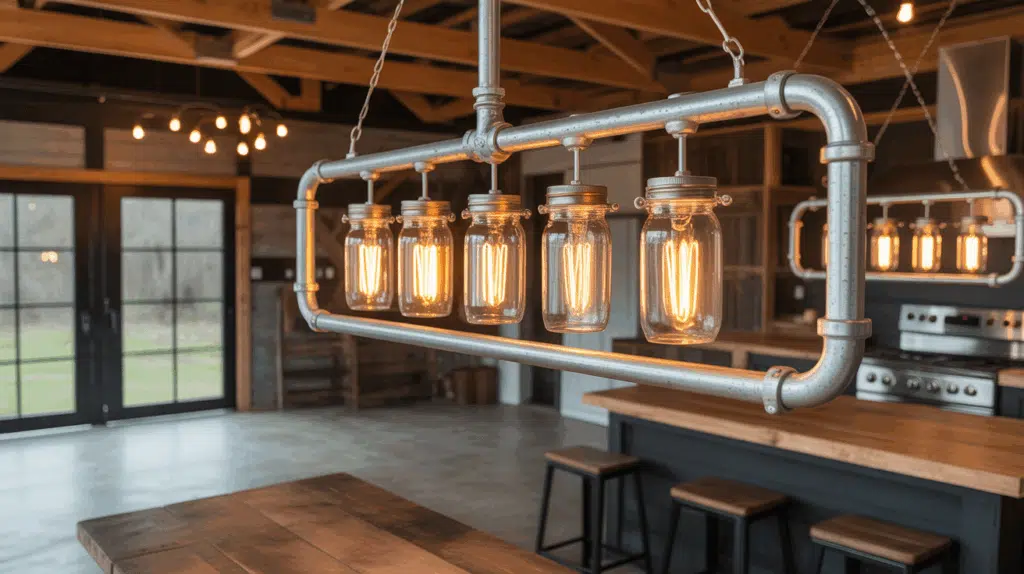
Create striking lighting with galvanized pipes, mason jars, and Edison bulbs. Hardware stores carry all the components you need for pendant lights, chandeliers, and wall sconces that perfectly match your barndo’s industrial aesthetic.
A single pipe pendant light costs about $25 in materials, compared to $150+ for similar store-bought fixtures. Wire carefully following electrical codes, or have an electrician handle the connections.
Pro Tip: Buy electrical components from specialty suppliers for better selection and lower prices.
5. Paint Everything White
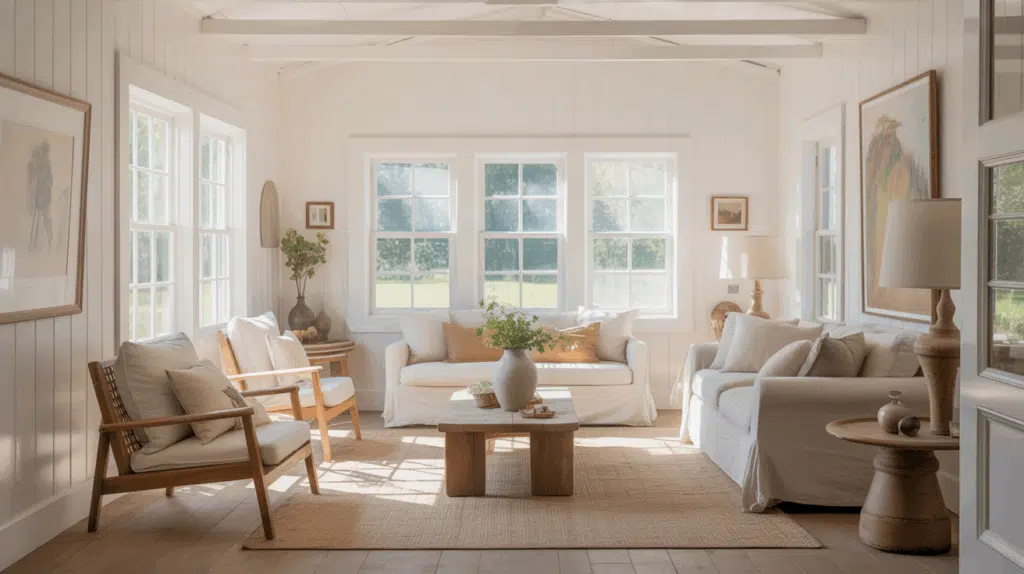
Fresh white paint works magic in any space, making rooms feel larger and brighter. Choose different white tones, such as warm ivory for walls and crisp white for trim, to add subtle depth without the expense of multiple paint colors.
White reflects natural light throughout the day, reducing the need for artificial lighting and creating a clean backdrop for furniture and artwork.
Pro Tip: Invest in quality paint and brushes for walls that will get heavy use.
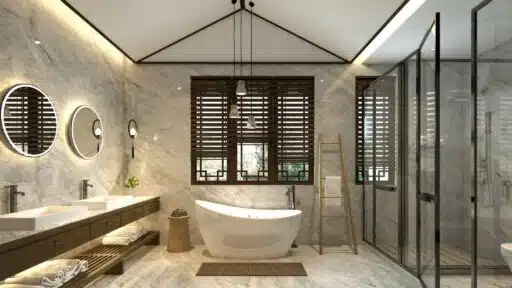
6. Butcher Block Countertops
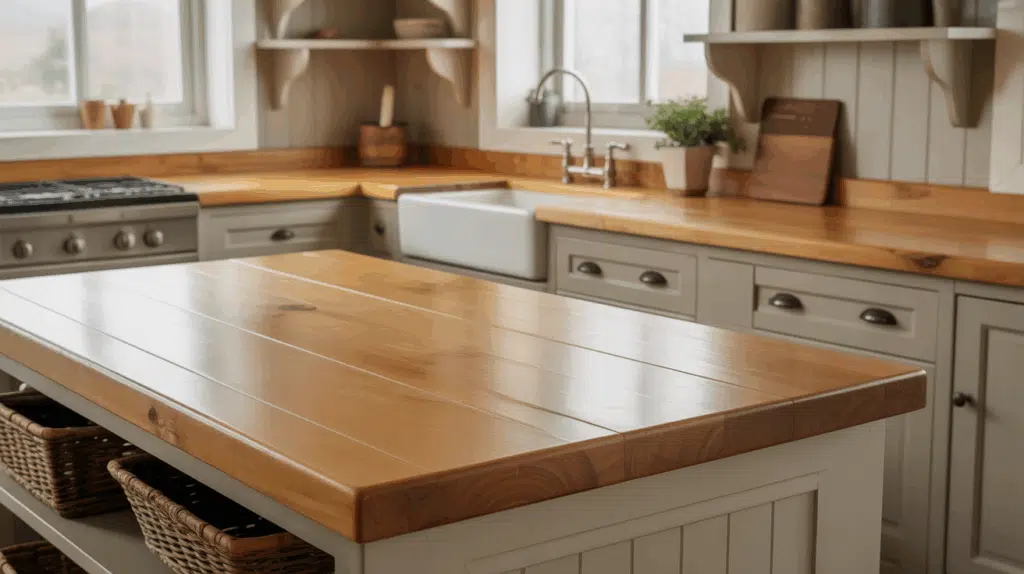
Solid wood countertops cost much less than granite or quartz while bringing natural warmth to kitchens and bathrooms. Sand and oil them annually to maintain their beautiful appearance and protect against water damage.
Birch and maple offer durability at reasonable prices, while oak provides distinctive grain patterns. Installation is straightforward for anyone comfortable with basic carpentry.
Pro Tip: Buy unfinished butcher block in standard lengths and cut to fit.
7. Sliding Barn Doors
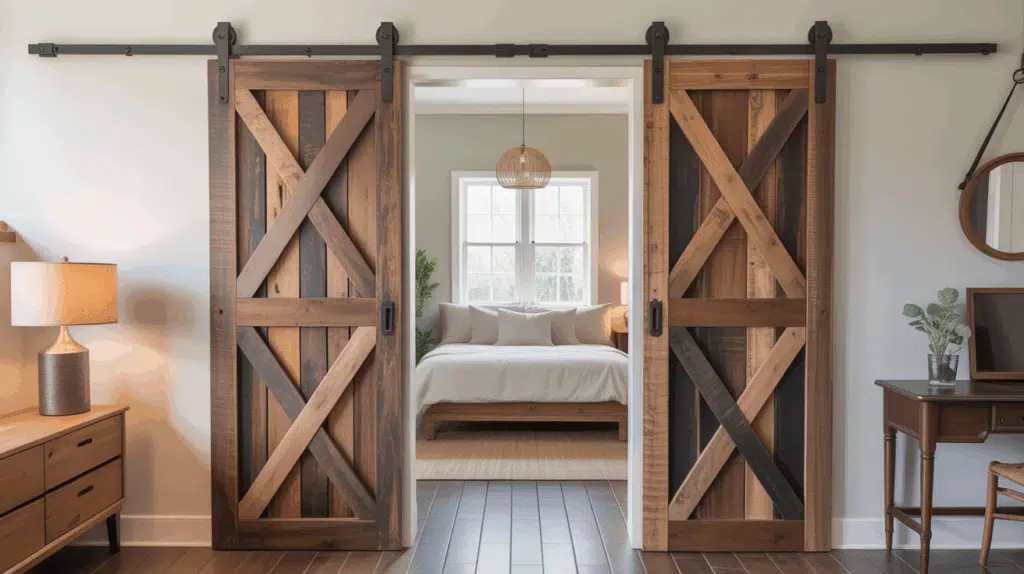
These space-saving doors fit perfectly with the barndominium style. Build your own using reclaimed wood and basic hardware, or find affordable kits at home improvement stores.
They work for bedrooms, bathrooms, or room dividers. The sliding mechanism eliminates swing space requirements, making it perfect for tight areas.
Pro Tip: Install blocking between wall studs before hanging drywall to provide solid mounting points.
8. Floating Shelves from Scrap Wood
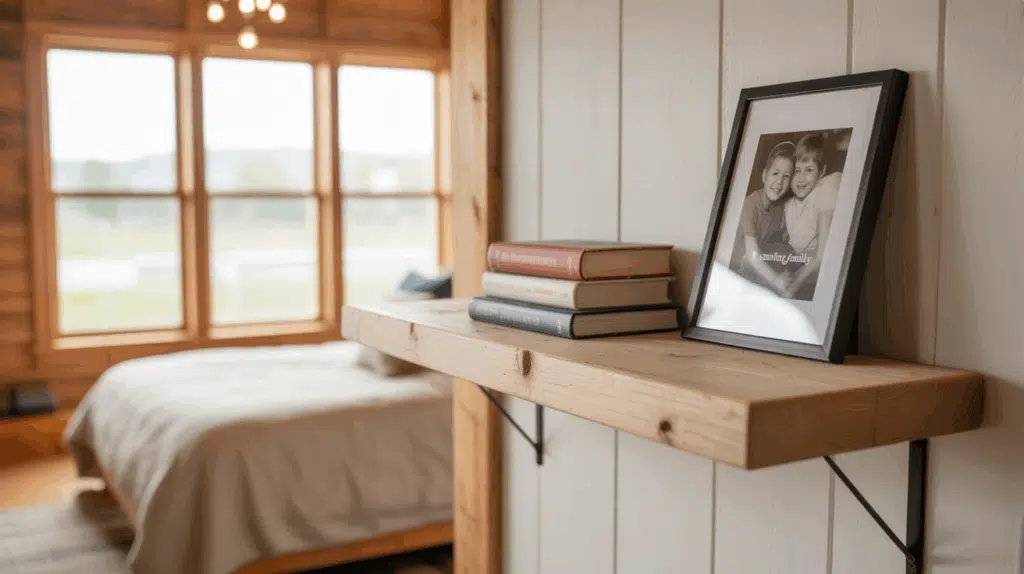
Turn leftover lumber into functional storage throughout your home. These simple shelves work in kitchens for spices, in bedrooms for books, or in bathrooms for toiletries. Just add basic brackets and you’re done.
The clean lines complement modern and rustic styles equally well. Use construction adhesive and screws for invisible mounting that appears to defy gravity. Sand and finish to match existing woodwork, or paint for a contemporary contrast.
Pro Tip: Cut a shallow groove on the shelf’s back edge to hide the mounting bracket completely.
9. Corrugated Metal Ceilings
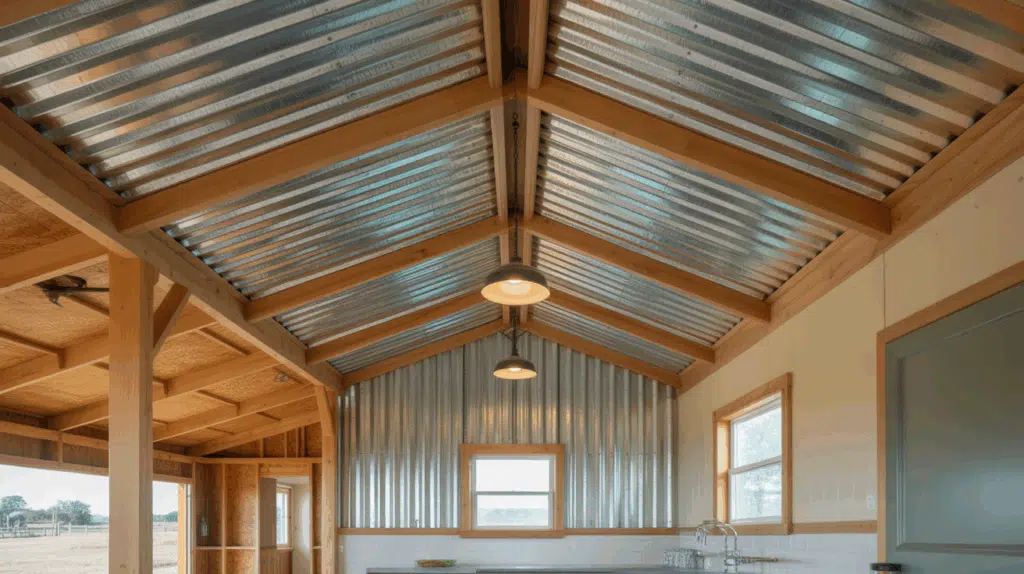
If you have leftover roofing material, use it to create striking ceiling treatments. The metallic finish reflects light and adds industrial character.
Install over existing drywall for an instant style boost. The ridged texture adds visual interest while the reflective surface brightens rooms naturally.
Pro Tip: Use furring strips to create an air gap between metal and drywall.
10. DIY Wall Art & Printable Decor
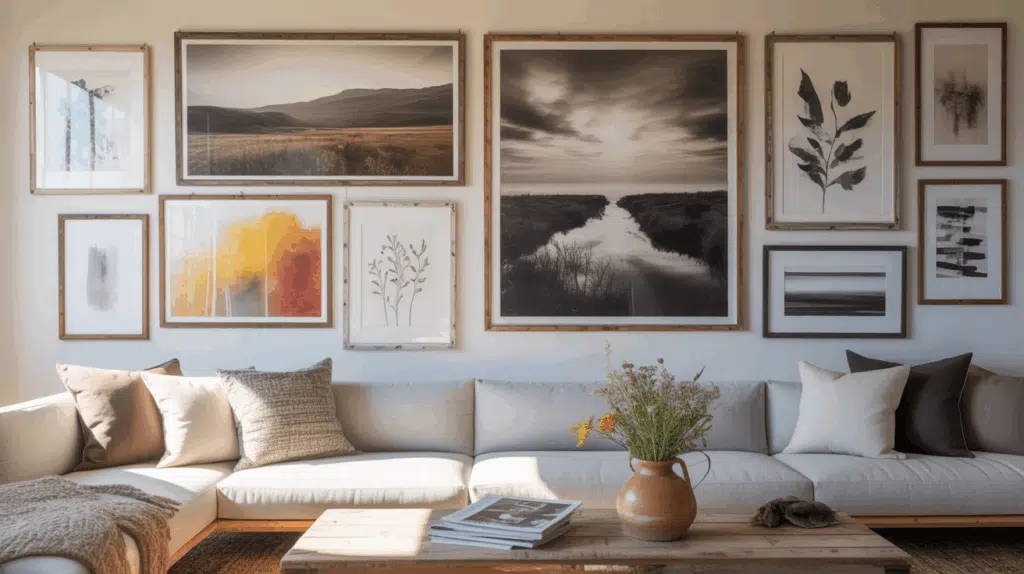
Fill large walls affordably with DIY artwork. Create oversized pieces using canvas drop cloths and paint, or print digital designs at your local copy shop. Frame with simple wood for a custom gallery wall.
Large-scale art makes the biggest impact in open barndominium spaces where standard-sized pieces get lost.
Pro Tip: Mount artwork on foam core backing before framing to prevent wrinkles.
11. Pallet Bed Frames
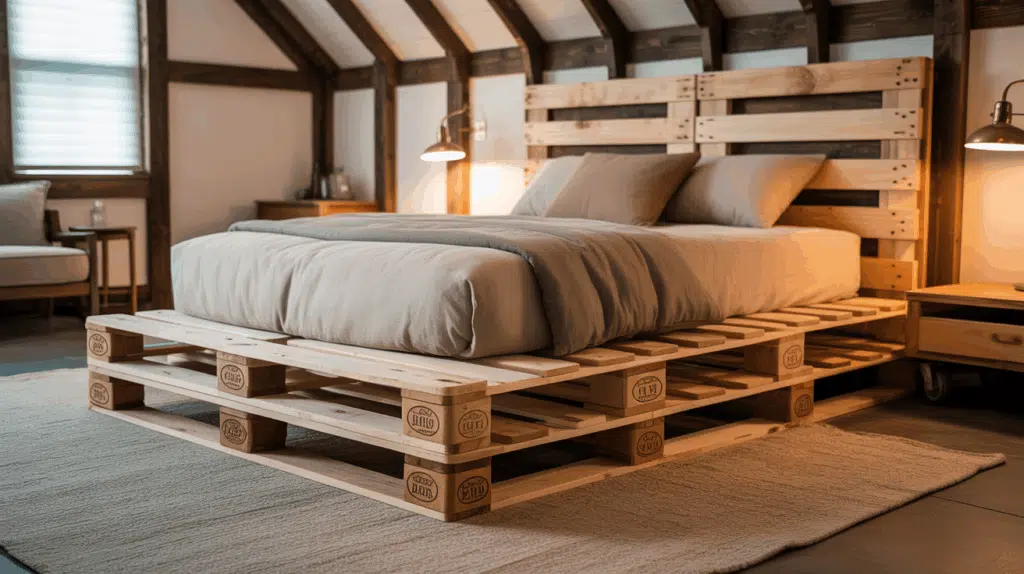
Build sturdy, rustic bed frames from shipping pallets. Sand them smooth, add a coat of stain or paint, and top with your mattress. The natural slats provide built-in ventilation while saving hundreds on furniture.
Look for heat-treated (HT) pallets rather than chemically treated ones for safety. Stack and secure multiple pallets for height, or use single layers for a low-profile platform look.
Pro Tip: Check pallet construction carefully – some use staples that create weak joints.
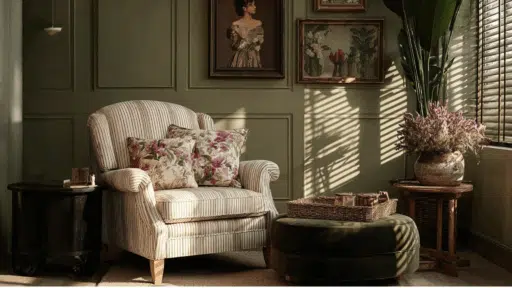
12. Thrift Store & Marketplace Finds
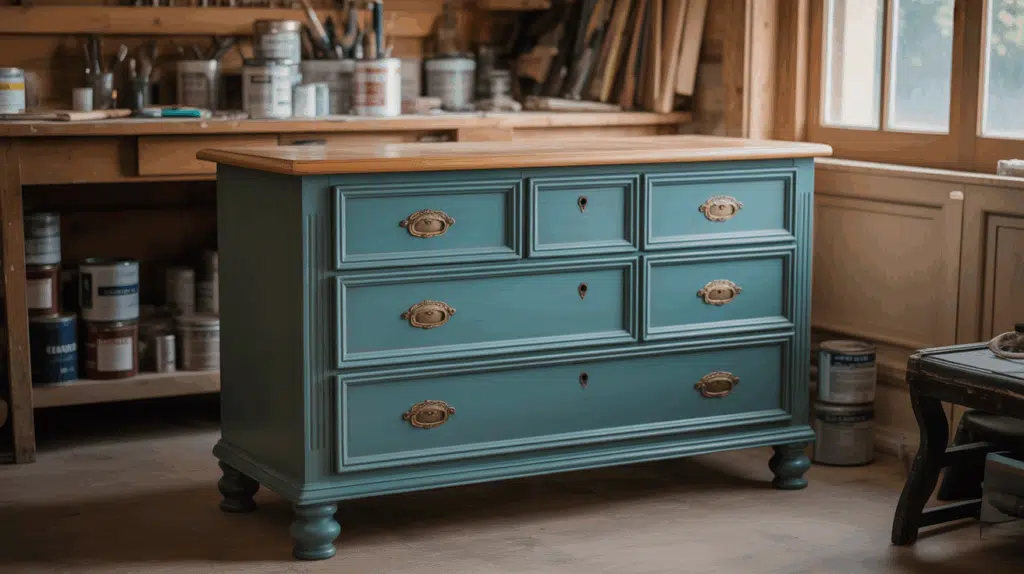
Score furniture with character at secondhand shops and online marketplaces. Look for solid wood pieces that just need fresh paint or new hardware. A weekend of refinishing can change tired furniture into custom pieces.
Estate sales often offer higher-quality pieces at reasonable prices, especially furniture from the 1950s-70s that’s well-built but considered outdated.
Pro Tip: Bring measurements and photos of your space when shopping.
13. Peel-and-Stick Backsplash Tiles
Install a kitchen or bathroom backsplash without special tools or professional help. Modern peel-and-stick options look convincingly like real tile, subway patterns, or natural stone at a fraction of the cost.
Clean surfaces thoroughly before application, and use a hair dryer to warm tiles for better adhesion. The removable nature makes them perfect for rentals or temporary solutions.
Pro Tip: Order extra tiles to account for cutting and potential future repairs.
14. Built-In Bench Seating with Storage
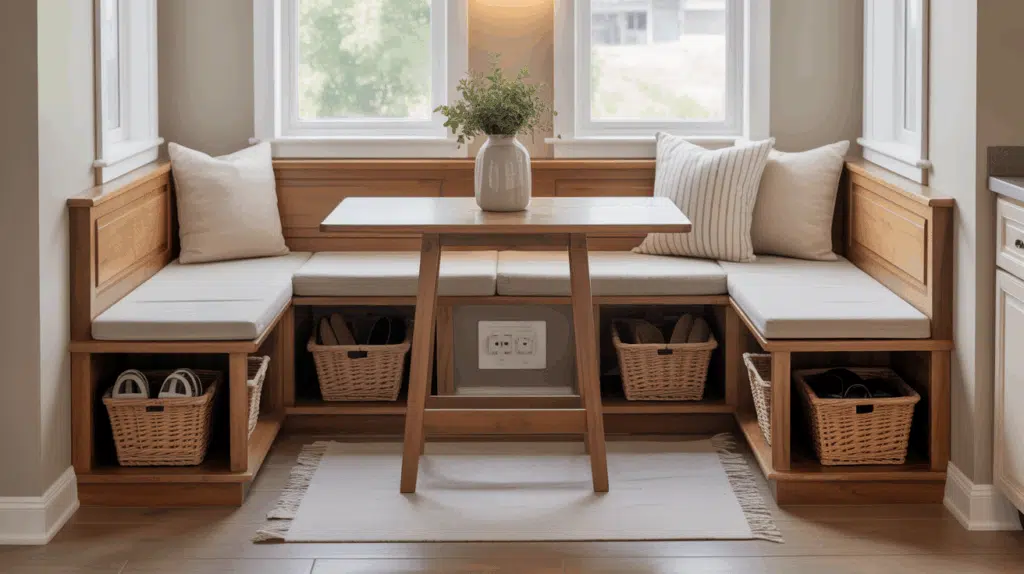
Maximize space and function with DIY bench seating. Build simple boxes with hinged tops for shoe storage by the door, or create breakfast nook seating with hidden compartments underneath.
Use piano hinges for smooth operation and soft-close hardware to prevent slamming. The built-in appearance adds value while providing practical storage that doesn’t take up floor space.
Pro Tip: Install gas struts (like those on car hoods) to hold heavy lids open safely.
15. Painted Plywood Floors
Change basic plywood subflooring into attractive floors with paint and polyurethane. Create patterns like checkerboards or wide plank looks using painter’s tape and different shades.
Seal with several coats for durability. This technique works well in bedrooms, offices, or other low-traffic areas where budget is more important than extreme durability.
Pro Tip: Prime all surfaces first and lightly sand between coats for the smoothest finish.
16. Minimalist Furniture Layout
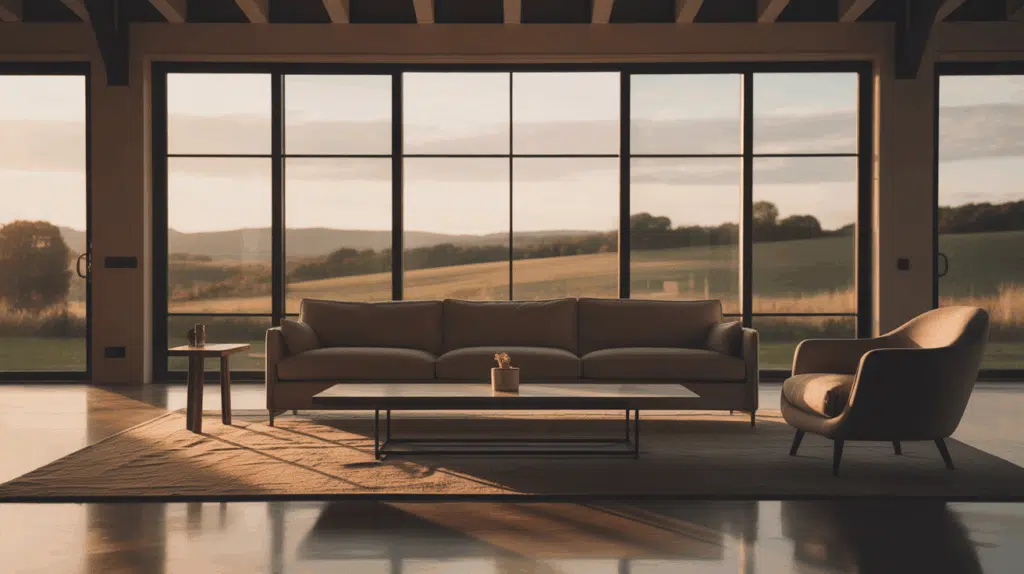
Choose fewer, better pieces arranged to maximize open space. A well-placed sofa, coffee table, and side chair can anchor a living area without cluttering. This approach saves money while maintaining that spacious barndo feel.
Leave plenty of walking paths and resist the urge to fill every corner. The goal is to create calm, functional spaces that highlight your barndominium’s architectural features.
Pro Tip: Use the “float” technique – pull furniture away from walls to create intimate conversation areas.
17. Utility Sink as Farmhouse Alternative
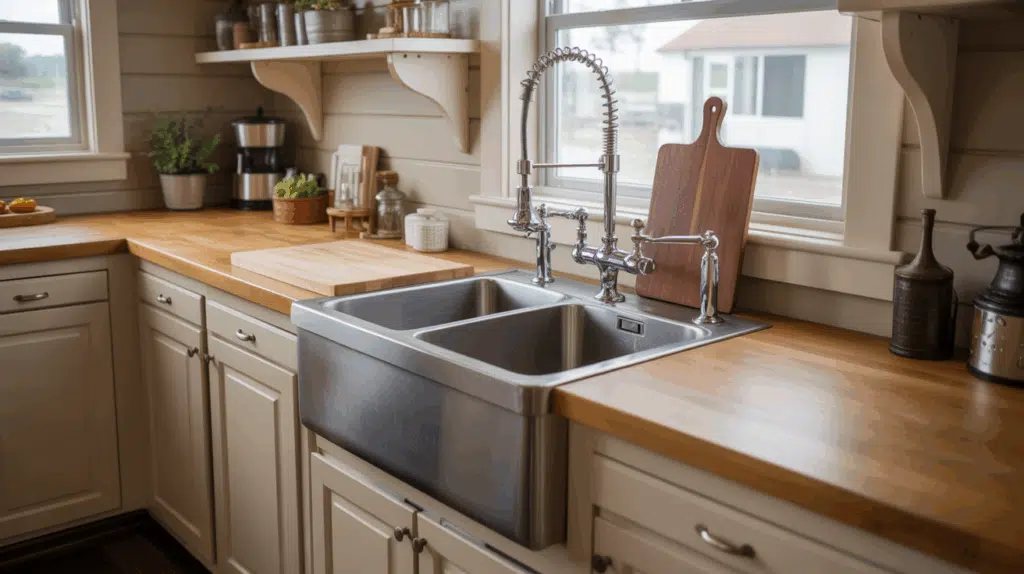
Install a deep utility sink in your kitchen instead of an expensive farmhouse sink. Paint or refinish as needed, and pair with a tall faucet for the same practical benefits at a much lower price.
Choose stainless steel for modern appeal or cast iron for vintage charm. The plain appearance can be upgraded with accessories like cutting boards that fit over the basin or decorative faucets that add personality.
Pro Tip: Look for vintage utility sinks at salvage yards – they often feature better construction.
18. DIY Pipe Closet Systems
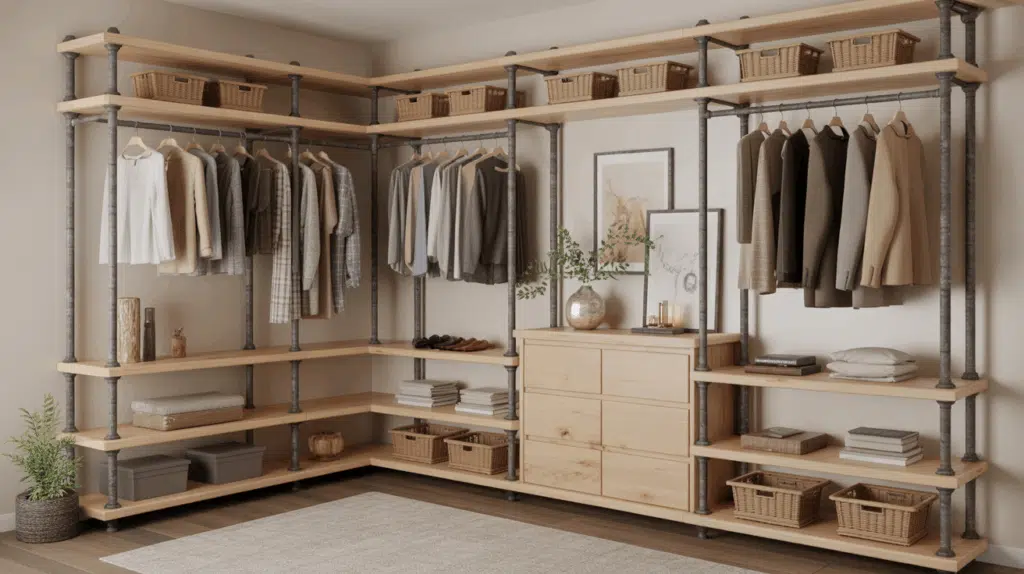
Create open wardrobes using galvanized pipes and fittings. These industrial-style closets cost less than built-ins while providing flexible storage that can adapt as your needs change.
The modular nature means you can reconfigure or expand the system easily. Consider adding wood shelves or decorative elements to soften the industrial look while maintaining functionality.
Pro Tip: Use floor flanges to anchor vertical pipes securely, and consider ceiling mounting for very tall installations.
19. Upcycled Doors and Windows as Décor
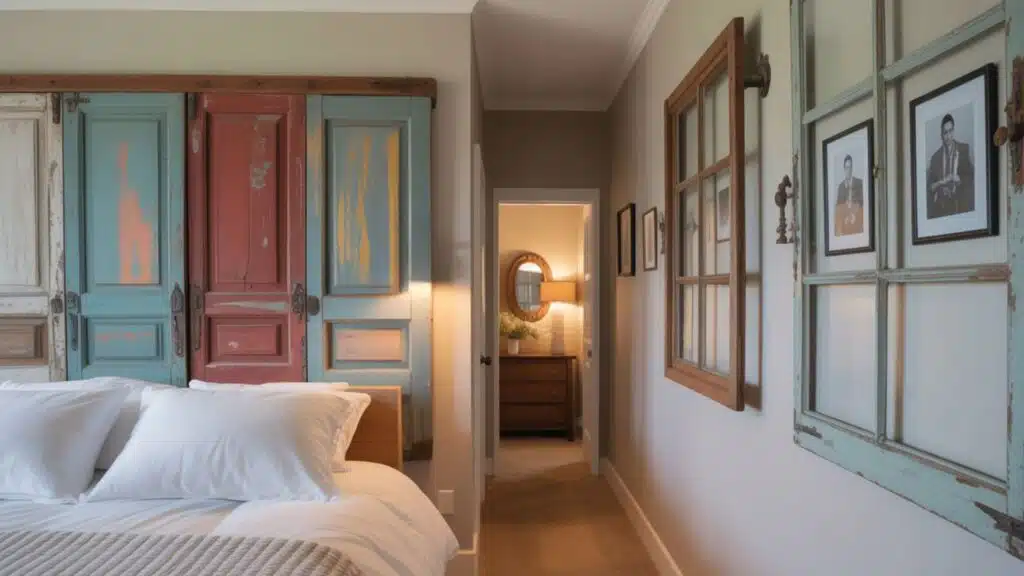
Turn old doors into headboards, room dividers, or wall art. Vintage windows become decorative mirrors or photo displays. Check salvage yards and demolition sites for unique architectural elements.
Clean and restore hardware when possible, as original pieces often have better quality and more interesting designs than contemporary replacements.
Pro Tip: Measure carefully before buying – architectural salvage often comes in non-standard sizes.
20. Mason Jar Bathroom Organizers
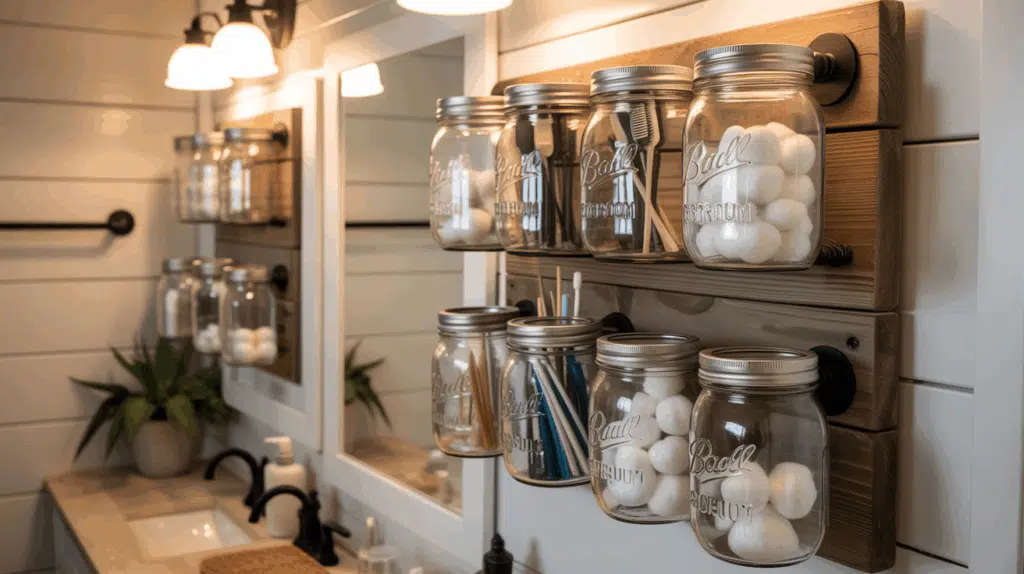
Mount mason jars to bathroom walls for toothbrush holders, cotton ball dispensers, or small toiletry storage. Add metal clamps or wood backing for a cohesive look that keeps essentials organized.
Choose jar sizes based on specific needs – wide-mouth pints for larger items, regular-mouth jars for toothbrushes. The clear glass makes finding items easy while maintaining a clean, organized appearance.
Pro Tip: Drill drainage holes in toothbrush holders to prevent water buildup.
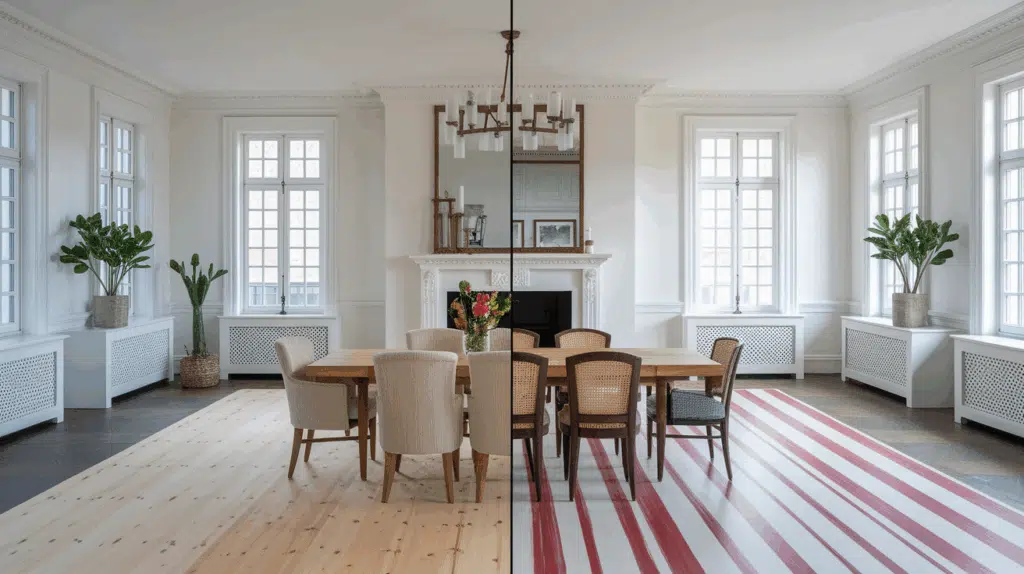
21. Large Area Rugs Instead of Carpet
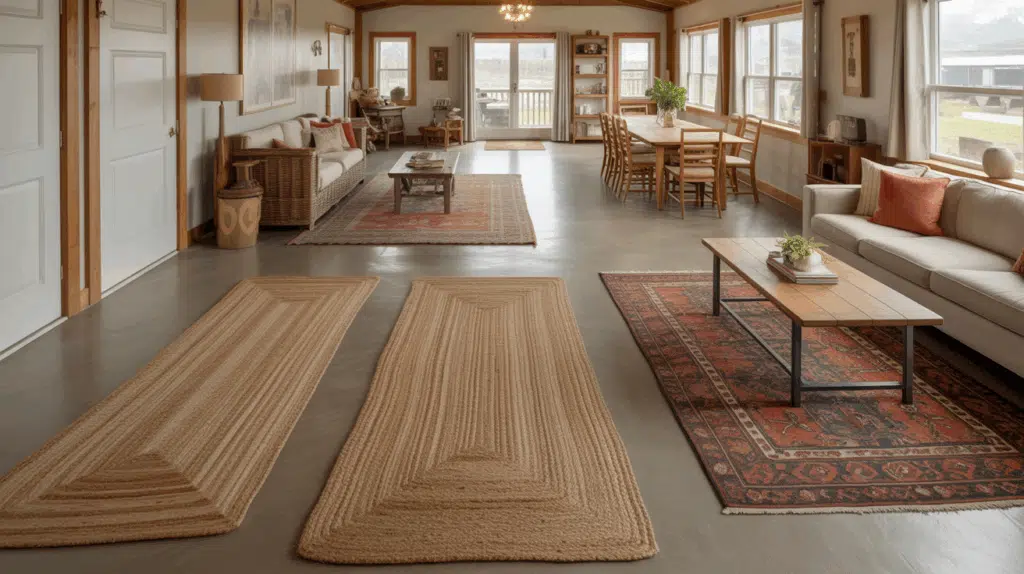
Define living spaces and add comfort with area rugs rather than wall-to-wall carpeting. Choose washable options or hunt for vintage rugs with character. Layer different sizes for visual interest.
Rugs offer flexibility that carpet can’t match – they can be moved, cleaned easily, and replaced as styles change.
In open floor plans, rugs help define different areas without permanent walls. Consider natural fiber rugs like jute or wool for durability, or synthetic options for easy maintenance in high-traffic areas.
Pro Tip: Size rugs so all furniture legs sit on the rug, or all legs sit off the rug.
Tips to Maximize Savings on Barndominium Interiors
Shop Smart: Watch for end-of-season sales, clearance items, and bulk discounts. Many home improvement stores offer contractor pricing if you’re buying materials for multiple projects.
Repurpose First: Before buying new, consider what you already have that could work with some modifications. Old furniture, leftover building materials, and items from other rooms might find new life in different spaces.
DIY What You Can: Labor costs add up quickly. Focus your DIY efforts on projects that don’t require special skills or tools – painting, simple carpentry, and decorating are all within reach for most homeowners.
Think Long-Term: Invest in pieces that will grow with your space. Modular storage, quality paint, and classic styles won’t go out of fashion and will serve you well for years to come.
Final Thoughts: Comfort and Style on a Budget
Creating a beautiful barndominium interior doesn’t require unlimited funds – just creativity, patience, and smart planning.
The key is starting with a clear vision and tackling projects one at a time. Focus on the changes that will make the biggest impact first, like fresh paint and good lighting, then add character pieces and personal touches.
Remember, the best barndominium interiors reflect the people who live there. Don’t be afraid to mix high and low, old and new, or rustic and refined.
Your home should tell your story, and the most meaningful spaces are often those created with love, time, and ingenuity rather than just money.
What’s your favorite budget barndominium idea from this list? Share your money-saving tips or project photos in the comments below – we’d love to see how you’re making your barndo dreams come true!

With a Master in Architectural Studies from University of Pennysylvania, Marwa Haydar has pioneered living spaces since 2005. Her expertise, initially honed in a prestigious architectural firm, is evident in her approach to creating environments. Marwa became part of our team in 2019 and has since been a driving force in our home improvement section, known for her practical yet stylish solutions. She’s been spearheading our design workshops since then, infusing her passion for teaching into her work. In her leisure time, Marwa enjoys exploring historic architecture and is an enthusiastic pottery hobbyist, further enriching her understanding of form and texture.