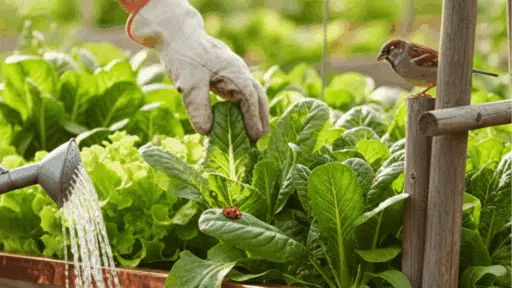

A plant owner waters their favorite houseplant and suddenly notices the soil surface crawling with tiny white or tan specks.
Panic sets in. What are these creatures, and are they harming the plant? Before reaching for pesticides or tossing the plant in the trash, it helps to know what’s actually living in that potting mix.
Most of the time, those tiny bugs are soil mites, harmless decomposers that break down organic matter.
But sometimes they’re springtails, fungus gnat larvae, or other creatures that signal different problems.
What Are Soil Mites?
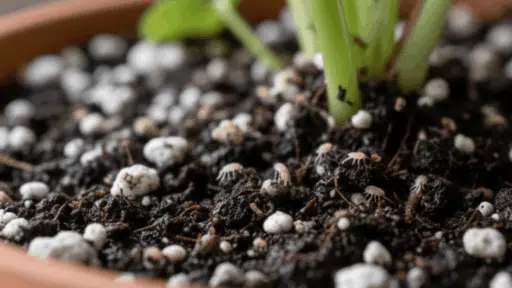
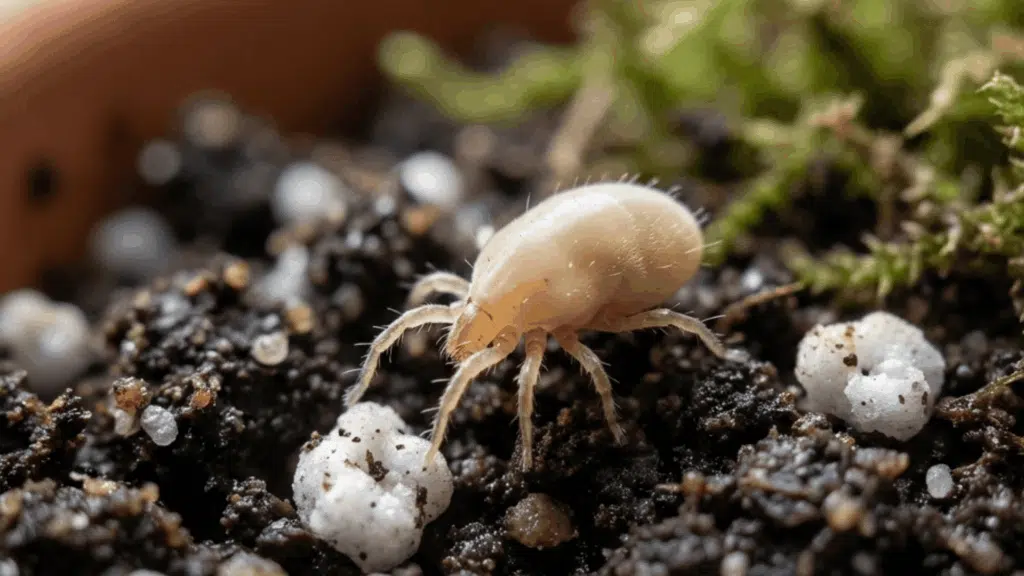
Soil mites are tiny arachnids that live in potting mix and garden soil. They’re related to spiders and ticks but are much smaller, often no bigger than a pinpoint or grain of salt.
Most soil mites feed on decaying organic matter like dead leaves, fungi, and bacteria. Some species are predators that eat other tiny soil creatures.
They’re part of the natural soil ecosystem and help break down debris into nutrients plants can use.
Soil mites show up in houseplants because potting mix contains organic materials like peat moss, bark, and compost.
When the soil stays moist and has plenty of organic debris, mites thrive. They’re especially visible after watering, when moisture brings them to the surface.
Are Soil Mites Harmful?
Most soil mites in potting mix are harmless and even beneficial. They help decompose organic matter and contribute to healthy soil structure.
The real problem is misidentification; what looks like harmless soil mites might actually be fungus gnat larvae or another pest that does cause problems.
However, large numbers of soil mites can be a red flag for other issues. If the soil is constantly soggy, has rotting organic matter, or shows fungus growth, the mites are thriving on those problems.
The mites themselves aren’t the issue; they’re just taking advantage of conditions that aren’t ideal for the plant.
A small number of people report mild skin irritation or allergic reactions when handling infested soil, but this is rare. For most plant owners, soil mites pose no health risk.
Soil Mites Identification
Identifying soil mites takes just a few minutes with careful observation. The key is watching their movement, checking where they gather, and noting their size and color.
1. Do The 60-Second “Spot Check.”
Start by looking at where the bugs are located. Soil mites cluster on the topsoil surface, in the drainage saucer, or under the pot rim.
They stay in the soil zone and rarely venture onto leaves or stems. Watch what they do when disturbed.
Soil mites crawl steadily and slowly. They don’t jump, fly, or wriggle in place. This movement pattern is often the biggest identification clue.
2. What Soil Mites Usually Look Like
Soil mites range from pinpoint-sized to about the size of a tiny speck of pepper. They have rounded or oval bodies with eight legs, though the legs are often hard to see without magnification.
Colors vary from white and cream to tan and brown. Some species are so pale they look almost translucent. The key identifier is their steady, crawling movement across the soil surface. They move deliberately, not erratically.
3. Tools that Make Identifying Easy
A phone camera with macro mode or a cheap jeweler’s loupe (10x magnification) makes identification much easier. Get close to the soil and zoom in to see body shape and leg count.
The white paper test also helps: scoop a small amount of topsoil onto white paper and shine a flashlight on it. The contrast makes tiny bugs easier to spot and observe.
4. Quick Checklist
Likely soil mites if:
Likely NOT soil mites if:
|
Look-Alikes That Get Mistaken for Soil Mites
Not every tiny bug in potting soil is a soil mite. Several other creatures look similar at first glance but have different behaviors and may require different responses.
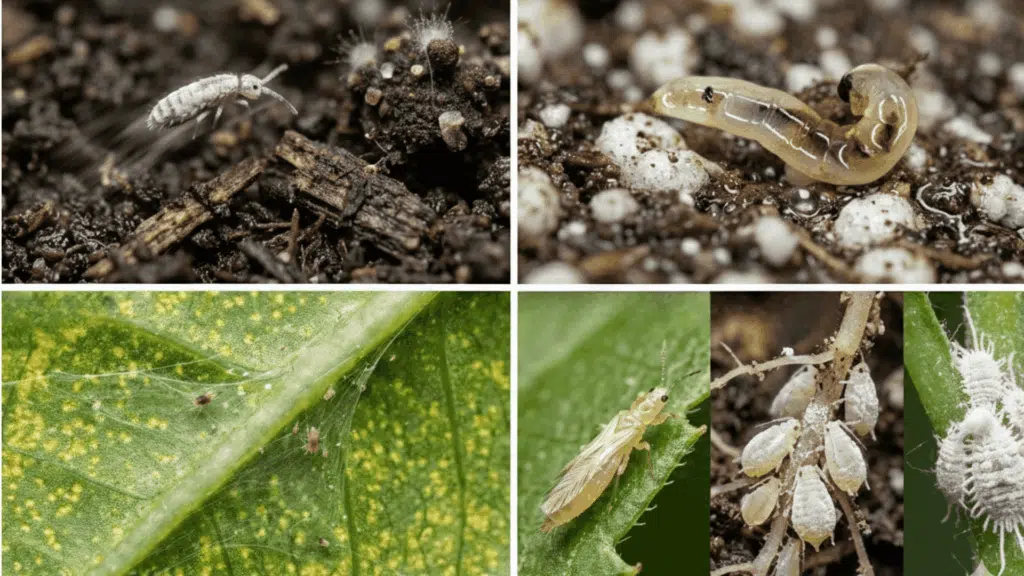
1. Springtails
Springtails are tiny white or gray insects that jump when disturbed. They have a spring-like organ called a furcula that launches them into the air; soil mites don’t jump. S
pringtails gather in very moist soil and on moldy surfaces. Like soil mites, they’re harmless decomposers, but their jumping behavior makes them easy to distinguish. If the bugs hop away when touched, they’re springtails, not mites.
2. Fungus Gnat Larvae
Fungus gnat larvae look like thin, translucent worms with black heads. They live in the top layer of wet soil and feed on organic matter and sometimes plant roots.
The adult gnats are tiny black flies that hover around the pot. If there are flies and worm-like larvae together, the problem is fungus gnats, which can damage young plants and seedlings.
3. Spider Mites (Not Soil Mites)
Spider mites live on plant leaves, not in soil. They cause yellow stippling or tiny pale dots on leaves and often leave fine webbing between stems and leaves.
If the bugs are on the foliage and the plant looks unhealthy, they’re spider mites, a serious pest that needs immediate treatment. Soil mites don’t cause this type of damage.
4. Thrips, Root Aphids, and Mealybugs (Quick Mentions)
Thrips are tiny, slender insects that damage leaves and flowers. Root aphids cluster on roots and suck plant sap, causing wilting.
Mealybugs look like white cottony clusters on stems and leaves. All of these pests cause visible plant damage. If the plant is struggling and bugs are on leaves or roots, isolate it immediately and identify the specific pest.
How to Identify Soil Mite Damage Vs Others
Soil mites are decomposers that don’t feed on healthy plant tissue. If damage appears on a plant, soil mites are not the cause. They simply don’t have the right mouthparts or feeding habits.
Signs that rule OUT soil mites as the problem:
- Yellow or brown spots on leaves (this indicates spider mites, thrips, or disease)
- Wilting or drooping despite proper watering (points to root rot, pests on roots, or fungal issues)
- Chewed leaf edges or holes (caused by caterpillars, slugs, or other chewing insects)
- Sticky residue or sooty mold on leaves (signals aphids, scale, or mealybugs)
- Stunted growth or root damage (likely fungus gnat larvae, root aphids, or soil-dwelling grubs)
If any of these symptoms appear, the culprit is something other than soil mites; look for pests on leaves or roots, check for diseases, or assess watering practices.
How To Get Rid of Soil Mites
Since most soil mites are harmless, the goal is to reduce their numbers, not eliminate every last one. These steps create conditions where mites don’t thrive without harming beneficial soil life.
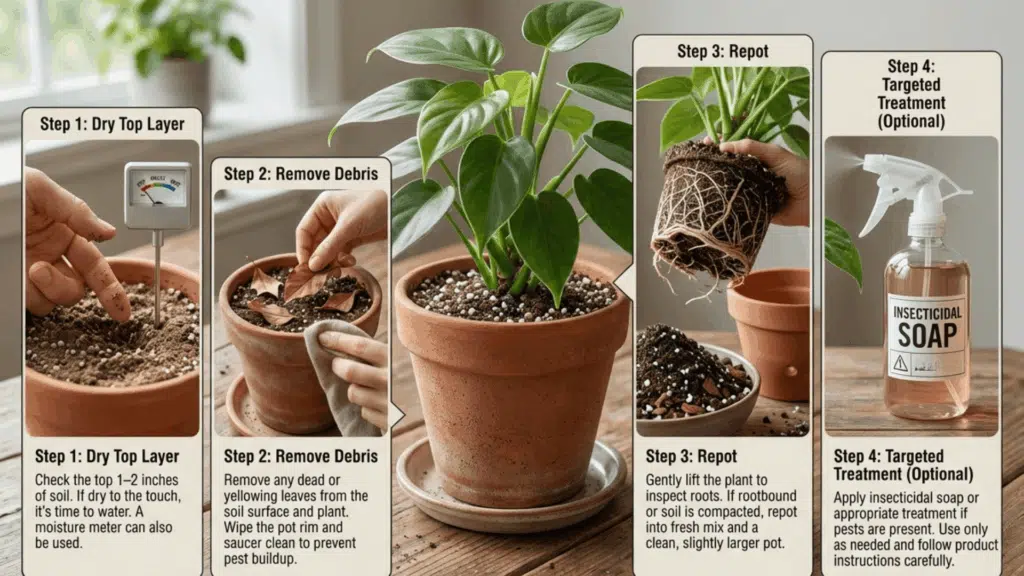
Step 1: Dry The Top Layer (Fastest, Safest)
Let the top 1–2 inches of soil dry out between waterings. Soil mites need moisture to survive, so a drier surface reduces their population quickly.
Try bottom-watering for a few weeks by placing the pot in a tray of water and letting it soak up moisture from the drainage holes. This keeps the top layer drier while still hydrating the plant.
Step 2: Remove The “Buffet”
Clear away dead leaves, old mulch, and any rotting organic material sitting on the soil surface.
Soil mites feed on this debris, so removing it takes away their food source. Wipe the pot rim and saucer to eliminate hiding spots and eggs.
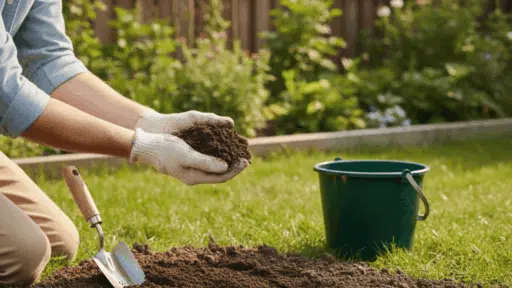
Step 3: Repot (Best Reset for Heavy Infestations)
For heavy infestations, repotting in fresh potting mix is the most effective solution. Gently remove the plant, shake off the old soil, and rinse the roots if needed. Wash the pot with hot, soapy water.
Discard the old soil; don’t reuse it in other pots. Fresh mix gives the plant a clean start without mites.
Step 4: Targeted Treatments (Only If Needed)
Mild insecticidal soap can reduce mites if numbers are very high, but it also affects beneficial organisms.
Use it sparingly and only if other methods don’t work. Don’t over-treat healthy soil ecosystems; soil mites are part of that ecosystem. If the plant is healthy and mite numbers are low, there’s no need to treat at all.
Ways To Prevent Soil Mites
Prevention focuses on creating conditions where mites don’t multiply out of control. Good watering habits are the most important factor.
Avoid keeping soil constantly soggy; let the top inch or two dry between waterings. Choose pots with drainage holes and use a well-draining potting mix that doesn’t stay waterlogged.
Quarantine new plants for a few weeks before placing them near other houseplants. This gives time to spot pests before they spread.
Clean drainage saucers regularly and wipe up spills so moisture doesn’t accumulate. Store unused potting mix in sealed containers in a dry location.
Open bags left in damp areas can develop mite populations before the mix is even used.
Conclusion
Soil mites are a normal part of a healthy potting mix and rarely cause problems for houseplants.
The key is accurate identification, knowing whether those tiny bugs are harmless soil mites or a pest that needs attention. Most of the time, a quick spot check reveals crawling mites that pose no threat.
If numbers get high, simple steps like drying the topsoil, removing debris, and improving drainage bring populations back under control.
With a little observation and the right approach, plant owners can manage soil mites without stress or harsh chemicals.

With a Master’s in Landscape Architecture from the University of Virginia, Sophia Stephenson has dedicated the last 20 years to creating and maintaining vibrant outdoor spaces. Her professional journey started in landscape design, where she gained a reputation for innovative and sustainable approaches. Sophia became a part of our editorial team as a freelancer in 2019, offering a fresh perspective on outdoor living. Since 2020, she has been the chief for our outdoor design content, blending aesthetic appeal with environmental stewardship. In her leisure time, Sophia is a keen photographer, capturing the beauty of natural landscapes, a hobby that complements her professional expertise.