Building a tiny house is not just about downsizing; it is about taking control of space, cost, and how a home is built from the ground up.
The idea of creating a fully functional house with fewer materials and smarter planning has drawn many people toward DIY tiny homes.
When done right, a tiny house can offer comfort, durability, and flexibility without unnecessary square footage.
Understanding the construction process makes the project feel achievable rather than overwhelming.
From framing and weatherproofing to utilities and interior finishes, each step follows a logical order that supports long-term use.
This guide breaks down how to build your own tiny house in clear stages, helping turn a complex build into a practical, well-organized project you can confidently start and finish.
What is a Tiny House?
A tiny house is a small residential structure designed to include all essential living areas within a limited space, usually between 100 and 400 square feet.
It can be built on a trailer (tiny house on wheels) or on a permanent foundation, depending on zoning rules and intended use.
Tiny houses are built using standard construction methods, most often a wood frame house structure, with proper insulation, electrical wiring, plumbing, and roofing.
The main difference from a traditional home is how space is planned. Instead of separate rooms, layouts rely on compact kitchens, combined living areas, lofted sleeping spaces, and built-in storage.
People choose tiny houses to reduce building costs, lower utility expenses, and avoid unused square footage.
They are commonly used as primary homes, backyard dwellings, vacation homes, or mobile living spaces, depending on local regulations and lifestyle needs.
How to Build Your Own Tiny House?
Before construction begins, decide the size, layout, and whether the tiny frame house will be on wheels or a fixed foundation.
Note: At the same time, check local zoning rules, permit requirements, and utility regulations.
These two steps are closely linked and should be settled early so the build can move forward without delays or costly changes later.
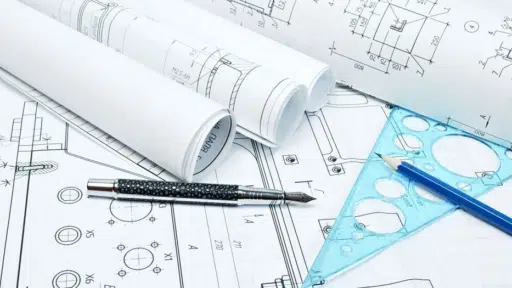
Step 1: Plan the Layout and Dimensions
The construction process starts with a clear plan.
This includes deciding the overall length and width, wall height, roof style, and whether a loft will be included.
Kitchen, bathroom, storage, and sleeping areas should be mapped out before materials are purchased.
A well-thought-out plan ensures that framing, utilities, and finishes fit together properly and helps avoid rework during later stages.
Step 2: Prepare Materials and Tools
Once the layout is finalized, gather all core materials and tools before construction begins.
Buying supplies in advance keeps work moving and avoids delays.
For a diy tiny house on wheels, estimating total weight at this stage helps ensure the trailer and framing materials are properly rated.
| Category | What’s Needed |
|---|---|
| Framing | 2×4 / 2×6 lumber, pressure-treated lumber, LVL beams |
| Sheathing | OSB or plywood (walls, roof, subfloor), tongue-and-groove subfloor |
| Fasteners | Wood screws, structural screws or lag bolts, joist hangers, and construction adhesive |
| Insulation & Sealing | Fiberglass or rigid foam insulation, spray foam, and house wrap |
| Roof & Exterior | Roof underlayment, metal roofing or shingles, flashing, drip edge |
| Plumbing | PEX tubing and fittings, PVC pipe for drains |
| Electrical | Electrical wire, outlet boxes, breaker panel |
| Core Tools | Circular or miter saw, drill/driver, level, tape measure, square |
| Safety Gear | Gloves, safety glasses, and a dust mask |
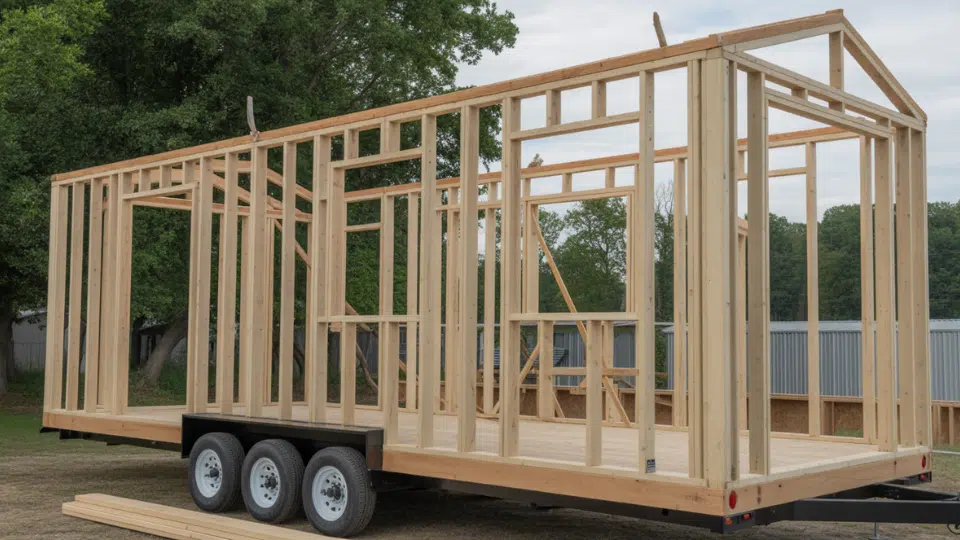
Step 3: Choose a Strong Foundation or Trailer
A solid base prevents most long-term issues.
For a trailer build
- Choose a trailer rated for the expected final weight
- Select a width that supports the floor plan without risky overhangs
- Confirm tie-down points for anchoring the frame to the trailer
For a fixed build
- Slab: durable and simple for plumbing runs
- Piers: good for uneven ground and airflow under the home
- Crawl space: allows easier access for repairs
Step 4: Build and Insulate the Subfloor
Construction begins from the ground up. The subfloor is built directly on the trailer or foundation using framing members secured tightly in place.
Gaps are sealed to limit air movement, and insulation is installed to improve comfort and energy efficiency.
A tongue-and-groove subfloor layer is then fastened with adhesive and screws to create a solid, quiet base for the rest of the build.
Step 5: Frame the Walls and Roof of Tiny House
Wall frames are typically assembled flat and then raised into position.
Stud spacing, window openings, and door headers are set according to the plan.
Once walls are secured, roof framing follows. Rafters or trusses are installed based on the chosen roof style, along with fascia boards and blocking.
This stage forms the structural frame of the frame house shell of the tiny home.
Step 6: Sheath and Weatherproof the Structure
After framing, wall and roof sheathing are installed to stiffen the structure.
Window and door openings are cut, followed by house wrap to protect against wind and moisture.
Proper flashing around openings is critical to prevent leaks. Windows and exterior doors are installed only after the structure is fully wrapped and sealed.
Step 7: Install Roofing and Exterior Siding
Roofing materials are applied over an appropriate underlayment, starting from the lower edge and working upward.
Flashing and drip edges help direct water away from the structure. Exterior siding is then installed, providing both protection and visual style.
Seams, fasteners, and joints are sealed before painting or staining to extend the life of the exterior.
Step 8: Rough-in Electrical, Plumbing, and Ventilation
With the exterior sealed, internal systems are installed.
Electrical wiring is run through wall cavities, outlets and switch boxes are secured, and the main panel location is set.
Plumbing lines are routed for water supply and drainage, with correct slope and venting.
Ventilation paths for the bathroom and kitchen are planned to control moisture and airflow.
Step 9: Insulate and Close the Walls
Insulation is placed in wall and ceiling cavities to improve temperature control and reduce noise.
Air sealing around framing joints and penetrations further improves efficiency.
Interior wall finishes such as drywall or wood paneling are then installed, followed by surface finishing where needed.
Step 10: Complete Interior Construction
Interior features of a frame house are built once the walls are closed. This includes cabinets, countertops, loft framing, stairs or ladders, and built-in storage.
Careful planning at this stage helps maximize usable space and keeps walkways clear.
Fixtures and fittings are installed gradually to maintain access during construction.
Step 11: Finish Flooring, Fixtures, and Trim
Flooring is installed after major construction work is complete.
Water-resistant materials are commonly used for durability. Baseboards, window trim, lighting fixtures, switches, plumbing fixtures, and appliances are installed next.
Each system is tested to ensure proper operation.
Step 12: Final Checks and Readiness
The final stage involves checking weather seals, roof connections, plumbing joints, and electrical circuits.
Once inspections are complete and you have checked all the checkpoints of this DIY tiny house checklist and find that all the utilities are connected, the tiny house is ready for use.
| ☐ Exterior: Roof seams flashing siding window door seals | ☐ Electrical: |
| ☐ Structure: Trailer or foundation connections stairs loft stability | ☐ Plumbing: water Leak check water pressure drain flow |
| ☐ Ventilation & HVAC: Fans heating cooling operation | ☐ Safety: Smoke carbon monoxide detectors, fire extinguisher |
Video Tutorial
Video reference and build process insights are credited to Builders Blueprint.
Tiny House Ideas That Make Small Spaces Work Better

These tiny house ideas are commonly used in DIY builds to improve layout efficiency and reduce the need for additional furniture.
1) Hide a Workspace Behind the Bed
In a tiny house, every wall must serve more than one purpose.
Placing a slim desk directly behind the bed frame allows the sleeping area to double as a daytime work zone.
This setup works especially well in studio-style tiny homes where separate rooms are not possible.
2) Use Stairs as Closed Storage
Loft stairs can do far more than provide access.
Built-in drawers or cabinets under each step create concealed storage for shoes, tools, pantry items, or clothing. This approach removes the need for extra cabinets elsewhere in the house.
3) Build Upward Instead of Outward
Ceiling height is one of the biggest advantages of a tiny house.
Lofted sleeping areas free up floor space below for seating, storage, or a kitchen. Even partial lofts can add usable square footage without increasing the footprint.
4) Combine Rooms that Share a Function
Some spaces naturally work together in a tiny house. Examples include:
- Kitchen and living area
- Office and guest sleeping space
- Bathroom storage integrated into wall cavities
Combining functions reduces walls, improves flow, and keeps the interior from feeling boxed in.
5) Replace Doors with Flexible Dividers
Swing doors take up valuable clearance space.
Curtains, sliding panels, or barn-style doors provide privacy while keeping walkways open.
These options also make future layout changes easier.
6) Invest in Built-in Furniture
Storage beds, bench seating with lift-up lids, and fixed dining benches reduce clutter and movement.
Built-ins stay in place during travel and allow tighter spacing than freestanding furniture.
7) Hide the Kitchen when It’s Not in Use
In ultra-small layouts, kitchens can visually dominate the space.
Folding panels, cabinet doors, or recessed designs allow the cooking area to be closed off, making the tiny house feel calmer when not in use.
Conclusion
A tiny house comes together step by step, not all at once.
Each phase, from planning and framing to utilities and finishing, builds on the last, turning a small structure into a complete living space.
When layout decisions are made early, and construction follows a clear order, the process stays efficient, and mistakes are easier to avoid.
What sets a successful tiny house apart is intention.
Materials are chosen carefully, space is used with purpose, and every feature earns its place.
Whether built on a trailer or a permanent foundation, a well-planned tiny house can remain comfortable, durable, and practical over time.
With patience and a clear construction path, small-scale building can lead to a fully functional home that supports everyday living.
Have additional ideas or build experiences to share? Add them in the comments to help others plan their own tiny house.

Holding a Master’s in Construction Management from Purdue University, William Ray has dedicated more than two decades to studying and applying construction principles. His professional journey includes a tenure with a prominent construction firm, where he specialized in project management and building technologies. William brought his knowledge to our team, providing in-depth insights into practical construction techniques. As the leader of our beginner’s guide to building since 2019, he has a knack for breaking down intricate processes into easily digestible content. When not involved in writing or onsite consultations, William enjoys woodworking and volunteering in community building projects, which aligns with his passion for hands-on construction and community service.