Are you looking to spice up your walls? Gallery walls are a fun way to show off your style.
This post shares 13 cool ideas for arranging frames, with size tips to make it easy. Whether you like things neat or random, there’s a layout here.
We’ll cover different shapes, frame combos, and ways to group your art. You’ll find ideas for small spaces and big walls alike.
By the end, you’ll have the know-how to create a perfect gallery wall that fits your home.
Ready to turn your blank wall into something special? Let’s dive into these creative layouts and make your space pop with personality.
Get set to transform your room with these frame-tastic ideas!
Gallery Wall Layout Ideas with Frame Sizes
These layouts range from simple grids to unique shapes. You’ll find ideas for symmetrical and asymmetrical designs, mixing frame sizes, and creating focal points.
Each layout has frame-size suggestions to help you plan your perfect gallery wall.
1. Asymmetrical Grid

The Asymmetrical Grid layout perfectly blends style and variety for bathroom decor.
Frames of various sizes are scattered across the wall, with no strict alignment.
The staggered arrangement adds visual depth and breaks away from traditional symmetry, making the layout dynamic yet harmonious.
This layout allows for flexibility in mixing different art or photo themes while maintaining a cohesive design that suits a bathroom’s relaxing and personal space.
The varied frame sizes create a balanced yet free-flowing display.
- Visual Strategy: Break free from traditional grids with an asymmetrical arrangement. Mix different frame sizes without aligning them on a straight grid.
- Recommended Frame Sizes: 16×20, 12×18, 8×10, 6×8.
2. Diagonal Flow

The Diagonal Flow layout arranges frames in a sweeping upward diagonal line, which is ideal for creating a sense of motion on a gallery wall.
Frames of varying sizes are placed along a smooth, ascending line, starting lower and moving higher across the wall.
This arrangement enhances the visual height of the room and adds a unique, progressive design.
The frames feature a balanced mix of nature-themed art and photography, blending modern aesthetic with organic elements, perfect for a lively and open living space.
- Visual Strategy: Arrange your frames in a diagonal line from one corner of the wall to the opposite corner, creating a dynamic movement.
- Recommended Frame Sizes: 18×24, 14×20, 12×18, 10×14.
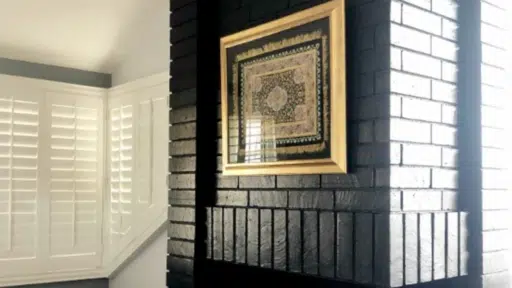
3. Staircase Cascade

The Staircase Cascade layout enhances the flow of a staircase by aligning frames to follow the upward slope.
Frames are arranged in a descending diagonal, mirroring the incline of the steps.
Black frames with white matting create a sleek, modern contrast against the white wall, drawing attention to the artwork and the staircase.
This layout is ideal for creating visual continuity in narrow spaces.
It guides the eye naturally up the stairs while effectively using vertical space for art display.
- Visual Strategy: Arrange frames in a cascading downward slope, mirroring the staircase steps.
- Recommended Frame Sizes: 14×20, 12×16, 10×14, 8×12.
4. Floating Rows
The Floating Rows layout uses evenly spaced horizontal lines of frames to create a structured yet fluid gallery wall.
The frames in this layout are strategically placed in rows, with the sizes inconsistent within each row for added interest. The frames float on the wall, emphasizing horizontal alignment without visible supports.
The artwork features landscapes and abstract pieces in rich, warm tones, creating a cohesive and visually engaging display perfect for spaces with an industrial or modern aesthetic.
- Visual Strategy: Create evenly spaced horizontal rows with a twist: the rows “float” by placing slightly varying frame sizes within each line.
- Recommended Frame Sizes: 12×18, 14×20, 10×14, 8×10 (vary per row).
5. Symmetry with Circle

The Symmetry with Circle layout centers a circular mirror and arranges frames around it, creating a balanced, harmonious display.
The frames, varying in size, are placed symmetrically around the circle, creating a starburst effect.
This design draws attention to the central feature while perfectly aligning the surrounding frames.
The black-and-white photography within the frames adds a minimalist, modern touch, making it ideal for contemporary living rooms or hallways where a focal point is essential.
Symmetry enhances visual clarity and order.
- Visual Strategy: Arrange frames in a circular pattern, with each frame forming part of the circle’s edge.
- Recommended Frame Sizes: 10×10, 12×12, 8×8, 6×6.
6. Dual Axis Layout

The Dual Axis Layout arranges frames along two intersecting axes, one vertical and one horizontal, forming a balanced cross-like design.
The central vertical axis features larger frames, drawing the eye upward, while the horizontal axis utilizes frames, creating a wide visual spread.
Smaller frames are strategically placed to fill the surrounding space.
This layout works well in open, high-ceiling areas, where natural light can accentuate the artwork. Using varied frame sizes helps maintain harmony and a natural flow across the intersecting lines.
- Visual Strategy: Create two intersecting axes, one vertical and one horizontal, with frames placed along both lines, forming a cross-shaped gallery.
- Recommended Frame Sizes: 20×30, 16×20, 12×18, 10×12.
7. Column of Layers

The Column of Layers layout in this space uses a vertical arrangement of frames, starting from larger pieces and tapering down to smaller sizes.
This alignment creates a structured yet visually rich column that draws the eye upwards, adding height to the room.
The mix of landscapes and classical artwork in ornate and vintage frames adds a timeless appeal.
This layout pairs well with antique furniture and traditional decor, creating a curated, elegant atmosphere that feels personal and refined.
The column enhances the room’s verticality without overwhelming the space.
- Visual Strategy: Create a vertical column of frames that vary slightly in size, stacked from the floor to the ceiling.
- Recommended Frame Sizes: 18×24, 14×18, 10×14.
8. Corner Wrap

The Corner Wrap layout incorporates adjacent walls by wrapping the gallery artfully around the corner.
A large frame serves as the centerpiece on the main wall, featuring a bold landscape, while smaller frames continue along the adjacent stairway wall.
This creates a harmonious flow that draws attention from the living area to the staircase.
The mix of frame sizes allows for variety while maintaining balance. This layout is ideal for connecting different spaces, making the room feel cohesive, and enhancing the visual interest across multiple viewpoints.
- Visual Strategy: Frame your wall corner by wrapping the gallery layout from one wall onto an adjacent wall, making the corner the central focus.
- Recommended Frame Sizes: 20×30, 12×18, 10×14.
9. Mirror Symmetry

The Mirror Symmetry layout is built around a central axis, creating a balanced and harmonious gallery wall.
Frames are arranged symmetrically on either side of the central line, with each frame on the left mirrored by a corresponding frame on the right.
The artwork, consisting of delicate floral paintings and intricate hand studies, adds a soft, artistic touch to the design.
This arrangement is perfect for spaces that require a balanced, orderly aesthetic, such as living rooms or bedrooms, where symmetry enhances the overall feeling of calm and cohesion.
- Visual Strategy: Use two identical sections of frames that mirror each other on either side of a central object, such as a mirror or painting, to create perfect symmetry.
- Recommended Frame Sizes: 18×24, 12×16, 8×10.
10. Framed Clusters

The Framed Clusters layout brings a sense of balance and symmetry to this living room.
Cluster 1, located above the couch, is evenly spaced and aligned to create a structured focal point.
Cluster 2 adds visual interest to the adjacent wall while maintaining harmony with the first cluster.
The colorful nature photography within the frames contrasts beautifully with the neutral wall and dark couch, providing a cohesive, warm design that ties the space together and enhances the room’s inviting feel.
- Visual Strategy: Group frames in small clusters across the wall instead of spreading them out, creating “islands” of frames.
- Recommended Frame Sizes: Cluster 1: 12×16, 8×10, 6×8; Cluster 2: 14×20, 10×12, 8×8.
11. Suspended Frames

The Suspended Frames layout creates a striking visual effect by hanging frames from the ceiling with strings or rods. Frames of varying sizes float at different heights, adding depth and dimension to the wall.
The arrangement of wooden and metallic frames plays with natural light streaming in from large windows, enhancing the suspended look.
This layout adds a modern, airy touch to the space, making it ideal for areas with high ceilings or large windows where the vertical display draws the eye upward, creating a unique gallery experience.
- Visual Strategy: Use frames that are hung from rods or strings, creating a layered, suspended look with different frame depths.
- Recommended Frame Sizes: 18×24, 14×18, 10×12.
12. Skyline Mimic

The Skyline Mimic layout artfully arranges frames of various sizes to resemble a city skyline.
Starting with a prominent frame as the tallest “building,” the layout tapers down with smaller frames, mimicking the rise and fall of a skyline.
The sepia-toned cityscape and architectural imagery complement the rustic and ornate wooden frames, creating an urban yet vintage feel.
This layout works well in large living rooms or hallways, drawing the eye across the wall in a rhythmic pattern, much like how the horizon guides the view of a city skyline.
- Visual Strategy: Arrange your frames to mimic the silhouette of a city skyline, with varying heights and widths, starting low and peaking in the middle.
- Recommended Frame Sizes: 24×36, 18×24, 14×20, 10×14.
13. Random Cluster

The Random Cluster layout arranges frames of various sizes in an informal, scattered pattern, perfect for a gallery wall that feels personal and eclectic.
The frame sizes ranges with a mix of artwork, photographs, and sketches.
Despite the seemingly irregular positioning, the cluster maintains balance through consistent spacing and varied frame colors, including wooden, black, and metallic borders.
This layout adds a vintage, collected feel, making it ideal for spaces like a cozy living room or hallway where character and personality are desired.
- Visual Strategy: Place frames in a seemingly random but intentional cluster, where no frame aligns directly with another, giving a casual, artistic vibe.
- Recommended Frame Sizes: 10×14, 8×10, 6×8, 4×6.
Conclusion
Let’s wrap up our gallery wall adventure! We’ve explored 13 creative layouts to turn your blank walls into eye-catching displays.
From simple grids to unique shapes, there’s a design for every style and space.
Remember, the key is to play with different frame sizes and arrangements until you find what speaks to you.
Whether you prefer symmetry or a more casual look, these ideas will help you showcase your favorite art and photos with flair.
Now it’s your turn to get creative! Pick your favorite layout, gather your frames, and start planning.
Don’t be afraid to mix things up – your gallery wall should reflect your personality.
Ready to transform your space? Get started on your gallery wall project today and watch your room come to life with memories and style.

James McLaren, with a rich background in architecture from the University of Manchester, has been contributing his expertise to the world of creative construction and home innovation for over 20 years. His journey began as a project manager for a leading construction firm, where he honed his skills in bringing complex designs to life. James joined our platform as a freelancer in 2019, quickly becoming a favorite for his insightful and practical advice. He has been a pivotal force to our wing ever since, bringing our readers a blend of technical know-how and creative flair. Beyond his professional life, James is an avid woodworker and enjoys restoring vintage furniture, a hobby that complements his professional insights beautifully.