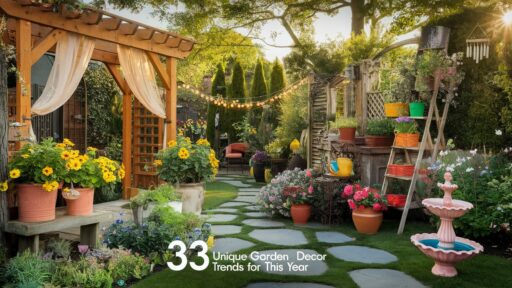
Let’s talk about garden borders. We all want neat, tidy edges for our flower beds, right? But hiring a pro can be pricey, and those plastic edgers just don’t cut it.
Don’t worry – we’ve got a great solution for you. Brick edging is the answer. It’s simple, affordable, and looks fantastic.
In this guide, we’ll walk you through creating your brick border step by step.
We’ll cover everything from picking the right bricks to laying them perfectly. You’ll have the know-how to transform your garden edges by the end.
Ready to roll up your sleeves and give your garden a makeover? Let’s get started on your DIY brick edging project!
What is Brick Edging?
Brick edging is a smart way to spruce up your garden. It’s simply a row of bricks placed along the edges of your flower beds or lawn.
Don’t let its simplicity fool you – it packs a punch in garden design.
Why choose brick edging? Well, it’s got a few tricks up its sleeve:
- It looks good: Brick edges give your garden a clean, classic look. They add a nice touch of color and texture, too.
- It keeps things tidy: These edges help define your garden beds clearly. No more fuzzy lines between your lawn and flowers!
- It’s a plant protector: Brick edges act like a mini wall. They stop grass from creeping into your flower beds. Pesky weeds? They’ll have a harder time sneaking in too.
We love how brick edging is both useful and pretty. It’s a win-win for your garden!
Can You Use Old Bricks for Edging?

You bet! We’re Big Fans of This Idea. Here’s Why:
- Charm and Character: Old Bricks Bring a Sense of History to Your Garden. Each Brick Tells a Story with Its Worn Edges and Faded Colors. This Weathered Look Can Add a Cozy, Lived-In Feel to Your Outdoor Space.
- Eco-Friendly Option: Reusing Old Bricks Gives New Life to Materials that Might Otherwise End Up In a Landfill. It’s a Small but Meaningful Way to Reduce Waste and Be Kind to Our Planet.
- Budget-Friendly: New Bricks Can Be Costly, but Old Ones? They Might Be Free if You Have Some Lying Around, or Cheap if You Source Them from Salvage Yards or Online Marketplaces. Your Wallet Will Thank You!
- Variety in appearance: Old bricks often come in different shades and textures, which can create a unique, eye-catching border in your garden.
Choose Your Design
When it comes to edging, you’ve got options! Let’s look at some design ideas:
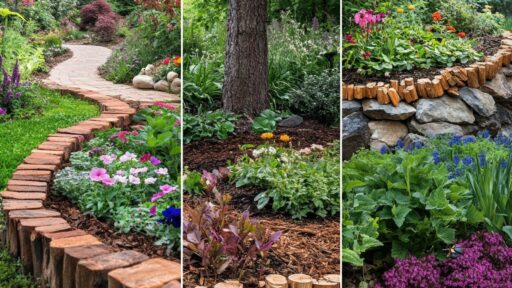
- Straight lines: This classic look is great for formal gardens or modern spaces and is also the easiest to lay out.
- Gentle curves: Want a softer look? Curved edges can add a touch of charm to your garden. They’re perfect for more natural, flowing designs.
- Zig-zag patterns: Feeling bold? A zig-zag edge can add some fun to your garden layout.
Tools and Materials Required
| Category | Item | Purpose |
|---|---|---|
| Materials | Bricks | Main material for the edging; choose type based on design |
| Paver Base | Provides a stable foundation for the bricks | |
| Paver Sand | Fills the gaps between bricks for stability | |
| Weed Barrier Fabric (Optional) | Prevents weed growth between bricks | |
| Gravel (Optional) | Acts as a base layer to prevent erosion | |
| Mortar (Optional) | For a more permanent edging solution | |
| Tools | Rubber Mallet | Used to tap bricks into place without damaging them |
| Flat Spade Shovel | For digging the trench where bricks will be placed | |
| Garden Edger | Helps in creating a clean, straight edge for the trench | |
| Level (Short & Long) | Ensures bricks are laid evenly and are level | |
| Measuring Tape | Used for precise measurements of the trench and bricks | |
| String Line & Stakes | Acts as a guide for laying bricks in a straight line | |
| Handheld Shovel | Useful for smaller digging tasks and adjustments | |
| Saw Suitable for Masonry | To cut bricks for a perfect fit in tight spaces |
Step-by-Step Guide to DIY Brick Edging
1. Gathering and Measuring Bricks

It’s time to figure out how many bricks you need. Here’s how:
- Measure your edging area: Use a tape measure to get the total length of your planned edge.
- Count your bricks: Lay a few along a short section of your planned edge. Count how many fit in a foot.
- Do the math: Multiply the length of your edge by the number of bricks per foot. Add about 10% extra for cuts and breakages.
For example, if your edge is 20 feet long and you use 3 bricks per foot, you’d need 60 bricks plus 6 extra, for a total of 66 bricks.
2. Dig a Trench to Install the Bricks

Let’s get our hands dirty! Here’s how to dig your trench:
- Mark your edging line using your chosen method (hose, string, or wood).
- Grab a flat spade or edger tool.
- Dig a trench about 4 inches deep and slightly wider than your bricks.
- Keep the bottom as flat as you can.
- Remove any roots or rocks you find.
Take your time here. A good trench makes for a stable edge.
3. Adding a Layer of Paver Base

Now, let’s give those bricks a comfy bed:
- Pour about 2 inches of paver base into your trench.
- Spread it evenly with a rake.
- Use a hand tamper to pack it down tight.
This layer helps with drainage and keeps your bricks from shifting.
4. Installing the Bricks

Placing the First Row
This is where the magic happens:
- Start at one end of your trench.
- Place your first brick, pressing it gently into the paver base.
- Use a level to check it’s straight. Adjust the paver base if needed.
- Slope the brick slightly away from your garden bed for good drainage.
Remember, this first brick sets the tone for your whole edge!
Using the String Line for Accuracy
Keep things straight with this trick:
- Tie a string between stakes at each end of your edging line.
- Place it just above your bricks.
- Use this as a guide as you lay each brick.
This helps keep your edge nice and straight.
Tapping Bricks into Place
Time to make those bricks snug:
- Once a brick is in place, grab your rubber mallet.
- Gently tap the brick to settle it into the paver base.
- Don’t hit too hard – we want to secure the brick, not crack it!
Laying the Remaining Bricks
Keep the momentum going:
- Place each brick snugly against the last one.
- Check for level and slope as you go.
- Use your string line to keep everything aligned.
5. Handling Odd-Sized Spaces

Sometimes, you’ll have a gap smaller than a brick. Here’s what to do:
- Measure the gap.
- Mark a brick to fit.
- Use a masonry chisel to cut the brick carefully.
- If it’s a small gap, you can also fill it with a paver base and top it with sand.
6. Brushing Sand into Cracks

Let’s lock those bricks in place:
- Pour fine sand over your bricks.
- Use a broom to sweep it into the cracks.
- Spray lightly with water to help the sand settle.
- Add more sand if needed.
This helps keep your bricks stable and discourages weeds.
Post-Installation Tips

By following the below-listed tips, you’ll keep your brick edging looking great and lasting for years to come!
Regular cleaning:
- Sweep off dirt and debris every few weeks
- Use a stiff brush for stubborn grime
- Avoid pressure washing, as it may loosen the sand between bricks
Weed control:
- Pull out any weeds that pop up between bricks promptly
- Apply a pet-friendly weed killer if needed
- Re-sand gaps where weeds were removed
Stability check:
- Walk along your edging twice a year
- Look for any loose or hollow bricks
- Lift and reset any problem bricks, adding more paver bases if needed
Winter care:
- Avoid using harsh de-icing salts near your edging
- Clear snow carefully to prevent damaging the bricks
Plant management:
- Trim back any overhanging plants
- This prevents moisture buildup on the bricks
Wrapping It Up
As we wrap up our brick-edging journey, let’s appreciate what we’ve accomplished.
With some effort and basic tools, you’ve learned how to create a beautiful, lasting border for your garden.
Remember, brick edging isn’t just about looks – it’s a practical solution that helps keep your garden tidy and your plants happy.
Whether you used new bricks or gave old ones a second life, you’ve added value to your outdoor space.
As you enjoy your newly edged garden, consider other areas where you might apply these skills. Maybe a path or a patio is in your future? Whatever your next project, you’ve got the know-how to tackle it.
Happy gardening!

