Are you tired of dealing with a damp, musty basement that threatens your home’s foundation and your family’s health?
Exterior basement waterproofing might be the game-changing solution you’ve been searching for.
Unlike quick fixes that treat symptoms, exterior waterproofing tackles moisture problems at the source, before water reaches your foundation walls.
This comprehensive approach involves excavating around the perimeter of your home, applying waterproof membranes, and installing proper drainage systems.
The result?
A completely dry basement and protected foundation for decades to come.
Ready to alter your basement from a liability into a valuable asset?
Your foundation deserves fortress-level protection!
What is Exterior Basement Waterproofing?
Exterior basement waterproofing is a method that prevents water from entering your basement from the outside.
It works by creating a barrier around your foundation walls, preventing water from even coming into contact with them.
Think of it like putting a raincoat on your house’s foundation.
This approach differs from interior waterproofing, which aims to manage water that has already entered your basement.
The science is simple: it’s always better to stop a problem at its source rather than deal with it after it has happened.
Exterior waterproofing is essential for serious water issues, foundation cracks, or when interior methods fail to fix basement moisture.
Signs You Need Exterior Basement Waterproofing
Your basement often gives clear warning signs when water becomes a serious problem.
These signals indicate that interior fixes will likely be insufficient.
- Water stains on basement walls show up as dark patches where water has soaked through your foundation.
- Musty odors and mold growth happen when moisture gets trapped and creates perfect conditions for mold.
- Efflorescence appears as white, powdery deposits when water carries minerals through concrete and leaves them behind.
- Cracks in foundation walls let water seep directly into your basement and get worse during rain.
- Hydrostatic pressure issues occur when groundwater builds up around your foundation and pushes against the walls hard.
- Failed interior waterproofing attempts mean the water problem is too big to handle from inside alone.
Don’t ignore these warning signs because they usually get worse over time.
The sooner you address exterior waterproofing, the less damage you’ll have to fix later.
Types of Exterior Waterproofing Systems
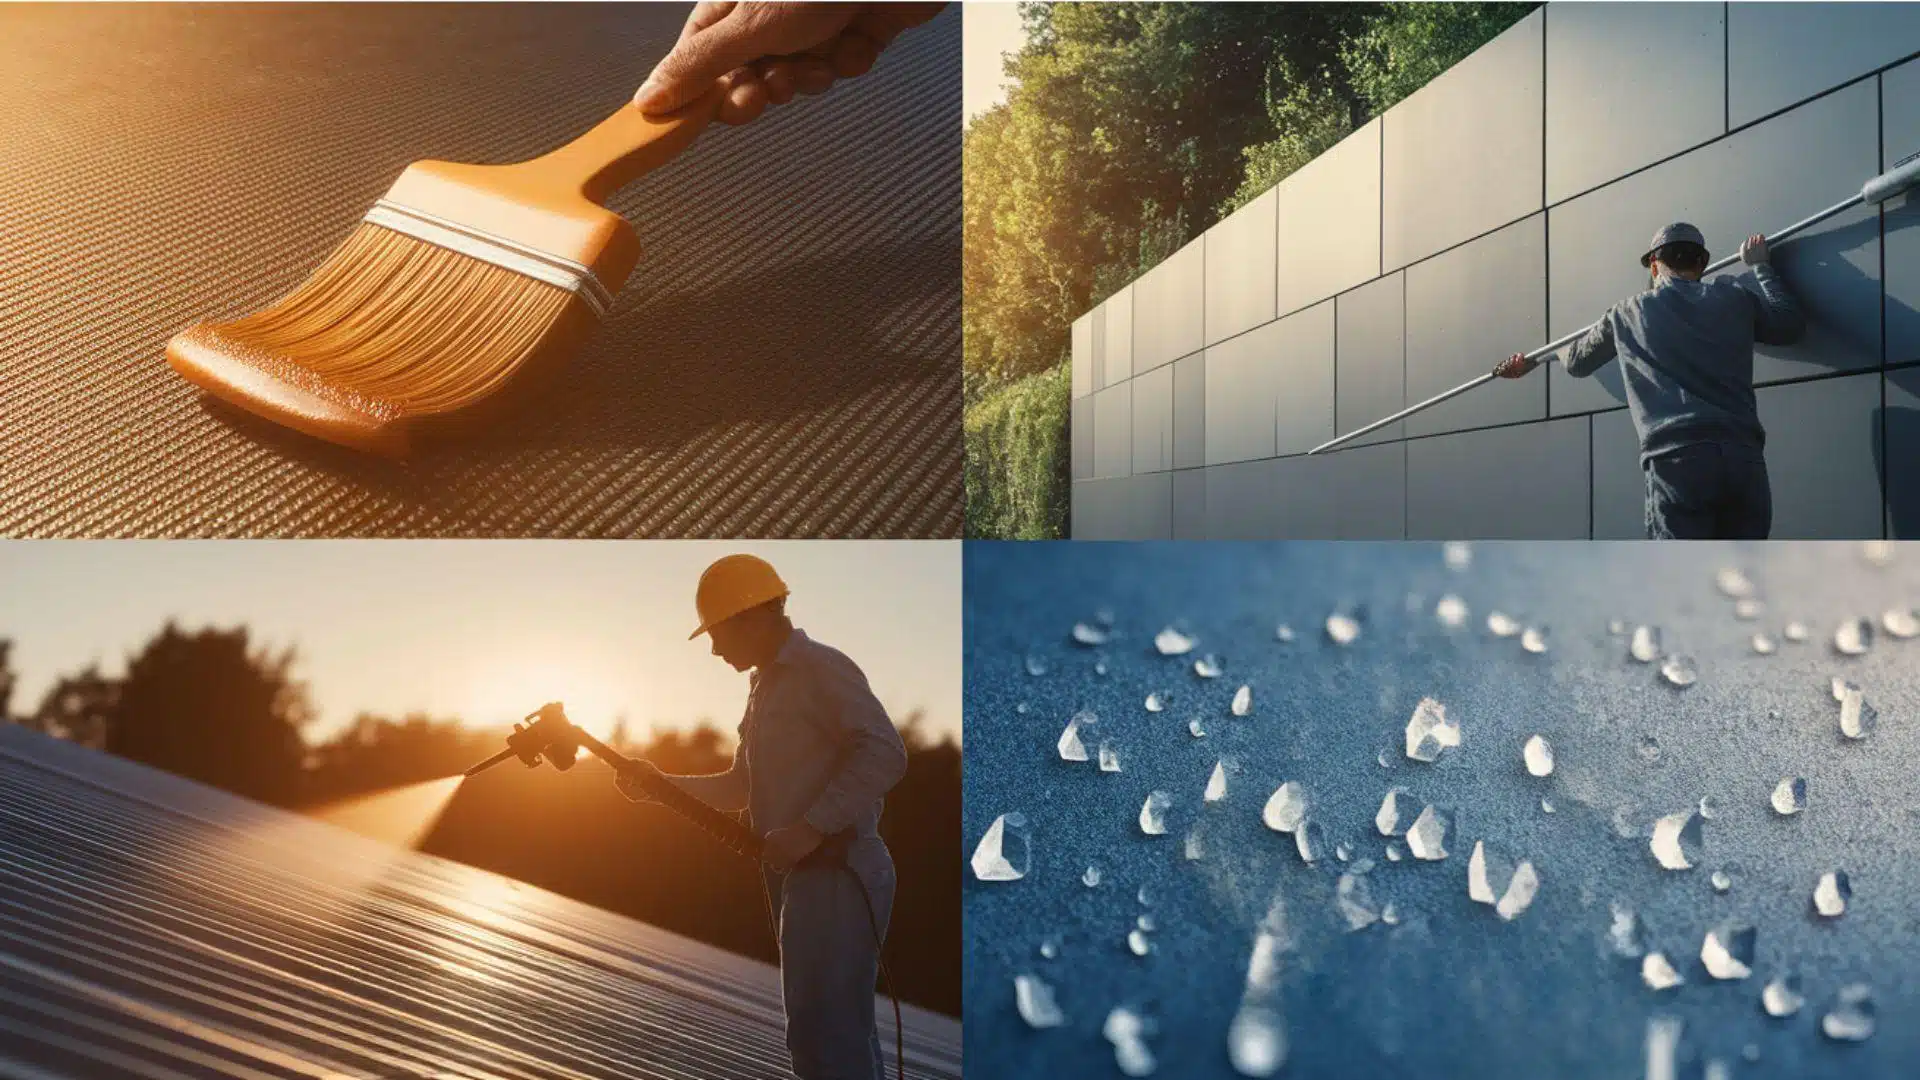
Choosing the right exterior waterproofing system can greatly impact your home’s defense against moisture damage.
Here’s a quick comparison of the most common types, helping you decide which best suits your needs.
| TYPE | DESCRIPTION | PROS | CONS |
|---|---|---|---|
| Liquid Membranes | Liquid Membranes Applied with a roller or brush (similar to applying a driveway coating); forms a flexible, rubber-like waterproof layer. | Seamless, flexible, and easy on uneven areas | Needs dry weather, may need recoating |
| Sheet Membranes | Pre-formed sheets (usually bituminous) are applied with adhesives or fasteners. | Durable, uniform, factory-tested | Hard to apply on corners, labor-heavy |
| Spray Systems | Liquid barrier sprayed directly onto surfaces for a quick, seamless coat. | Fast, seamless, great for large areas | Costly gear, needs skilled spraying |
| Crystalline Waterproofing | Penetrates concrete to form crystals that block water paths internally. | Self-healing, long-lasting, internal seal | Only for concrete, not for big cracks |
Each system offers unique strengths and limitations.
Consider your home’s foundation type, budget, and climate before selecting the ideal waterproofing solution.
Benefits of Exterior Waterproofing
Exterior waterproofing offers many advantages that make it worth the investment for most homeowners.
These benefits protect both your home’s structure and your family’s health long-term.
Understanding these advantages helps you see why exterior methods work better than interior fixes.
- Long-term effectiveness means your waterproofing system keeps working for 15-25 years without needing major repairs or replacements.
- Protects foundation structure by preventing water damage that can cause cracks, settling, and expensive structural problems over time.
- Prevents mold and mildew growth by stopping moisture at the source, which keeps your basement air healthy and safe.
- Increases home value by approximately 10–20% return on investment when you sell your house to new buyers.
- Reduces humidity levels throughout your basement, making the space more comfortable and preventing musty odors from developing.
These benefits make exterior waterproofing a smart, long-term investment for your home and family.
Most homeowners find the peace of mind and protection worth every penny spent.
The system pays for itself through prevented damage and increased property value over time.
Materials Required
When planning an exterior basement waterproofing project, it’s important to budget for all the necessary materials.
Below is a table showing estimated costs for commonly used items to help you prepare.
| Material | Estimated Cost (USD) |
|---|---|
| Shovel & Trenching Equipment | $40–$100 (shovel) |
| Landscape Fabric (Soil Separator) | $19–$38 |
| Liquid Rubber Waterproofing | $15–$30 per quart (0.95 L) |
| Fiber-Reinforced Sealant | $10–$20 per tube |
| Perforated Drain Pipe (100 ft) | $99 |
| 3/4″ to 1″ Gravel (Approx. 2 tons) | $30–$150 |
| Blower or Brush (Wall Cleaning) | $20–$50 |
| Mulch (Final Touch-Up) | $35–$170 per cubic yard installed |
| Plants and Shrubs (Replanting) | $5–$20 each |
| PVC or Culvert Pipe (if needed) | $0.5–$10 per foot |
Total Estimated Cost:$300-$1,350
These prices are estimates and may vary depending on your location and supplier.
Use this list as a general guide to help you plan your project effectively.
Exterior Basement Waterproofing: Step-By-Step Guide
Exterior basement waterproofing involves five main steps that work together to keep water out permanently.
The process starts with clearing the area and digging down to your foundation footer.
Then you clean and seal the foundation walls before installing a drainage system and backfilling properly.
STEP 1: Prepare the Site and Clear Landscaping
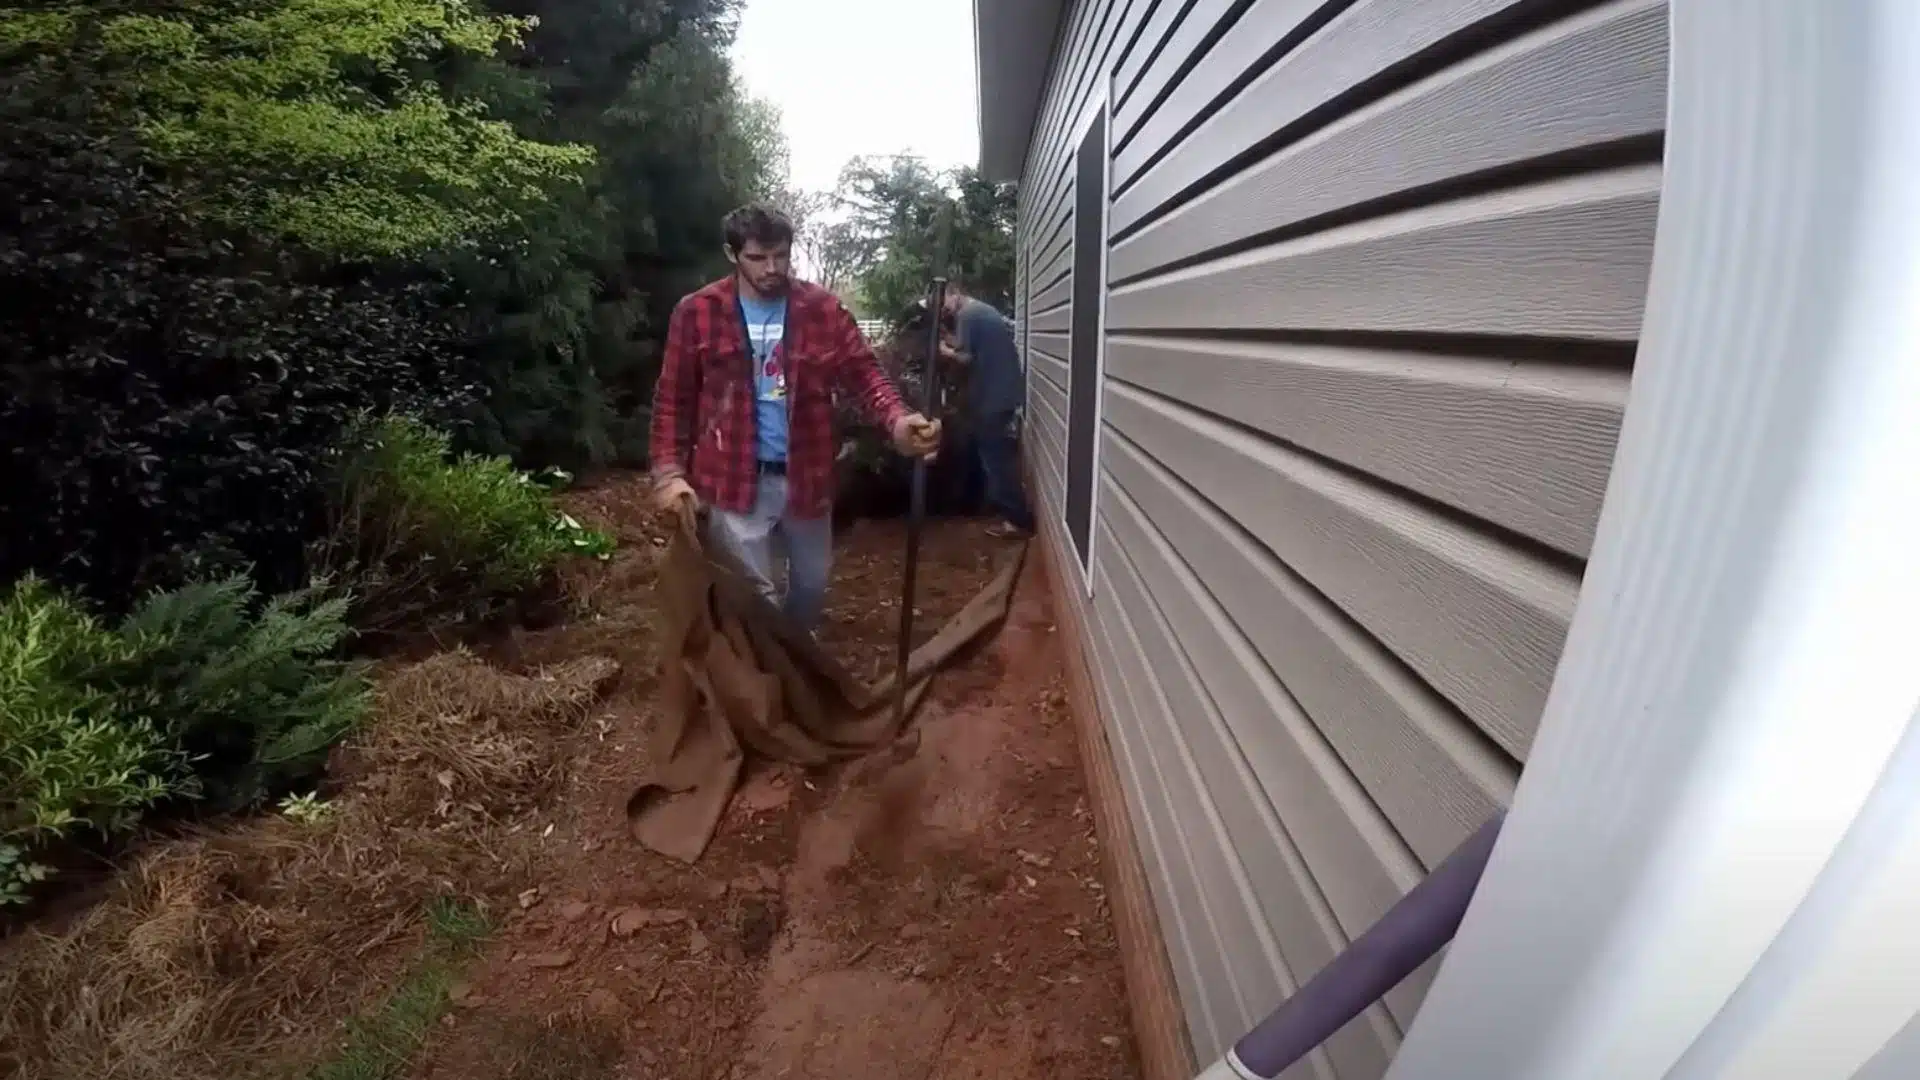
Before starting waterproofing, remove any shrubs or plants along the foundation wall.
If you plan to reuse the landscaping, dig around each plant carefully and preserve the root ball.
Also, pull back any landscape fabric to expose the soil.
This initial step helps clear access for excavation along the footing.
Insider Insights:
- Save money by reusing healthy shrubs—just keep the root ball intact and moist.
- Mark utility lines before digging to avoid safety hazards or fines.
- Use zip ties to roll up and reuse the landscape fabric later.
STEP 2: Dig a Trench Down to the Footer
Excavate a narrow trench alongside the foundation wall down to the footer level.
The trench should be about one shovel wide and a few inches below the top of the footer.
This allows for proper placement of gravel and a perforated drainpipe, ensuring water can flow away efficiently.
Insider Insights:
- Stay just below the top of the footer to avoid compromising structural stability.
- A narrow trench saves backfill time and material later.
- Use a trenching machine if the soil is compacted or rocky.
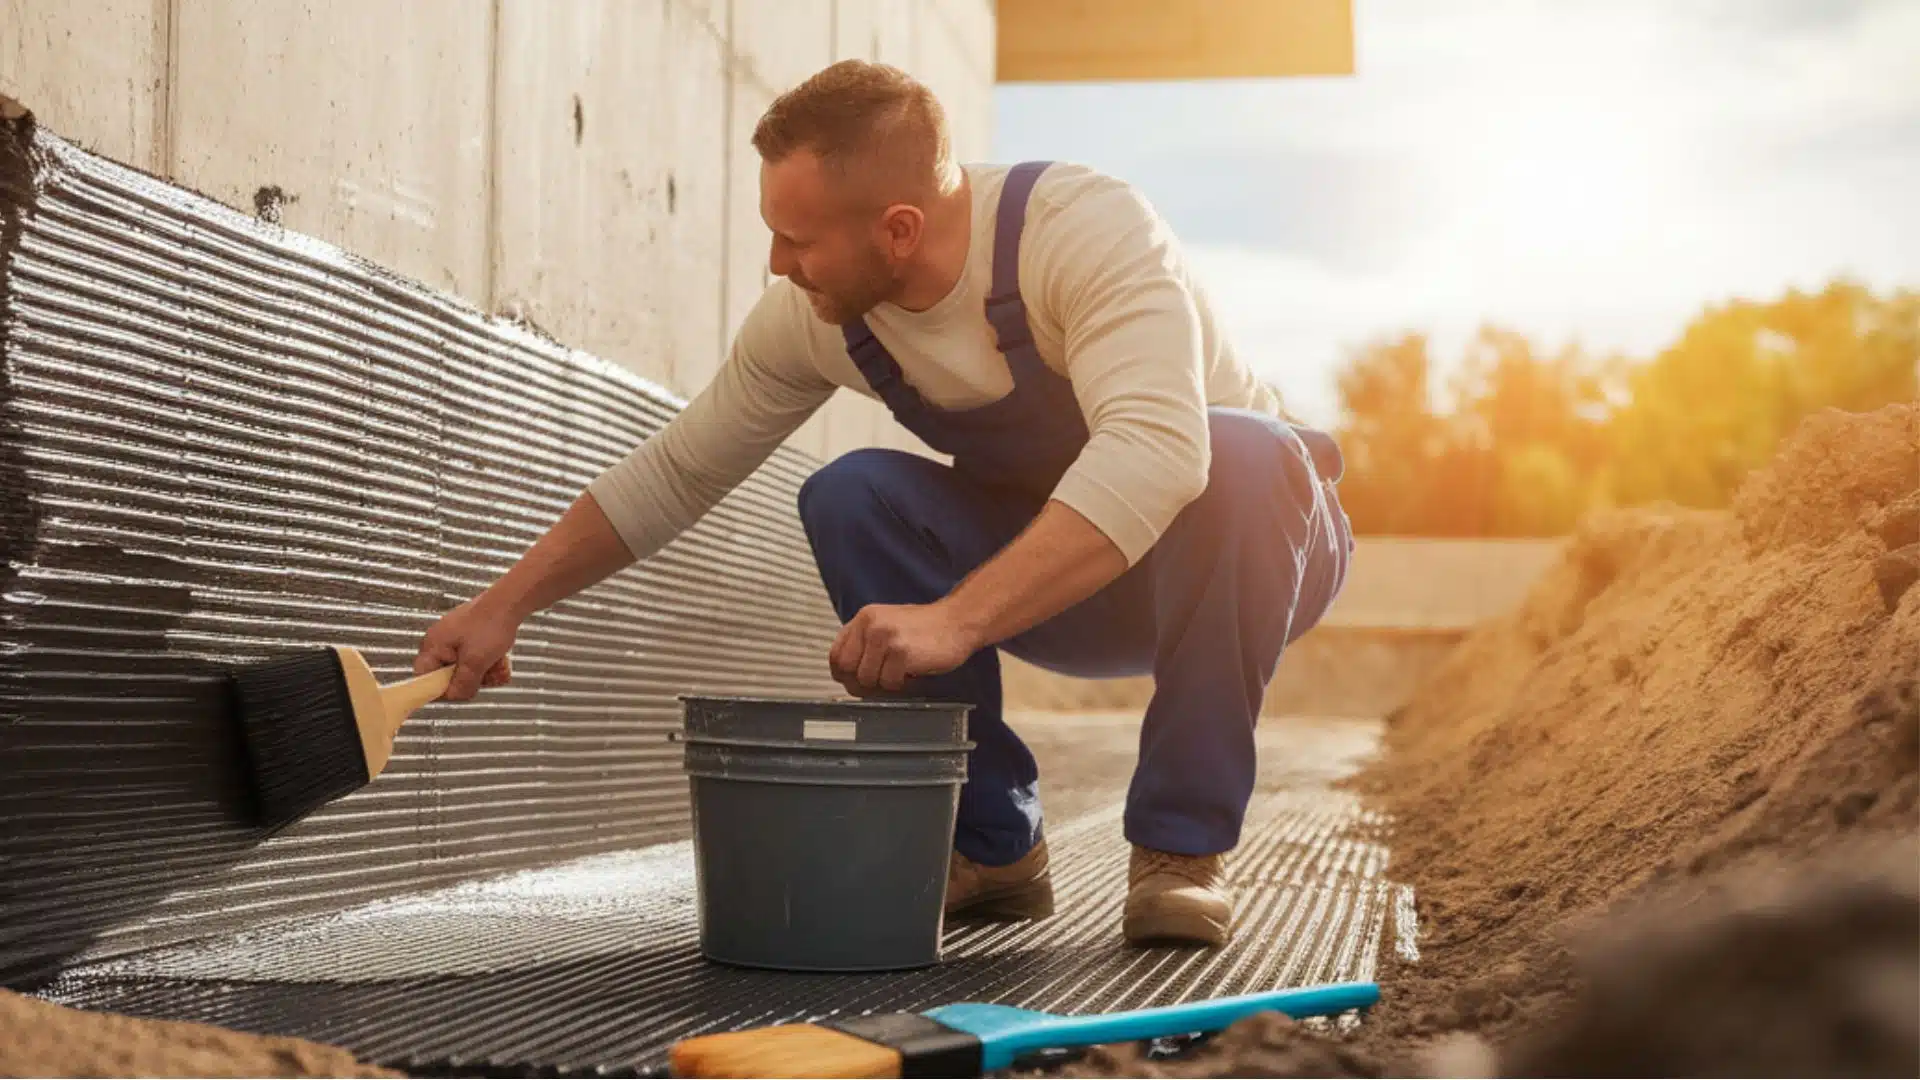
STEP 3: Clean the Foundation and Apply Waterproofing
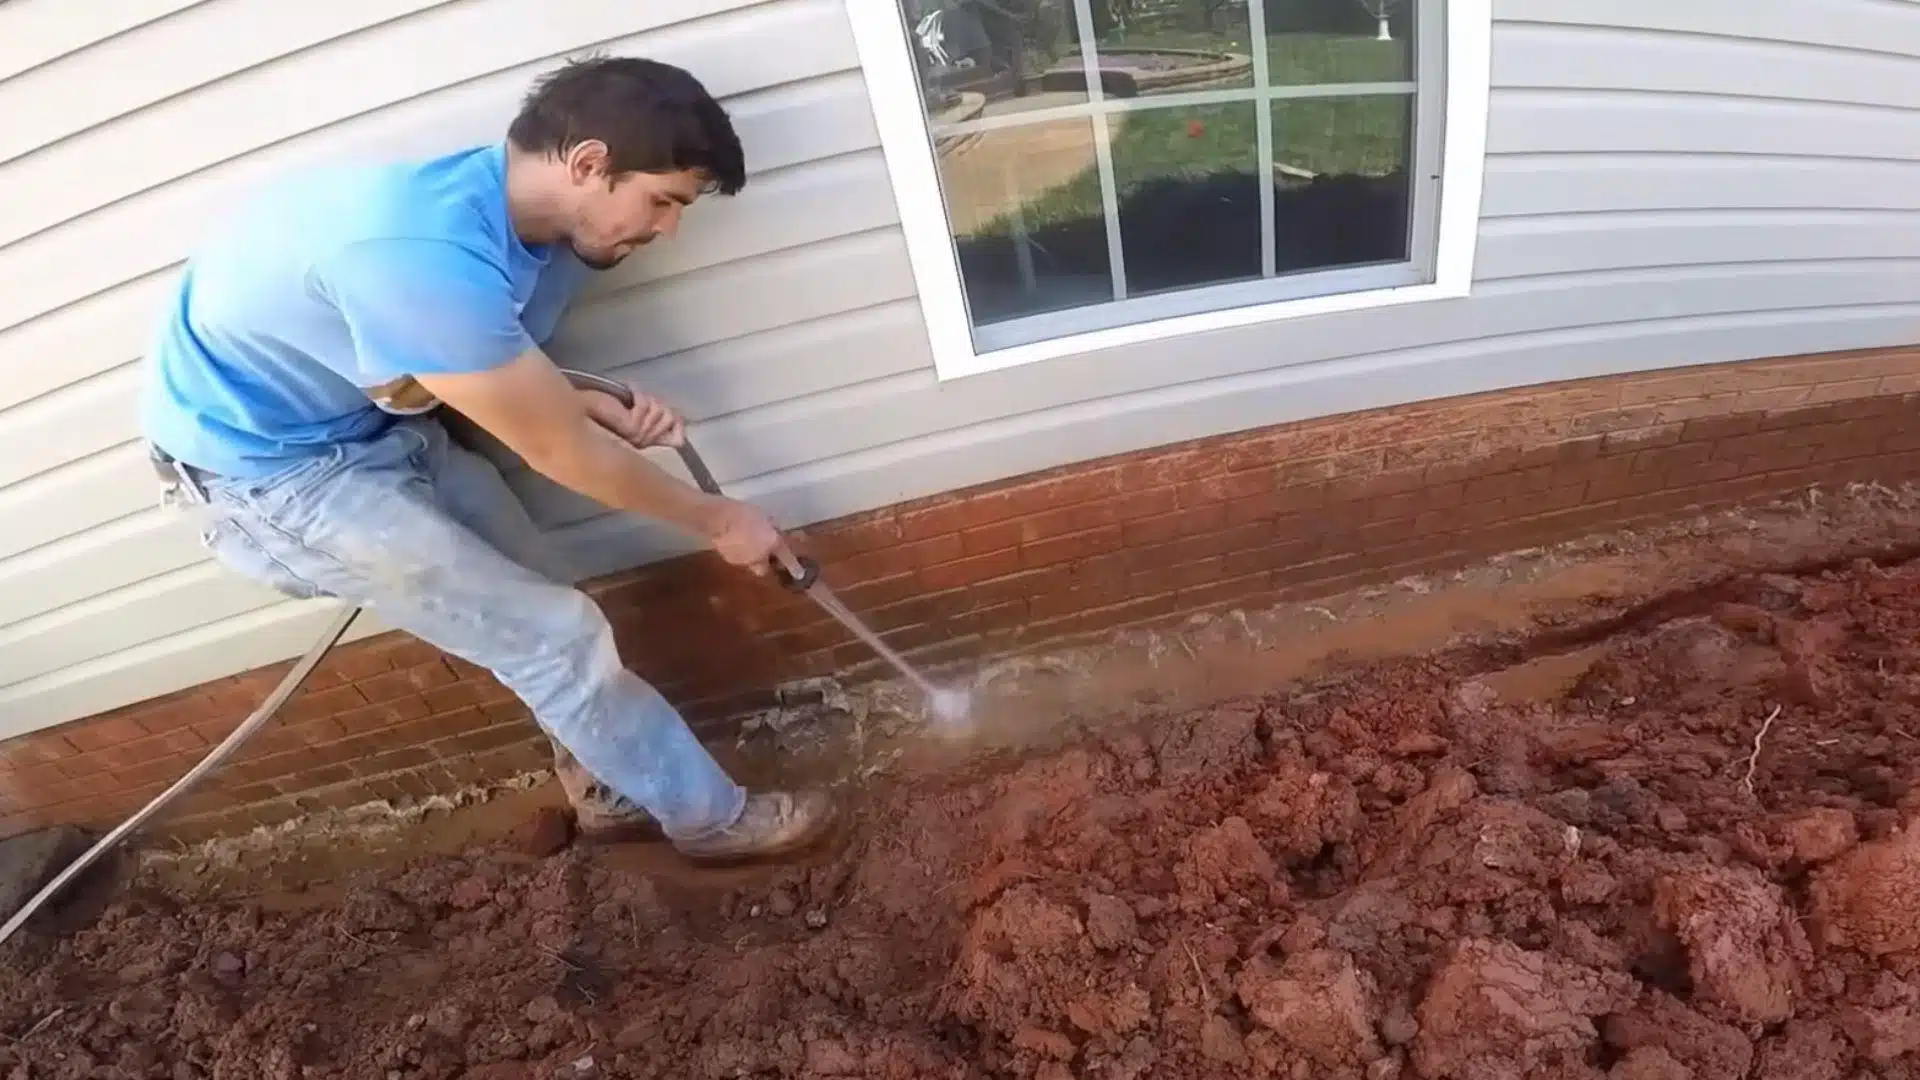
Wash excess mortar and debris from the footer and foundation wall with water, particularly at the seam where they meet.
Once clean, apply a fiber-reinforced sealant and follow it with a coat of liquid rubber.
This seals any gaps or cracks and creates a watertight barrier along the wall.
Insider Insights:
- Let the foundation wall fully dry before applying any waterproofing for maximum adhesion.
- Use a blower to speed up the drying process and remove stubborn dust.
- Focus especially on the wall-footer joint—it’s the most common leak point.
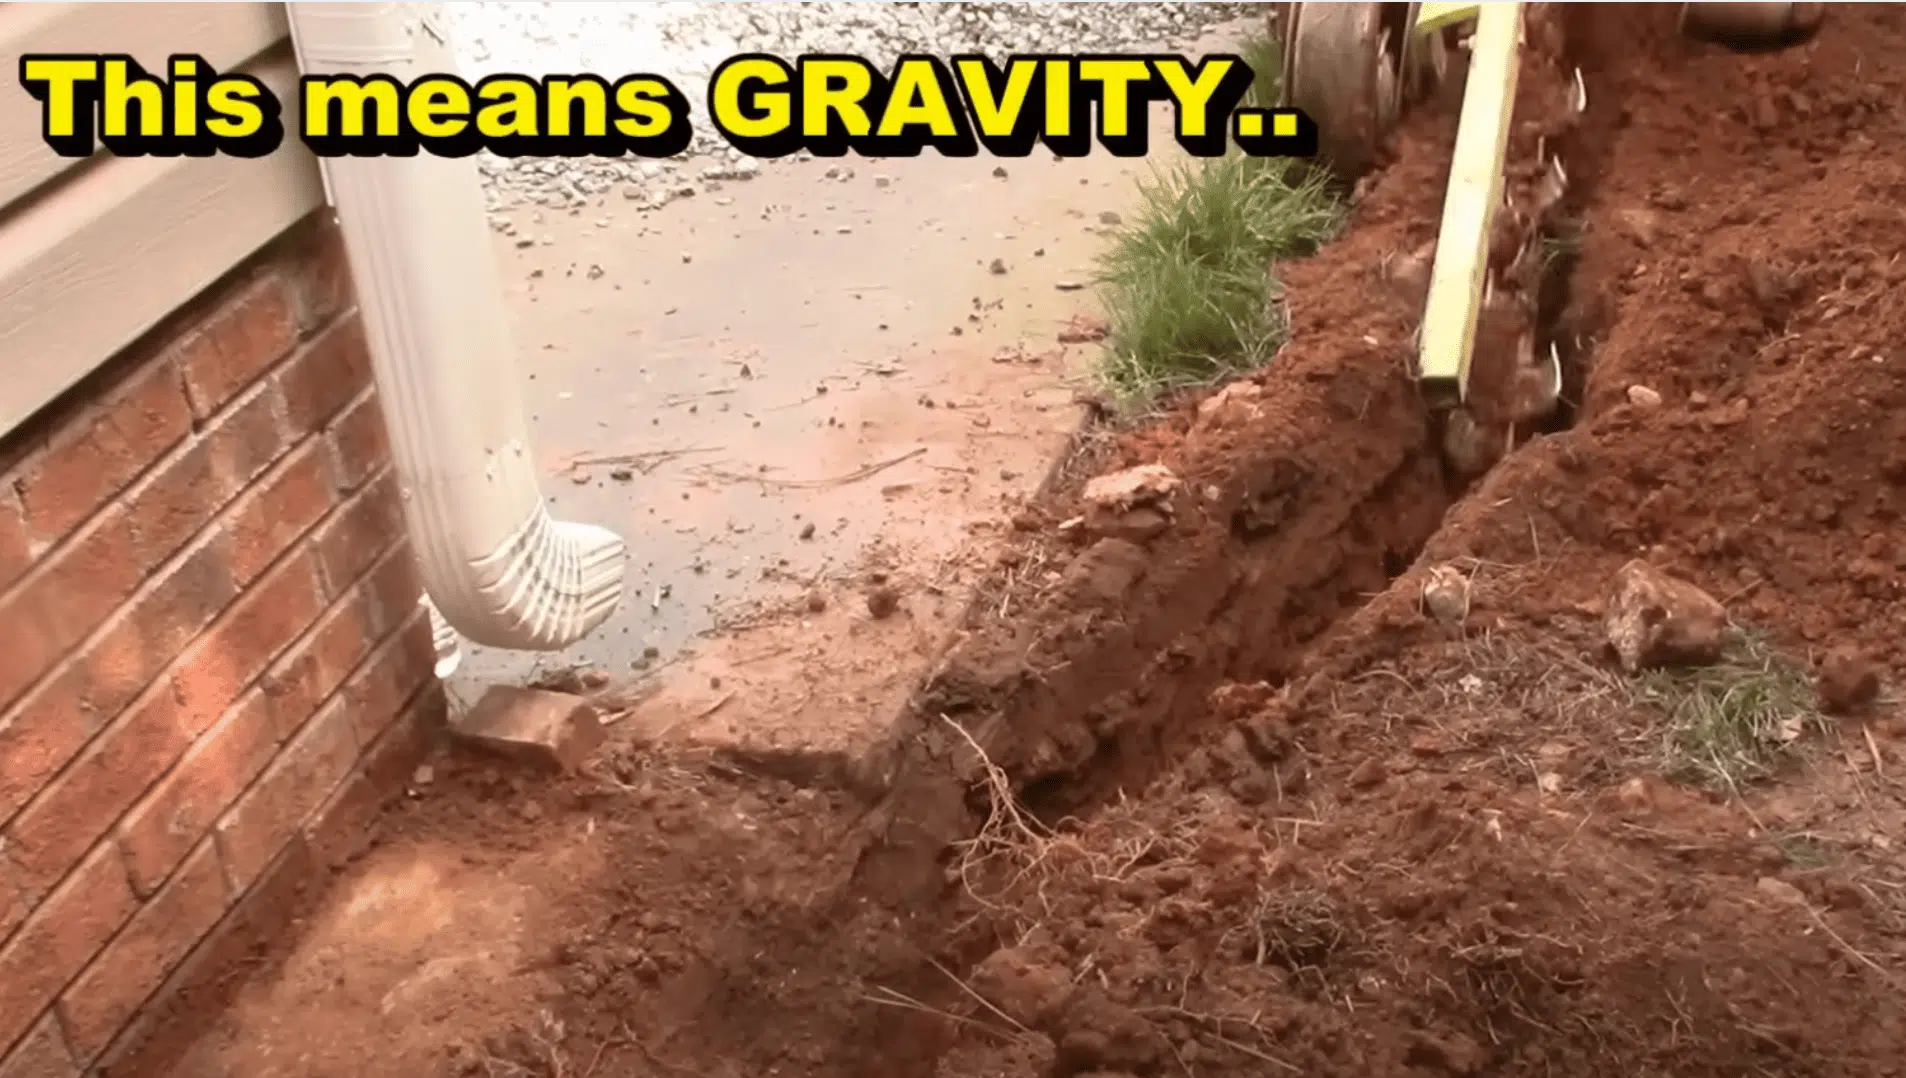
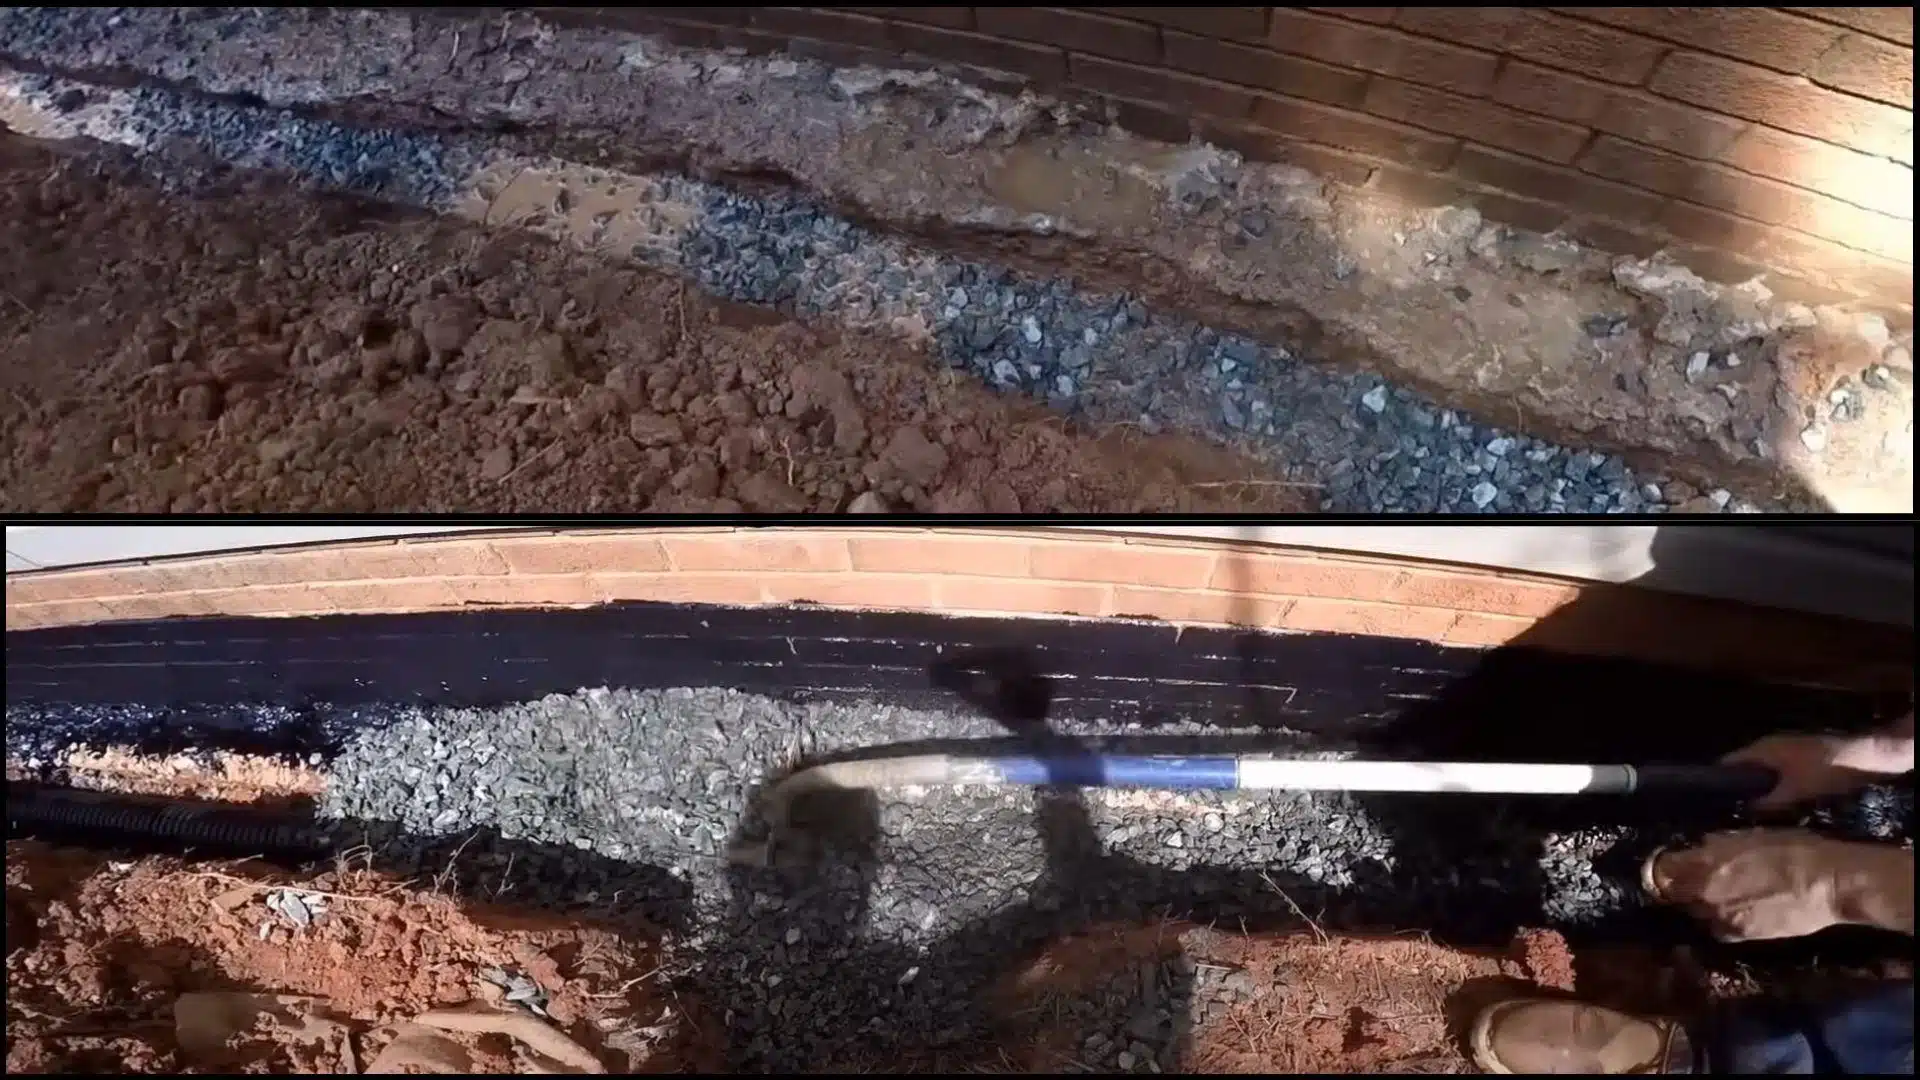
STEP 4: Install Drainage System with Gravel and Pipe
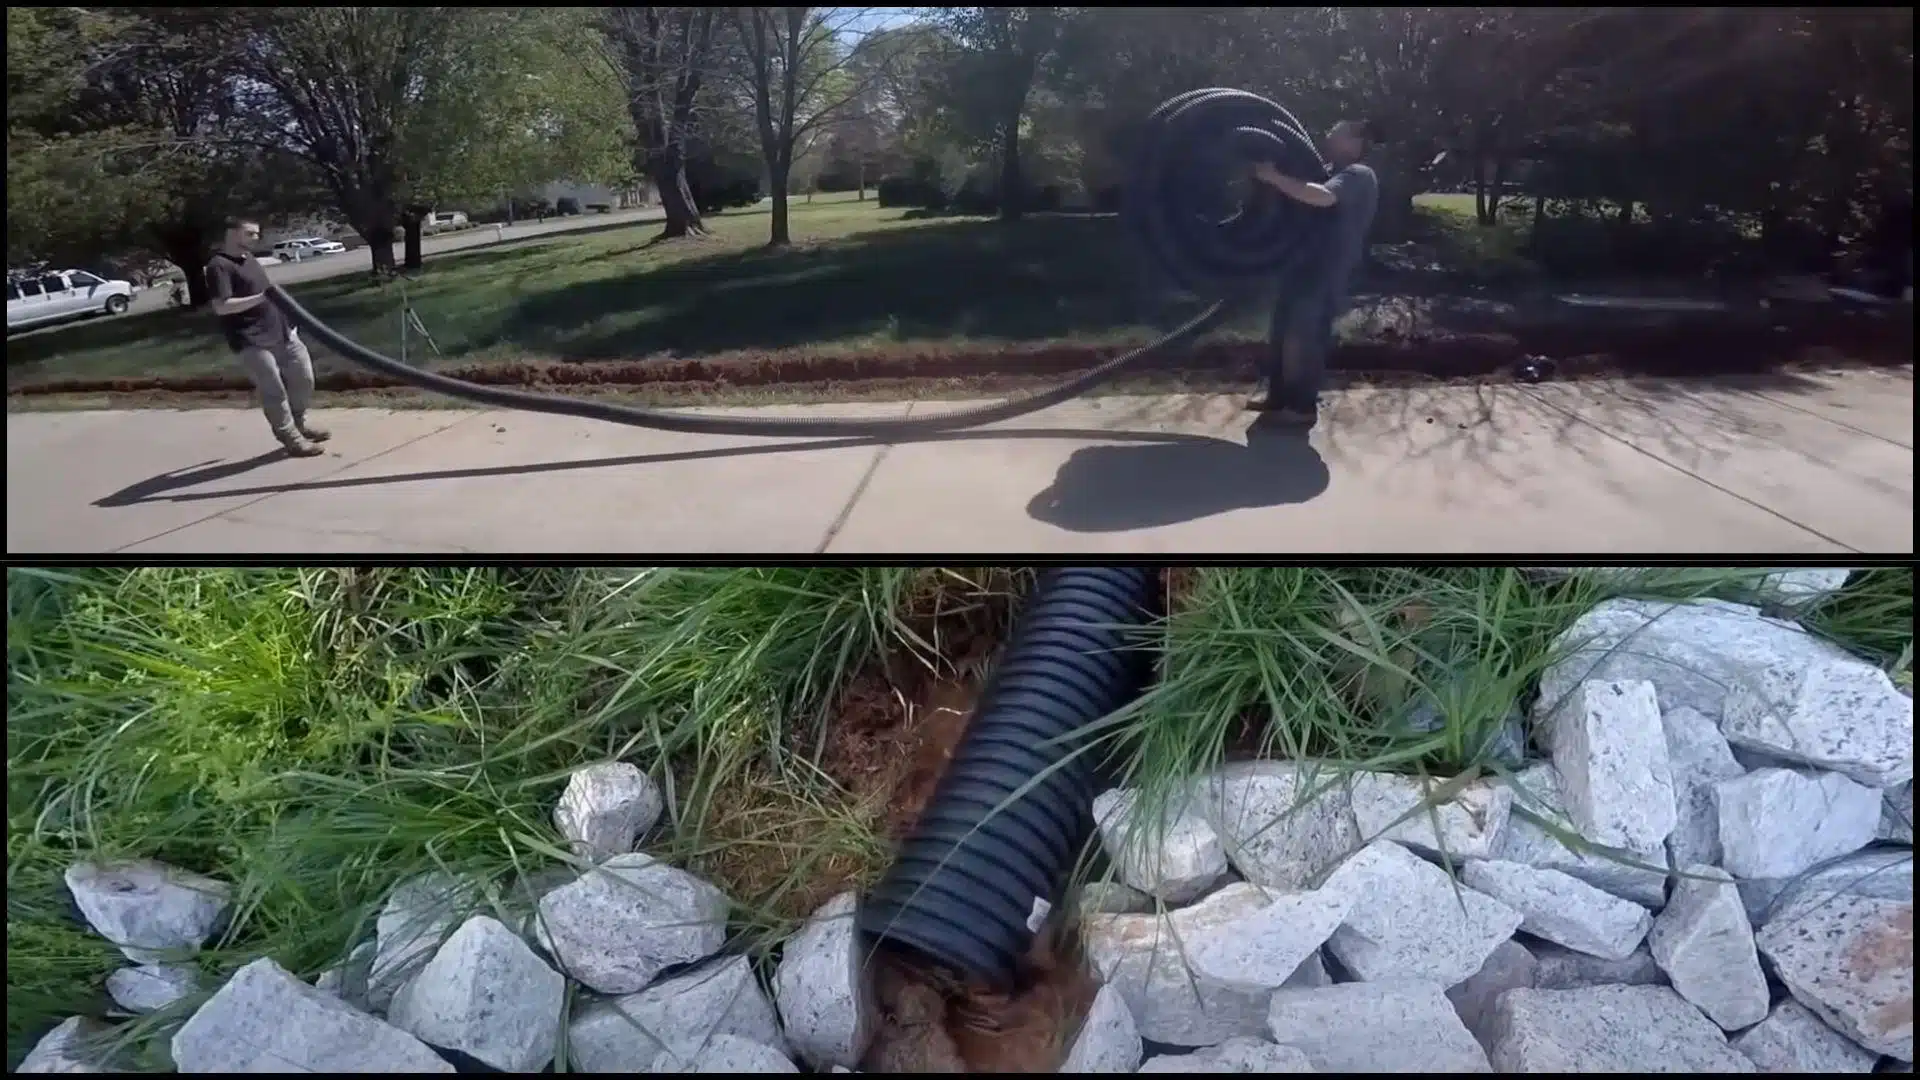
Lay a base layer of gravel at the bottom of the trench.
Place a perforated pipe (holes down) beside the footer and cover with gravel.
The gravel allows water to pass easily and enter the pipe, which then carries it away from the foundation via gravity.
Insider Insights:
- Ensure holes in the perforated pipe face downward—this allows better drainage.
- Use 67 gravel (3/4″–1″) for optimal water flow.
- Avoid crushed limestone—it compacts and restricts drainage over time.
STEP 5: Backfill and Grade for Proper Drainage
After installing the drainage system, cover it with a soil separator (landscape fabric) to prevent clogging.
Backfill the trench carefully with soil, ensuring not to exceed the height of the sill plate or siding.
Finally, grade the soil away from the foundation to promote surface water runoff, then restore landscaping and mulch.
Insider Insights:
- Use native soil for backfill when possible—it settles better and prevents water pooling.
- Grade at least 6 inches over the first 10 feet for effective runoff.
- Avoid overfilling—soil touching siding can cause wood rot or insect issues.
Video WalkThrough: See How Experts Do It
For more information, check out this video tutorial by Apple Drains
Cost Factors and Budgeting
Exterior basement waterproofing usually costs between $5,000 and $20,000 for most homes, depending on size.
Key cost factors include excavation work, waterproofing materials, drainage systems, and any necessary foundation repairs needed.
Exterior work costs more than interior methods ($2,000-$8,000), but lasts much longer and completely solves problems at their source.
Average Return on Investment (ROI) is about 30% when selling, while preventing expensive water damage repairs costing thousands more later.
Financing options, such as personal loans or home equity loans, help spread the costs over time.
DIY vs. Professional Installation
Deciding between DIY and professional waterproofing depends on your skills, budget, and the complexity of your project.
Most homeowners can handle small, simple projects, but larger jobs typically require professional expertise.
Consider these key factors before making your choice.
| ASPECT | DIY INSTALLATION | PROFESSIONAL INSTALLATION |
|---|---|---|
| When Possible | Small projects, good access, basic skills | Any project, complex foundations, permits needed |
| Main Risks | Foundation damage, no warranty, safety hazards | Higher costs, scheduling delays |
| Key Benefits | Lower costs, personal control, and own timeline | Expert knowledge, warranties, and proper equipment |
| Selection Process | Research licensing, get multiple quotes | Check BBB ratings, verify insurance, and get references |
Remember that foundation work affects your home’s structural integrity and long-term value.
While DIY can save money upfront, mistakes can cost thousands more to fix later.
Professional installation often yields better results and provides greater confidence in long-term protection for most homeowners.
Maintenance and Longevity
Exterior waterproofing systems are built to last for many years with proper care and attention.
Like any home system, they work best when you stay on top of basic maintenance.
Understanding what to expect helps you protect your investment in the long term.
- Exterior waterproofing typically lasts 10-20 years, depending on materials used, soil conditions, and local climate factors.
- Maintenance requires cleaning gutters, ensuring proper grading, and clearing debris from foundation drainage areas.
- Warning signs of system failure include returning water stains, musty odors, new foundation cracks, or standing water near walls.
- Schedule professional inspections every 3-5 years or after major storms, flooding, or if you notice any concerning changes.
Regular maintenance is much cheaper than replacing an entire waterproofing system that failed early.
Most problems can be caught and fixed easily if you stay alert to changes.
Taking care of your system now saves you money and headaches later.
Common Mistakes to Avoid
Even experienced DIYers can make costly errors during exterior waterproofing projects that reduce effectiveness.
These mistakes often lead to water problems returning within just a few years.
Learning what to avoid helps ensure your waterproofing system works properly for decades.
- Poor drainage planning: It occurs when people fail to consider where water will flow after leaving the drainage pipe.
- Using the wrong materials: It occurs when homeowners choose cheap products that aren’t designed for below-ground waterproofing or soil conditions.
- Inadequate surface preparation: It means not properly cleaning foundation walls or failing to repair cracks before applying waterproofing.
- Improper backfilling: It involves using the incorrect soil type, failing to compact properly, or filling too quickly without creating distinct layers.
- Ignoring grading issues: It means not sloping soil away from the foundation, which lets surface water pool.
These mistakes can turn a good waterproofing job into a waste of time and money.
Take time to plan properly and use quality materials for the best results.
When in doubt, consult with professionals to avoid expensive do-overs later.
Wrapping It Up
Exterior basement waterproofing proves that stopping water problems at the source is always the smartest approach.
From protecting your foundation to increasing home value, this investment pays dividends for years ahead.
While the upfront cost might seem high, it’s much cheaper than dealing with ongoing water damage.
If you tackle the project yourself or hire professionals, proper planning ensures lasting results.
Remember to maintain your system with regular inspections and basic upkeep for maximum longevity.
The sense of calmness from a completely dry basement makes every dollar spent worthwhile.
Most homeowners wish they had done this sooner after seeing the amazing results.
Share your waterproofing success stories in the comments below!
If you’re interested in more DIY projects content, feel free to click here and explore other blogs that you might enjoy.

Stephanie Grace, a graduate with a degree in Fine Arts from the Savannah College of Art and Design, has been inspiring DIY enthusiasts with her creative and practical guidance for over 14 years. Her career in design and crafting began in a small artisan workshop, where she developed a passion for transforming everyday materials into beautiful and functional items. Stephanie joined our website in 2018, rapidly gaining popularity for her easy-to-follow DIY tutorials and innovative project ideas. Since then, she has been the creative mind behind our DIY section, helping readers bring their artistic visions to life. Outside her professional pursuits, Stephanie enjoys pottery and urban gardening, hobbies that showcase her love for hands-on creativity and nature.