
Want to make your shelves look amazing?
Brass shelf rails are the perfect answer!
These shiny, golden-colored metal strips attach to your shelves and instantly make them look fancy and expensive.
Think of brass rails like jewelry for your furniture.
They’re super strong and won’t rust or break easily.
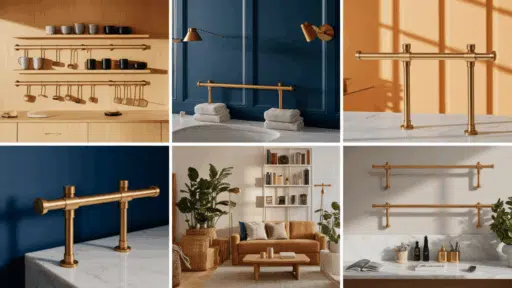
You can use them in your kitchen to hold spice jars, in your bathroom for towels, or in your bedroom for books and decorations.
The best part?
They’re easy to install! Just measure, mark, and screw them on.
Brass rails work with any style – modern, vintage, or classic.
They’ll make your room look like a magazine photo!
Ready to upgrade your space?
What are Brass Shelf Rails?
Ever wondered how those beautiful brass rails support your favorite books?
Let’s plunge in!
Brass shelf rails are graceful metal supports that hold your shelves in place.
They come in different styles – traditional, modern, and vintage – to match your home’s look.
Want to know a secret?
Brass doesn’t just look pretty, it’s super durable too! Unlike other metals, it won’t rust easily.
Have you noticed how brass develops that gorgeous patina over time?
That’s what makes each rail unique to your home.
What’s your favorite style of brass rail? Traditional with ornate details, or sleek modern lines?
Types of Brass Shelf Rails
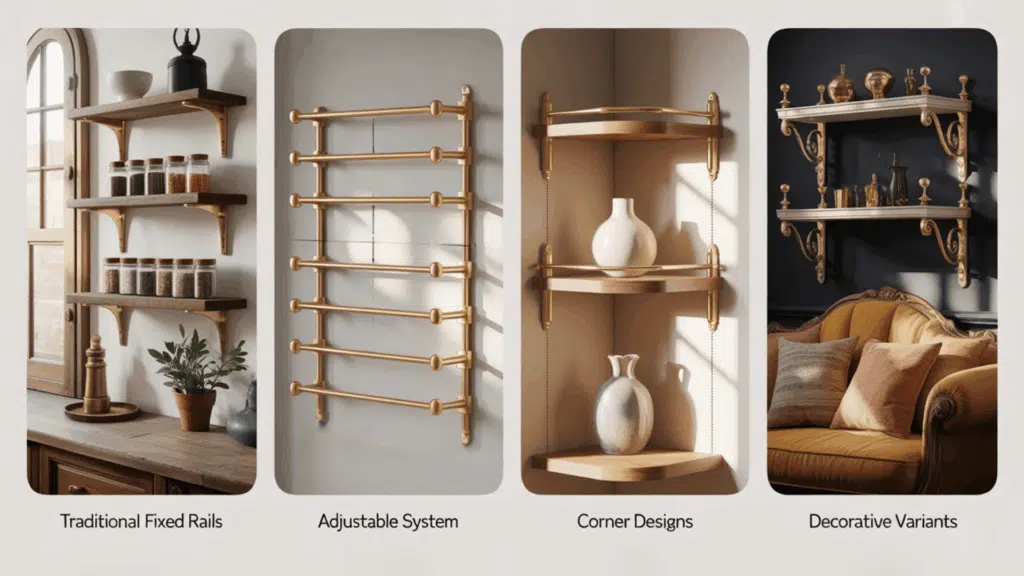
Brass shelf rails come in different styles. Some are fixed in place, while others can be adjusted or shaped to fit corners.
A few have decorative ends that match room themes.
Let’s go over each style.
1. Traditional Fixed Rails
These rails are installed in a permanent position and don’t move.
They provide solid support for items on open shelves.
Ideal for kitchens, living rooms, or home offices.
They keep things neatly in place with a classic look.
2. Adjustable Systems
These systems allow you to shift rails up or down.
You can customize shelf height based on what you store.
Perfect for growing families or changing décor needs.
They offer flexibility without giving up style or function.
3. Corner Designs
Corner rails are shaped to follow shelf edges or curves.
They wrap around two or more sides for extra security.
This setup adds stability while enhancing visual appeal.
It’s a smart choice for corner shelves or wraparound units.
4. Decorative Variants
These rails feature ornate tips, finishes, or curved details.
They work like regular rails but with added flair.
People choose them to match vintage, modern, or luxe styles.
They turn basic shelving into a beautiful room feature.
Benefits of Brass Shelf Rails
Brass shelf rails do more than hold things steady.
They give shelves a clean border, help organize items, and add a nice finish.
Brass is also tough and doesn’t rust, so it’s great in damp places.
These rails come in shiny, brushed, or darker finishes and fit many shelf sizes.
Here’s where brass shelf rails work best:
- Kitchen: Brass shelf rails keep dishes, jars, and mugs secure on open shelving while adding a polished, decorative edge to displays.
- Bathroom: Bathroom rails hold towels, bottles, and supplies on vanity or above-toilet shelves, preventing items from slipping in damp spaces.
- Living Room: Brass rails frame books, plants, or photos on floating shelves, giving structure while showcasing favorite décor and reducing clutter.
- Office: Brass rails organize notebooks, tools, and supplies in workspaces, adding a grand touch without looking too industrial.
- Stores: Brass rails help shelves stay neat and well-styled, perfect for boutique shops or display areas where product presentation matters.
Pick the finish that matches your style, measure your shelves, and get ready to love how organized and polished everything looks!
Tools and Materials
To install brass rails properly, you’ll need the right tools and materials.
Each item plays a role in measuring, cutting, and securing the rails.
This list will help you stay organized and ready to start.
| ITEM | USE | COST (USD) |
|---|---|---|
| Brass rods/posts | The main part of the rail | $20–$40 |
| Measuring tape | Mark where the posts go | $5–$10 |
| Drill + bits | Make holes for screws | $25–$50 |
| Screws & anchors | Attach posts to the shelf | $5–$10 |
| Hacksaw or cutter | Cut rods to the right size | $10–$30 |
| Screwdriver/wrench | Tighten the screws | $8–$15 |
| Adhesive (optional) | Extra hold for some posts | $5–$12 |
Step-by-Step Installation
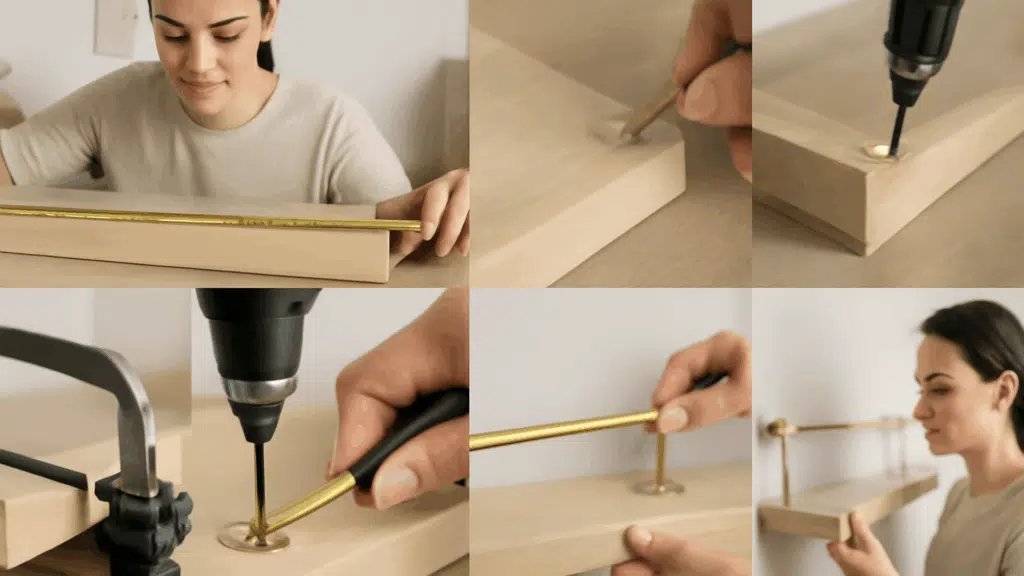
Installing brass shelf rails is a simple DIY task with the right approach.
These steps will guide you through a clean and secure setup.
From measuring to final touches, each step matters for a polished finish.
Follow along to create strong, stylish open shelving.
Step 1: Measure the Shelf
Measure the full length and depth with tape, then plan for post spacing every 8 to 14 inches, depending on the storage weight.
Step 2: Mark the Post Spots
Lightly mark with a pencil where each post will be placed, starting from the ends and working inward for even spacing.
Step 3: Cut the Rods
Measure the exact rod length needed between posts and use a hacksaw or pipe cutter. File the ends smooth after cutting to avoid snags.
Step 4: Drill Pilot Holes
Make starter holes using a drill with the right size bit to make screwing in posts easier without cracking the wood.
Step 5: Attach the Posts
Line up the post with your marks and screw it down firmly. Ensure the post is upright and steady before fully tightening.
Step 6: Slide in the Rods
Push the brass rods through each post opening, gently twisting while inserting for snug fits.
Step 7: Secure Corners
For shelves with turns or edges, use corner connectors or special corner posts to maintain a smooth, continuous appearance.
Once rails are installed, check stability and clean pencil marks to enjoy your elevated, impressive shelf look.
With careful installation, your rails create a lasting style that goes beyond just holding items.
Shopping Considerations
Look for solid brass instead of coated metal. Solid pieces last longer and feel sturdy.
Make sure the finish looks smooth and that the posts fit snugly with the rods.
| BRAND/STORE | MATERIAL & FINISH | PRICE RANGE (USD) | NOTABLE FEATURES |
|---|---|---|---|
| Pepe & Carols | Solid brass, various finishes | $12–$21+ per component | Handmade to order, multiple styles, ships in 2–5 weeks |
| The Brass Addict | Solid unlacquered brushed brass | $6.59+ per component | Rods and posts sold separately, unique brushed finish, 3–4 week delivery |
| Rejuvenation | Solid brass | $39 per set/component | Traditional style, modular system |
| KegWorks | Unlacquered polished brass tubing | Price varies by length (2–8 ft), e.g., $49.95 for 2 ft | Bar foot rail tubing, customizable lengths, patinas naturally |
Choosing the right brass rails means balancing style, quality, and cost.
Solid brass ensures long-term durability and a richer look over time.
With the right brand, your shelving will look sharp and last for years.
Design Inspiration
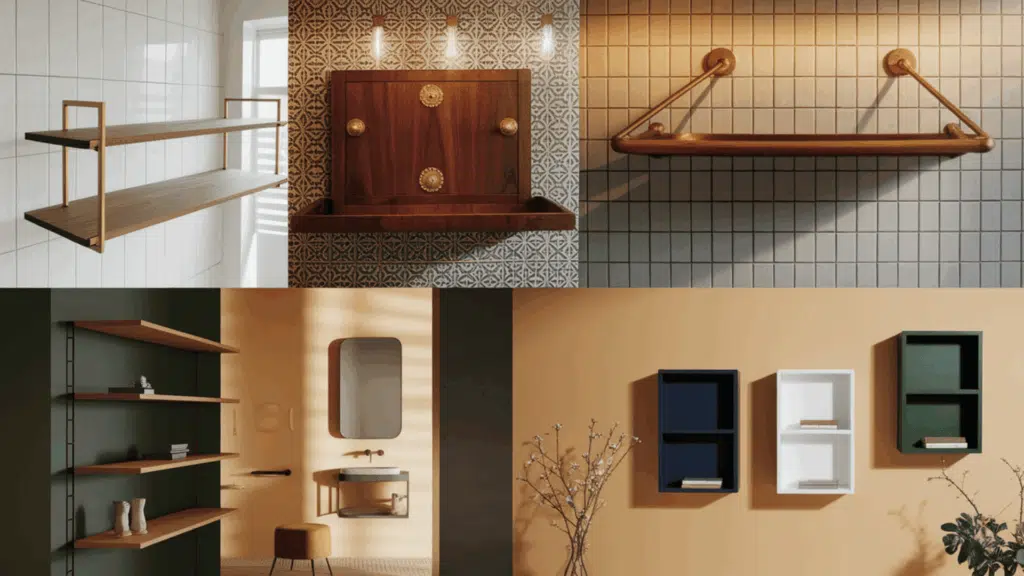
Brass shelf rails are more than functional—they’re also a stylish detail that enhances many interior looks.
With the right materials and layout, they can add both character and cohesion to your shelving setup.
Contemporary Styling Ideas
For a fresh and open feel, use light woods like oak, birch, or ash.
Pair them with simple, slim brass rails.
The mix creates a soft, airy look that feels calm and clean.
This works well in kitchens and bathrooms where you want everything to feel open and well-lit.
Keep the rail design minimal to let the wood and brass shine together.
Vintage and Retro Applications
To evoke a sense of history, choose rail ends or knobs shaped like historical objects.
Use them with dark-stained wood like mahogany or walnut.
Adding a marble shelf or patterned tile behind the rail will make it stand out even more.
This style works great in classic kitchens, study nooks, or cozy living areas that need a bit of old charm.
Common Errors
Even simple installs can undergo hiccups, but knowing what to expect and how to fix issues can save time and frustration.
Here are the most common problems people face during setup.
Quick fixes make all the difference in getting it just right.
- Sharp rod edges: Smooth them with a metal file
- Posts don’t align: Recheck measurements before drilling
- Hard shelf surface: Use stronger bits or wall anchors
- Loose rods: Add a little adhesive or use locking posts
Mistakes happen but are easily corrected with tweaks, so double-check measurements and work slowly when drilling or cutting.
A careful install keeps shelves safe and stable, ensuring you’re ready for a smooth, stunning project finish.
Maintenance and Care
Brass rails are easy to care for with regular upkeep to maintain their beautiful appearance.
Following these simple maintenance steps will keep your rails looking their best.
• Basic Cleaning: For coated brass, use soapy water; for bare brass, use a damp cloth and dry quickly to prevent water spots.
• Monthly Polishing: Polish with brass cleaner or a homemade lemon juice and baking soda mixture to maintain shine.
• Avoid Damage: Never use harsh chemicals that can scratch or dull the surface finish.
• Spot Treatment: For dark spots, apply a vinegar-soaked cloth briefly, then wipe gently to remove tarnishing.
• Regular Maintenance: Weekly dusting and monthly deep cleaning prevent buildup and preserve the finish.
With consistent care using these methods, your brass rails will retain their lustrous finish for years.
These small maintenance steps ensure your investment continues to enhance your space beautifully.
Conclusion
Brass shelf rails are a practical and beautiful way to upgrade any space with open shelves.
They help organize your items while also adding a warm, golden touch to your room’s style.
Their strength, design variety, and long-lasting finish make them a dependable choice.
Installing them doesn’t take a few tools or time, and even simple setups can make your shelves feel complete.
When picking your rails, consider your shelf size, room style, and the items you’ll store.
A little planning goes a long way.
Once installed, they’re they’re cared for and offer lasting value.
If you’re looking for a way to polish and purposefully decorate your shelves, brass shelf rails are a reliable and stylish option.
Have you used brass shelf rails in your home?
Share your experience and tips in the comments below!

With a Master in Architectural Studies from University of Pennysylvania, Marwa Haydar has pioneered living spaces since 2005. Her expertise, initially honed in a prestigious architectural firm, is evident in her approach to creating environments. Marwa became part of our team in 2019 and has since been a driving force in our home improvement section, known for her practical yet stylish solutions. She’s been spearheading our design workshops since then, infusing her passion for teaching into her work. In her leisure time, Marwa enjoys exploring historic architecture and is an enthusiastic pottery hobbyist, further enriching her understanding of form and texture.