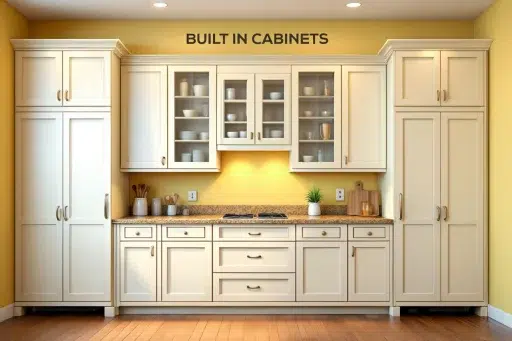
Ever dreamed of those stunning built-in cabinets you see in magazines? You can create them yourself! This guide walks you through building custom shelving that adds both style and storage to any room.
With just basic tools and materials, you’ll learn how to measure your space, build cabinet frames, and add those perfect finishing touches. No professional experience is needed.
By the end of this post, you’ll have the confidence to tackle this weekend project and remake an ordinary wall into a showstopper in your home. Your friends will be shocked when you tell them, “I built that myself!”
Ready to create something beautiful and functional that perfectly fits your space? Let’s get started!
What Are Built-In Cabinets?
Built-in cabinets are custom storage solutions that are permanently fixed to a home’s structure rather than freestanding furniture.
They’re designed to fit precisely into specific spaces, creating a smooth integration with walls, nooks, or alcoves.
Unlike movable furniture, built-ins become part of your home’s elements. They’re typically constructed on-site or pre-fabricated to exact measurements, maximizing every inch of available space while creating a cohesive, intentional look.
In our upcoming DIY steps, I’ll guide you through planning and installing your built-in cabinets to change underutilized spaces into functional, attractive storage solutions.
Benefits of Installing Built-In Cabinets
Built-in cabinets offer a perfect combination of functionality and aesthetics for any home. These custom storage solutions maximize space efficiency by utilizing areas that would otherwise remain unused, such as awkward corners or recessed walls.
Unlike freestanding furniture, built-ins create an effortless, integrated look that enhances your home’s character.
Key benefits include:
- Custom design tailored to your specific needs and space
- Increased property value for potential resale
- Reduced dust collection compared to freestanding units
- Better space utilization, especially in small rooms
- Cohesive, polished appearance that ties a room together
Even in living rooms, bedrooms, or home offices, built-in cabinets provide organization while serving as a design focal point that reflects your personal style.
Planning and Preparation
Proper planning is essential to ensuring success before starting your built-in cabinet project. Start by carefully measuring your space and considering how the cabinets will function in your daily life.
Assessing Your Space
Before beginning any home organization project, carefully evaluate your current space. Take measurements of rooms, closets, and storage areas to understand spatial limitations.
Consider traffic flow patterns and how you naturally use each area. Identify problem zones where clutter accumulates or storage solutions fail.
Take note of constructive features that might impact storage options, such as sloped ceilings or built-ins. This assessment creates a foundation for smart organizational decisions that work with your specific environment rather than against it.
Choosing the Right Style and Material
Selecting the appropriate style and material for your project requires striking a balance between aesthetics and functionality. Consider your environment’s demands—durability for high-traffic areas, water resistance for bathrooms.
Material choices like hardwood offer timeless appeal but require maintenance, while laminate provides affordability and resilience.
Style should complement existing décor while reflecting personal taste. If eco-friendliness is important to you, research the sustainability credentials of the materials.
Remember that high-quality materials generally offer better long-term value, despite their higher initial costs.
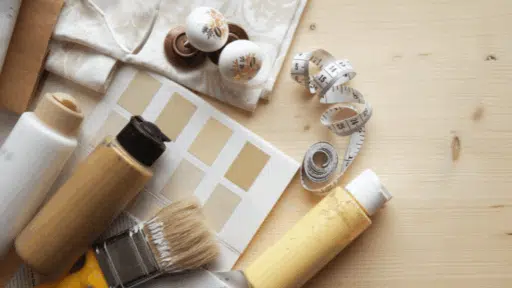
Materials Needed
Before beginning your built-in cabinet project, gather these essential tools and supplies. Each item is crucial in ensuring your cabinets are measured accurately, cut precisely, and installed securely for a professional-looking result.
| TOOL | DESCRIPTION | ESTIMATED COST |
|---|---|---|
| Tape Measure | Used for accurate measurements of materials and spaces | $10-25 |
| Level | Ensures horizontal and vertical surfaces are perfectly straight | $15-40 |
| Circular Saw/Table Saw | Makes straight cuts through wood and other materials | $100-300 |
| Jigsaw | Makes curved, angled, or intricate cuts in materials | $50-150 |
| Drill/Driver | Creates holes and drives screws into materials | $75-200 |
| Pocket Hole Jig | Creates angled holes for strong, hidden joints | $40-150 |
| Stud Finder | Locate wall studs for secure mounting | $20-50 |
| Clamps | Holds materials in place during assembly or gluing | $30-100 |
| Sander | Smooths surfaces and removes finishes | $50-150 |
| Paintbrushes/Rollers | Applies paint, stain, or finish to surfaces | $20-60 |
| Safety Equipment | Protects eyes, lungs, and hands during work | $30-80 |
Investing in quality tools now will save you time and money on your woodworking projects for years to come.
Total Estimated Cost – $295–$347.
Step-by-Step Guide: How To Make Built-in Cabinets
Creating beautiful built-in cabinets is achievable for DIY enthusiasts willing to take their time with each phase. The process involves careful planning, precise measuring, thoughtful construction, and meticulous finishing.
Follow these detailed steps to change an ordinary wall into a custom storage solution that looks like it was always meant to be there.
Step 1: Plan the Built-in Design
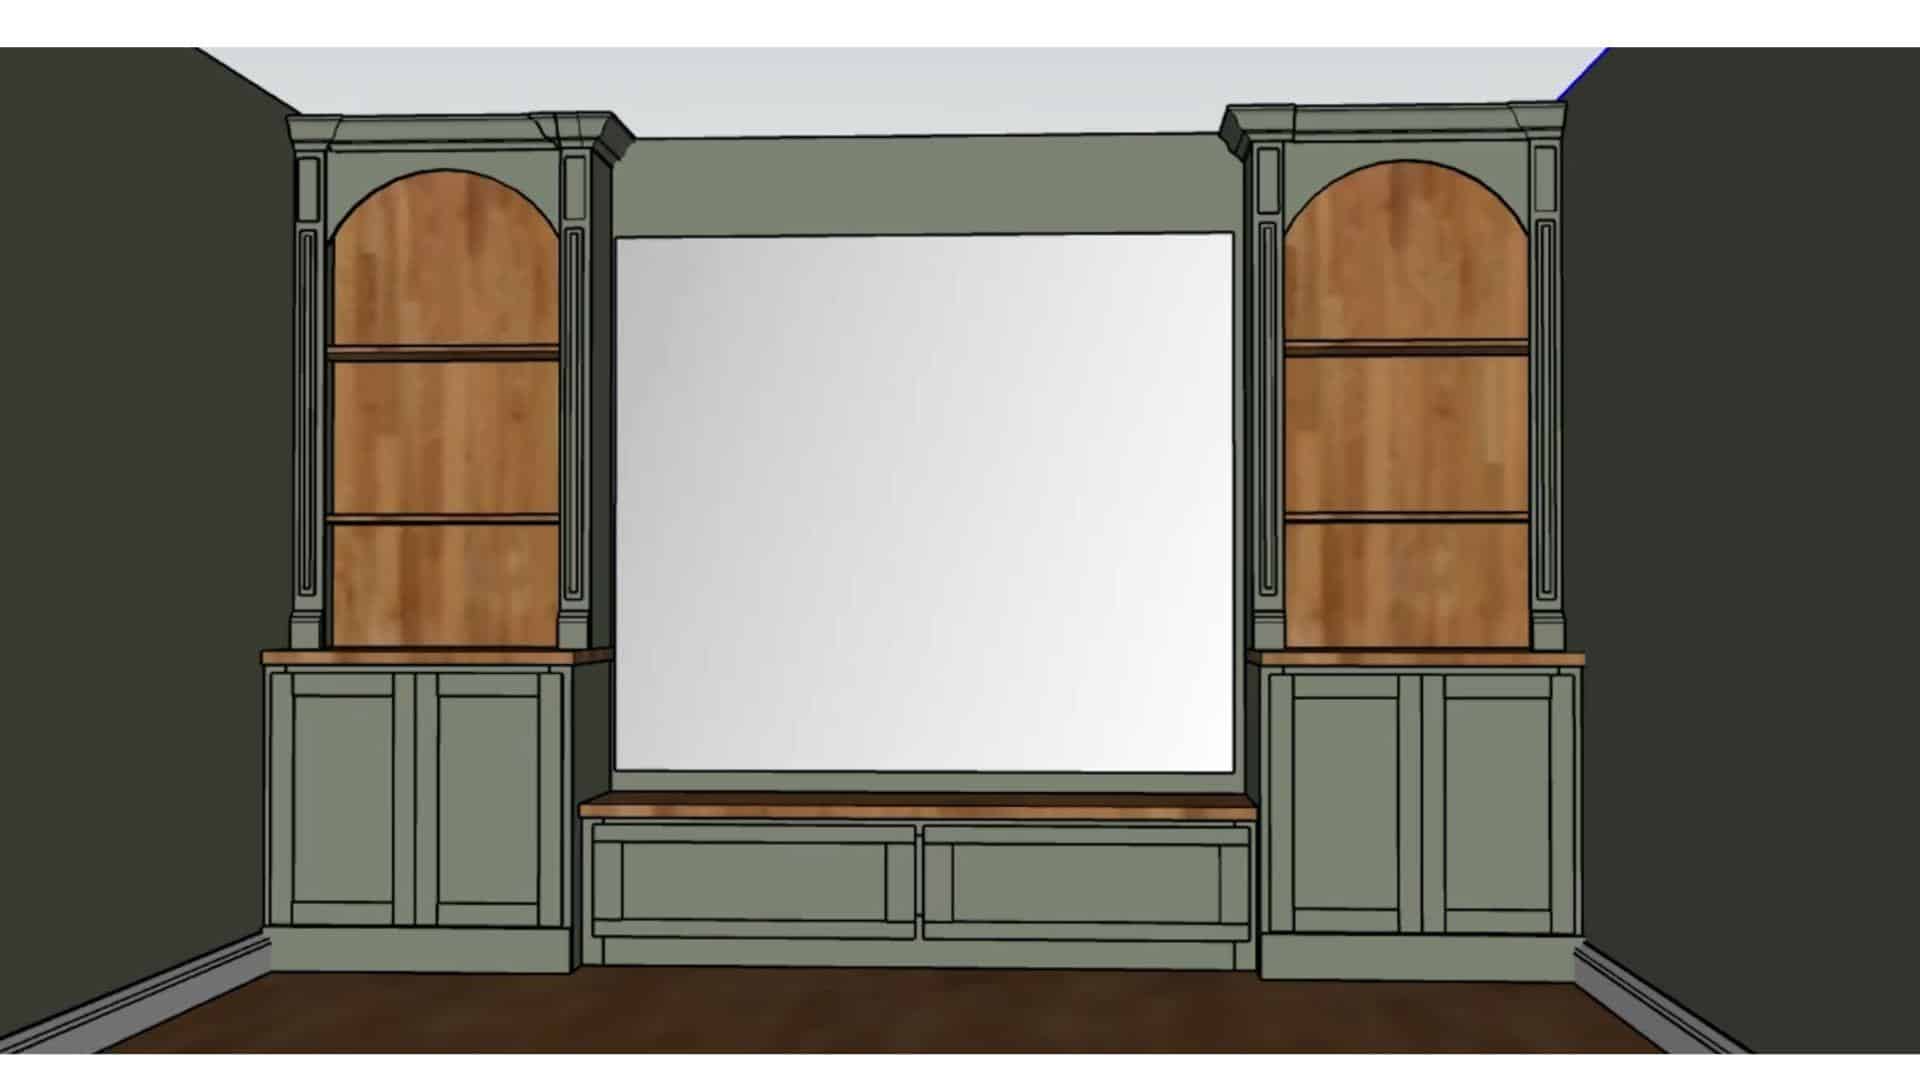
Start by assessing the space where the built-in will go. Measure the dimensions carefully, noting any features like windows or baseboards that could impact the design.
Choose whether you want bookshelves, storage cabinets, or a combination. Sketch your ideas to visualize the final look before cutting materials.
Step 2: Cut the Plywood for the Cabinets
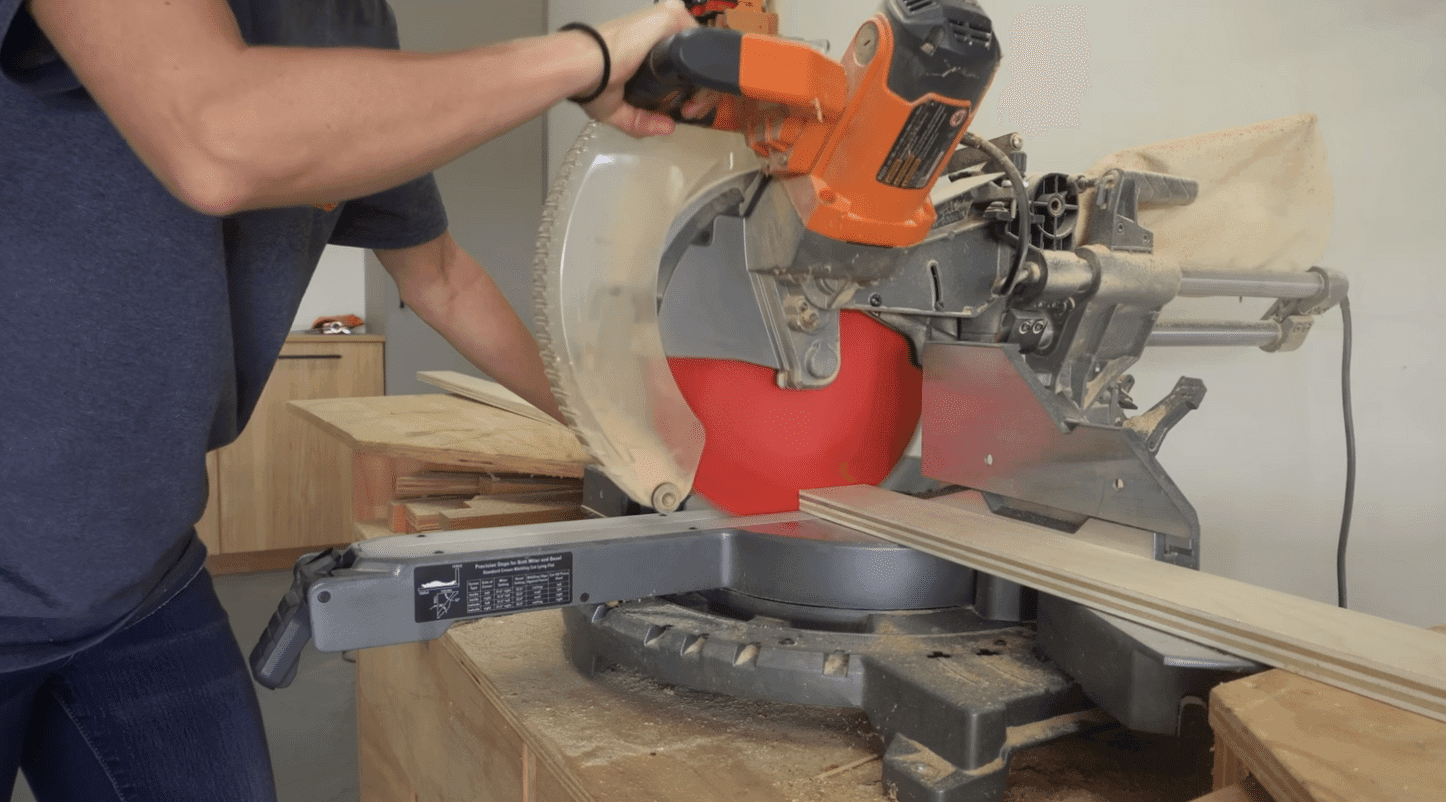
Cut 3/4-inch birch plywood into the required pieces for the cabinets. These will form the base and upper cabinets, and they should be sized to fit the space you measured in step one. Consider how you will install the shelves and
Leave room for any additional features like a bench or crown molding.
Step 3: Assemble the Cabinet Boxes
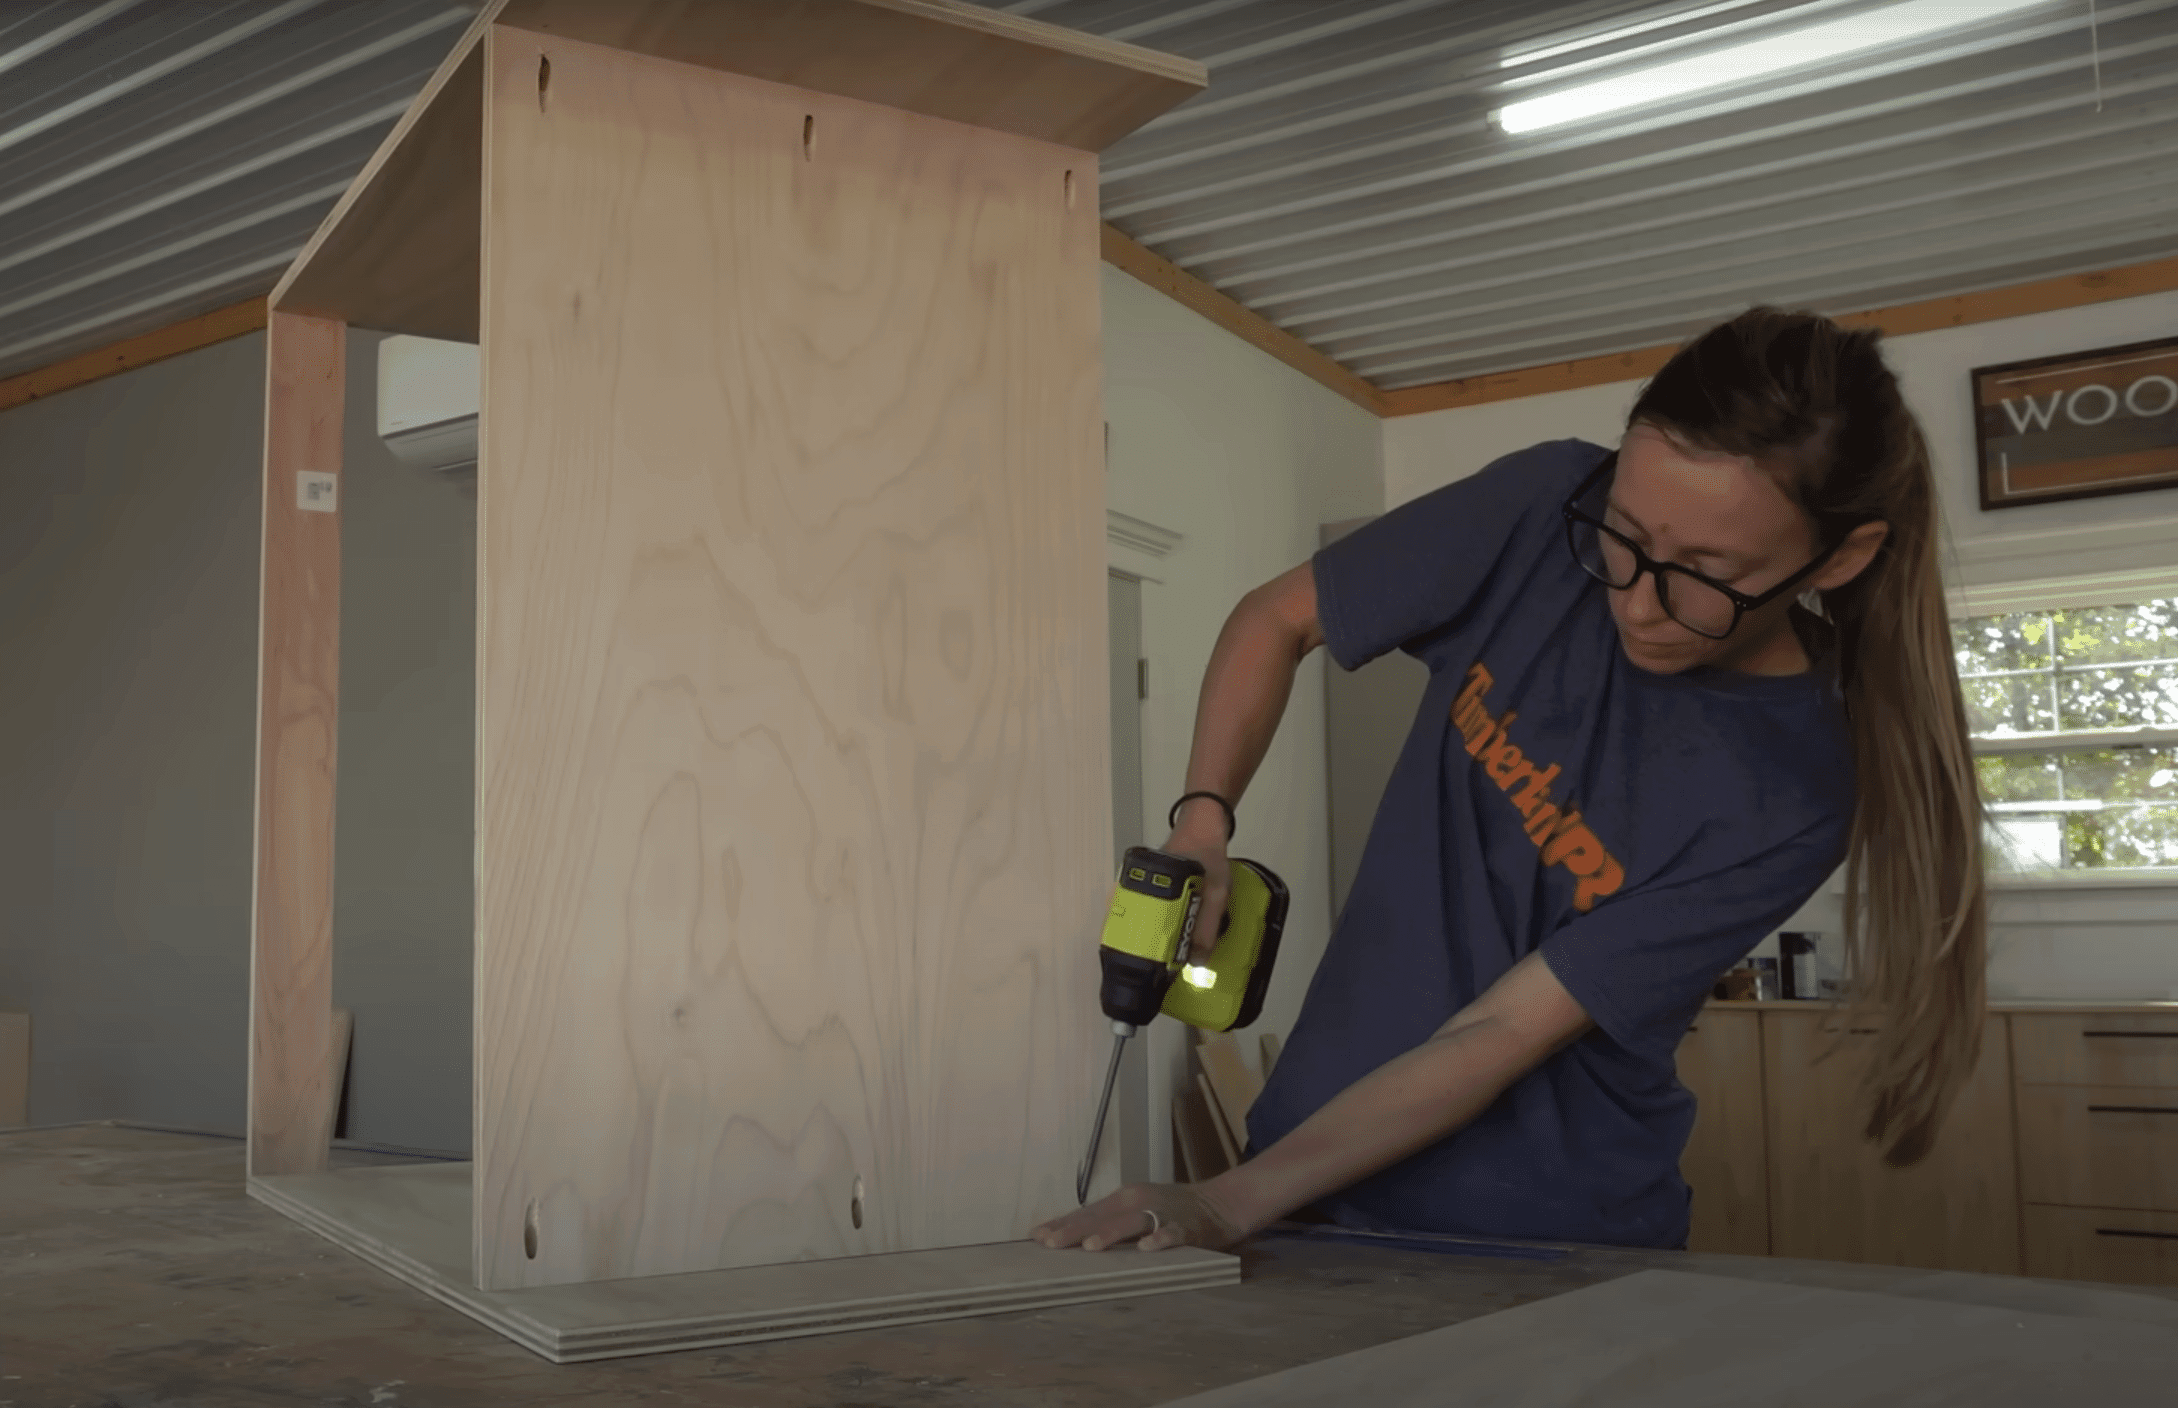
Use pocket hole screws to assemble the cabinet boxes. For upper cabinets, use 3/4-inch plywood for the sides and top, with 1/2-inch plywood for the back.
As these will rest on the base cabinets, leave out the bottom panel if necessary. Ensure all edges are aligned properly for a neat finish.
Step 4: Add Face Frames and Trim
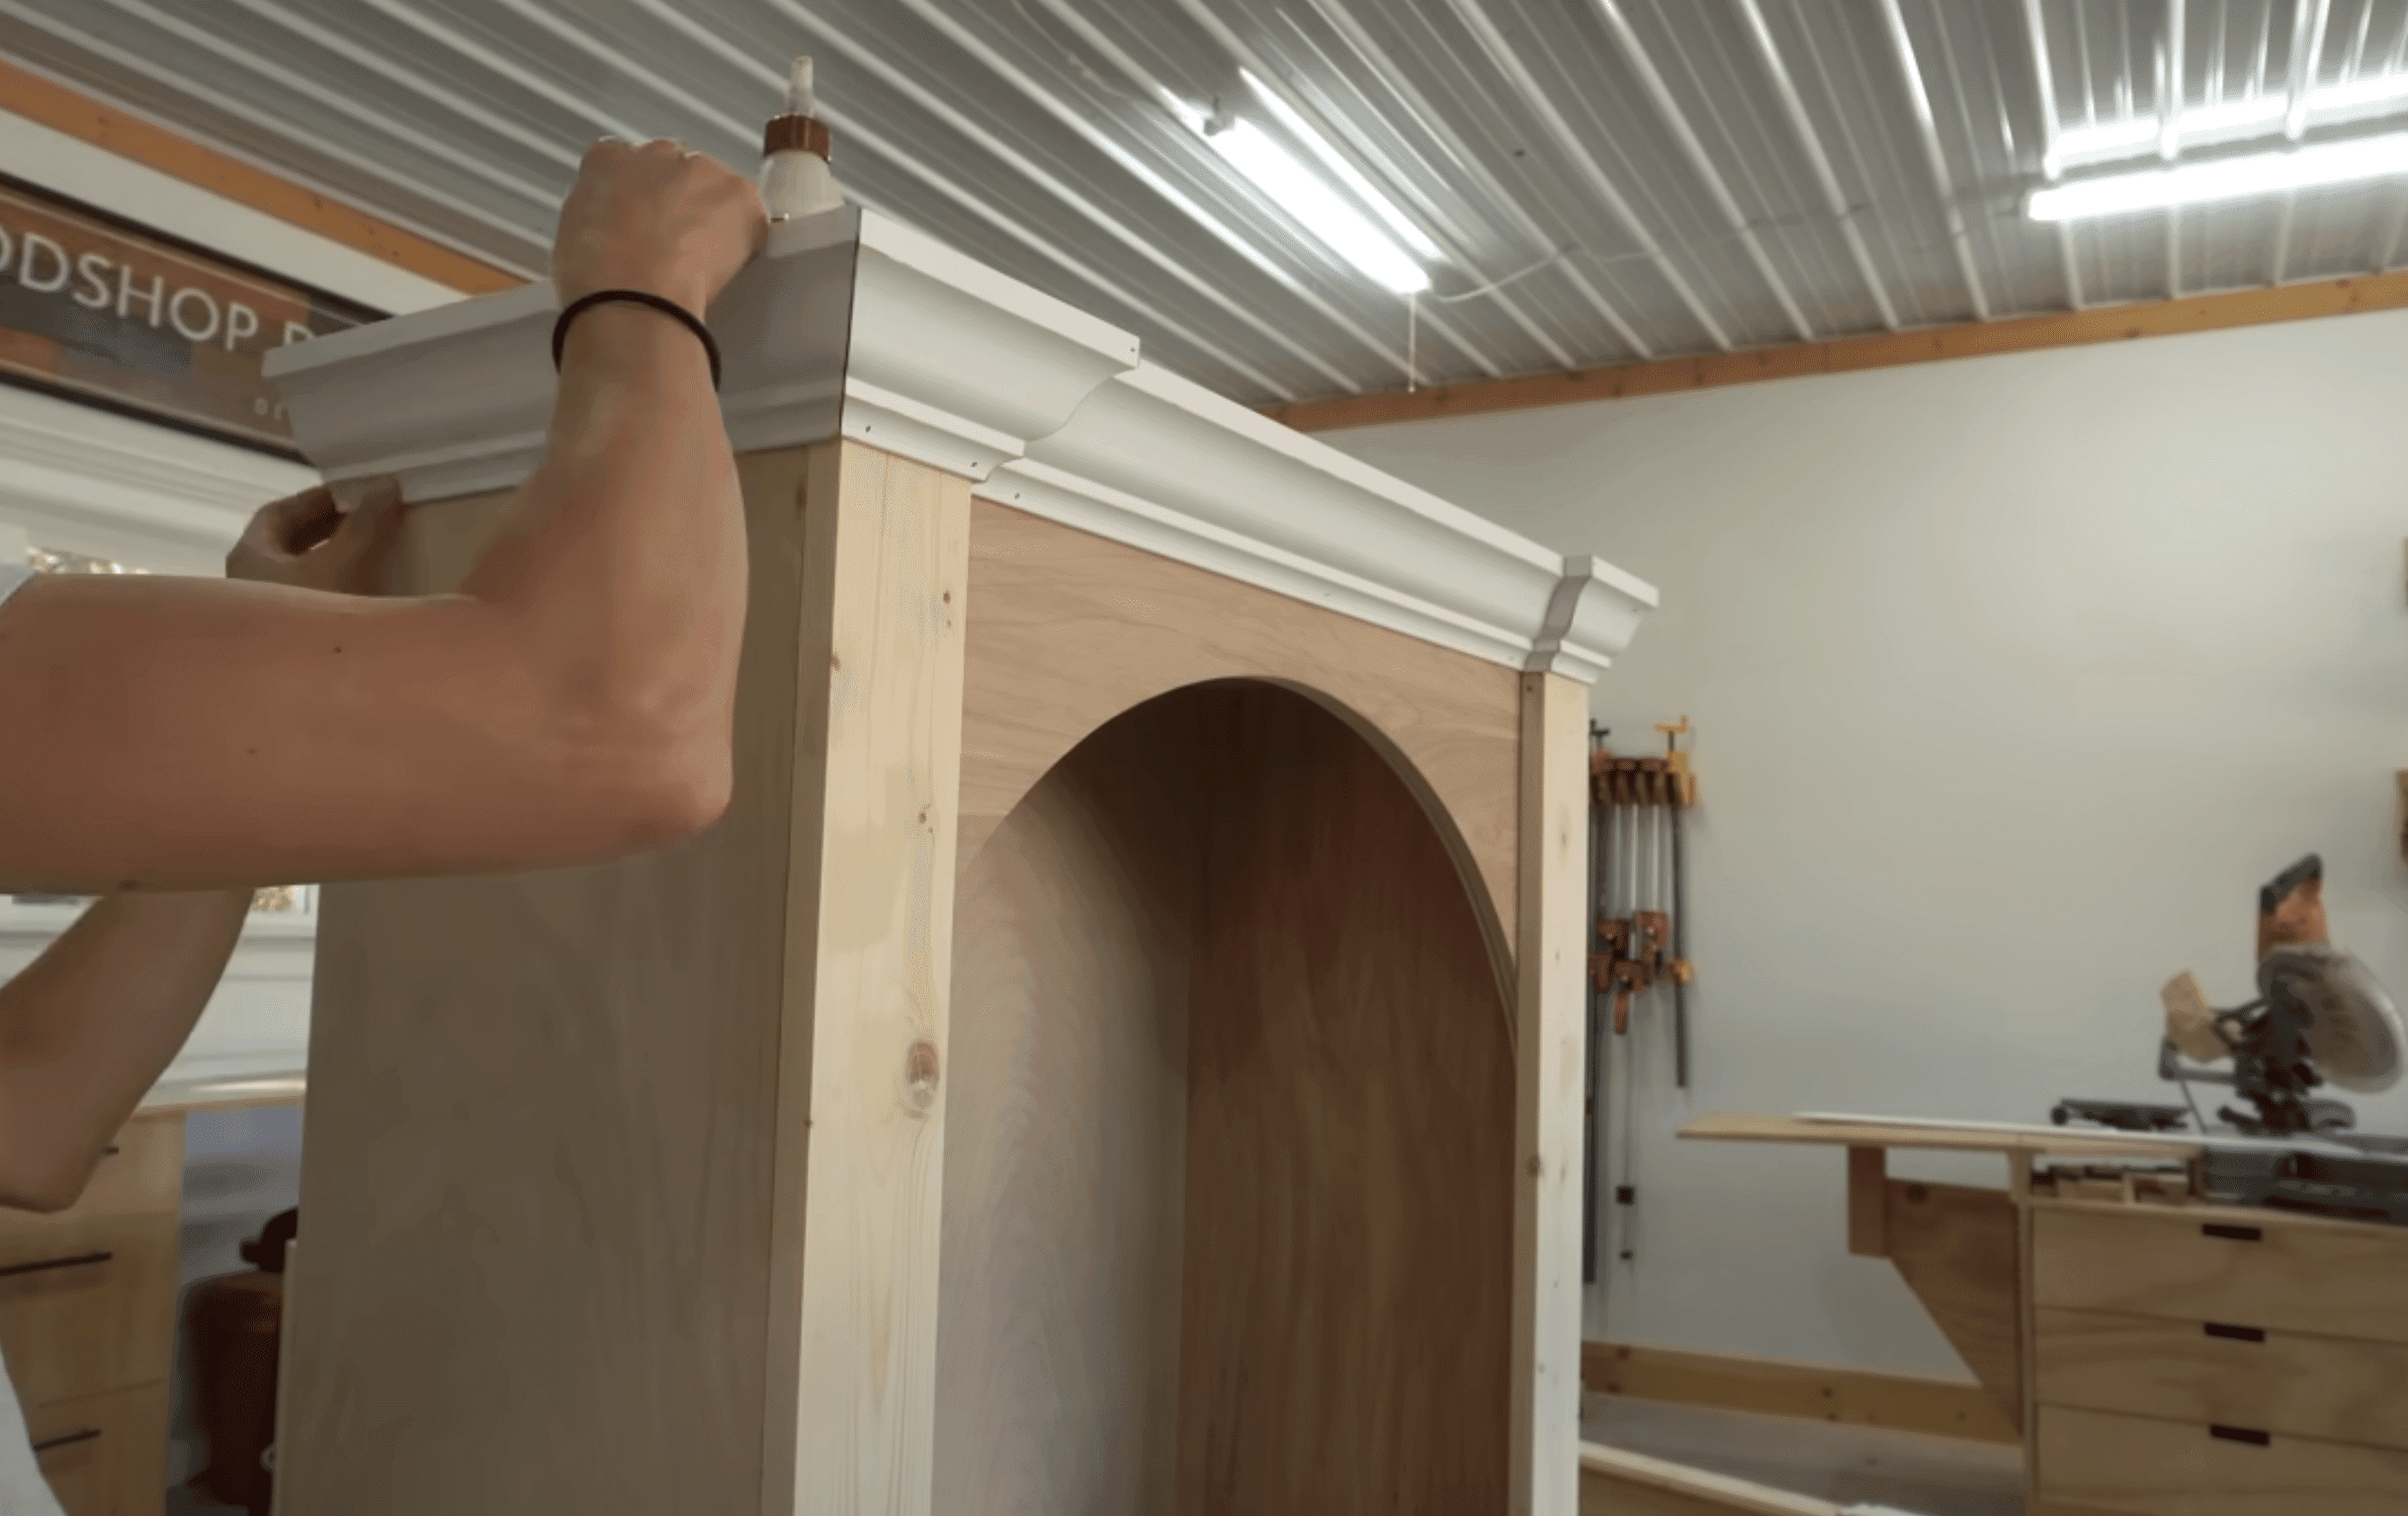
Install the face frames on the cabinet boxes. Depending on your design, use 1x3s or other trim pieces.
When placing the trim, ensure it overhangs where needed to hide gaps between the cabinet and wall, especially if your walls are not square. To finish the look, add crown molding to the top.
Step 5: Install and Finish the Built-ins
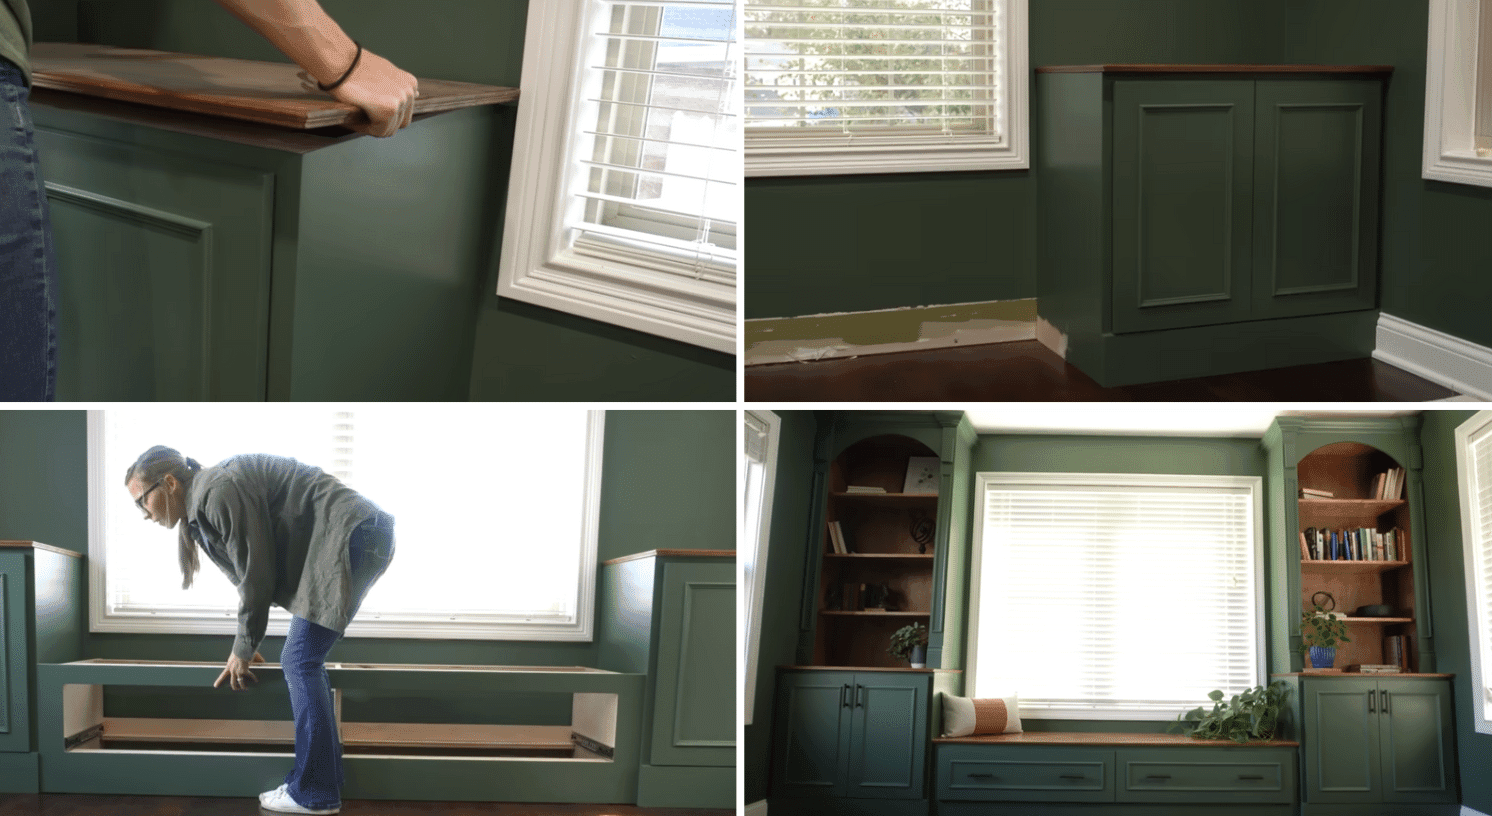
Once the assembly is complete, secure the cabinets to the wall and trim the bench or shelves to fit. Apply your chosen paint or stain, starting with primer and then finishing with a smooth coat of color.
Finally, add any custom features, such as drawer fronts or additional trim pieces, to complete the built-ins.
For more ideas and help, watch the Video Tutorial by Shara Woodshop Diaries
Common Mistakes to Avoid
Several pitfalls can derail your project and lead to costly fixes when installing built-in cabinets. Understanding these common errors before starting will save you headaches, money, and disappointment.
- Rushing through the planning phase
- Underestimating the total project cost
- Choosing materials that don’t match your home’s style
- Failing to consider future needs and flexibility
- Overlooking lighting requirements inside cabinets
- Neglecting to account for electrical outlets and switches
- Attempting complex builds without proper skills or tools
Remember that a successful built-in cabinet project hinges on careful attention to detail from start to finish.
By avoiding these common pitfalls and investing time in proper planning, you’ll create beautiful, functional storage solutions that enhance your home for years to come.
Maintenance and Long-Term Considerations
Proper care of your woodworking tools not only extends their lifespan but also ensures consistent, quality results in all your projects. Consider these essential maintenance practices:
- Clean tools thoroughly after each use to prevent rust and buildup of debris
- Regularly check and sharpen cutting edges to maintain precision and safety
- Store tools in a dry environment, preferably with silica gel packets, in humid climates
- Lubricate moving parts according to manufacturer recommendations
- Inspect power cords and batteries for damage before each use
- Create a maintenance schedule and log to track service history for each tool
Remember that quality tools are an investment—with proper maintenance, many will serve you reliably for decades, making your initial purchase cost significantly more economical over time.
Conclusion
Built-in cabinets represent the perfect marriage of form and function in home design. As we’ve seen throughout this guide, these custom storage solutions upgrade underutilized spaces into features that enhance both your home’s value and daily functionality.
From the careful planning stages to the final finishing touches, creating built-ins is a rewarding DIY project that delivers professional-looking results with basic woodworking skills.
With proper maintenance and quality materials, your custom cabinets will serve your home beautifully for decades to come, making them not just a practical addition but a lasting investment in your property’s aesthetic appeal and functionality.
If you’re interested in more DIY projects for your home, feel free to click here and explore our collection of easy weekend makeovers and step-by-step renovation tutorials.

With a Master in Architectural Studies from University of Pennysylvania, Marwa Haydar has pioneered living spaces since 2005. Her expertise, initially honed in a prestigious architectural firm, is evident in her approach to creating environments. Marwa became part of our team in 2019 and has since been a driving force in our home improvement section, known for her practical yet stylish solutions. She’s been spearheading our design workshops since then, infusing her passion for teaching into her work. In her leisure time, Marwa enjoys exploring historic architecture and is an enthusiastic pottery hobbyist, further enriching her understanding of form and texture.