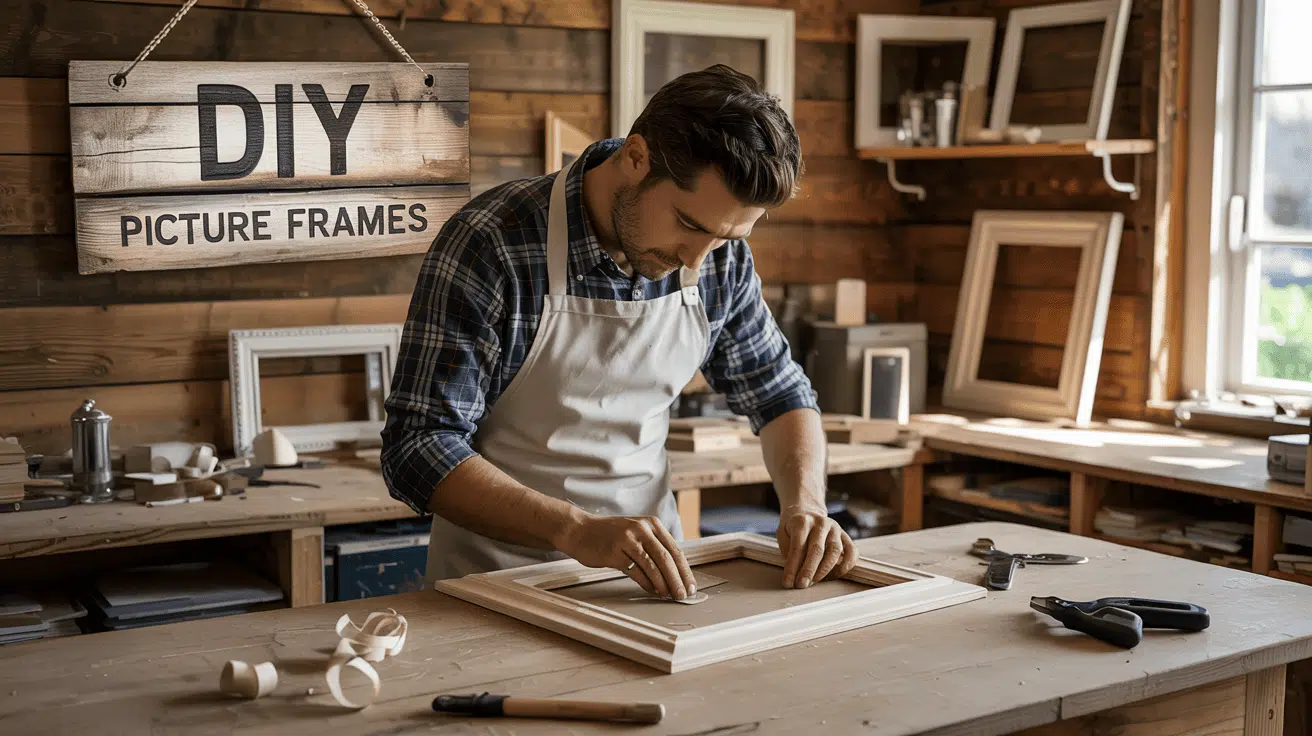
Ever wondered why so many artists make their frames? Creating a DIY canvas frame is easier than you think and totally worth the effort!
You’ll save serious money while crafting something uniquely yours. With just basic tools from any hardware store, you can build a custom-sized frame that perfectly fits your artwork.
The process is surprisingly simple—measure, cut, join, and you’re done. There’s something incredibly satisfying about pointing to your displayed artwork and saying, “I made that frame myself.”
Your DIY canvas frame project doesn’t require professional skills, just patience and the right materials.
Ready to transform your plain canvases into professional-looking displays? Let’s get started on this weekend project, which your walls (and wallet) will definitely thank you for.
Why Making a DIY Canvas Frame Is Totally Worth It?
Making your canvas frame is super easy and totally cool! You’ll save money compared to buying expensive frames, and you’ll create something that perfectly fits your artwork.
Imagine hanging a piece of art that not only looks great but was also framed by you. It’s like a double win! You don’t need fancy skills—grab a few basic tools from the hardware store, and you’re good to go.
All you need to do is measure, cut some wood, and put the pieces together. No rocket science is involved! When friends ask where you got that cool frame, you can proudly say, “I made it myself!” How cool is that?
Why not give it a shot this weekend? Your walls will look great, and you’ll feel like a total DIY champ.
Materials and Tools You’ll Need

Picking the Best Wood for DIY Canvas Frames
When making DIY canvas frames, choose sturdy, easy-to-work-with wood. Poplar is perfect because it’s lightweight, takes paint well, and won’t break the bank.
Pine works, too, if you’re on a tight budget. For larger frames, consider harder woods like oak or maple to prevent warping over time. Whatever you pick, make sure it’s straight and knot-free for the best results!
Must-Have Tools for Your DIY Canvas Frame Project
- Poplar wood boards
- Plywood (for the internal frame)
- Wood glue
- Finish nails
- Miter saw
- Table saw or router
- Frame clamp or ratchet strap
- Sandpaper
- Paint sprayer (optional for finishing)
- Hanging hardware (brackets, screws, drywall anchors)
- Blue tape
- Magic eraser
Total Estimated Costs
- If Tools Are Owned: $43–$166
- If Tools Are Purchased: $143–$1,066
Step-by-Step Guide for Making a DIY Canvas Frame
STEP 1: Measure Your Canvas and Plan the Frame

Start by measuring the size of your canvas print to determine the overall dimensions of the frame. You’ll need to add a 1/8-inch reveal around the canvas and an extra inch and a quarter for the frame width.
This ensures a snug fit for your canvas. For instance, if your print is 35 1/2 inches wide, the total width for your frame should be 36 3/4 inches.
Pro Tips:
- Double-check your measurements before cutting the wood to avoid mistakes.
- Use a ruler or tape measure to get accurate and precise dimensions for your frame.
STEP 2: Rip the Wood to Size
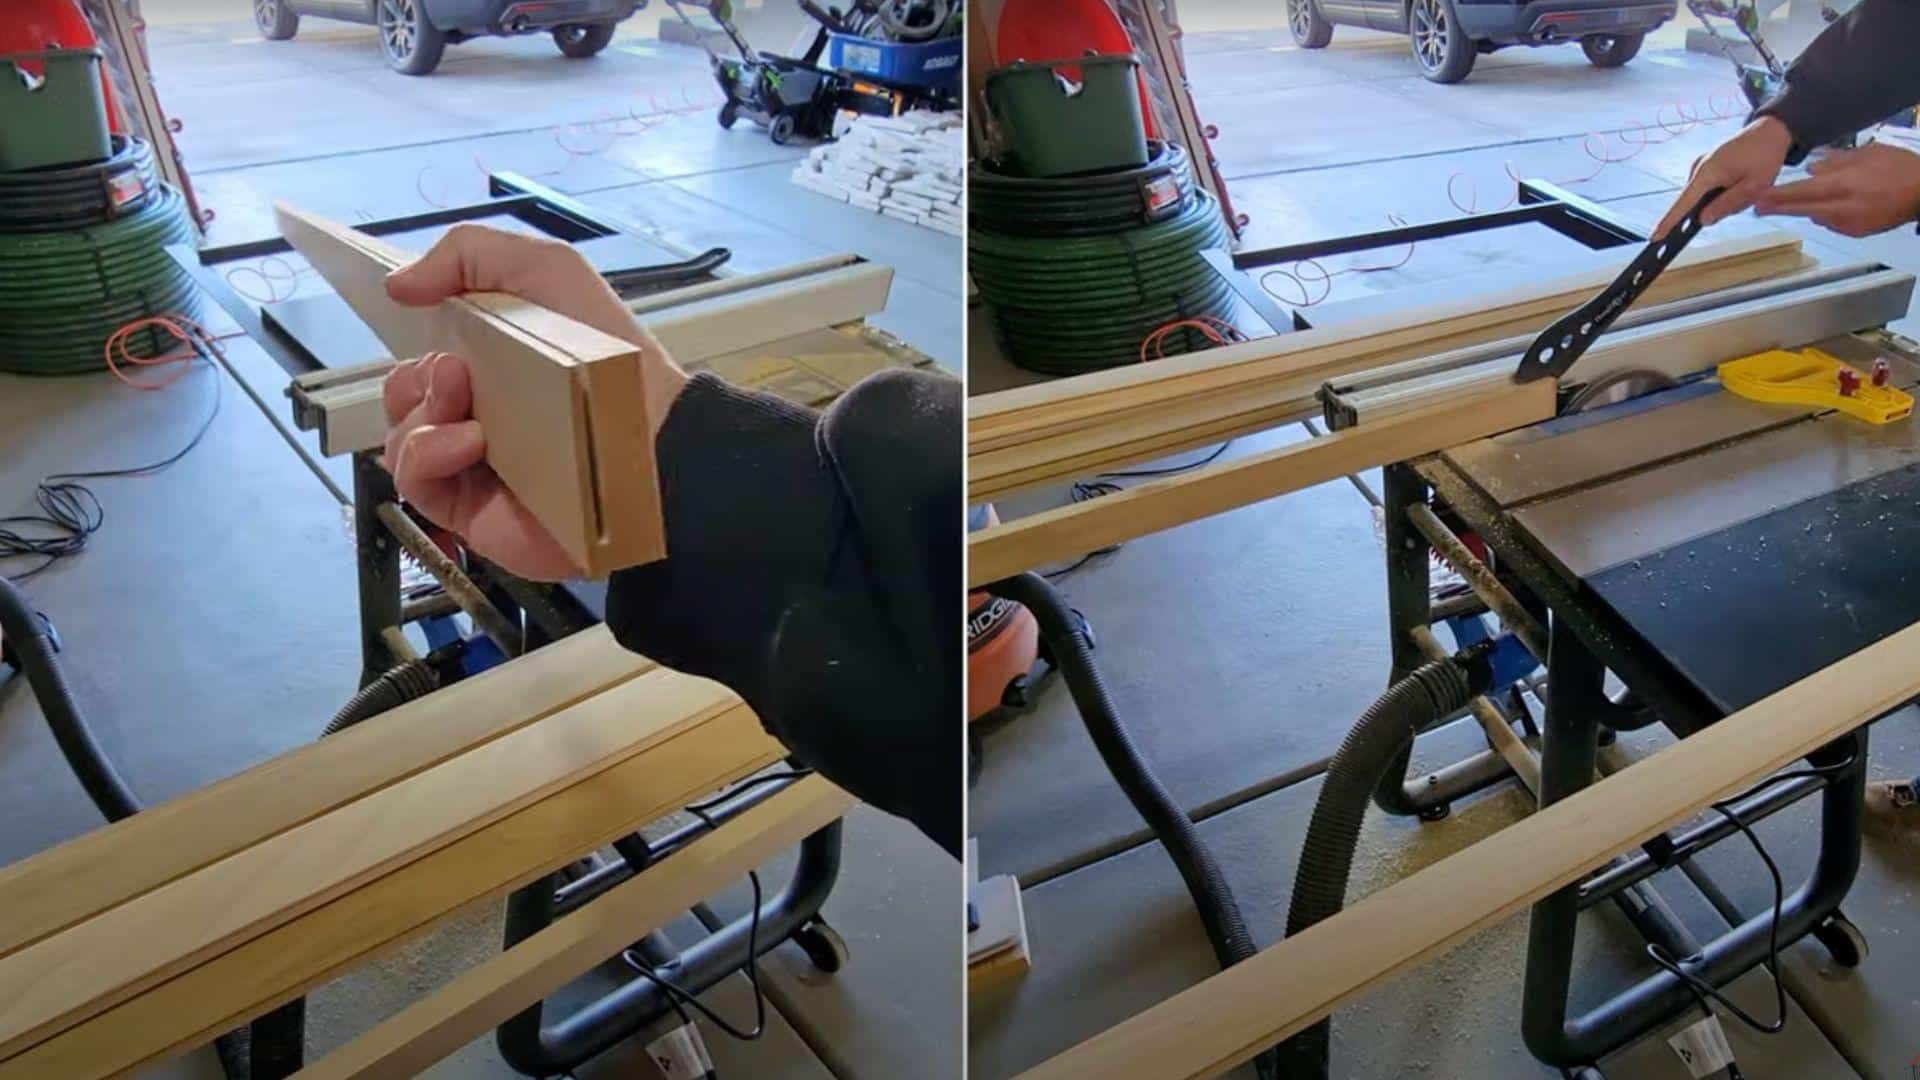
Using poplar wood, rip it down to the correct width and depth of your frame. For this project, you want a depth of 1 3/4 inches.
This will allow the frame to sit snugly around the canvas. The wood should be cut evenly for a smooth finish. Measure the cuts twice before making any adjustments.
Pro Tips:
- Poplar wood is ideal for projects like this because it paints well and is budget-friendly.
- Always wear safety gear when using power tools to prevent accidents.
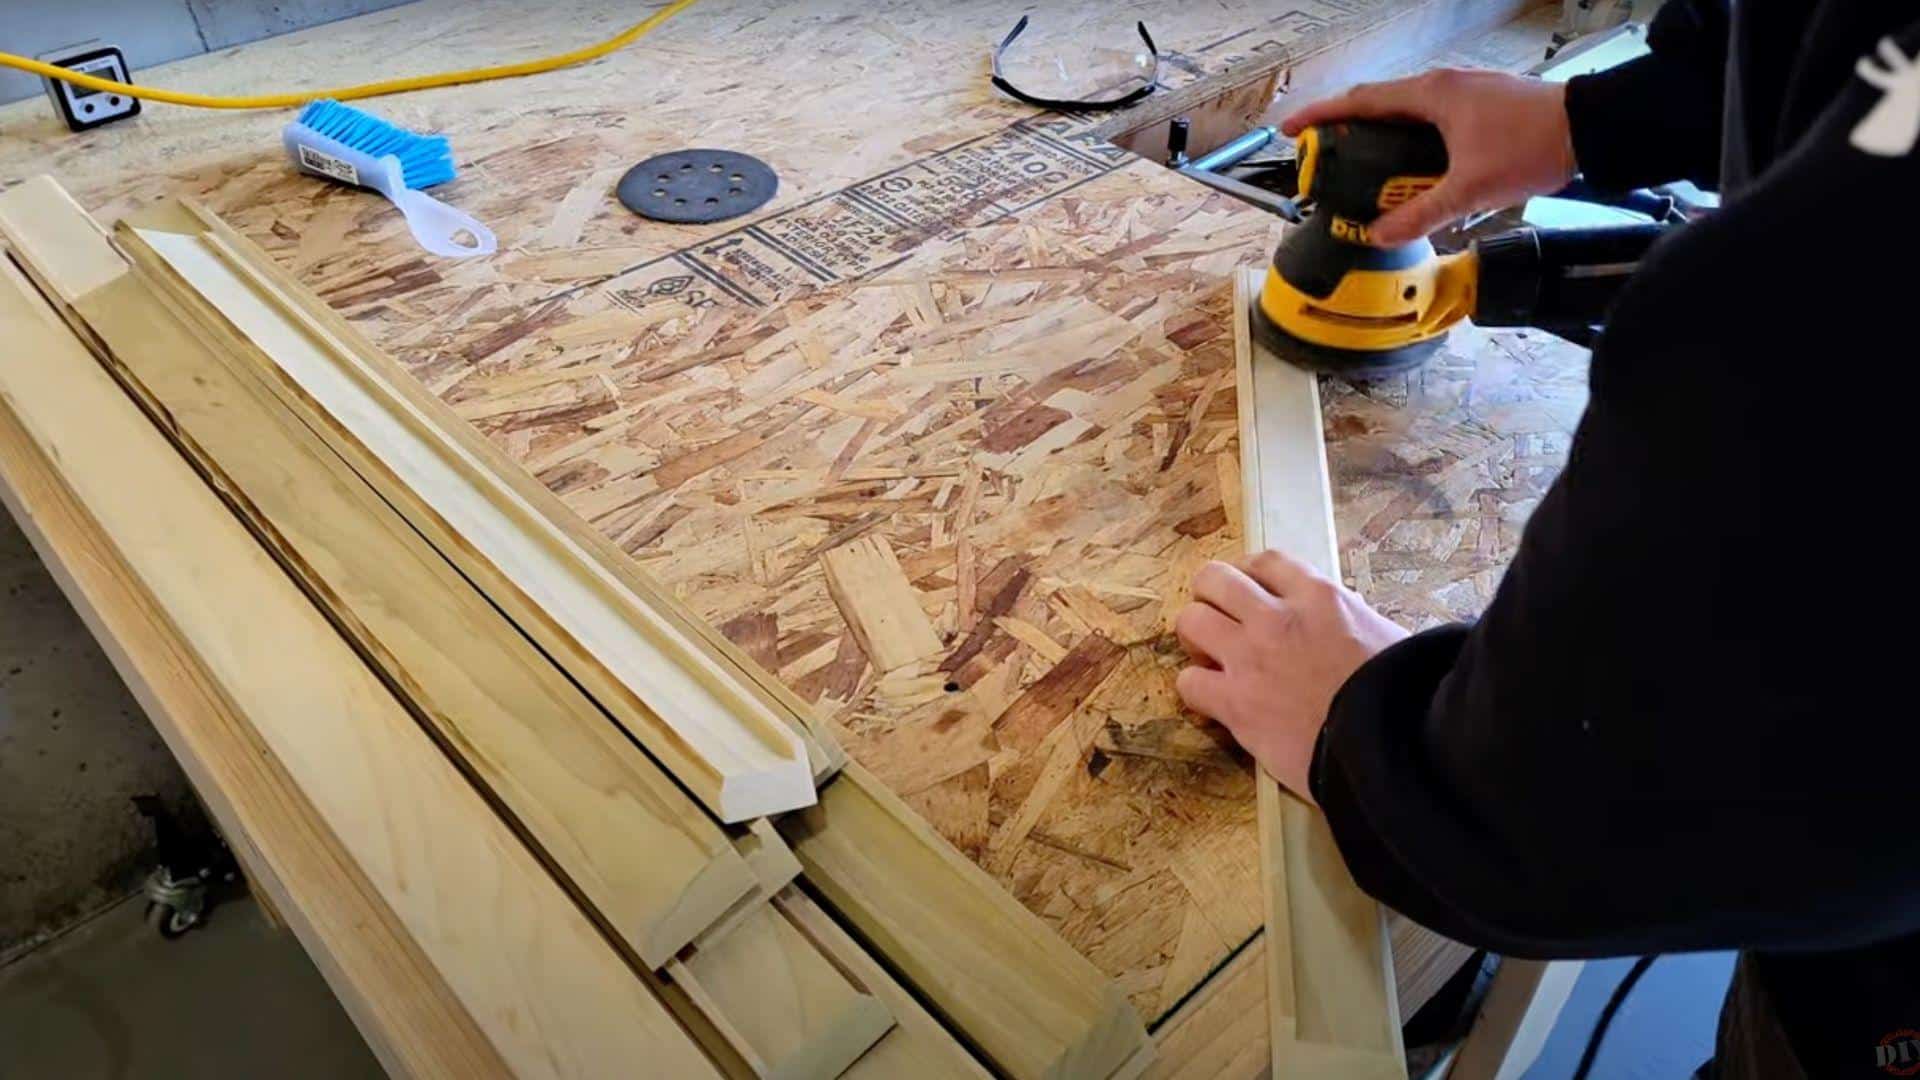
STEP 3: Cut the Rabbet (Lip Shelf)
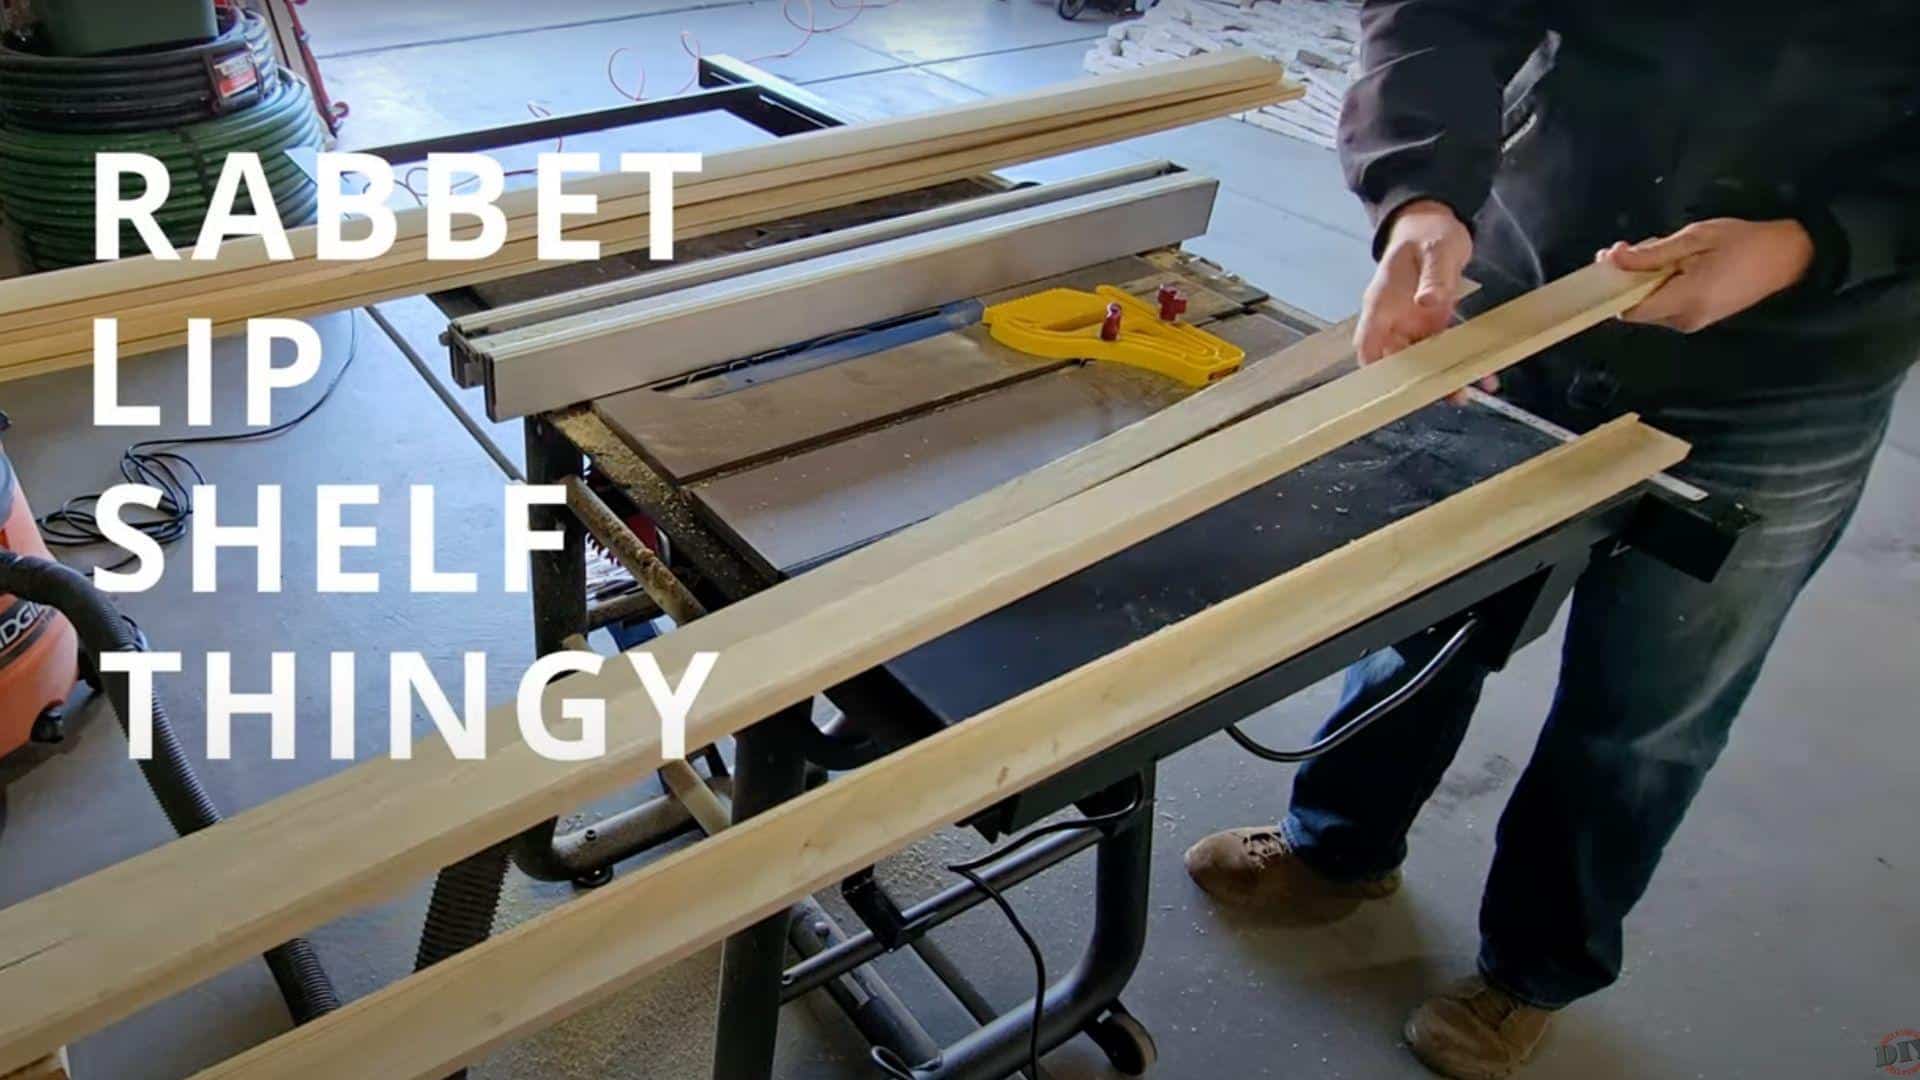
Cut a “rabbet” or lip into the wood to create a shelf where the canvas can rest. The cut should be about 1/4 inch deep and 1/8 inch wide, allowing the canvas to sit firmly in place. You can do this using a table saw or router to ensure the cut is neat and even.
Pro Tips:
- Take your time to make precise cuts so the canvas sits securely on the lip.
- If you’re unsure about the depth of the cut, test it on a scrap piece of wood first.
STEP 4: Miter the Frame Corners
Use a miter saw to cut the four pieces of your frame at a 45-degree angle, ensuring a perfect fit at the corners.
If you don’t have a miter saw, you can use a handsaw with a miter box for similar results. Accuracy is key here, as uneven cuts will make assembly difficult.
Pro Tips:
- Always check that your miter saw is set to the right angle before cutting.
- Sand the edges lightly after cutting to smooth out any rough spots.
STEP 5: Assemble the Frame and Attach the Canvas
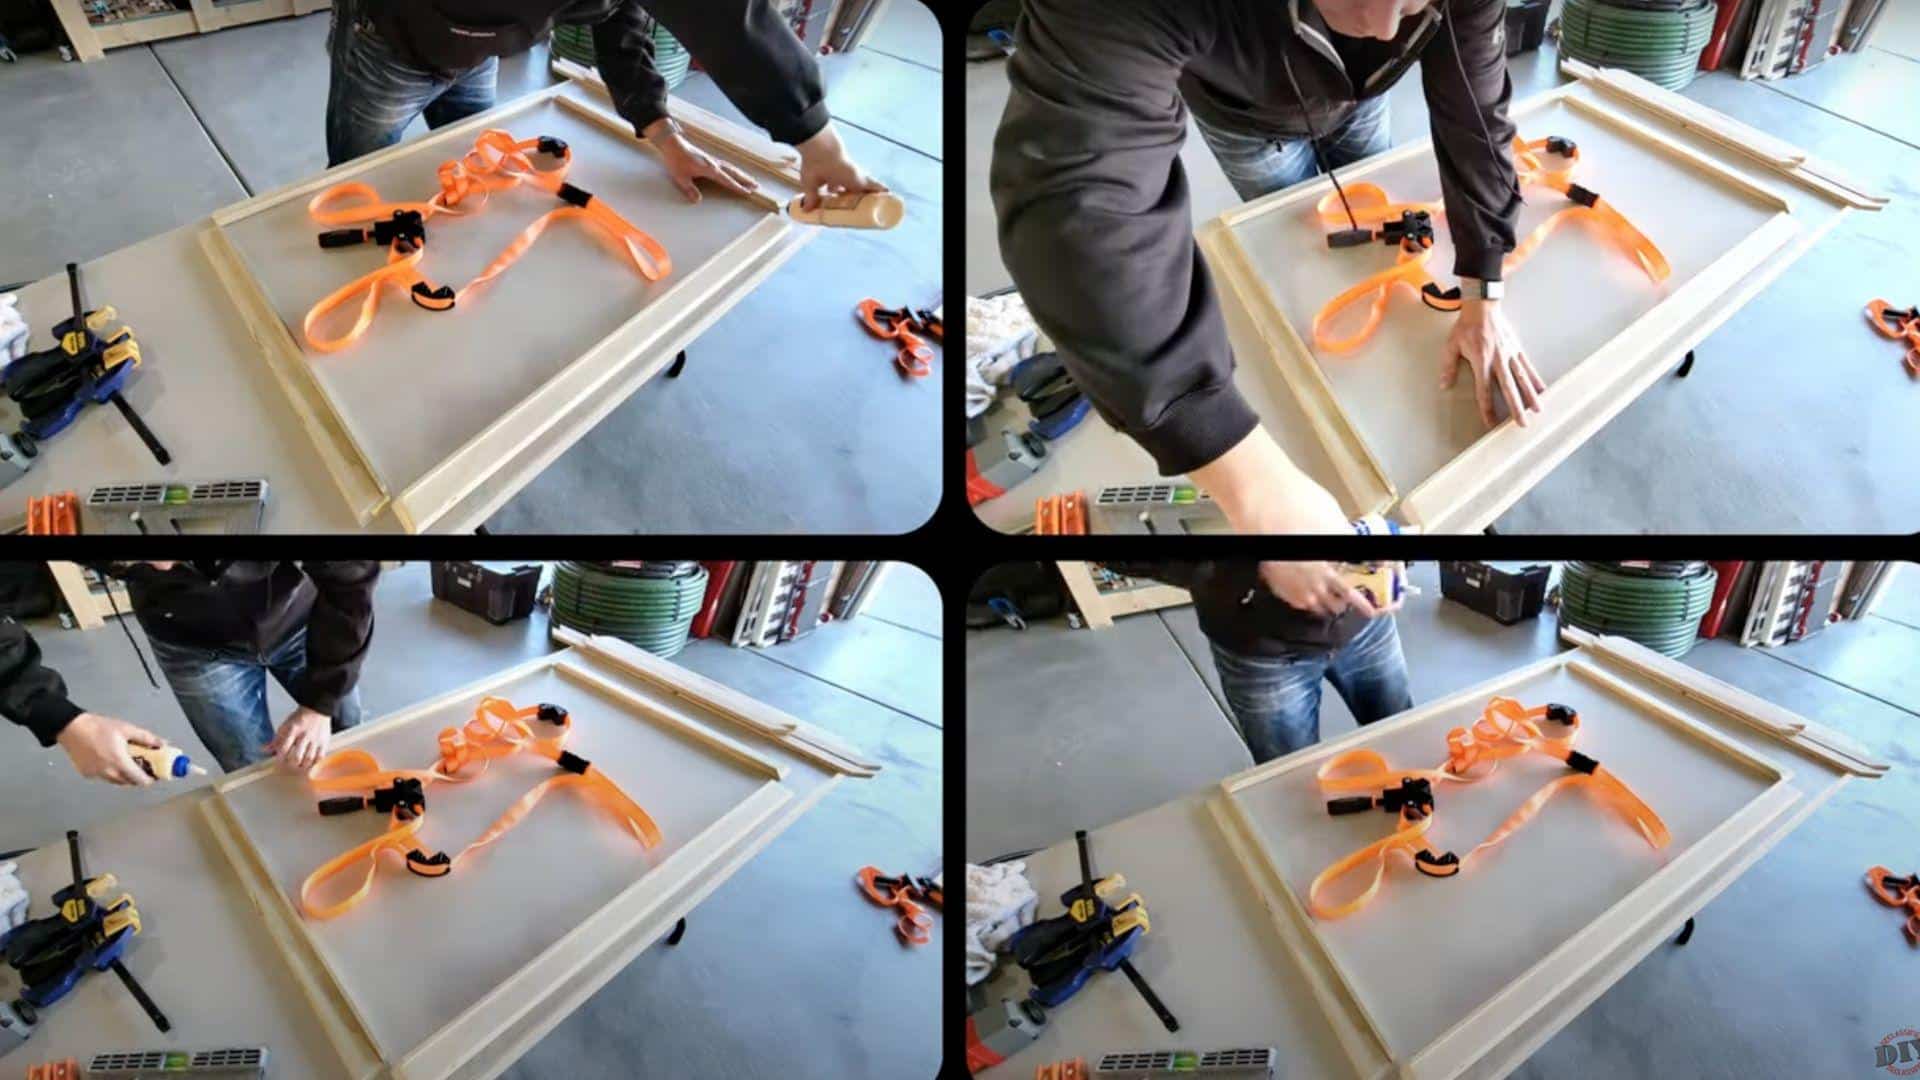
Once all the pieces are cut, begin assembling the frame using wood glue and finish nails to secure the joints.
After the frame is glued, install plywood backing to help keep it square and stable. Finally, attach the canvas to the frame from the back, using small nails or screws to secure it.
Pro Tips:
- Use a frame clamp or ratchet strap to hold the frame together while the glue dries.
- Clean off excess glue with a damp cloth before it hardens to maintain a neat finish.
Watch How It’s Done: DIY Canvas Frame Video Tutorial
For more information, check out this video tutorial by DIY Declassified
Style Options for DIY Canvas Frames
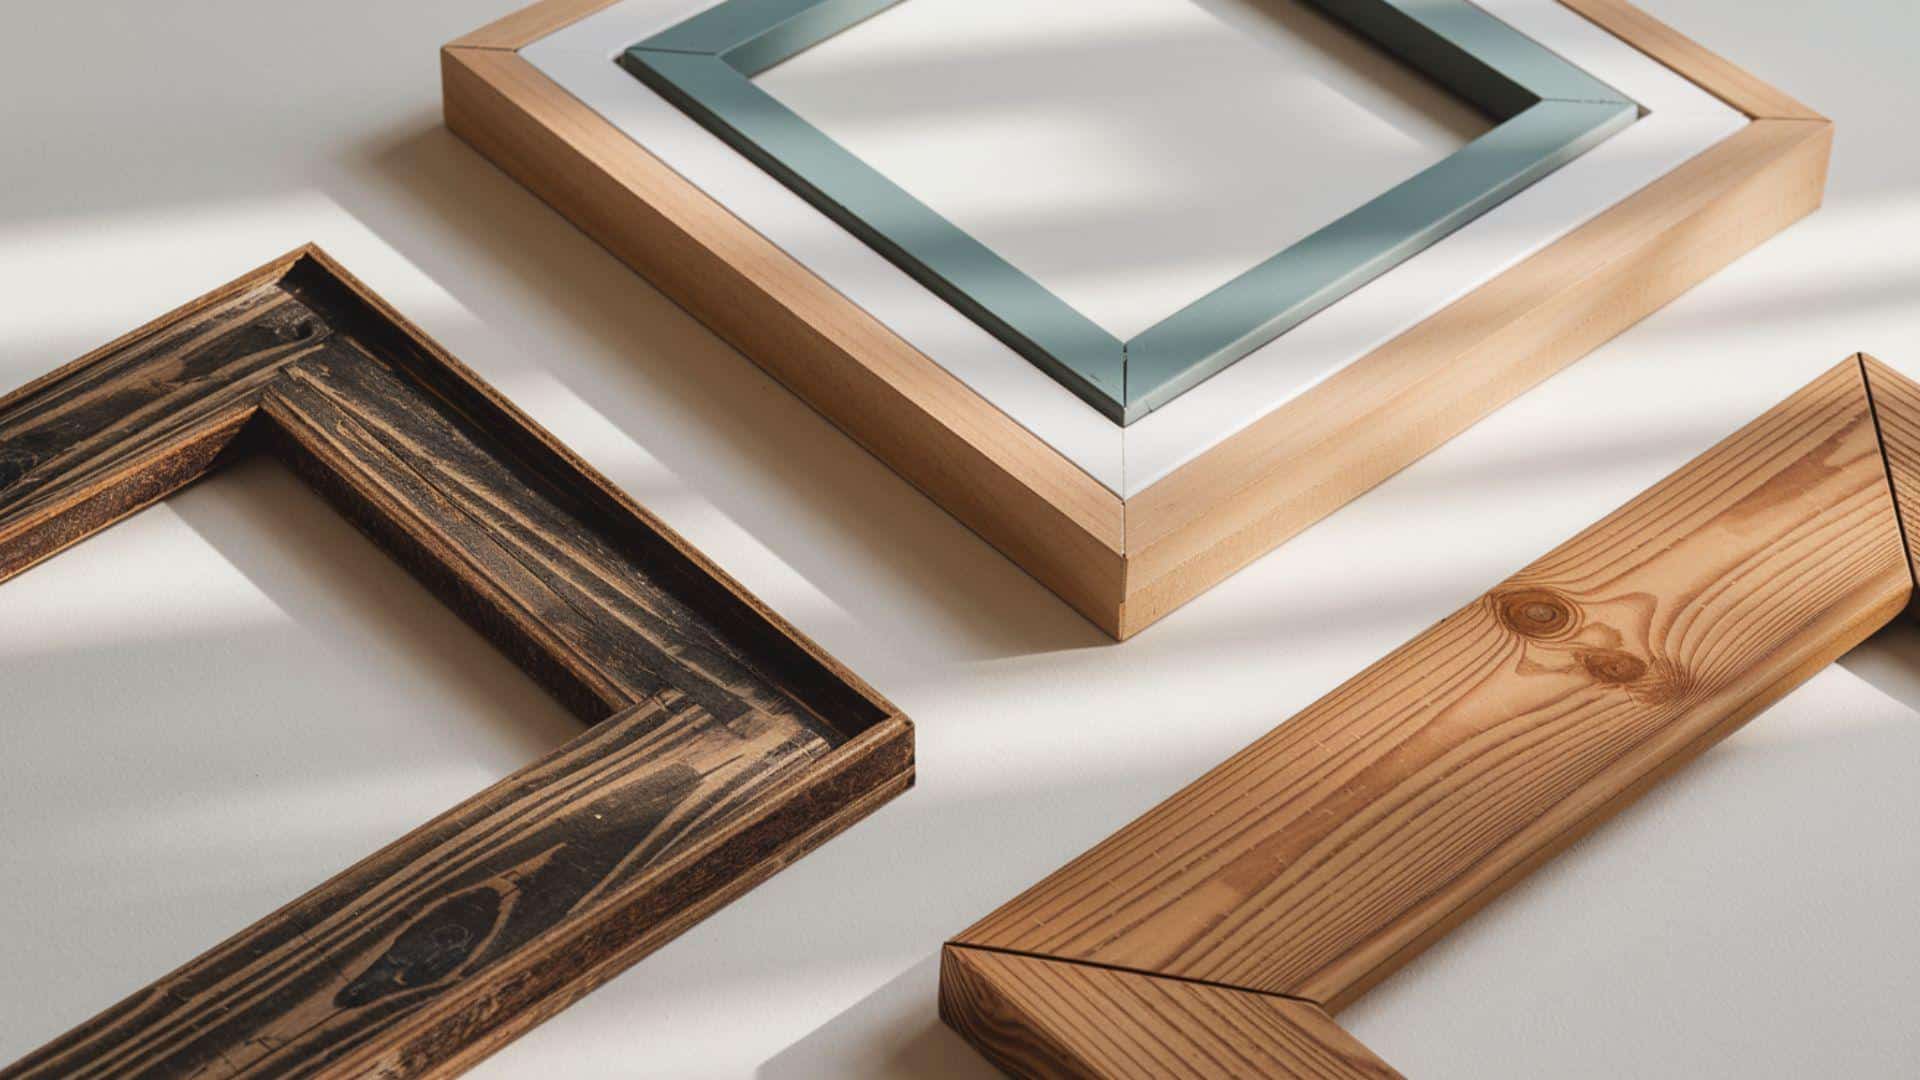
Simple vs. Decorative Frame Designs
| FRAME STYLE | DESCRIPTION | IDEAL FOR | KEY CONSIDERATIONS |
|---|---|---|---|
| Simple Frames | Straight edges with minimalistic design, focusing on clean lines. | Modern spaces and minimalist décor | Keeps the focus on the artwork, providing a subtle look. |
| Decorative Frames | Features like beveled edges, rounded corners, or intricate carvings add more detail. | Traditional, vintage, or classic rooms | Complements ornate or detailed artwork. |
Match Your Canvas Frame to Your Home Decor
When designing DIY canvas frames, think about your room’s color scheme and materials. For coastal themes, whitewashed or light blue frames create a breezy feel.
Rich, dark wood frames complement rustic or industrial spaces, while metal-finished frames work well in contemporary settings.
Don’t be afraid to use contrasting colors for a pop of interest—a bright frame can make neutral artwork stand out.
Maintaining Your DIY Canvas Frame
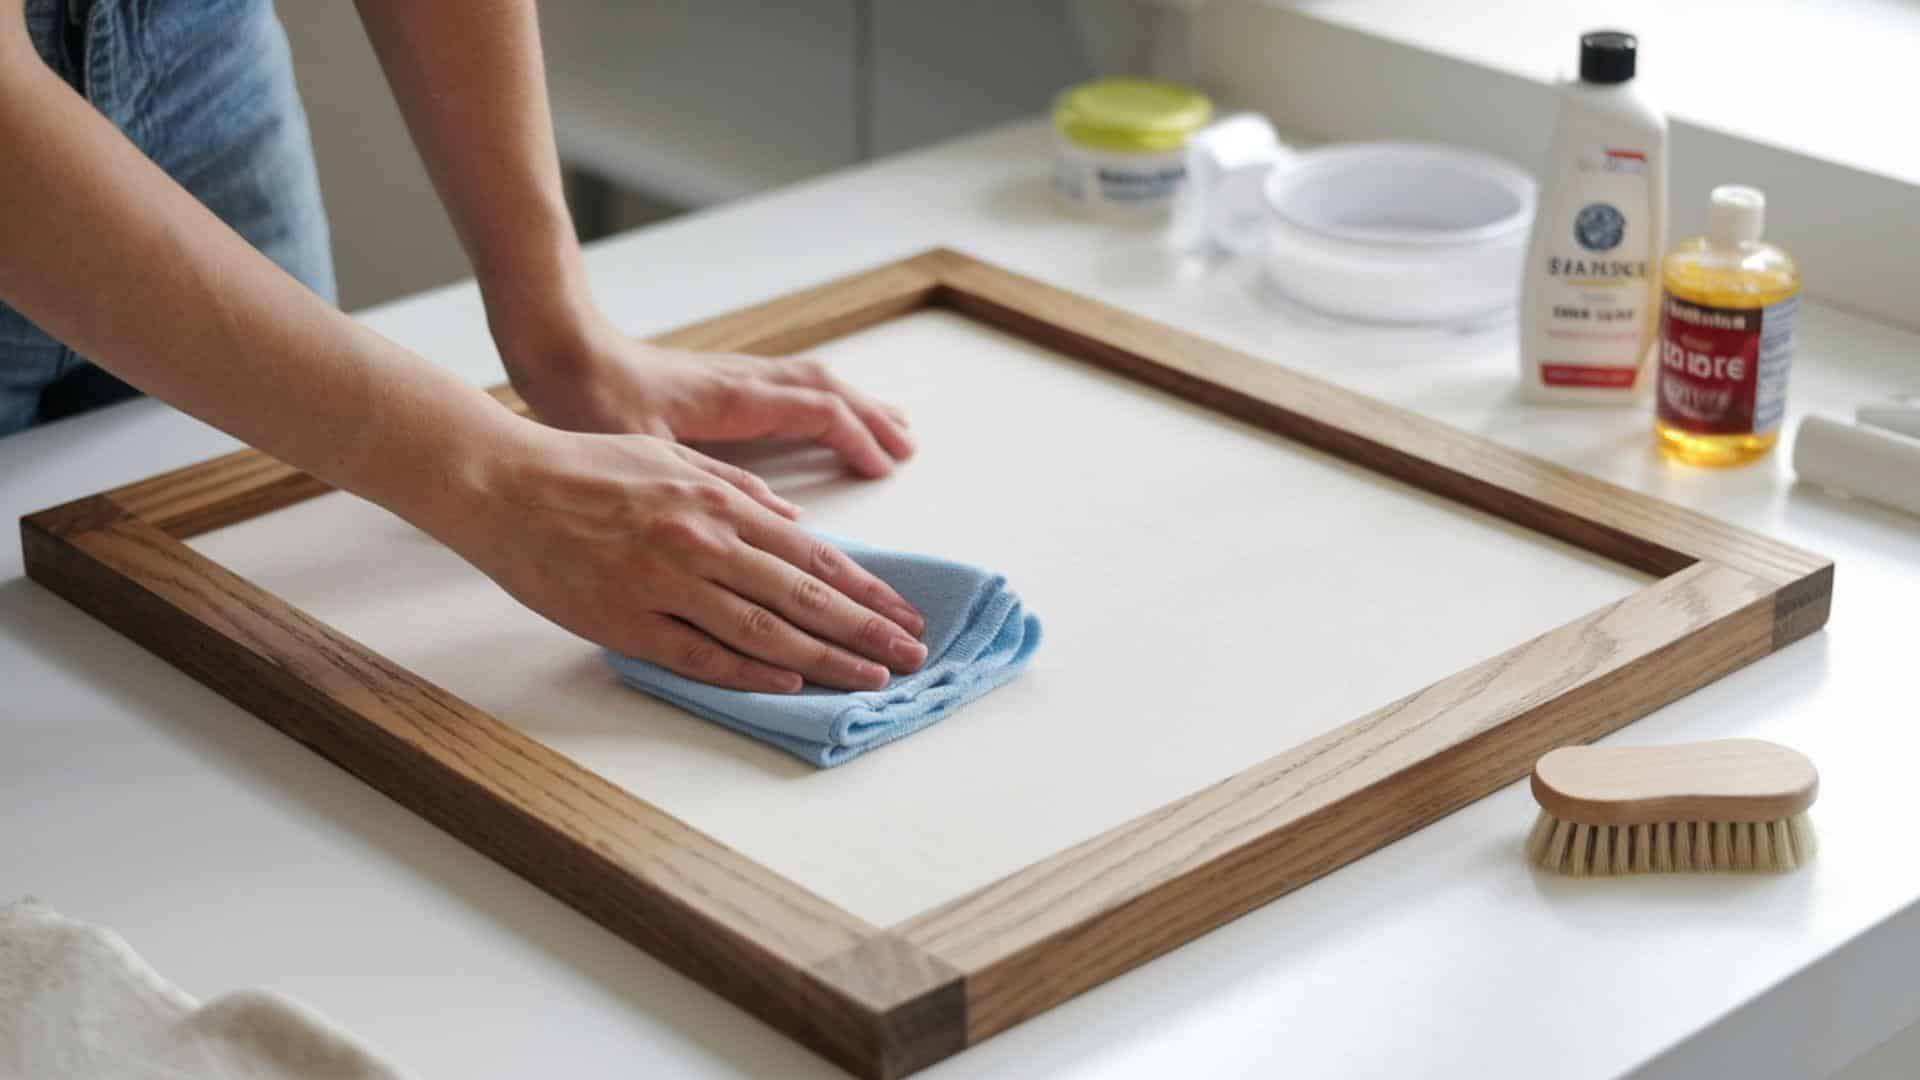
Regular Dusting—Dust your DIY canvas frames weekly using a soft microfiber cloth or feather duster. This prevents buildup that can damage the frame and artwork over time. For hard-to-reach corners, try using a clean makeup brush.
Check Joint Stability—Every few months, gently test the frame’s corners for looseness. Apply a small amount of wood glue to reinforce weak joints before they fail. This preventative check keeps your artwork secure.
Control Humidity Levels—Keep your frames away from areas with high humidity, like bathrooms or kitchens. Excessive moisture can warp wooden frames and damage canvas. Consider using a dehumidifier in damp spaces.
Touch-Up Surface Finishes—Inspect your frame for scratches or worn areas annually. Small imperfections can be fixed with matching paint, stain, or wood markers. Addressing minor damage early prevents bigger problems later.
Secure Hanging Hardware—Periodically check that all mounting hardware remains tight and secure. Loose brackets or wires can lead to falls that damage your frame and walls. Replace any rusty or bent hardware immediately.
Common Mistakes to Avoid
- Rushing through measurements – Taking shortcuts when measuring your wood pieces can lead to gaps in corners and a frame that doesn’t properly fit your canvas.
- Skipping the sanding step – Not properly sanding your wood before assembly leaves rough edges that can snag the canvas and look unprofessional.
- Using incorrect joining techniques – Failing to create proper miter joints or using insufficient wood glue results in weak corners that separate over time.
- Choosing the wrong wood thickness – Selecting boards that are too thin for larger frames causes bowing and warping, while overly thick wood overwhelms smaller artwork.
- Neglecting proper finishing – Skipping protective sealants or rushing paint application leads to peeling, discoloration, and frames that don’t stand the test of time.
Wrapping It Up
Your DIY canvas frame trip doesn’t end after assembly. Regular maintenance ensures your handcrafted frames last for years.
Weekly dusting prevents buildup that damages both the frame and the artwork. Check corners periodically for looseness and reinforce weak spots early.
Keep frames away from humid areas like bathrooms to prevent warping. Touch up scratches promptly with matching paint.
Don’t forget to check hanging hardware regularly—loose brackets can damage walls and frames.
By avoiding common mistakes like rushing measurements, skipping sanding, or using incorrect joining techniques, your DIY canvas frames will last a long time.
Remember, a well-crafted frame doesn’t just display art—it becomes part of the masterpiece itself. Frame on, creative friends!

James McLaren, with a rich background in architecture from the University of Manchester, has been contributing his expertise to the world of creative construction and home innovation for over 20 years. His journey began as a project manager for a leading construction firm, where he honed his skills in bringing complex designs to life. James joined our platform as a freelancer in 2019, quickly becoming a favorite for his insightful and practical advice. He has been a pivotal force to our wing ever since, bringing our readers a blend of technical know-how and creative flair. Beyond his professional life, James is an avid woodworker and enjoys restoring vintage furniture, a hobby that complements his professional insights beautifully.