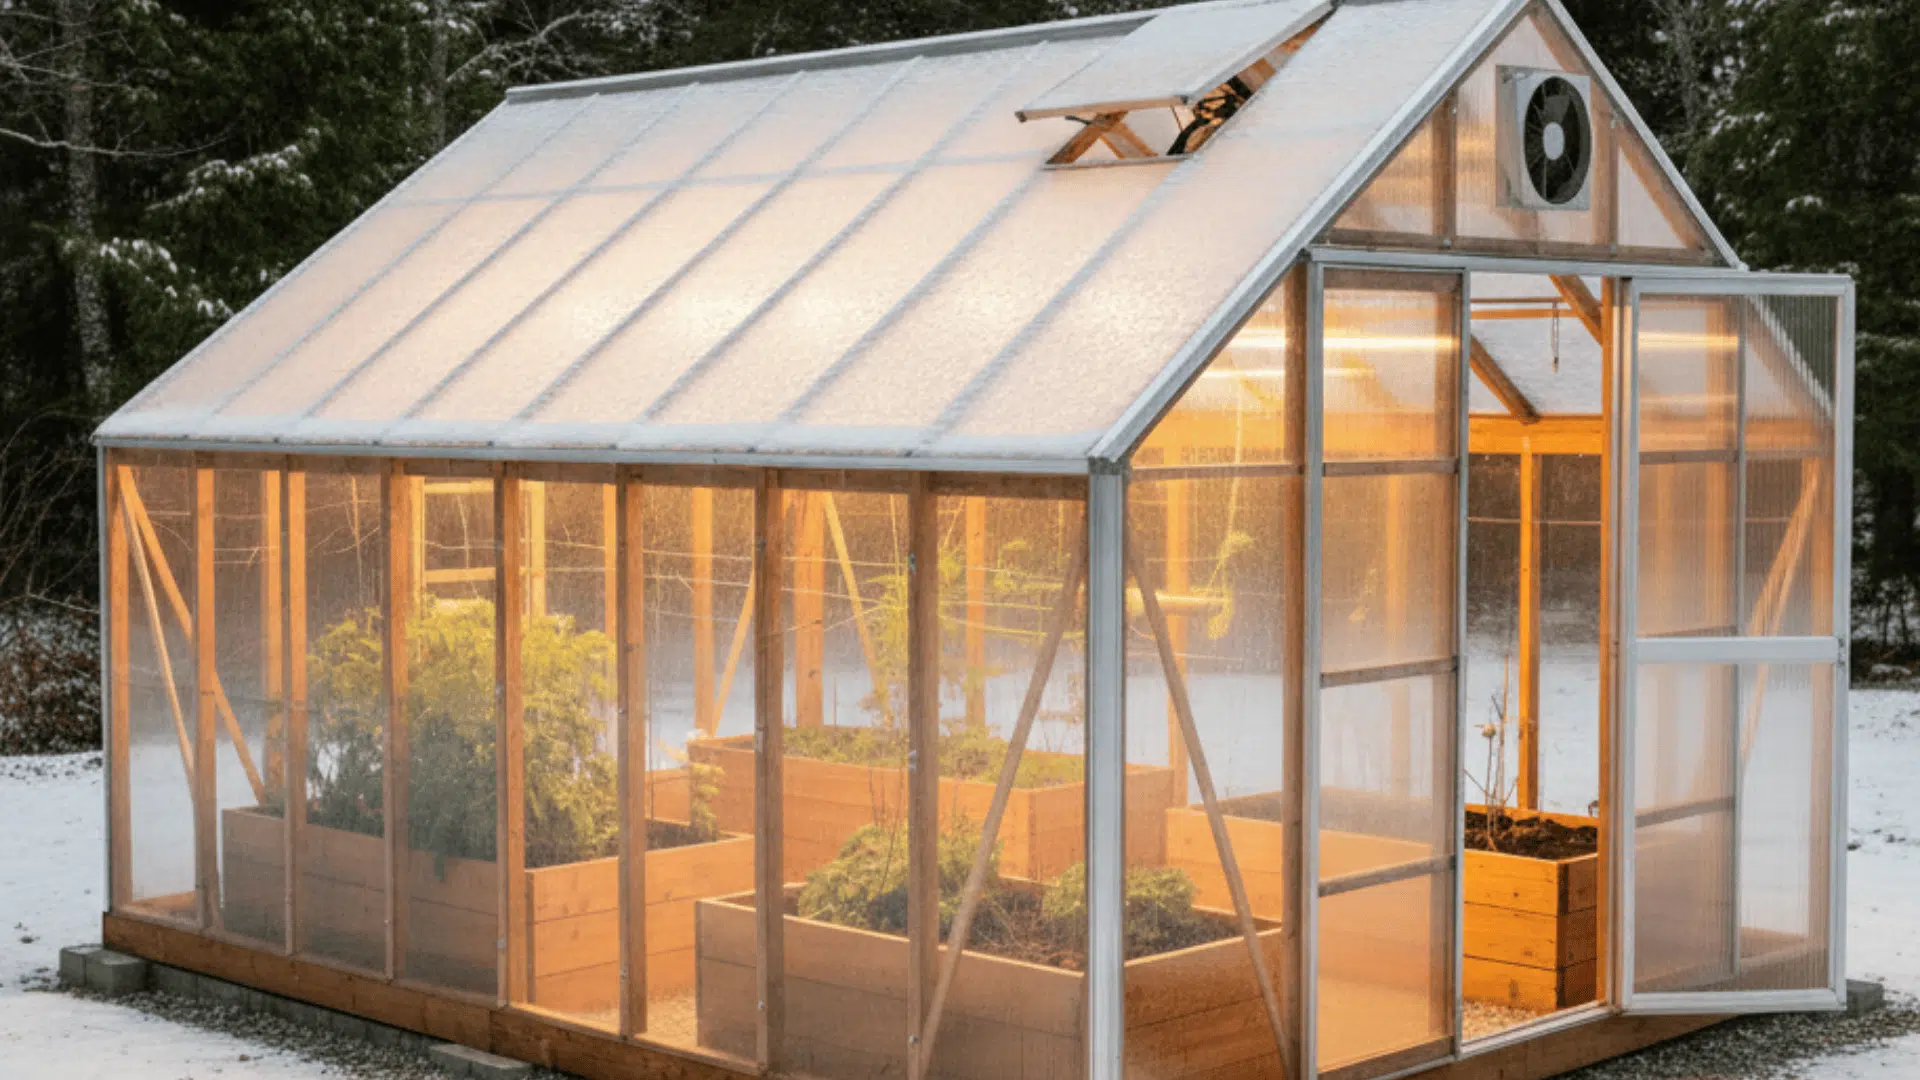
Building a custom DIY polycarbonate greenhouse offers a practical solution for year-round growing across a range of climates.
This build, completed in Maine, showcases a step-by-step approach for planning, framing, ventilation, and finishing.
The structure uses weather-ready materials like 16 mm polycarbonate roofing, solar-powered fans, and storm-secured foundations.
Attention to airflow, snow load, and thermal control ensures reliable performance in challenging environments.
With thoughtful preparation and efficient execution, a greenhouse like this creates a strong foundation for extended growing seasons.
Step-by-Step DIY Greenhouse
Build a sturdy, all-polycarbonate greenhouse by working in the same order a pro would: roof first, then walls, then cutouts and ventilation. Follow these steps to keep the structure weather-tight, square, and easy to assemble.
Materials Required
| Material | Quantity |
|---|---|
| Pressure-treated lumber (base) | 6 boards (2×6×12′) |
| Framing lumber (walls/doors) | 60 boards (2×4×8′) |
| Rafters/headers | 14 boards (2×6×12′) |
| Concrete piers (“cookies”) + brackets | 6–8 piers + 8 brackets |
| Polycarbonate roof (16 mm) | 4 panels (4’×8′) |
| Polycarbonate walls (10 mm) | 8 sheets (4’×12′) |
| H channels (joiners) | ~140 linear ft |
| U channels (end caps) | ~220 linear ft |
| Polycarbonate screws + EPDM washers | ~500 |
| Large gasket washers | ~250 |
| Aluminum sealing tape | 2 rolls |
| Exterior silicone sealant | 12 tubes |
| Roof flashing | ~45 linear ft |
| Doors | 2 |
| Wax-piston louvers | 3 |
| Solar fan + thermostat/controller | 1 set |
| Landscape fabric + mulch/gravel | 1 roll + ~20 bags |
| Basic tools + safety gear | 1 set |
Step 1: Plan Your Layout and Ventilation

Measure your site, confirm a 12×16 footprint, and sketch doors, louvers, and fan placement for strong cross-breeze airflow. Mark stud spacing to match panel widths.
Include roof pitch, overhangs, and access paths for tools and staging. Double-check local snow and wind loads before ordering anything.
Step 2: Choose Panels and Order the Full System

Select tri-wall polycarbonate for all surfaces: 16 mm for the roof in heavy-snow climates and 10 mm for walls.
Order custom cuts or full sheets plus matching H joiners, U end caps, flashing, aluminum tape, silicone sealant, and gasketed fasteners sized for all panel thickness.
Step 3: Build a Square, Storm-Ready Frame

Build the wood frame on a level base: sill, studs, rafters, and end gables. Keep everything square and plumb using a level, diagonals, and temporary bracing.
Add blocking where doors, louvers, and the fan will mount later, so cutouts stay rigid under Maine-style spring weather.
Step 4: Unload and Store Polycarbonate Correctly

Arrange delivery access, then unload panels carefully using a tractor, dolly, or by hand. Carry sheets vertically to avoid flexing.
Store them flat in shade, separated and covered with a light tarp to reflect heat, so heat doesn’t build up and warp lower panels badly.
Step 5: Cut Panels and Seal the Flutes

Cut panels with a circular saw or table saw using a fine blade. Keep factory edges visible where possible.
Seal open flutes: apply aluminum tape on the rooftop edges, then cover with flashing; apply U channels on the other edges using a continuous silicone bead carefully.
Step 6: Install the Roof First

Start with the roof to keep the work area dry. Place the first roof panel, align it, and capture the next panel with an H channel.
Screw through the joiner into rafters, spacing fasteners evenly. Trim the last panel to fit, hiding cut edges neatly.
Step 7: Anchor the Structure and Prep the Perimeter

Anchor the greenhouse so it can’t lift in storms. Bolt the base to concrete piers or “cookies,” using brackets and corrosion-resistant hardware.
Add landscape fabric and mulch or gravel around the perimeter to reduce mud, improve drainage, and keep work safer for everyone at doorways.
Step 8: Skin the Long Walls with A Repeatable System

Prepare wall panels by siliconing U channels onto the top and bottom edges. Install the first wall panel perfectly level, plumb, and square, then add an H channel and the next panel.
Keep screws slightly loose until corners and trims are fitted, then tighten everything fully.
Step 9: Fit Gables and Cut Openings in Place

Measure each gable end’s low and high points, transfer the roof angle onto polycarbonate, and test-fit before sealing U channels. Install end panels, then secure them firmly around door frames.
Cut door, fan, and louver openings in place, sand edges, and apply ice-and-water shield tape.
Step 10: Finish Doors, Ventilation, and Final Sealing

Hang both doors, using planing and shims for smooth gaps, and add stops and weather seals. Mount wax-piston louvers, the exhaust louver, and a solar-powered fan controlled by a thermostat.
Finish by installing beds and paths, then add the remaining fasteners and final caulking everywhere carefully.
Video Tutorial
Special thanks to Jacques in the Garden for providing valuable insights in their video, which I referenced while creating this guide.
What Do You Need to Consider when Starting?
Before beginning construction, evaluating your site and structure needs is essential for long-term success. The right setup ensures strength, efficiency, and adaptability through all seasons.
1. Climate and Site Conditions
Factor in local snow load, wind exposure, and sunlight patterns. Choose materials rated for harsh weather and place the structure to maximize sun while avoiding water runoff zones or shaded areas. A well-chosen site makes every phase of the build easier and more resilient.
2. Ventilation and Layout
Plan strong cross-ventilation using opposing doors, louvers, and a solar fan. Mark out a 12×16 footprint with access paths, tool zones, and planting areas.
Align door openings with wind flow and reserve wall space for hardware mounts before building to ensure seamless panel and airflow integration.
3. Tools, Materials, and Codes
Confirm access to all tools: saws, drills, sealants, and safety gear. Order full material quantities in advance, especially custom-cut polycarbonate and sealing supplies.
Check for local building code requirements, especially regarding snow load or structure height, to avoid delays or the need for costly adjustments mid-build.’
Common Mistakes You Should Avoid
Even small shortcuts during greenhouse construction can lead to long-term structural or environmental issues. Avoid these common mistakes to ensure a durable, weather-resistant, and functional build.
Skipping structural leveling causes uneven frames and poor panel alignment, affecting airflow and waterproofing.
Storing panels incorrectly, especially in the sun, leads to heat damage, warping, and installation problems.
Using mismatched fasteners can crack polycarbonate or allow leaks; always use the correct hardware.
Rushing cuts and sealant risks poor edges and missed seals, inviting water and insects inside.
Neglecting ventilation planning limits airflow, even with fans installed, compromising temperature control.
Smart execution protects your investment and extends greenhouse performance year after year.
Conclusion
With careful planning, the right polycarbonate materials, and a solid frame, you can build a high-performance greenhouse tailored to your site and growing goals.
This Maine build shows how durable, DIY structures can handle serious weather, stay off-grid, and look great doing it.
By following these steps, especially storing panels correctly, sealing edges well, and creating adequate airflow, you’ll avoid common pitfalls and enjoy a greenhouse that works hard year-round.
From anchoring the frame to setting up garden beds inside, every detail adds up to a space that thrives in every season. Now it’s your turn to build.

James McLaren, with a rich background in architecture from the University of Manchester, has been contributing his expertise to the world of creative construction and home innovation for over 20 years. His journey began as a project manager for a leading construction firm, where he honed his skills in bringing complex designs to life. James joined our platform as a freelancer in 2019, quickly becoming a favorite for his insightful and practical advice. He has been a pivotal force to our wing ever since, bringing our readers a blend of technical know-how and creative flair. Beyond his professional life, James is an avid woodworker and enjoys restoring vintage furniture, a hobby that complements his professional insights beautifully.