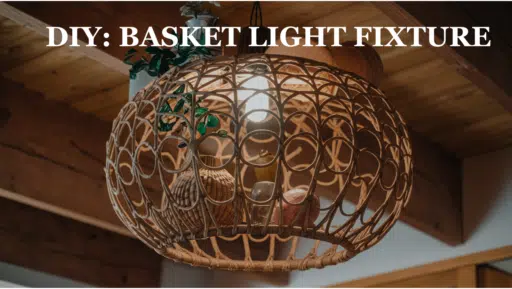

Want to add a touch of handcrafted beauty to your home without breaking the bank? Learn how to turn a simple basket into a stunning light fixture that looks like it came from a high-end design store.
This clever DIY project takes an ordinary woven basket. It converts it into a showstopping pendant light that can work in any room, from your cozy breakfast nook to a smart entryway.
This project saves you money compared to store-bought lighting and allows you to customize the look to match your style perfectly.
You can choose a basket that fits your vision if you prefer a modern farmhouse, boho chic, or classic coastal design.
With just a few basic supplies and simple steps, you can create a unique light fixture that will add warmth and character to your space and become a conversation piece guests will admire.
Materials Needed for Your DIY Basket Light Fixture
Looking to create a stunning light fixture without breaking the bank?
Upgrade a simple woven basket into a designer-worthy pendant light with just a few basic supplies. Here’s everything you’ll need for this budget-friendly project:
Materials Needed:
| Item | Description/Notes |
|---|---|
| Woven basket of your choice (look for one that’s sturdy, ideally with a defined center at the bottom) | The base for creating a light fixture needs to be sturdy. |
| Semi-flush mount light kit in black, silver, or gold | It provides the lighting element, which is available in multiple finishes. |
| Heavy-duty cutting pliers | This is for cutting wires or other materials as needed. |
| Floral wire | Used for securing decorative elements or wiring. |
| Twine or rope in your preferred color | To add a decorative touch or secure components. |
| Hot glue gun + glue sticks | This is for securely adhering parts, especially decorative items. |
| Light plate or ceiling hook for mounting | Mount the basket light to the ceiling securely. |
The most important piece is finding the right basket. Look for a woven basket that complements your decor style at stores like HomeGoods, At Home, or thrift shops.
You’ll want one without handles and enough spacing in the weave to let the light shine through beautifully.
The light kit can be used with any standard semi-flush mount fixture. Just choose one with a shade ring that securely holds your basket.
With less than $40 in supplies, you can create a custom pendant light that looks like it came straight from a high-end lighting store.
Step-by-Step Guide to Making a Basket Light Fixture
Step 1: Gather Materials
Start by gathering all the materials needed for the project. You’ll need an Ikea woven basket and a pendant light kit (a Hema light fixture works well).
Also, gather a few tools, such as a butter knife, heavy-duty scissors or pruning shears, and a reed, to fix the basket. You may also need a tape measure to measure the diameter of the light fixture.
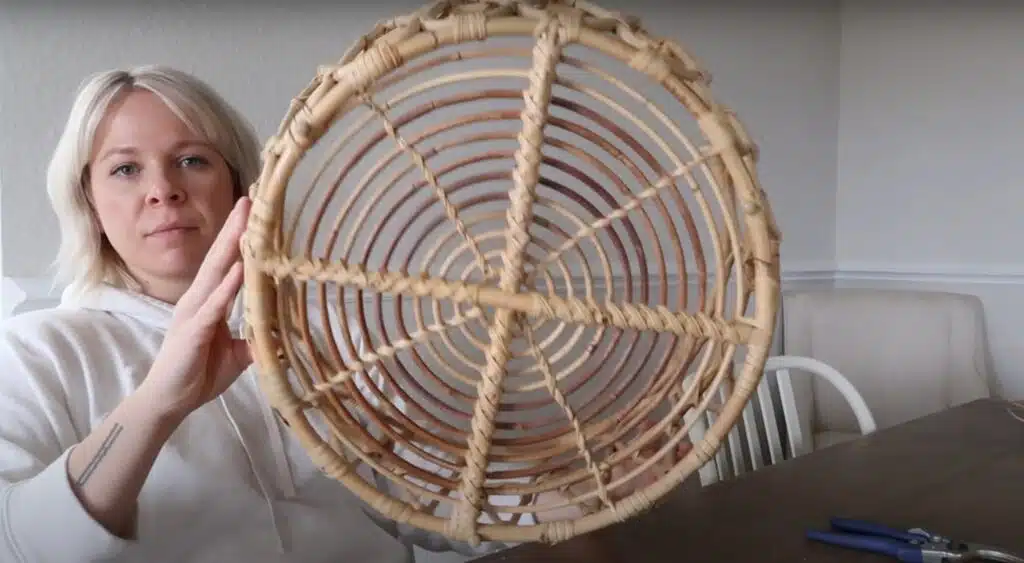
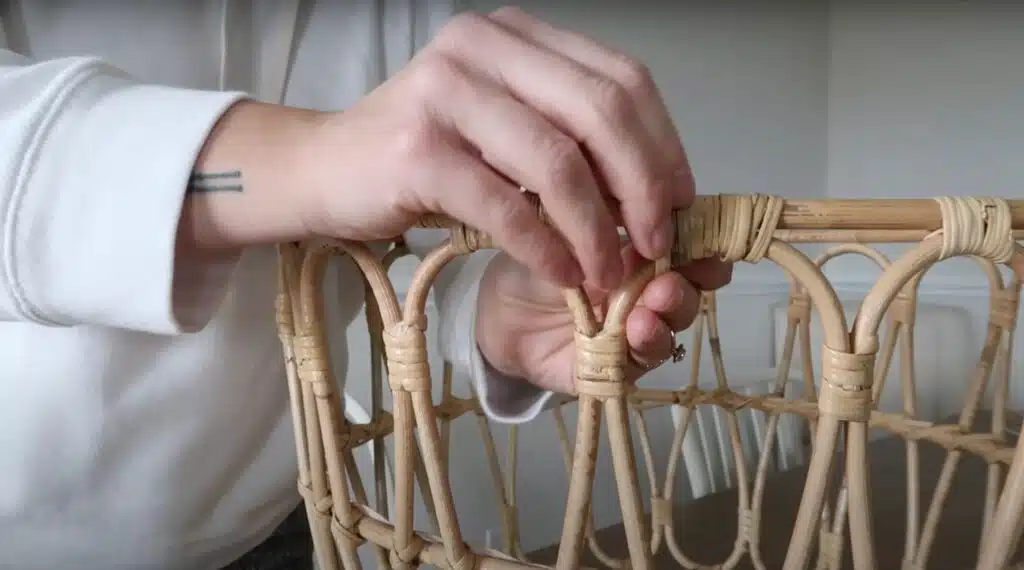
Step 2: Remove the Handles
Carefully remove the handles from the basket. Use a butter knife or an awl to pry out the reed wrapping the handles.
Be gentle to avoid damaging the basket. If the handles are stapled or nailed, work slowly to detach them without ripping the basket material.
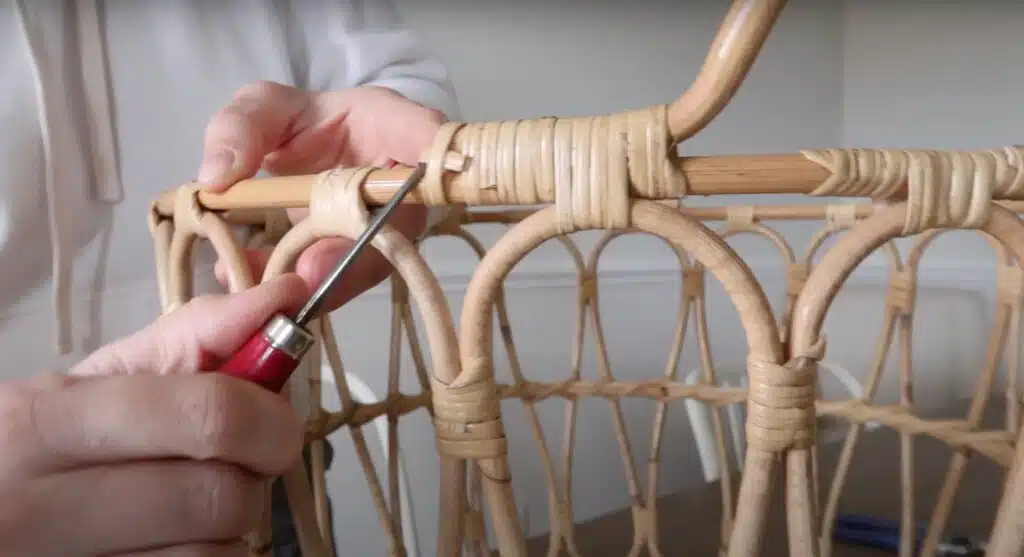
Step 3: Fix the Missing Reed
After removing the handles, you’ll notice gaps where the reed was. Wrap a new reed around these spots, tucking the ends neatly underneath the wrapped sections.
Cut off any excess reed and secure it tightly, making the basket look effortless again.
Step 4: Cut the Hole
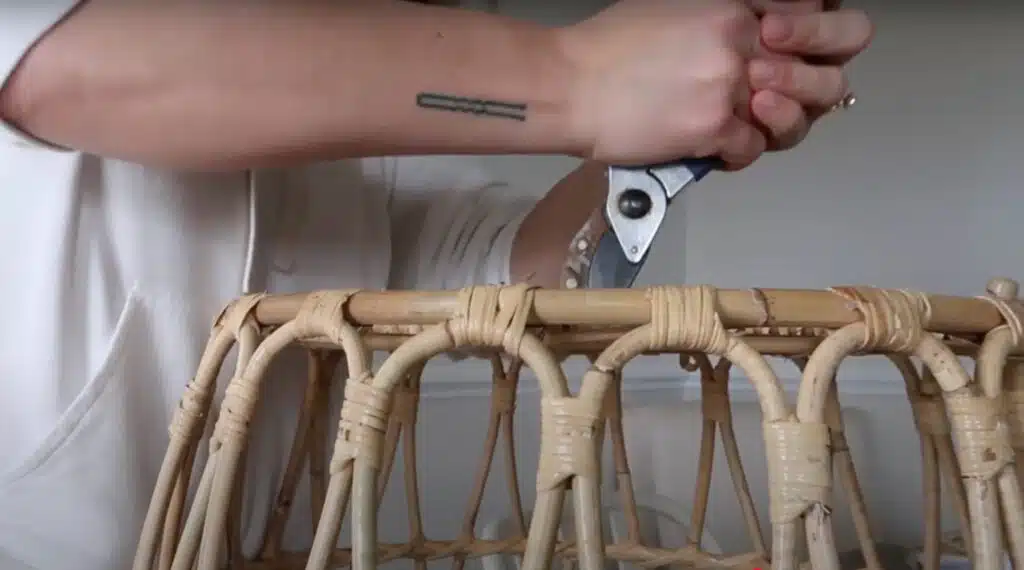
Measure the diameter of the light fixture’s base (usually about 1.5 inches) and mark it on the bottom of the basket.
Use pruning shears or bolt cutters to cut the hole. Take care; cutting through the rattan or bamboo material can be tough, so ensure the hole is big enough to fit the light socket snugly.
Step 5: Install the Light
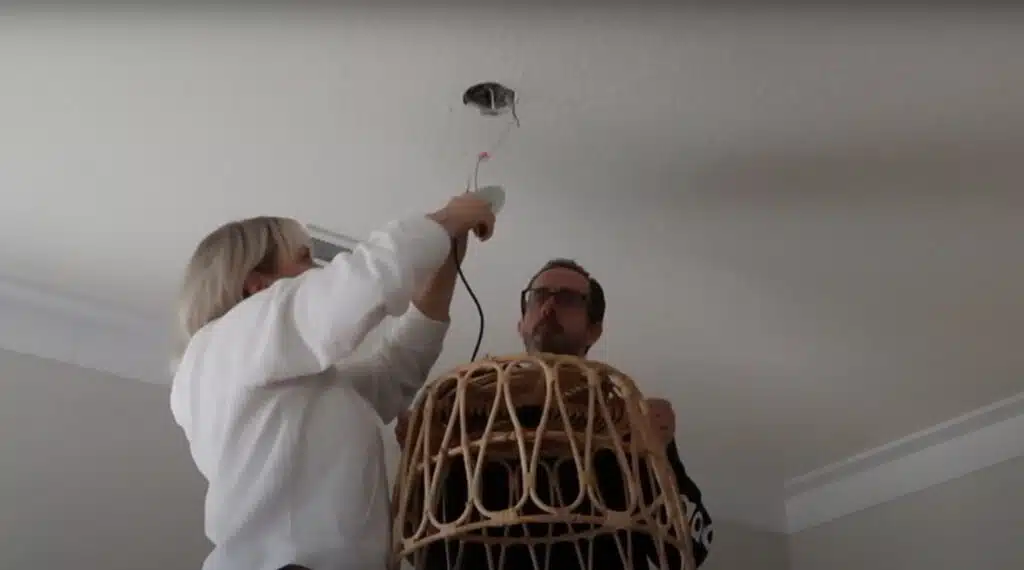
Once the hole is cut, thread the light fixture’s cord through the hole in the basket and mount it securely onto the light kit.
Turn off the power before starting the installation. It’s recommended to have a second person assist with holding the light while securing it to the ceiling.
Make sure the light is installed safely and level.
Watch and Learn: Easy DIY Basket Light Fixture Project
Decorating and Styling with Your New Basket Light Fixture
Incorporating the Basket Light Fixture into Your Home. Once your DIY basket light fixture is complete, it’s time to integrate it into your home decor. The versatility of the basket light fixture allows it to complement various interior styles.
Here are a few styling ideas:
Kitchen
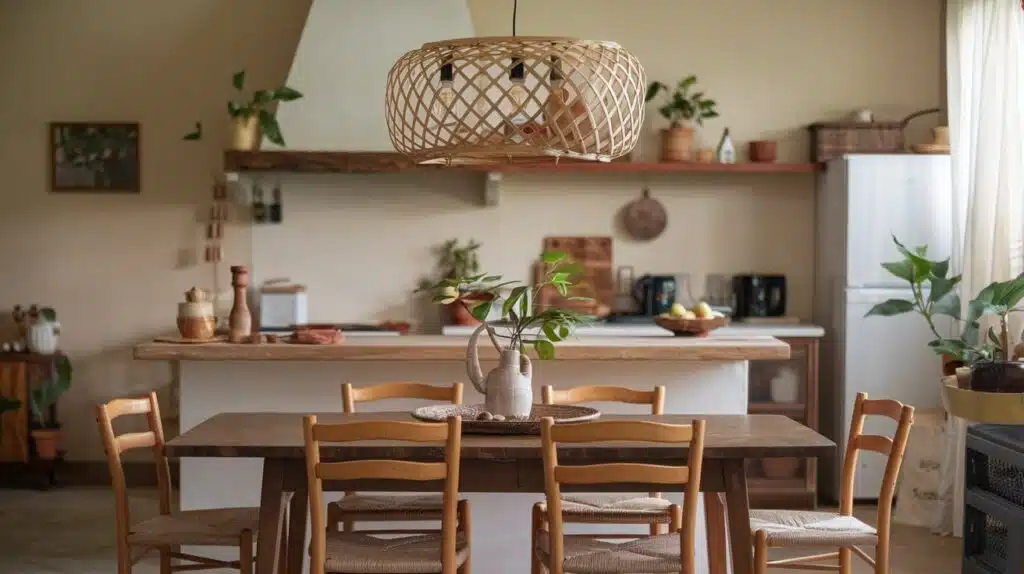
Hang the basket light fixture above the kitchen island or dining table to add warmth and charm. Pair it with natural wood countertops and soft-toned accents to create a cozy, rustic vibe.
Dining Room
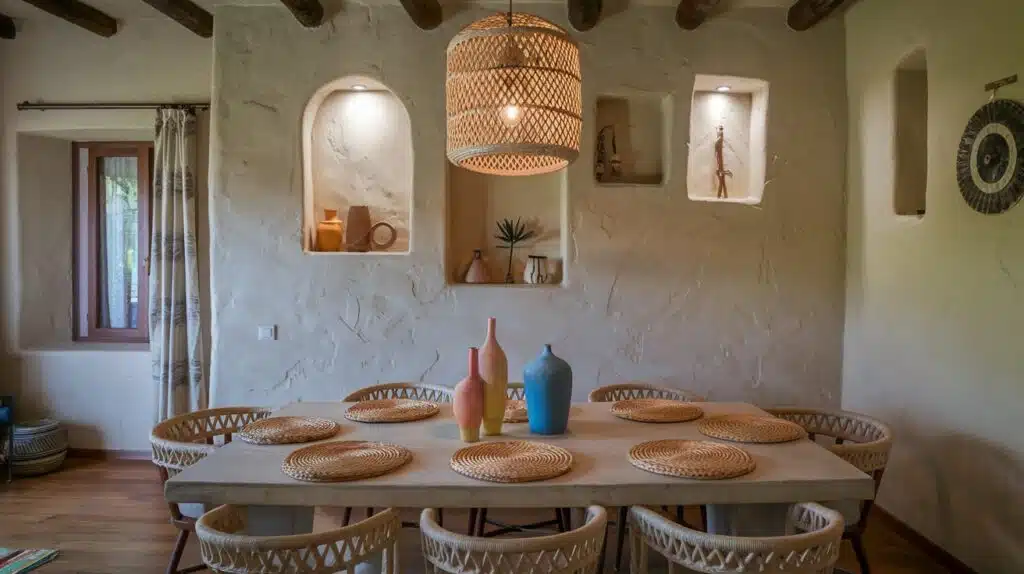
Place the light fixture above your dining table to create a welcoming ambiance. Combine it with woven placemats, a farmhouse-style table, and colorful vases for a cozy, inviting atmosphere.
Bedroom
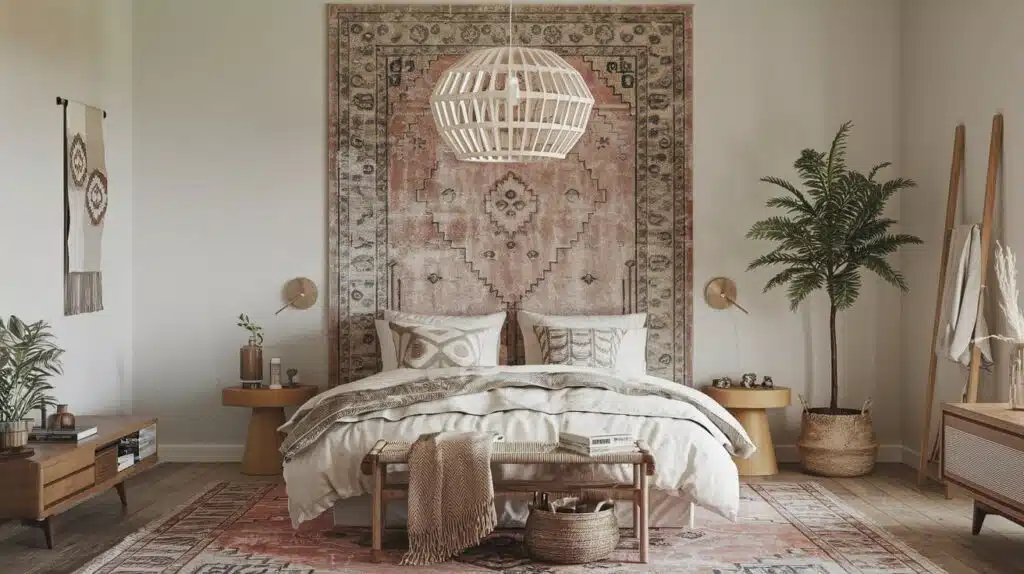
Add the basket light fixture to the bedroom for a boho-inspired look. Hang it above the bedside tables or the center of the room, and complement it with soft bedding, plants, and minimalistic furniture for a relaxed, chic vibe.
Entryway

Styling Tips to Complement the Light Fixture
Add plants For Natural Vibe

Use greenery like hanging plants or potted plants to bring natural beauty and life to the room, complementing the organic feel of the basket.
Mix with Rustic or Minimalist Furniture.

Pair the light fixture with rustic wooden furniture for a cozy vibe, or use smart, minimalist pieces to make it the space’s focal point.
By following these styling tips, you’ll create a harmonious and well-coordinated space.
Conclusion
Ready to change an ordinary basket into a stunning focal point? This simple DIY project proves beautiful lighting doesn’t need to break the bank.
What I love most about this project is its versatility. Each basket has a unique pattern and texture, so no two fixtures will look exactly alike.
Plus, the filtered light creates lovely shadows on your walls, adding an extra ambiance that standard fixtures can’t provide. Why not make a weekend of it? Grab a friend, head to your local thrift store for the perfect basket, and try this project.
And once you’re hooked on DIY lighting, you might find yourself eyeing all sorts of containers with new creative possibilities!
Remember – sometimes the most beautiful home additions come from thinking outside the box (in this case, inside the basket).

Ava Taylor, holding a Bachelor’s degree in Interior Design from the Pratt Institute, has made her mark in creating engaging and functional living spaces for over 14 years. She began her career with a New York-based design studio, where she gained a reputation for her innovative and user-centric designs. Ava joined our team in 2019, bringing a blend of artistic flair and practicality to our home improvement section. Since the she has been the lead contributor to our room transformation series, inspiring readers with her unique approach to maximizing space utility and aesthetic appeal. Beyond her professional work, Ava is a passionate collector of vintage furniture, a hobby that enriches her design perspective.