Bathrooms can be overwhelming spaces for children with sensory sensitivities. Harsh lighting, loud flushes, slippery floors, and cluttered counters can all contribute to anxiety and avoidance.
The good news is that creating a calming, functional, and safe bathroom doesn’t require a big renovation budget. With thoughtful adjustments, you can make the space inviting, manageable, and even fun for your child, all without breaking the bank.
This guide will walk you through affordable strategies to transform a bathroom into a sensory-friendly haven, covering lighting, textures, routines, and storage.
Understand Your Child’s Sensory Triggers
The first step in creating a sensory-friendly bathroom is observing and identifying what overwhelms your child. Common triggers include:
- Bright or flickering lights
- Echoing sounds from toilets or showers
- Cold surfaces or hard floors
- Cluttered counters or too many visible products
- Strong smells from cleaners or soaps
Once you know the triggers, you can focus on low-cost changes that reduce stress and help your child feel in control of the space.
For parents looking to pair design changes with behavioral strategies, resources with step-by-step potty routines can be invaluable. For example, autism toilet training tips offer guidance on readiness signs, visual schedules, and gradual routines that complement a sensory-friendly environment.
Soft Lighting and Muted Colors
Lighting is one of the most impactful and inexpensive ways to change a bathroom’s sensory feel. Bright overhead lights can feel harsh, while dim, indirect lighting can create a calm environment.
Tips to implement on a budget:
- Replace bright bulbs with warm, soft-white LEDs
- Add stick-on motion sensor lights under cabinets or around mirrors
- Use frosted window film or light curtains to diffuse natural light
Muted colors on walls, towels, or bath mats can also reduce visual overstimulation. Soft blues, greens, or neutrals work best.
You don’t have to repaint. Stickers, decals, or inexpensive shower curtains can achieve a similar calming effect.
Incorporate Soft-Close and Non-Slip Features
Practical upgrades can make the bathroom safer and less startling for kids:
- Soft-close toilet seats reduce the loud slamming sound
- Non-slip bath mats and stickers prevent slips and add a tactile element that can feel grounding
- Rubber grips or textured decals for the floor of the bathtub can make baths less intimidating
Many of these items are available for under $20, making them a budget-friendly way to improve both safety and comfort.
Simplify Storage and Reduce Clutter
Overcrowded counters and cabinets can overwhelm children who are sensitive to visual stimuli. Simple storage solutions can help:
- Use clear bins or labeled baskets to keep items organized
- Keep daily-use items in easy-to-reach containers
- Rotate bath toys to avoid overwhelming choices
- Store cleaning supplies in a separate, secure cabinet
The goal is to make the environment predictable, which supports independence and reduces stress during routines.
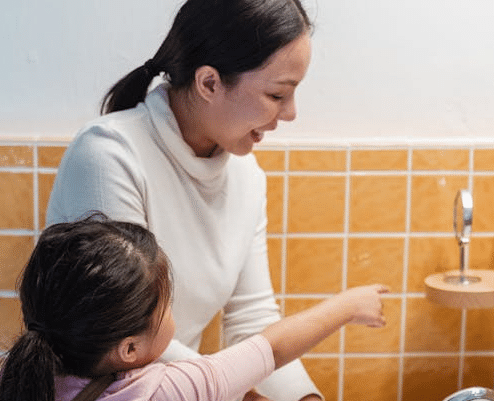
Build Visual Schedules and Consistent Routines
Bathrooms can be more approachable when children know what to expect. Visual schedules and step-by-step routines help them navigate hygiene tasks independently:
- Use laminated picture cards for steps like handwashing, flushing, and towel drying
- Post the schedule at eye level for your child
- Encourage practice with positive reinforcement for following the routine
Choose Calming Textures
Textures matter more than you might think. Soft towels, bathrobes, and cushioned rugs can help children feel grounded. Avoid rough sponges or scratchy mats that may trigger discomfort.
Keep in mind:
- Opt for microfiber towels or plush bath mats
- Consider padded toilet seat covers for added comfort
- Use silicone or rubber-friendly bath toys for tactile engagement
DIY Fixes Under $100
You don’t need to spend a fortune to make impactful changes. Many sensory-friendly upgrades can be achieved with DIY solutions:
- Install peel-and-stick LED lights for $10–$15
- Swap out a harsh shower curtain for a muted color or pattern for $20
- Add non-slip decals and soft-close accessories for $30 to $40
- Use baskets, bins, or drawer organizers for $10 to $20
Even with a modest budget, layering small adjustments can transform the bathroom experience.
Encourage Independence and Comfort
Once the bathroom is visually calm, safe, and organized, children can gain confidence in using it independently. Combining environmental adjustments with consistent routines helps reduce anxiety and builds skills over time.
Consider:
- Celebrating milestones, like successfully following the visual schedule
- Gradually introducing new tasks to avoid overwhelm
- Rotating items slowly, so the space remains familiar
Maintain Low-Scent, Low-Noise Environment
Strong smells and loud noises can overwhelm sensitive children. Choose mild, hypoallergenic soaps and detergents, and avoid automatic flushes or noisy appliances.
Even small changes, like closing the toilet lid before flushing, can make a big difference.
Bottom Line
Creating a sensory-friendly bathroom doesn’t have to be expensive or complicated. By focusing on lighting, textures, safety, routines, and DIY solutions, you can create a calming, functional space that reduces overwhelm for children with sensory sensitivities.
Combining environmental adjustments with structured potty routines ensures a holistic approach that fosters comfort, independence, and confidence, all on a budget-friendly plan.

Holding a Master’s in Library and Information Science from the University of Illinois, Josh Clarke has dedicated more than 15 years to managing and disseminating information across various platforms. His professional journey includes significant experience as a research librarian, where he developed an expertise in sourcing and providing accurate and comprehensive answers to diverse questions. In 2018, Josh brought his rich experience to our platform, quickly establishing himself as a reliable source for general FAQs. He has been overseeing our information curation since then, combining his research skills with a flair for engaging content delivery. When not involved in information management, Josh enjoys exploring digital photography and participating in local quiz competitions, hobbies that complement his inquisitive nature and love for learning.