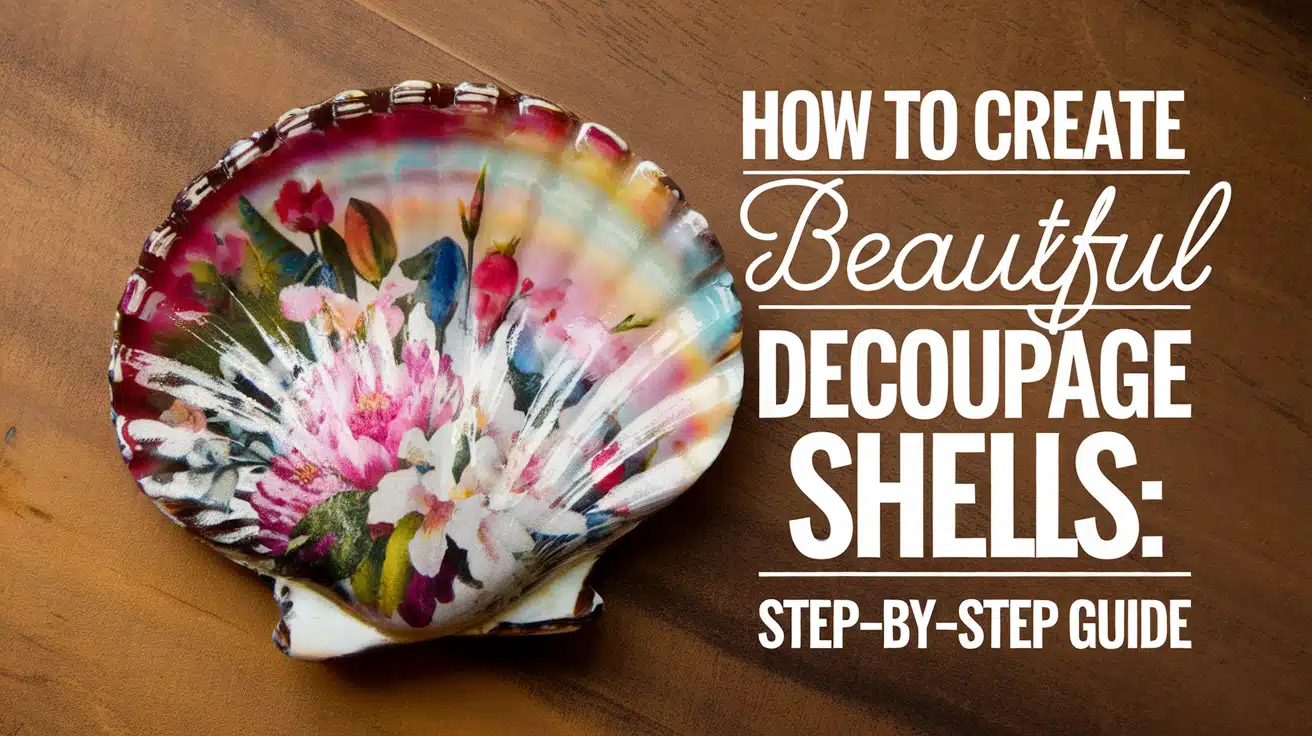
Want to turn ordinary seashells into beautiful home decorations? Most shells from beach walks end up forgotten in drawers or boxes. But with simple supplies and time, you can make something special.
Let me show you how to turn beach finds into eye-catching art pieces using decoupage. In this guide, you’ll learn the step-by-step process of decorating shells, from basic techniques to creative touches.
We’ll cover everything from picking the right supplies to displaying your finished work.
By the end, you’ll know how to create pretty shell decorations that can be used as jewelry holders, soap dishes, or display pieces.
These shells make perfect gifts and add a personal touch to any room.
Materials and Tools Needed
| Material/Tool | Description |
|---|---|
| Clamshells | It can be found in any size on ocean or bay beaches. |
| Cocktail napkin with a print | Napkin with a printed design (e.g., from TJ Maxx, Marshalls, Tree Shop). |
| Mod Podge (Gloss) | Glossy finish glue for decoupage. |
| Acrylic white paint | For applying a base coat to the shell. |
| Paintbrush | For applying paint and Mod Podge. |
| Cheap nail file | To file excess tissue paper along the edges. |
| Plastic bag/Saran wrap | Used for smoothing the tissue paper onto the shell. |
| Metallic gold acrylic paint | This is done to create a gold edging on the shell. |
Step-by-Step Decoupage Process
Step 1: Shell Preparation
Take your clamshell and apply a light coat of white acrylic paint. This helps cover any spots or marks on the surface. Let it dry before proceeding.
Step 2: Napkin Setup
Look at your paper napkin and peel it apart carefully. Most napkins have multiple layers – you only need the printed top layer. Make sure to cut or tear a piece slightly larger than your shell.
Step 3: First Glue Layer
Apply gloss Mod Podge all over the shell’s inner surface. Use your brush to spread it evenly, making sure to coat every area. This creates the base that holds your design.
Step 4: Design Placement
Put your napkin piece on the shell. Look for the main pattern or flower and center it where you want. The napkin should go past the edges a bit. This extra material helps with the next steps.
Step 5: Smooth Application
Take your plastic bag and press the napkin down gently. Start from the middle and work your way out. Push the napkin into all the curves and edges. This step stops air bubbles from forming.
Step 6: Edge Work
Get your brush slightly wet with plain water. Touch it along the napkin edges. As the paper gets soft, pull off the extra bits. Work bit by bit around the whole shell. Take your time here.
Step 7: Clean Finish
Use your nail file to smooth any tiny paper pieces left on the edges. Go slowly and lightly – you don’t want to scratch the shell or tear the design.
Step 8: Adding Gold Details
Paint gold edges with your small brush. Work carefully along the rim. Apply two coats for better coverage. You can paint the top edge, too, but leave the back plain for a natural look.
Step 9: Final Protection
Wait until everything is completely dry – about 6-8 hours or overnight. Then, add one last coat of gloss Mod Podge to the whole design. This keeps your work safe and adds shine.
Tips for Success:
Video Tutorial
Watch the full YouTube video tutorial on how to decoupage shells.
Advanced Techniques and Creative Ideas
Take your shell art to new heights with these special methods and fresh ideas. Each technique adds its own special touch to your creations.
1. Fabric Decoupage
Try swapping paper for fabric to create unique textures. Small cotton prints work well on shells – just cut them like you would napkins.
The fabric sticks differently than paper, so use extra Mod Podge. Press the fabric into the shell’s curves with care. Cotton and thin silk give the best results.
2. Mixed Media Magic
Add more flair to your shells by mixing different materials. Try these combinations:
- Small pearls along the edges
- Tiny seashells glued on top
- Paint accents over the decoupage
- Glitter touches in specific spots
- Sea glass pieces as focal points
The key is placing add-ons after your base design dries fully. This stops colors from running together.
3. Making Shell Collections
Build groups of shells that tell a story:
- Summer shells with bright flowers
- Winter designs with snow scenes
- Spring patterns with small blooms
- Fall leaves and warm colors
You can also make sets for special times:
- Holiday decorations
- Beach-themed bathroom sets
- Table centerpieces
- Gift collections
4. 3D Layer Effects
Build depth in your designs:
- Start with a base pattern
- Cut small pieces from extra napkins
- Place them on top of dried areas
- Seal between each layer
- Build up spots you want to stand out
Let each layer dry before adding the next. This will make certain parts of your design pop up slightly, giving the final piece real depth.
Remember to seal all layers well, especially when trying new methods. Each shell might need an extra gloss coat to keep everything in place.
Displaying and Using Your Shells

Home Décor Ideas
Your decorated shells can transform any room into a more inviting space. A single large shell creates a striking statement piece on mantels or coffee tables.
Groups of smaller shells bring visual interest to bookshelves or window ledges. The bathroom offers a natural setting for these pieces, where they fit perfectly with coastal or spa-like themes.
Consider placing shells at varying heights to create visual flow in your displays. Natural light makes the gold edges shine, while soft lamp light shows off the glossy finish of your work.
Functional Uses
Shell art combines beauty with purpose in your daily life. Medium-sized shells work perfectly as ring holders near sinks or on bedside tables. Small shells find their purpose on desks, keeping tiny items like paper clips or stamps organized.
Larger pieces serve well as soap dishes or catch-all spots in entryways. For these practical uses, select shells with stable bases. Add small felt pads underneath to protect your furniture and keep the shells steady. This simple step helps your pieces last while protecting your surfaces.
Gift Ideas
Shell art makes thoughtful presents for many occasions. Each piece marks time and care, setting it apart from store-bought gifts. Small ring dishes work wonderfully for wedding presents, especially when made with patterns that mean something to the couple.
For housewarmings, consider shells that match the new home’s style or color scheme. To make the gift more meaningful, include a small note about the shell’s creation.
Care Instructions
Proper care keeps your shells looking fresh and beautiful. Regular dusting with a soft cloth maintains their shine. Keep them away from direct sunlight to prevent pattern fading.
When moving shells, hold them by their edges to protect the artwork. Store them flat when not in use to prevent chips or damage. Well-maintained shells become lasting pieces that bring joy for years to come.
Conclusion
Making shell art brings joy and satisfaction. This simple craft lets you blend colors, patterns, and textures to create pieces that matter. Each shell becomes a canvas for your ideas.
Your finished shells tell stories—of beach walks where you found them, quiet moments spent creating, and spaces made more personal by your work. With practice, you’ll develop your style and find new ways to use these natural treasures.
Remember, each shell carries its shape and character. Some will hold rings by your sink; others will rest on shelves, catching light and eyes. Take time with each piece, knowing that good things come from patient work.
These decorated shells become more than crafts – they become small, lasting home pieces.


