
Installing tile over a subfloor is a manageable DIY project when the process is approached methodically.
The key is preparation, correct material selection, and working in a controlled sequence. Skipping steps or rushing layout decisions leads to uneven tiles, cracked grout, or long-term failure.
Understand the complete the process with repeatable steps presented clearly so first-time installers can work confidently.
It focuses on large-format tile installed over an uncoupling membrane, which is the correct method for reducing movement and preventing cracks on wood subfloors.
How to Install Tile Flooring Over a Subfloor
This is the practical process for removing vinyl flooring and installing large-format tile using an uncoupling membrane.
It is intended for homeowners completing a first-time tile installation who need clear sequencing, correct materials, and controlled execution to avoid common failures.
Materials Required
| Material / Tool | Quantity (Approx.) |
|---|---|
| Large-format tile (12×24 in) | Based on room size + 10% waste |
| Uncoupling membrane (e.g., Ditra) | Room square footage |
| Uncoupling membrane thin-set mortar | 1 bag |
| Polymer additive or water (per mortar spec) | As required |
| Tile thin-set mortar (large-format) | 1–2 bags |
| Notched trowel (membrane + tile sizes) | 2 |
| Tile spacers (3/16 in) | 1 pack |
| Tile saw or manual tile cutter | 1 |
| Utility knife or scissors | 1 |
| Oscillating tool (for jambs) | 1 |
| Rubber grout float | 1 |
| Pre-mixed grout | As required |
| Sponge + bucket | 1 each |
| Vacuum | 1 |
| Belt sander + sanding belts | 1 |
| Pry bar | 1 |
| Diagonal pliers | 1 |
| Measuring tape + marker | 1 each |
| Schluter transition strip | 1 |
| Painters tape | 1 roll |
Step 1: Clear the Room and Remove Existing Flooring
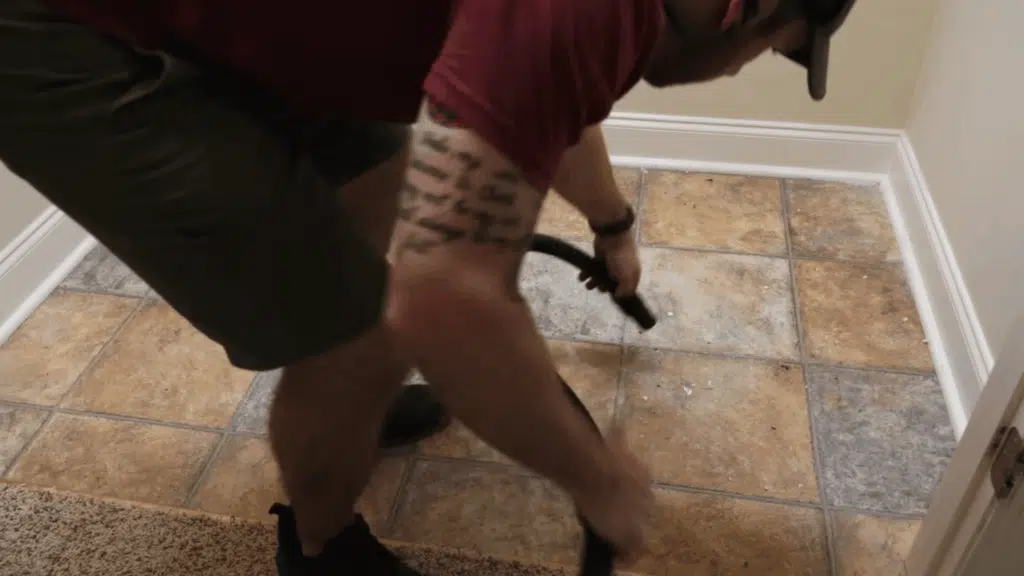
Remove appliances and all floor coverings. Pry off trim and transitions. Remove vinyl flooring completely, including any plywood underlayment.
Pull staples using diagonal pliers rather than hammering them flat. Vacuum thoroughly once all materials are removed.
Step 2: Flatten and Prep the Subfloor
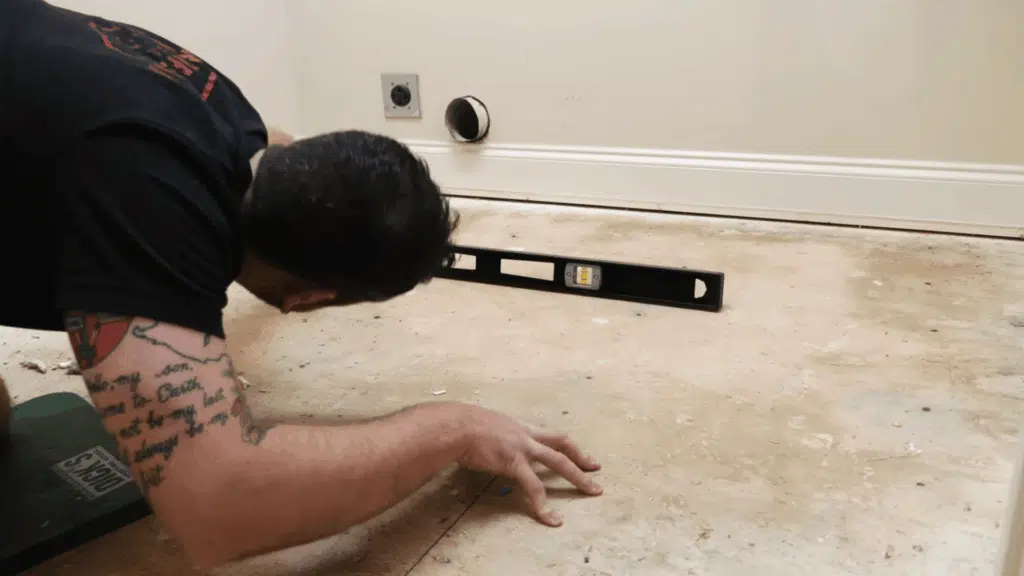
Inspect the subfloor for humps or uneven areas. Mark high spots and sand them flush using a belt sander. Flatness is critical for large-format tile to prevent lippage. Vacuum again to remove all dust before continuing.
Step 3: Install the Uncoupling Membrane
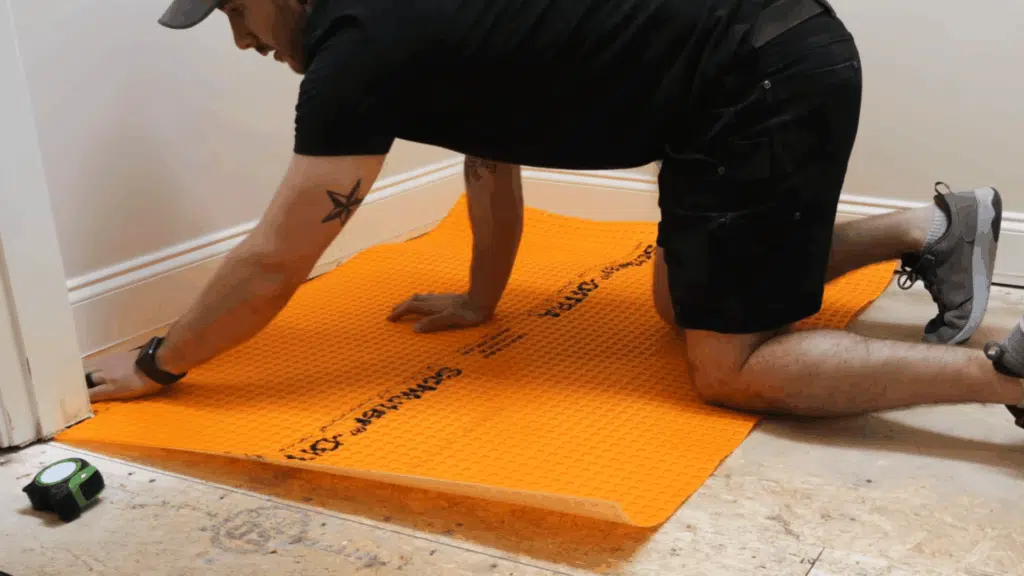
Mix uncoupling membrane mortar to specification. Spread mortar onto the subfloor and comb with the correct trowel notch.
Lay the membrane fleece-side down and embed it fully using a grout float. Lift corners to verify full coverage before continuing.
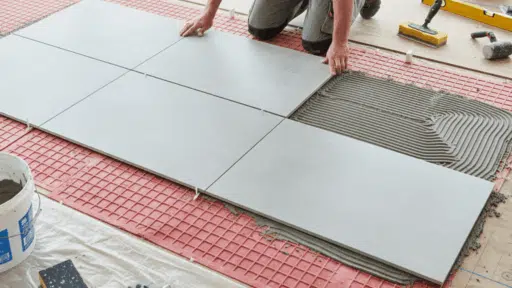
Step 4: Dry Fit Tile and Plan Layout
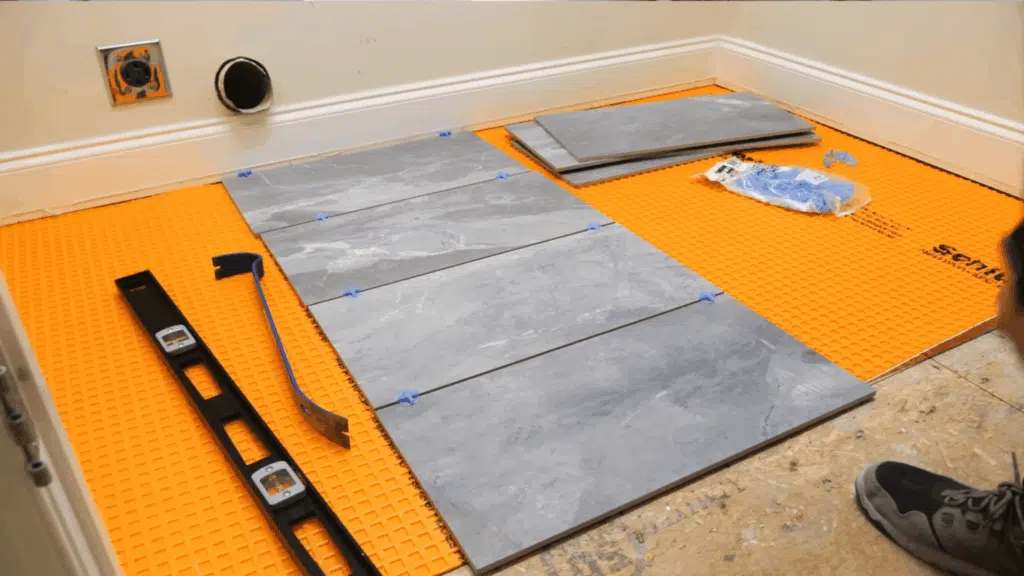
Dry fit tiles to establish layout, grout spacing, and offset pattern. Use a maximum 33% offset for large-format tile.
Mark cut lines carefully, accounting for wall gaps and trim. Label tiles to ensure accurate placement during installation.
Step 5: Cut Tiles and Undercut Trim
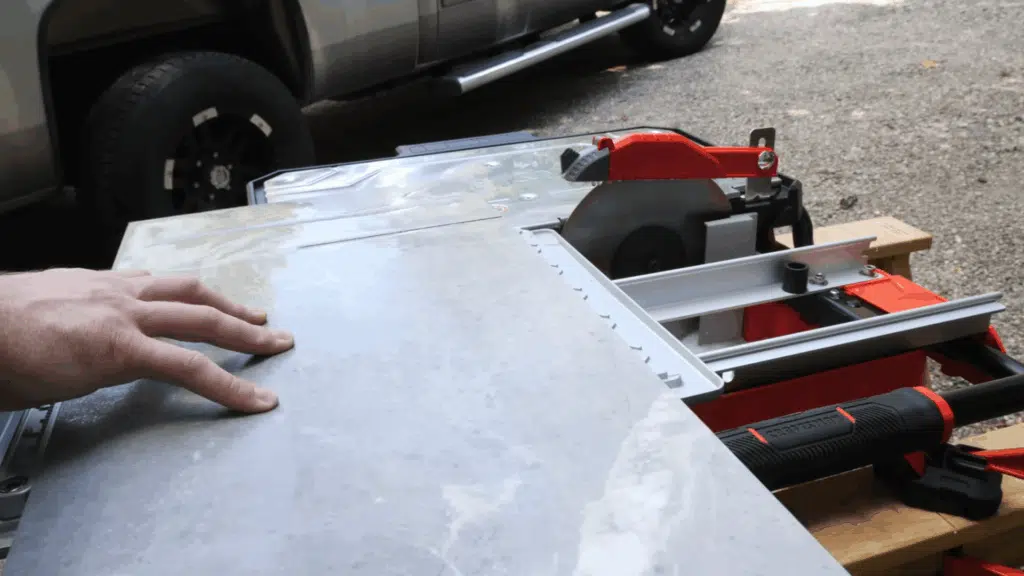
Cut tiles using a tile saw or manual cutter. Undercut door jambs and trim using an oscillating tool with a tile and membrane as a height guide.
Ensure adequate clearance for thin-set and tile thickness to prevent binding during placement.
Step 6: Set Tile with Thin-Set Mortar
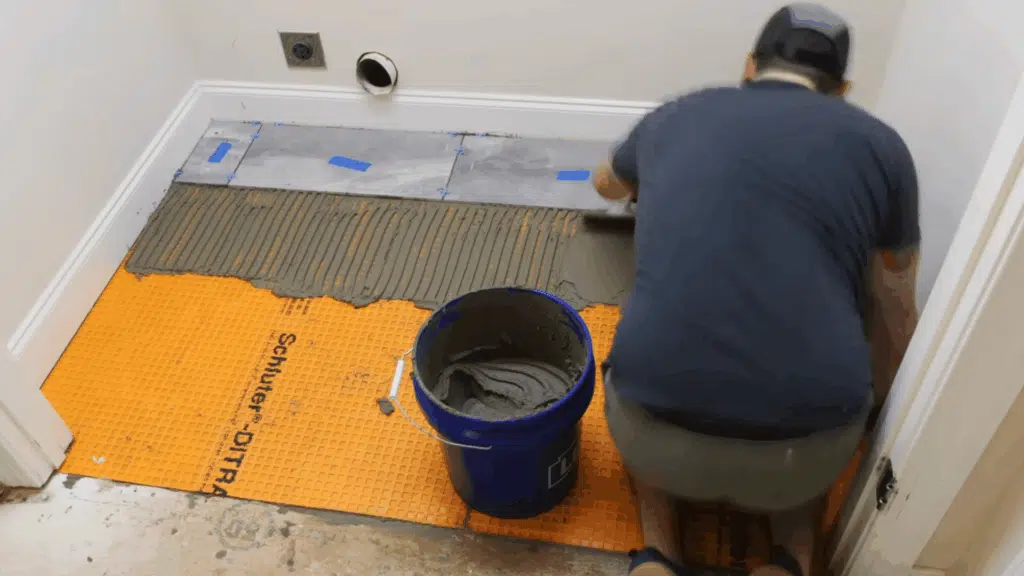
Use large-format tile mortar and a larger notched trowel. Fill membrane cavities first, then comb mortar in straight lines perpendicular to the tile length.
Set tiles by pressing and sliding slightly to collapse ridges. Use spacers to maintain consistent joints.
Step 7: Grout, Clean, and Cure

Allow tile to set for 24 hours. Remove spacers and clean joints. Apply grout using a float, forcing it fully into joints. Remove excess at a 45-degree angle.
After the partial set, clean with a damp sponge. Allow grout to cure fully before use.
Note: Accurate prep, flat substrates, correct mortar selection, and controlled spacing determine tile performance. Rushing layout or skipping prep leads to cracking, lippage, or poor adhesion.
Video Tutorial
Special thanks to Crafted Workshop for providing valuable insights in their video, which I referenced while creating this guide.
Tips for A Smooth and Simple Installation
Small decisions made during installation have a direct impact on tile performance and appearance.
Focusing on consistency and control helps prevent common DIY errors before they become permanent.
- Work in small, manageable sections so that the thin-set does not dry before the tiles are set, which ensures proper bonding.
- Maintain straight, consistent trowel ridges to allow trapped air to escape and achieve full tile coverage.
- Check alignment and lippage frequently with a straightedge while the mortar is still workable.
- Clean excess thin-set from joints immediately to preserve proper grout depth and uniform joint lines.
- Stop and fix issues as they appear instead of forcing tiles into place or correcting them later.
Consistent technique and early corrections lead to a stronger, cleaner finished floor.
Conclusion
A successful tile installation depends more on preparation and sequencing than speed.
Taking the time to flatten the subfloor, dry-fit the layout, and use the correct mortars prevents the most common DIY failures.
Large-format tile demands accuracy, but when installed correctly over an uncoupling membrane, it delivers long-term durability and clean results.
By following each step in order and addressing issues as they appear, homeowners can complete a professional-looking tile floor without unnecessary rework or repairs.

James McLaren, with a rich background in architecture from the University of Manchester, has been contributing his expertise to the world of creative construction and home innovation for over 20 years. His journey began as a project manager for a leading construction firm, where he honed his skills in bringing complex designs to life. James joined our platform as a freelancer in 2019, quickly becoming a favorite for his insightful and practical advice. He has been a pivotal force to our wing ever since, bringing our readers a blend of technical know-how and creative flair. Beyond his professional life, James is an avid woodworker and enjoys restoring vintage furniture, a hobby that complements his professional insights beautifully.