

When I first saw a farmhouse sink in my sister’s kitchen update, I was instantly smitten. Those deep, wide basins with their classic front panel spoke to me – part vintage look, part pure functionality.
Kitchen dreams don’t have to stay dreams, and installing your own farmhouse sink is totally possible. These sinks offer more than looks:
- Extra washing space
- Classic style
- Long-lasting performance
If you’re thinking, “I’m not a skilled worker,” stop right there. My guide is your complete roadmap. I’ll walk you through every single step, breaking down a complex project into simple, clear actions.
If you’re a weekend DIY enthusiast or a first-time home improver, you’ll have the confidence to create the kitchen you’ve always wanted.
Supplies Needed
- Tape measure
- Jigsaw or oscillating saw
- Construction adhesive
- Screws and screwdriver
- Painters tape
- 2×4 wood pieces (for support)
- Push-to-connect fittings (if working with copper pipes)
- PVC cutter or hacksaw
- 80-grit sandpaper
- Level and shims
Step-by-Step Guide to Installing a Farmhouse Sink
Step 1: Plan the Installation

Before starting, the plan is to remove the old sink and countertop, prep the cabinet, install the new farmhouse sink, and finish with the new counters and faucet.
It’s important to have all necessary fixtures like soap dispensers and accessories ready before measurement, as holes may need to be drilled on-site.
Also, ask your countertop installer if there’s anything specific you need to do to prepare.
Step 2: Confirm Cabinet Compatibility
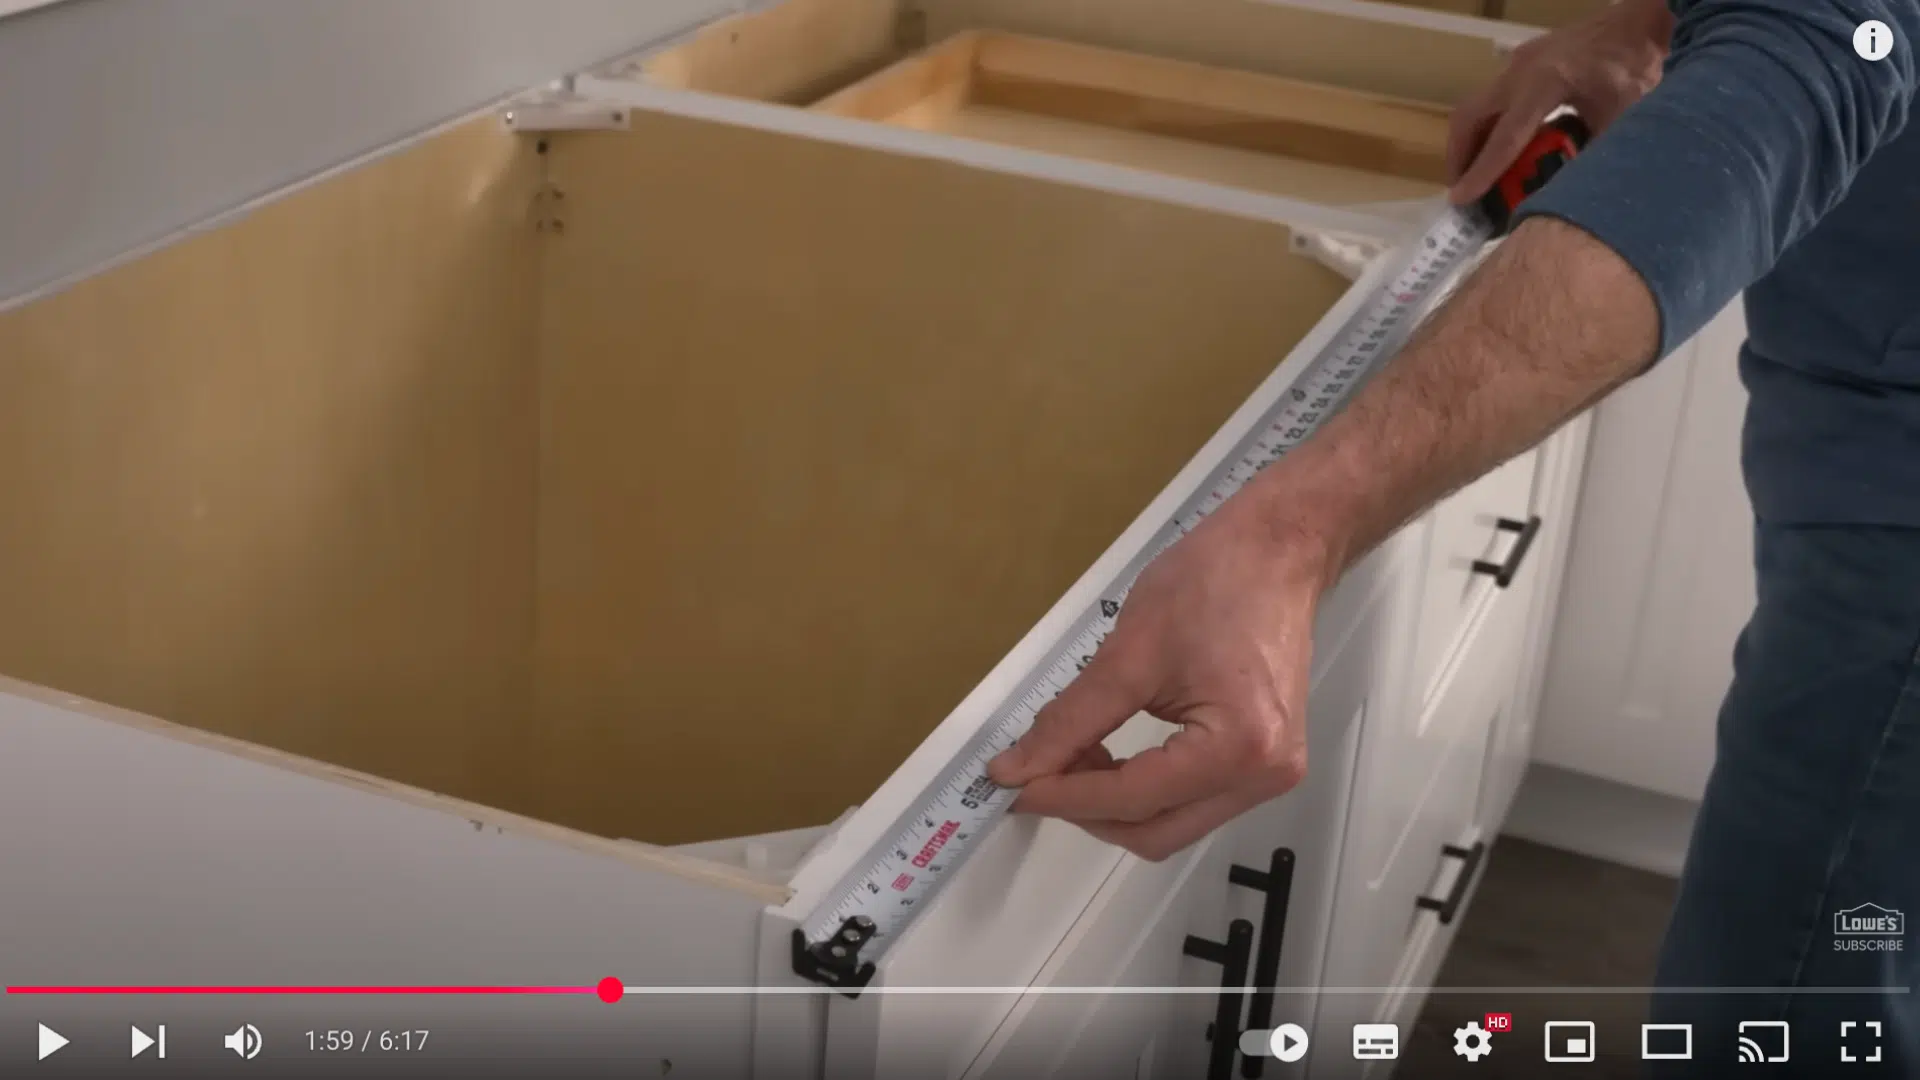
This particular Kohler sink doesn’t need a special cabinet, but you should still confirm that it fits.
Check the cabinet width, the distance from the top of the cabinet to the drawer openings, and the distance to the cabinet doors.
These measurements ensure that the sink apron doesn’t interfere with any part of the cabinet. If your sink is near a corner, confirm that drawers, doors, or dishwashers nearby can still open freely.
Step 3: Remove the Old Sink

Before removing the sink, take a photo of your current plumbing layout for reference. Turn off the water supply and disconnect all plumbing, including the disposal.
Underneath the sink, remove the clips, cut through the sealant around the top, and then lift the sink out. At this point, you may need to adjust the plumbing height to accommodate the new sink’s deeper basin.
Step 4: Adjust the Plumbing
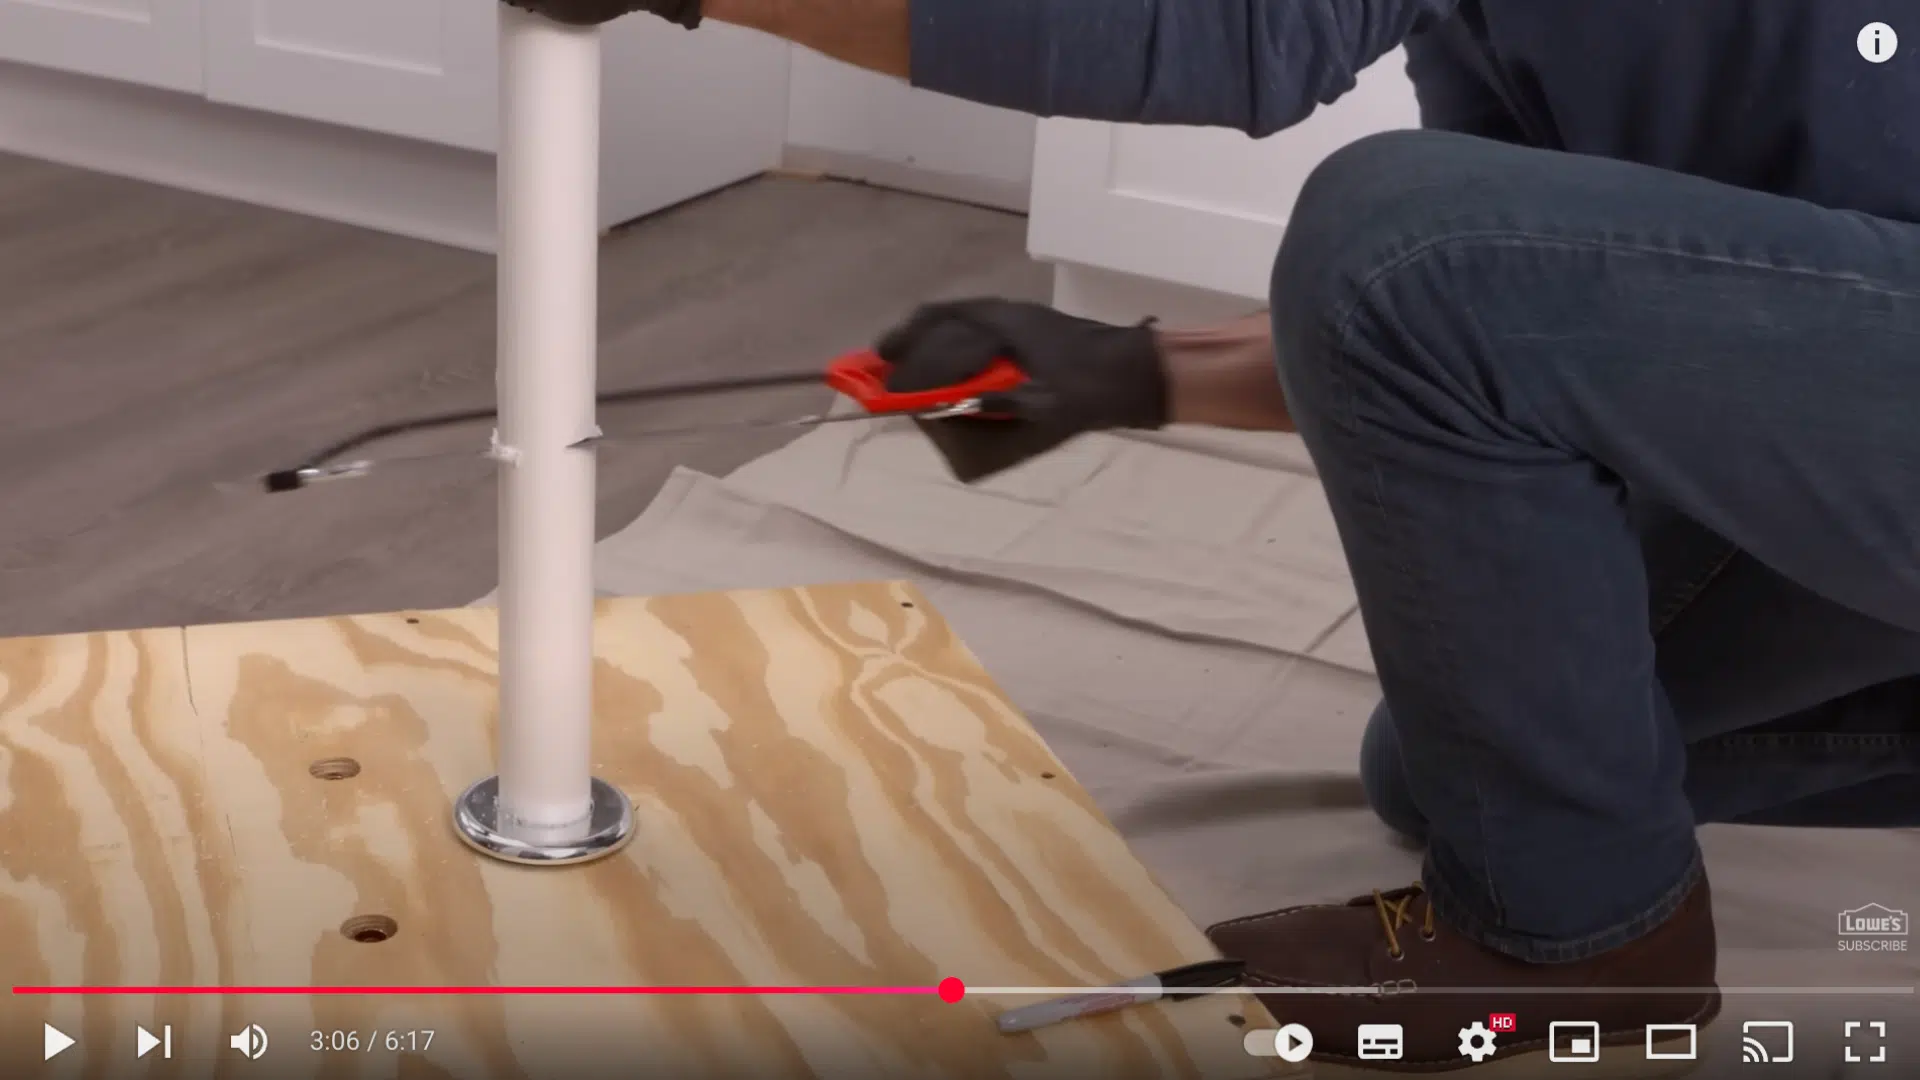
To make plumbing adjustments, use a hacksaw or PVC cutter to cut your existing drain pipes to the proper length. Sand the cut edges with 80-grit sandpaper.
For copper pipes, use a pipe cutter to cleanly cut the pipe and deburr the edges. You can then attach push-to-connect fittings to easily reconnect the water lines. These push fittings snap into place without the need for soldering.
Step 5: Remove the Countertop

To take out the old countertop, first check if it’s screwed in or glued. If screwed, simply back out the screws with a screwdriver or drill.
If it’s glued, carefully use an oscillating saw to separate it from the cabinet frame. Removing the countertop gives you full access to level the base cabinets and prep for sink installation.
Step 6: Level the Base Cabinets
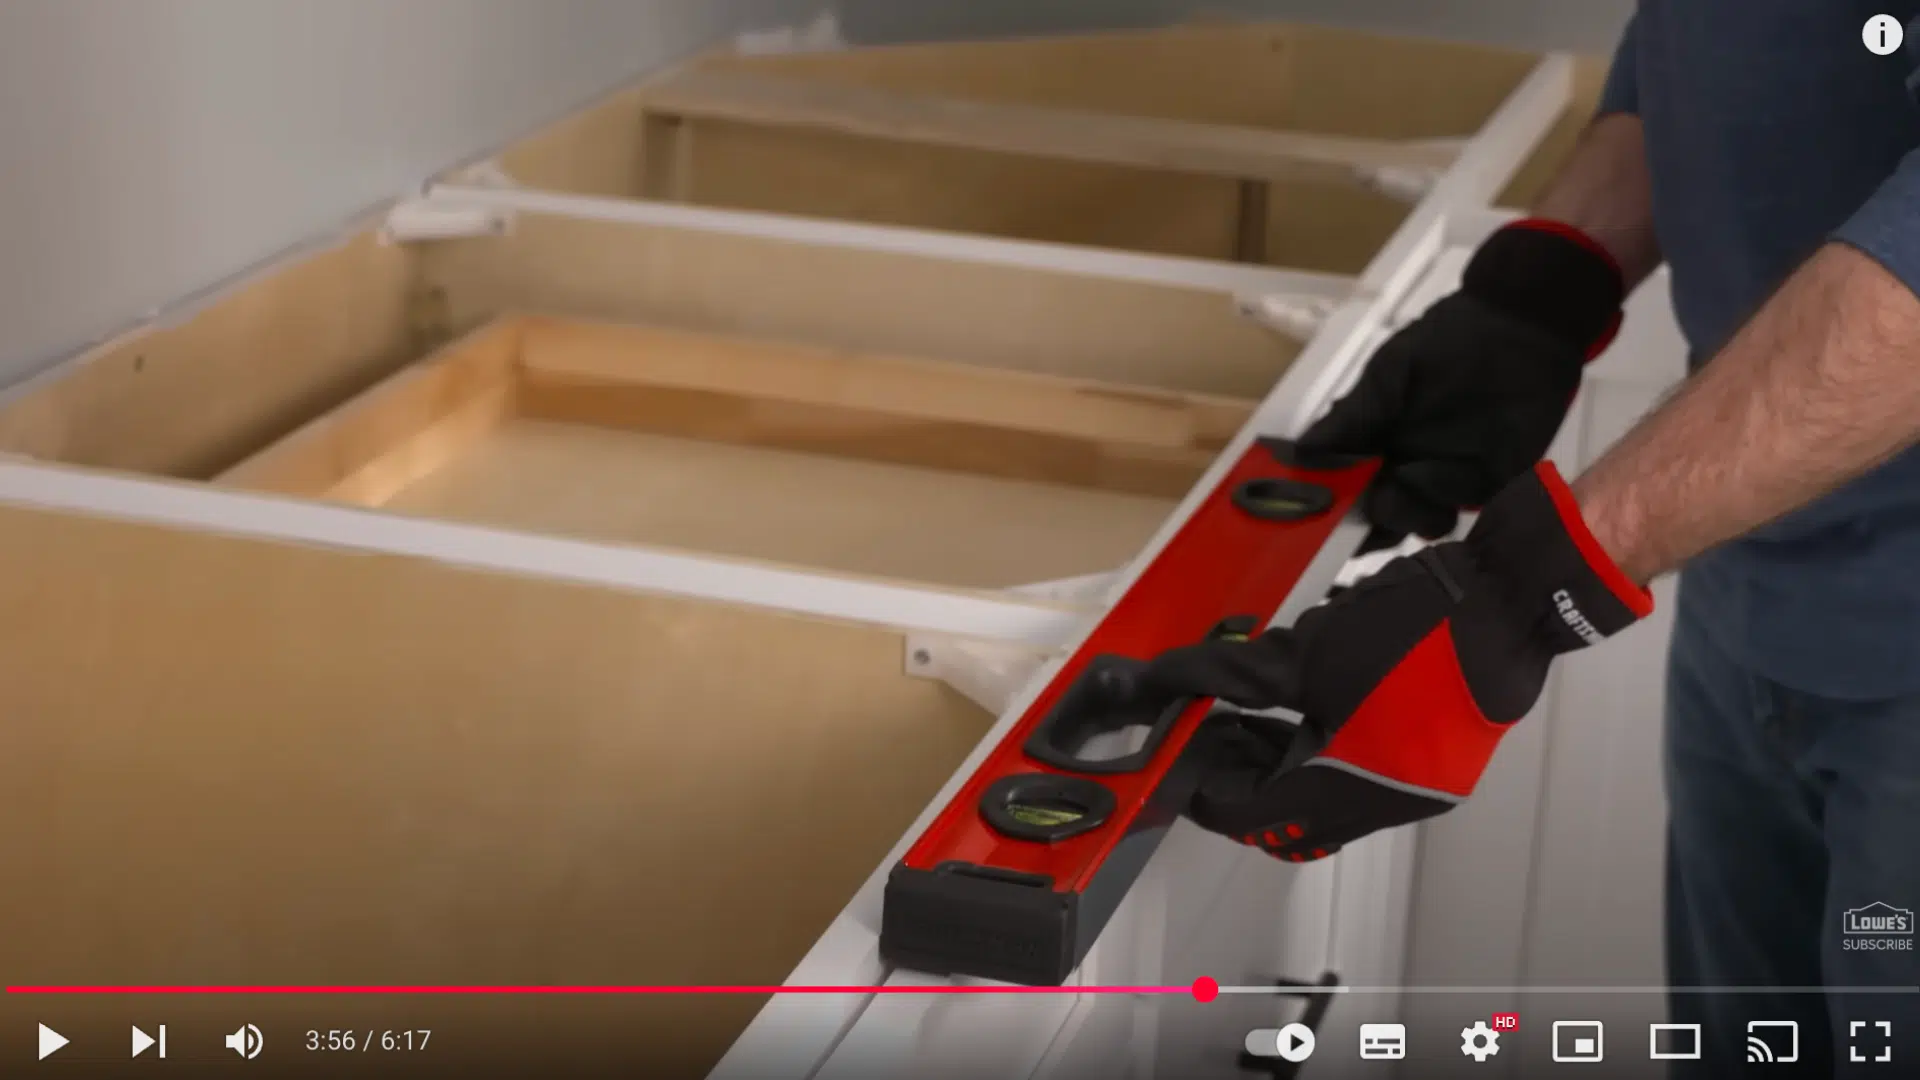
Once the countertop is off, use a level to check the tops of your cabinets. If needed, add shims to ensure everything is flat and even.
This step is critical so your new countertop will sit properly on the cabinets after the sink is installed.
Step 7: Prep the Cabinet for the Sink
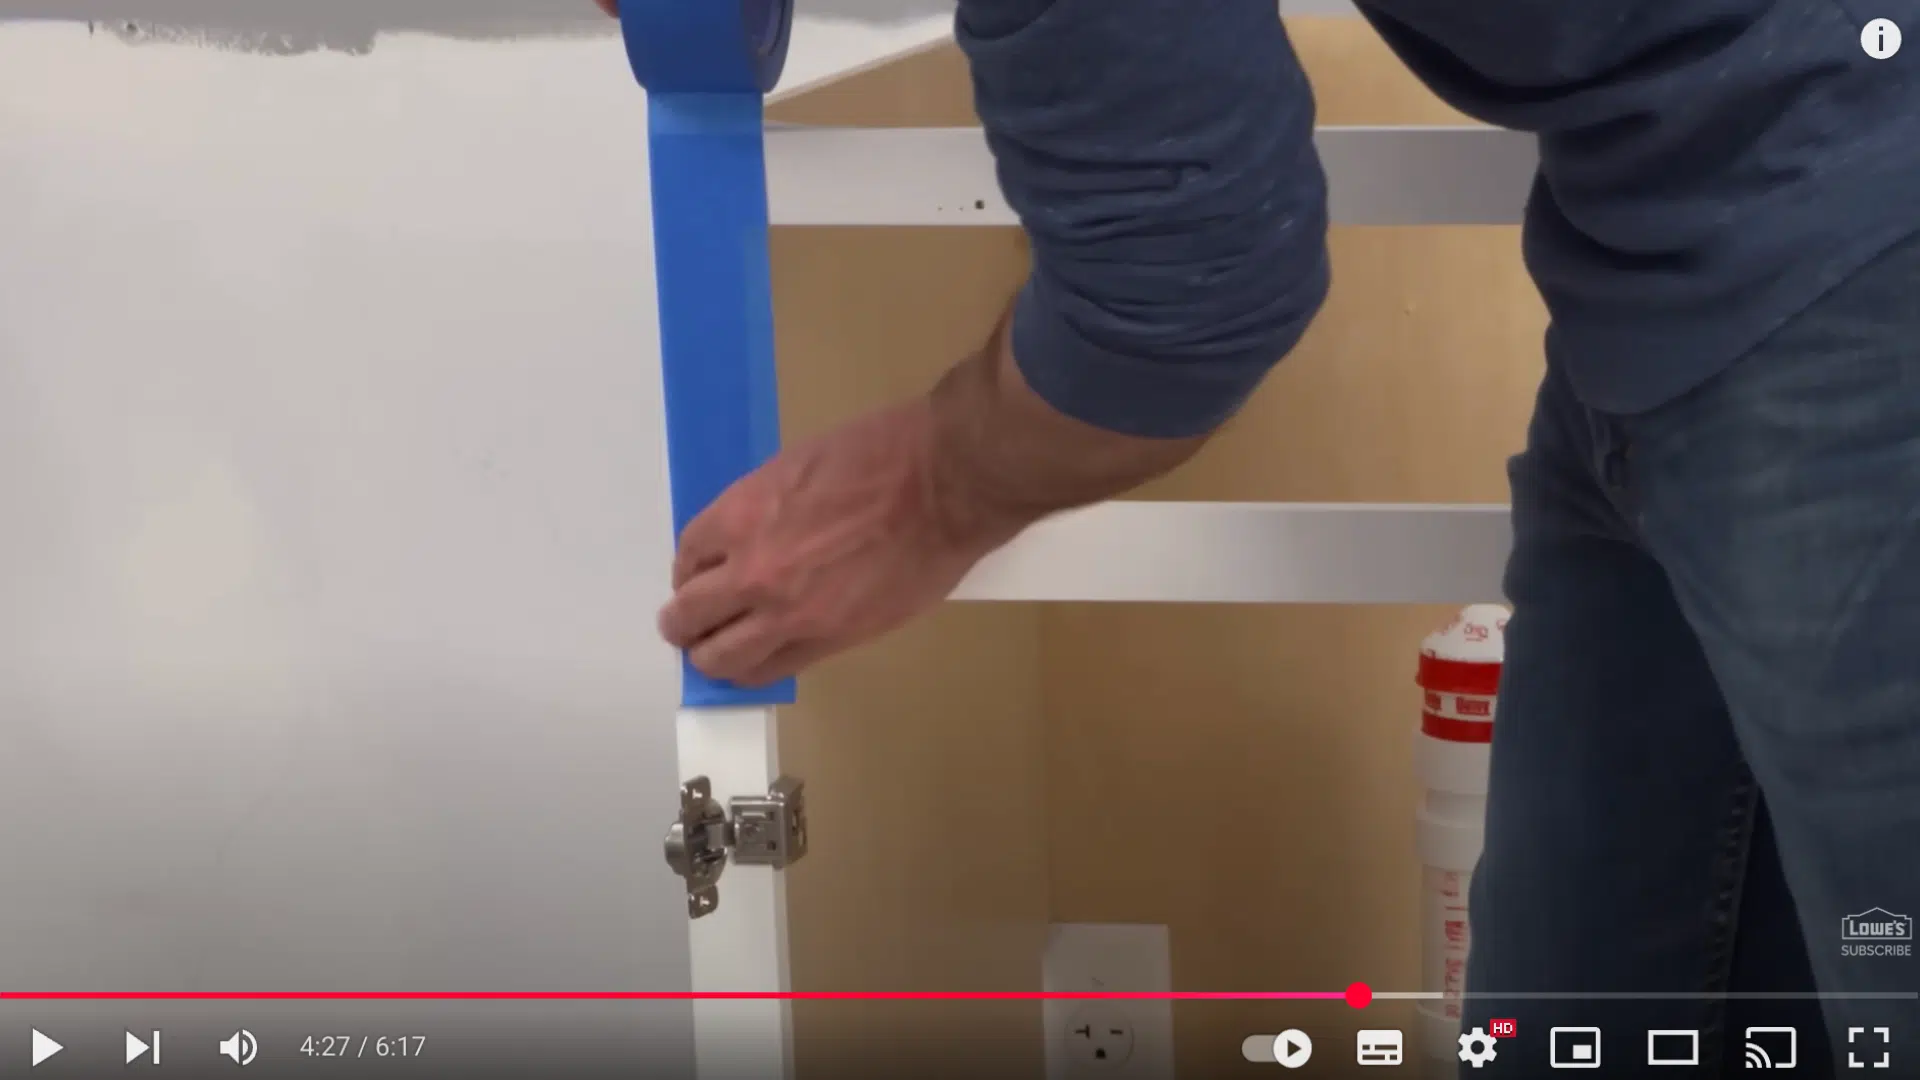
Remove cabinet doors and false drawer fronts to prevent damage and improve access. Your sink should come with a template for cutting out the front panel of your cabinet.
Mask the cut lines with painter’s tape to reduce splintering. Mark the cabinet center, align the template, and trace it.
Remove the template and cut along the outline with a jigsaw or oscillating saw. Smooth the cut edges with sandpaper if needed.
Step 8: Add Support for the Sink

Farmhouse sinks are heavy, even heavier when full of water, so they require solid support inside the cabinet. Your sink must sit level with the top of the cabinet, or slightly below, but never above.
Measure the sink’s thickness and mark where the support should go. In this case, the support should sit ⅝ of an inch below the top.
Use 2x4s to create horizontal supports inside the cabinet, secured with construction adhesive and screws. Add vertical supports from the base of the cabinet to the horizontal frame for added strength.
Step 9: Set the Sink in Place

With the support installed, carefully place the sink into position. You may need an extra pair of hands for this step due to the sink’s weight.
If the sink sits too low, use shims to raise it slightly. Double-check that the height is level and flush with the cabinet top. Once it’s set properly, your sink is ready for countertop installation.
Step 10: Install the Countertop

Now that your farmhouse sink is installed, it’s time to install your new countertop. Here, a butcher block top is used. If you’re using a stone surface, now is the time to call your countertop installer to complete the process.
Maintenance Tips to Keep Your Sink Looking Great
Your farmhouse sink needs some love to stay beautiful. Just like taking care of a car or a favorite pair of shoes, your sink requires simple, regular care.
- Clean It Gently Every Day: Use a soft cloth and mild dish soap – skip the rough scrubbers. Wipe your sink after each use to remove food bits and water spots. It’s quick and keeps things looking fresh.
- Watch Out for Stains: Foods like tomato sauce, lemon juice, and wine can stain if left sitting. Rinse or wipe up spills right away to avoid marks and keep your sink looking good.
- Check the Seal Now and Then: Every 6 to 12 months, take a look at the caulk around your sink. If you see cracks or gaps, reapply with silicone caulk. It only takes a few minutes and helps prevent water damage.
- Fix Small Scratches: Light scratches are normal. Use a non-abrasive pad and gently buff in circles. It’s a simple way to make your sink look smooth and clean again.
Pro Survival Kit
- Soft microfiber cloth
- Mild dish soap
- Non-abrasive pad
- Silicone caulk
- Patience (the real secret weapon)
Conclusion
From measuring to cutting, from fitting to sealing, you’ve just completed a major kitchen upgrade. Those careful steps we covered, precise measurements, proper support, and careful installation have changed your space.
Remember that patience is your best tool. Measure twice, cut once, and breathe deeply. Not everything will be perfect the first time, and that’s okay. Kitchen projects are about learning, not perfection.
I want to see your hard work in action. Drop a photo in the comments below. Struggled with a tricky cut? Confused about a step? Ask away. Your questions help everyone improve.
Take a moment to admire your work. You didn’t just install a sink, you nailed that home improvement win.

With a Master’s in Architecture from the University of California, Berkeley, Mitchell Green has spent over two decades dedicated to the study and practical application of home fixture design. His career started in an architectural firm, providing him a strong foundation in the structural and aesthetic aspects of home interiors. Mitchell brought his comprehensive knowledge to our platform, where he has been an influential voice in our home fixtures and fittings section. Since 2018, he has been guiding our readers through the intricacies of selecting and installing fixtures, combining technical know-how with design flair. In his spare time, Mitchell is a keen photographer, capturing architectural details and design elements, an interest that complements his professional focus.