Want to give your kitchen or bathroom a fresh, updated look without the cost of a full renovation? Painting them might be the answer. It’s affordable, surprisingly easy, and gives your space a brand-new vibe.
If you’re covering outdated laminate or just craving a new color, the right paint and prep can deliver surprisingly durable and stylish results.
You don’t need special skills or a big budget—just a weekend, some patience, and the right steps.
In this guide, we’ll cover everything from choosing the appropriate materials and prepping the surface to applying the paint and sealing your results for long-term protection.
The Magic of Countertop Paint
Countertop paint isn’t just regular paint in disguise – it’s a specialized formula designed to withstand the unique challenges that kitchen and bathroom surfaces face daily.
This remarkable product adheres to multiple surfaces, including laminate, cultured marble, ceramic tile, and even some solid surfaces that you’d think couldn’t be painted.
What makes these paints so special is their durability. Quality countertop paints contain epoxy or urethane components that create a hard, sealed surface resistant to water, heat, and daily wear.
If a full kitchen renovation isn’t in your immediate budget, a well-done countertop painting project can refresh your space for years while you save for that dream remodel.
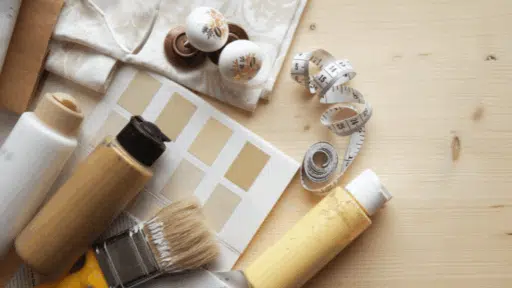
Tools and Materials Required
Preparation is key to any DIY project, and painting countertops is no exception. Here is everything you’ll need:
| ITEM | PURPOSE | ESTIMATED COST |
|---|---|---|
| 220-grit sandpaper | Prepping the countertop surface | $5–$15 |
| Sanding block/electric sander | Smoothing surfaces | $10–$50 |
| Paint roller (9-inch) | Applying paint evenly | $10–$20 |
| Foam roller covers | Replacement covers | $5–$15 |
| Paint tray | Holding paint | $2–$10 |
| Trim brush | Precision painting | $5–$20 |
| Latex gloves | Protecting hands | $5–$10 |
| Painter’s tape | Masking edges | $3–$10 |
| Plastic sheeting/drop cloths | Protecting surroundings | $5–$15 |
| Acrylic primer | Base coat | $15–$30 |
| Acrylic paint | Countertop color | $20–$50 |
| High-gloss topcoat | Protective finish | $20–$40 |
Total Estimated Cost: $105–$275
Steps to Create The Magical Countertop
Painting countertops may seem like a challenging task, but it becomes quite manageable when you approach it step by step. Follow these carefully outlined steps to ensure a clean, long-lasting finish that holds up to daily use.
Step 1: Sand and Clean Thoroughly
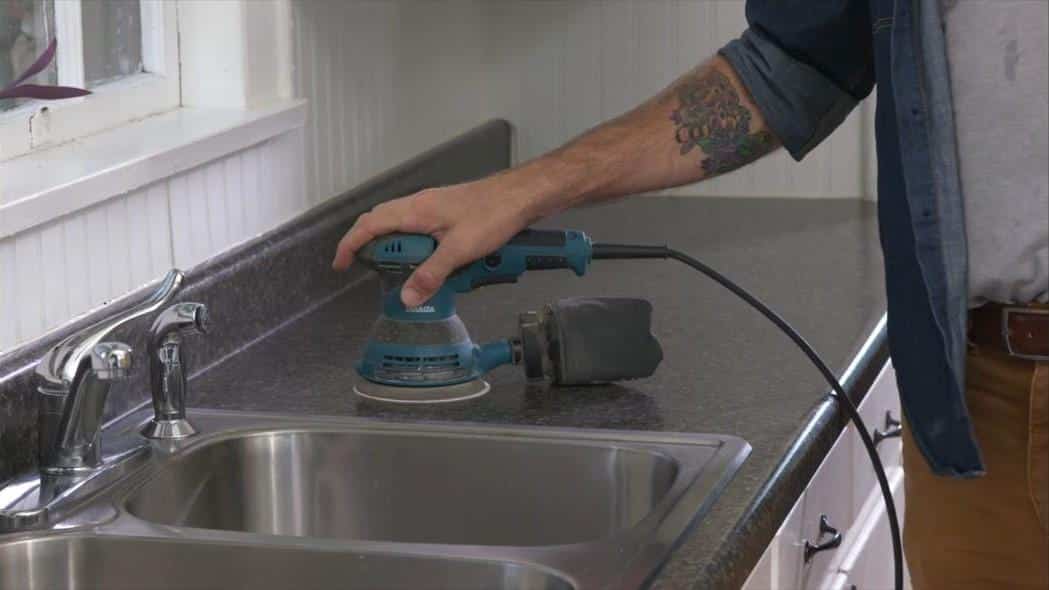
Begin by sanding your countertop surface with 220-grit sandpaper (an electric sander can speed things up).
Focus on removing any glossy finish and rough spots; you’re aiming for a smooth, dull surface. Once done, use mineral spirits on a lint-free cotton rag to wipe the entire area clean.
Let it dry completely, then run your hand over the surface; it should feel smooth and dust-free.
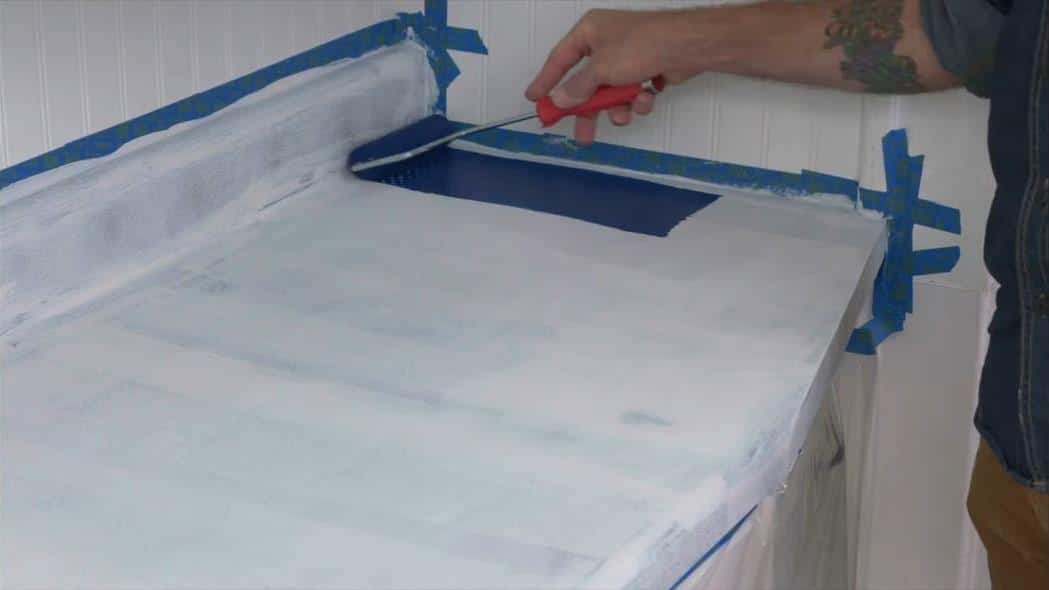
Step 2: Protect Surrounding Areas
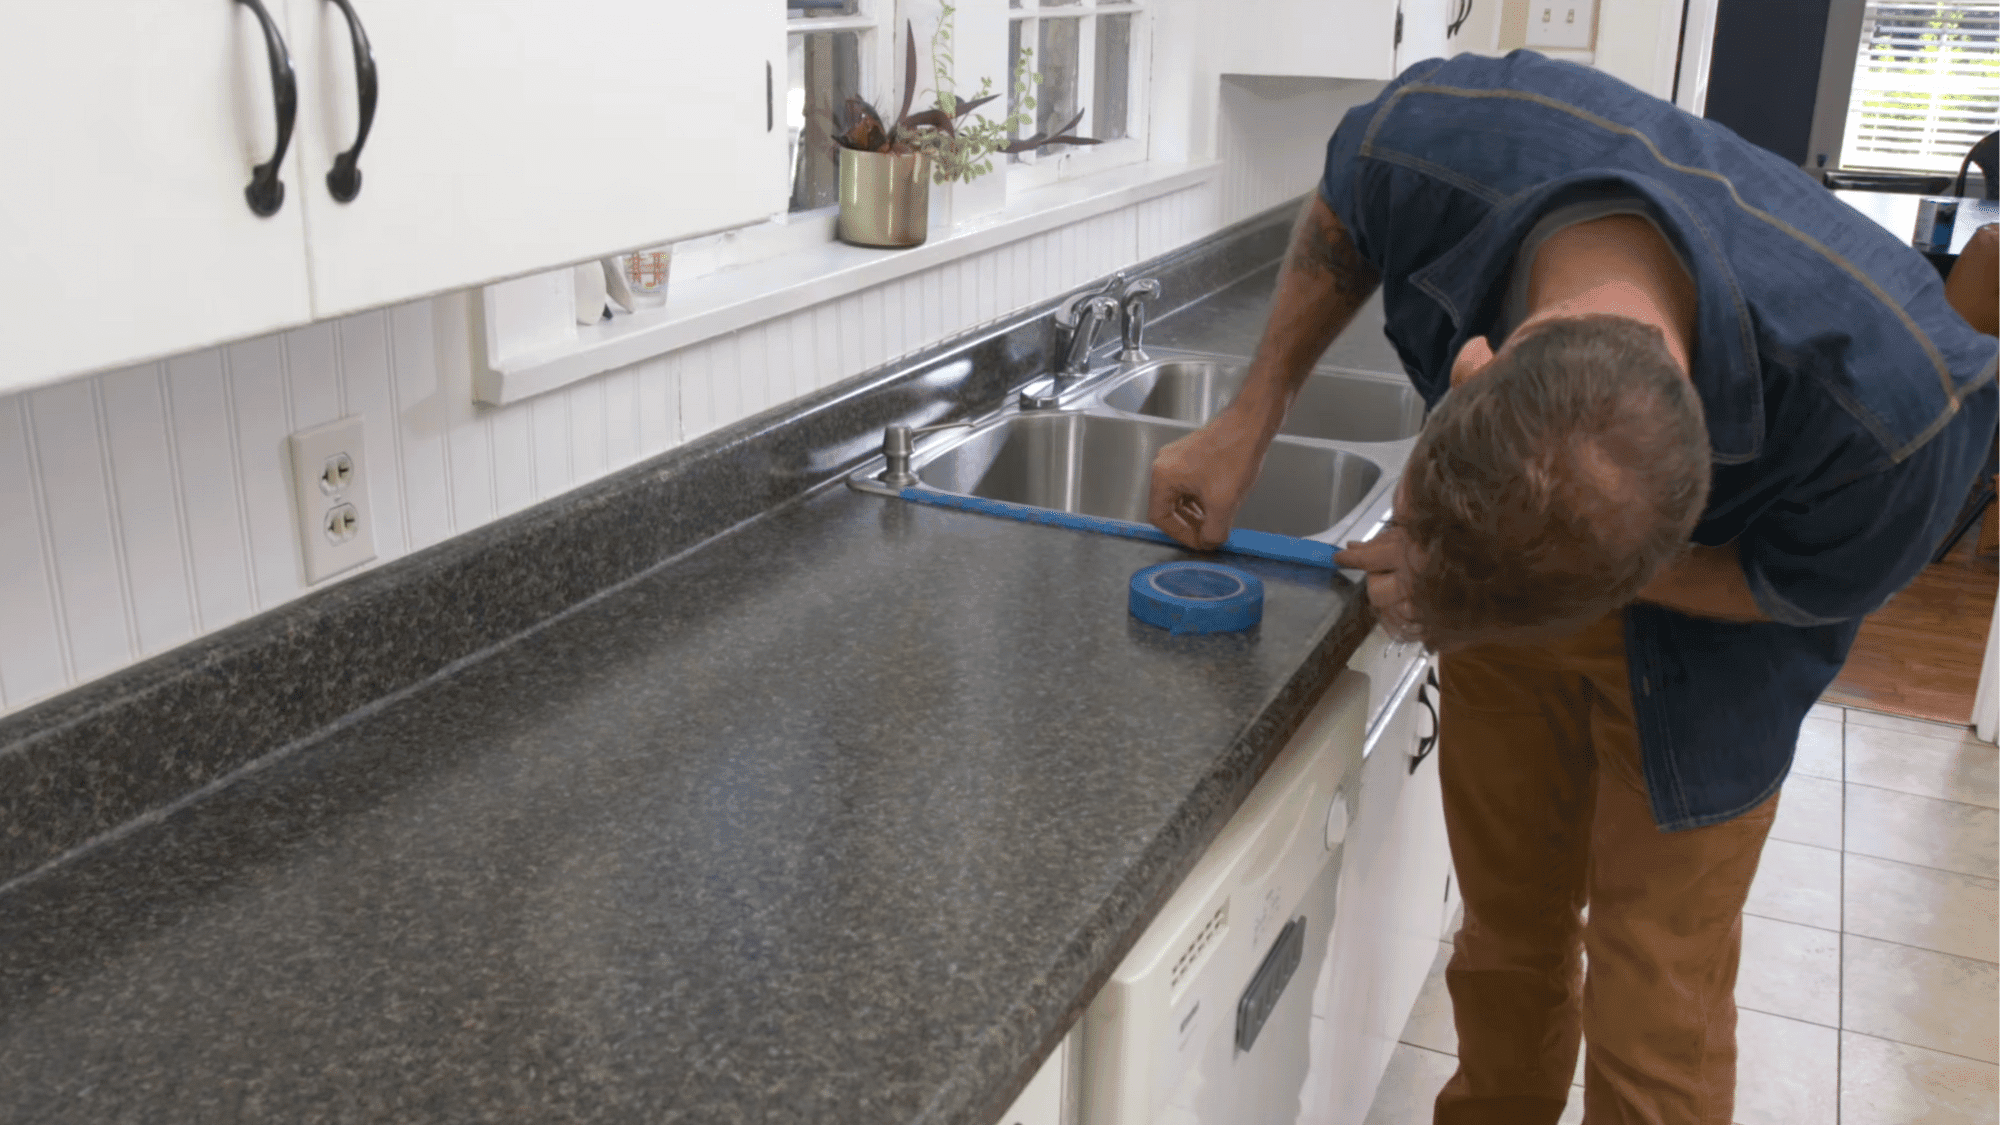
To prevent accidental paint splashes, apply painter’s tape around the sink, walls, and edges. Cover the cabinets and floors with plastic sheets or old newspapers.
Good prep work here saves cleanup later! Open a window or turn on a kitchen fan to ensure proper ventilation throughout the project.
Step 3: Prime the Countertop
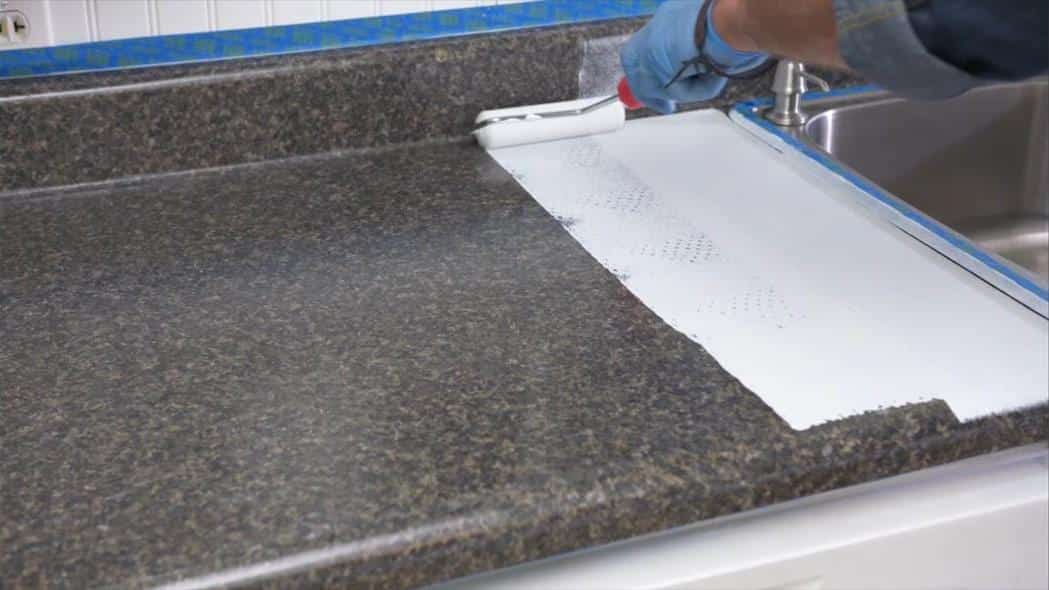
Stir your acrylic primer thoroughly. Using a foam roller, apply the primer in long, even strokes from front to back, overlapping slightly with each pass to maintain a “wet edge.” This prevents visible lines.
Use a trim brush for tight spots around the sink or backsplash. Let the primer dry for at least 6 hours before proceeding.
Step 4: Apply the Paint
Once the primer is dry, repeat the process with your acrylic countertop paint. Use smooth, even strokes and maintain a wet edge, just as you would with the primer.
Let the first coat dry for 4 hours, then apply a second coat the same way. Patience here leads to a more durable, beautiful finish.
Step 5: Seal with a Protective Topcoat

After the paint has dried, apply your high-gloss acrylic topcoat using the same foam roller and technique. This adds a shiny, protective layer. Allow it to dry for 4 hours, then apply a second coat.
Let your countertop sit for 24 hours before light use. Remember that it takes 14 days to cure fully, so treat it gently during that time.
Video Tutorial – Watch How It’s Done
For more information, check out this video tutorial by HGTV
Benefits and Drawbacks of Painting Countertops
Painting countertops emerges as a popular DIY alternative for homeowners seeking a kitchen or bathroom refresh without the significant investment of full replacement.
It presents an opportunity for dramatic aesthetic change on a budget.
| BENEFITS | DRAWBACKS |
|---|---|
| You can modify your countertop for just a few hundred bucks. | Painted countertops won’t forgive damage from things like slipping with a chef’s knife. |
| Fast turnaround—you can prep, paint, and finish within a weekend without professional help. | After a few months, you may notice tiny wear patterns in high-use areas. |
| Creates a sleek, white surface or a convincing marble pattern. | You must avoid placing hot pans directly on the surface to prevent permanent bubbles or scorch marks. |
| Gives your kitchen a brand-new look without the cost of new materials. | Painted countertops need more care than traditional surfaces to stay looking good. |
| Saves thousands compared to installing new granite. | Your instinct to quickly set down hot cookware can cause damage if not careful. |
Aftercare of Your Freshly Painted Countertop
Maintaining your freshly painted countertop is essential for preserving its appearance and durability. This includes not only painting countertops but also caring for them.
Follow the given care guidelines to ensure lasting results and protect your investment.
- Allow your newly painted countertops to cure completely before regular use; typically 3-7 days for light contact and up to 30 days for full hardening.
- Use soft cleaning cloths rather than abrasive scrubbers that could damage the finish.
- Clean with mild soap and water mixtures instead of harsh chemicals that can break down the protective topcoat.
- Avoid placing hot pots and pans directly on painted surfaces; use trivets or hot pads even after full curing.
- Apply a fresh coat of sealer every 6-12 months to maintain the protective barrier and extend the life of your paint job.
- Use cutting boards religiously; knives will cut through paint no matter how well it’s sealed.
- Wipe up spills immediately, especially acidic substances like lemon juice or vinegar that can eventually etch through sealants.
Finishing It Up
As you step back and admire your freshly painted countertops, take pride in what you’ve accomplished. Not only have you saved hundreds or even thousands of dollars, but you’ve also breathed new life into your space with your own two hands.
Remember that while painted countertops require some extra care, the beauty and satisfaction they provide are well worth it.
Document your modification with before-and-after photos. It’s a rewarding way to see your progress and may encourage others to take on their projects. Enjoy the renewed look of your space.
If you’re interested in more DIY projects for your home, feel free to click here and explore our collection of easy weekend makeovers and step-by-step renovation tutorials.

With a Master in Architectural Studies from University of Pennysylvania, Marwa Haydar has pioneered living spaces since 2005. Her expertise, initially honed in a prestigious architectural firm, is evident in her approach to creating environments. Marwa became part of our team in 2019 and has since been a driving force in our home improvement section, known for her practical yet stylish solutions. She’s been spearheading our design workshops since then, infusing her passion for teaching into her work. In her leisure time, Marwa enjoys exploring historic architecture and is an enthusiastic pottery hobbyist, further enriching her understanding of form and texture.