Hardwood floors add timeless beauty and value to your home, offering both elegance and durability. However, to maintain their pristine condition, it is essential to periodically sand and refinish them. Proper preparation of your hardwood flooring before sanding is crucial to achieving the best results and ensuring a seamless finish. This article will guide you through the necessary steps to prepare your flooring for sanding effectively, enhancing both the appearance and longevity of your floors.
The Importance of Proper Preparation
Proper preparation of your hardwood flooring before sanding cannot be overstated. It sets the foundation for a successful refinishing project and can significantly impact the final outcome. Inadequate preparation may lead to uneven surfaces, unsightly blemishes, or even permanent damage to your floors, which can be both costly and time-consuming to rectify.
One of the primary reasons for thorough preparation is to ensure the sanding process is smooth and efficient. Proper preparation helps in identifying any existing issues, such as loose boards or deep scratches, that need addressing before sanding begins. Tackling these problems beforehand ensures the sander can glide smoothly over the surface, resulting in a uniform finish and reducing the risk of further damage. For homeowners looking for a fast and professional solution, 1 DAY Refinishing in Manhattan offers the convenience of restoring hardwood floors efficiently in just a single day.
Additionally, preparing your floors properly can enhance the lifespan of the finish. By ensuring the floor is clean, repaired, and ready, you allow the finish to adhere more effectively, providing better protection against wear and tear. This attention to detail will save you time and money in the long run, as it reduces the frequency of future refinishing projects.
Tools and Materials Needed for Sanding Wood Floors
Before you begin, gather all the necessary tools and materials to ensure a seamless process. Having everything on hand will prevent interruptions and allow you to focus entirely on the task at hand.
Essential Tools:
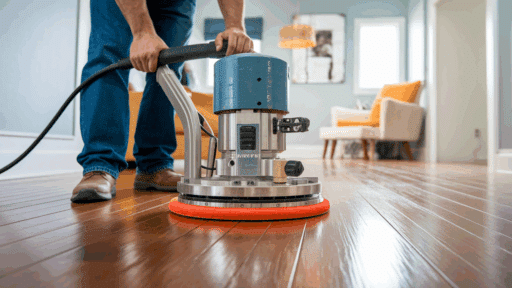
- Sander: A drum sander or orbital sander is essential for large areas, while an edge sander is useful for corners and edges.
- Vacuum Cleaner: A powerful vacuum will help remove dust and debris before and after sanding.
- Pry Bar and Hammer: For removing baseboards or any obstructions.
- Putty Knife: Useful for filling gaps or removing old finishes.
Materials You’ll Need:
- Sandpaper: Different grits for different stages, ranging from coarse to fine.
- Wood Filler: To repair any cracks or holes in the floor.
- Protective Gear: Including dust masks, safety goggles, and ear protection.
- Painter’s Tape: For protecting walls and other fixtures.
Having these tools and materials ready will streamline the preparation process and ensure that you are well-equipped to handle any challenges that may arise.
Steps to Take Before Sanding
Once you have your tools and materials ready, it’s time to prepare your space for sanding. This involves several crucial steps that will ensure your project starts off on the right foot.
1. Clear the Area:
Remove all furniture, rugs, and other items from the room. Ensuring a clear workspace will prevent any obstructions during sanding and provide you with a safe environment to work in. Consider using sliders to move heavy items without scratching the floor.
2. Seal Off the Area:
Dust from sanding can easily spread throughout your home, so it’s important to seal off the room to contain it. Use plastic sheeting and painter’s tape to cover doorways, vents, and any adjoining spaces.
3. Check for Protruding Nails:
Inspect the floor for any nails or staples that may be sticking up. Use a hammer and nail set to ensure they are flush with the surface to avoid damaging the sander or causing injury.
Taking these steps before sanding will not only protect your home but will also create a more efficient working environment, allowing you to focus on achieving the best possible finish for your floors.
How to Clean and Remove Furniture from the Area
Cleaning the area thoroughly is a critical step in preparation. Even the smallest particles of dust or dirt can interfere with the sanding process, leading to imperfections in the final finish.
Cleaning Steps:
- Sweep and Vacuum: Start by sweeping the floor to remove larger debris, followed by a thorough vacuum to capture fine dust particles.
- Mop the Floor: Use a damp mop to remove any remaining dust. Ensure the floor is completely dry before proceeding to the next step.
- Inspect for Stains: Identify and treat any stains that could affect the sanding process. Use appropriate cleaners for stubborn marks.
When it comes to furniture removal, plan ahead to make the process as smooth as possible. Label furniture and items if necessary, and create a temporary storage plan for them.
Furniture Removal Tips:
- Disassemble Large Pieces: If possible, disassemble large furniture to make them easier to move.
- Use Protective Covers: Protect furniture from dust by covering them with sheets or tarps.
- Plan Your Layout: Consider the layout of your room when replacing furniture to avoid future scratches or damage.
Inspecting and Repairing the Floor Before Sanding
Thoroughly inspecting and repairing your hardwood floor before sanding is essential to achieving a flawless finish. This stage is all about identifying any imperfections or potential issues that could disrupt the sanding process or affect the final result.
Inspection Checklist:
- Check for Damage: Look for any signs of damage, such as deep scratches, dents, or gouges. Note any areas that require repair.
- Evaluate the Floor’s Condition: Assess the overall condition of the floor. Determine if there are any loose boards or if the finish is peeling.
- Inspect for Moisture: Ensure there are no signs of moisture damage, such as warping or discoloration.
Once you have identified the areas that need attention, proceed with the necessary repairs.
Repair Process:
- Filling Gaps and Cracks: Use wood filler to repair any cracks or holes. Allow it to dry completely before sanding.
- Secure Loose Boards: If any boards are loose, nail them down securely. Ensure nails are countersunk to avoid damaging the sander.
- Sand Down High Spots: Use coarse sandpaper to sand down any high spots or uneven areas to create a level surface.
Taking the time to inspect and repair your floor will ensure that you achieve a smooth, uniform finish when sanding, enhancing both the appearance and durability of your hardwood flooring.
Choosing the Right Sandpaper Grit for Your Floors
Selecting the appropriate sandpaper grit is crucial for a successful sanding project. The right grit will depend on the condition of your floor and the desired finish.
Understanding Sandpaper Grits:
- Coarse Grit (40-60): Ideal for removing old finishes and smoothing out significant imperfections.
- Medium Grit (80-100): Used for preparing the surface after coarse sanding, removing any remaining scratches.
- Fine Grit (120-150): Provides a smooth finish, ready for staining or sealing.
How to Choose:
- Assess the Floor’s Condition: If the floor has deep scratches or thick layers of old finish, start with a coarse grit.
- Progress Gradually: Begin with the coarsest grit and work your way up to the finest grit in stages. This ensures a smooth transition and even finish.
- Test a Small Area: If unsure, test a small, inconspicuous area first to determine the best grit combination.
Safety Precautions During the Sanding Process
Safety should always be a top priority when undertaking any home improvement project. Sanding wood floors can generate a significant amount of dust and noise, so taking the necessary precautions is essential.
Safety Equipment:
- Dust Mask or Respirator: Protects against inhaling dust particles.
- Safety Goggles: Shields your eyes from dust and debris.
- Ear Protection: Reduces the risk of hearing damage from loud equipment.
Safe Practices:
- Ventilation: Ensure the room is well-ventilated to disperse dust particles and reduce inhalation risks.
- Proper Handling of Equipment: Familiarize yourself with the sander’s operation manual and follow the manufacturer’s safety instructions.
- Take Breaks: Regular breaks will help prevent fatigue and allow you to assess your progress.
Following these safety precautions will not only protect your health but also ensure a more comfortable and efficient sanding process.
Summary
Proper preparation is the cornerstone of a successful hardwood flooring sanding project. Embrace the opportunity to transform your living space with renewed hardwood flooring that reflects your personal style and commitment to quality. Whether you choose to undertake this project yourself or hire a professional, understanding the preparation process empowers you to make informed decisions and achieve the best possible results.


