Replacing a stair railing might seem like a big job, but I’ve done it, and it’s more manageable than it looks. The first time I took on this project, I was unsure where to start.
But with the right tools and a clear plan, I made it through step by step. An old or wobbly railing isn’t just an eyesore; it can be a safety issue, too.
Upgrading it not only improves how the space looks but also how secure it feels. You don’t need to be a pro or invest in expensive gear.
I’ll guide you through everything I’ve learned, so the process feels simple and approachable. If your stairs are due for an upgrade, now’s a great time to take that first step.
Why Replace Your Stair Railing?
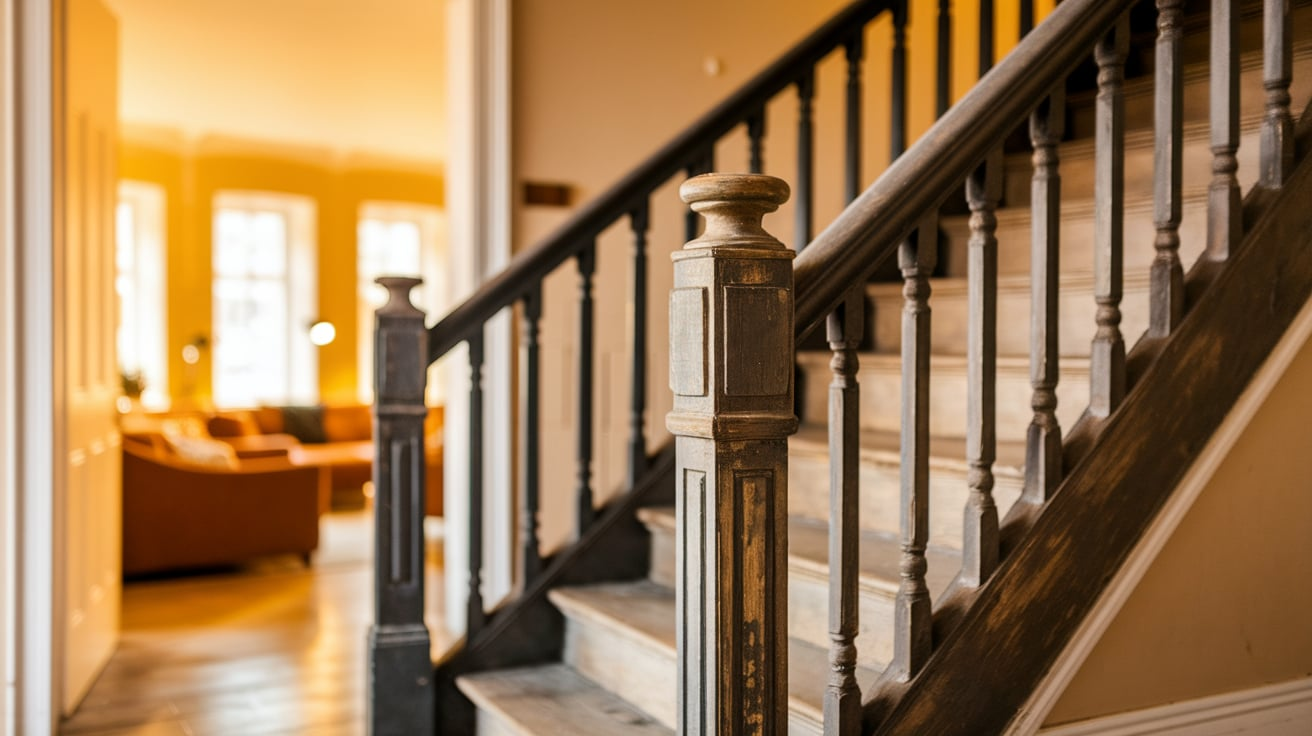
A stair railing does more than just guide you up and down the stairs; it plays a key role in keeping everyone safe. Over time, railings can become loose, unstable, or damaged, making them a potential hazard.
Even if the structure is solid, an outdated design can make your whole staircase look tired. Swapping it out for something more modern or stylish instantly refreshes the space.
Sometimes, older railings no longer meet current building codes. That’s something I learned the hard way during a remodel and had to correct before selling.
If your railing wiggles, creaks, or just looks worn down, it’s probably time for an upgrade. And trust me, once it’s replaced, the entire staircase feels brand new again.
How to Replace a Stair Railing
Replacing a stair railing involves removing the old components, prepping the surface, and securely installing a new handrail, balusters, and posts to meet safety standards and enhance appearance.
Tools and Materials Needed
Having the right tools and materials on hand ensures a smoother, safer, and more efficient stair railing replacement process.
- Drill
- Assorted drill bits
- Miter saw
- Depth stop or gauge block
- Railing bolts
- Wood glue
- Measuring tape
- Level
- Square
- Pencil
- Blue painter’s tape
- Spacer blocks
- Oak plugs or wood filler (for patching old holes)
- New handrail
- Balusters
- Newel posts (if replacing existing ones)
- Scrap piece of handrail (for angled drill guidance)
Step 1: Patch Old Holes Before Installing the New Railing
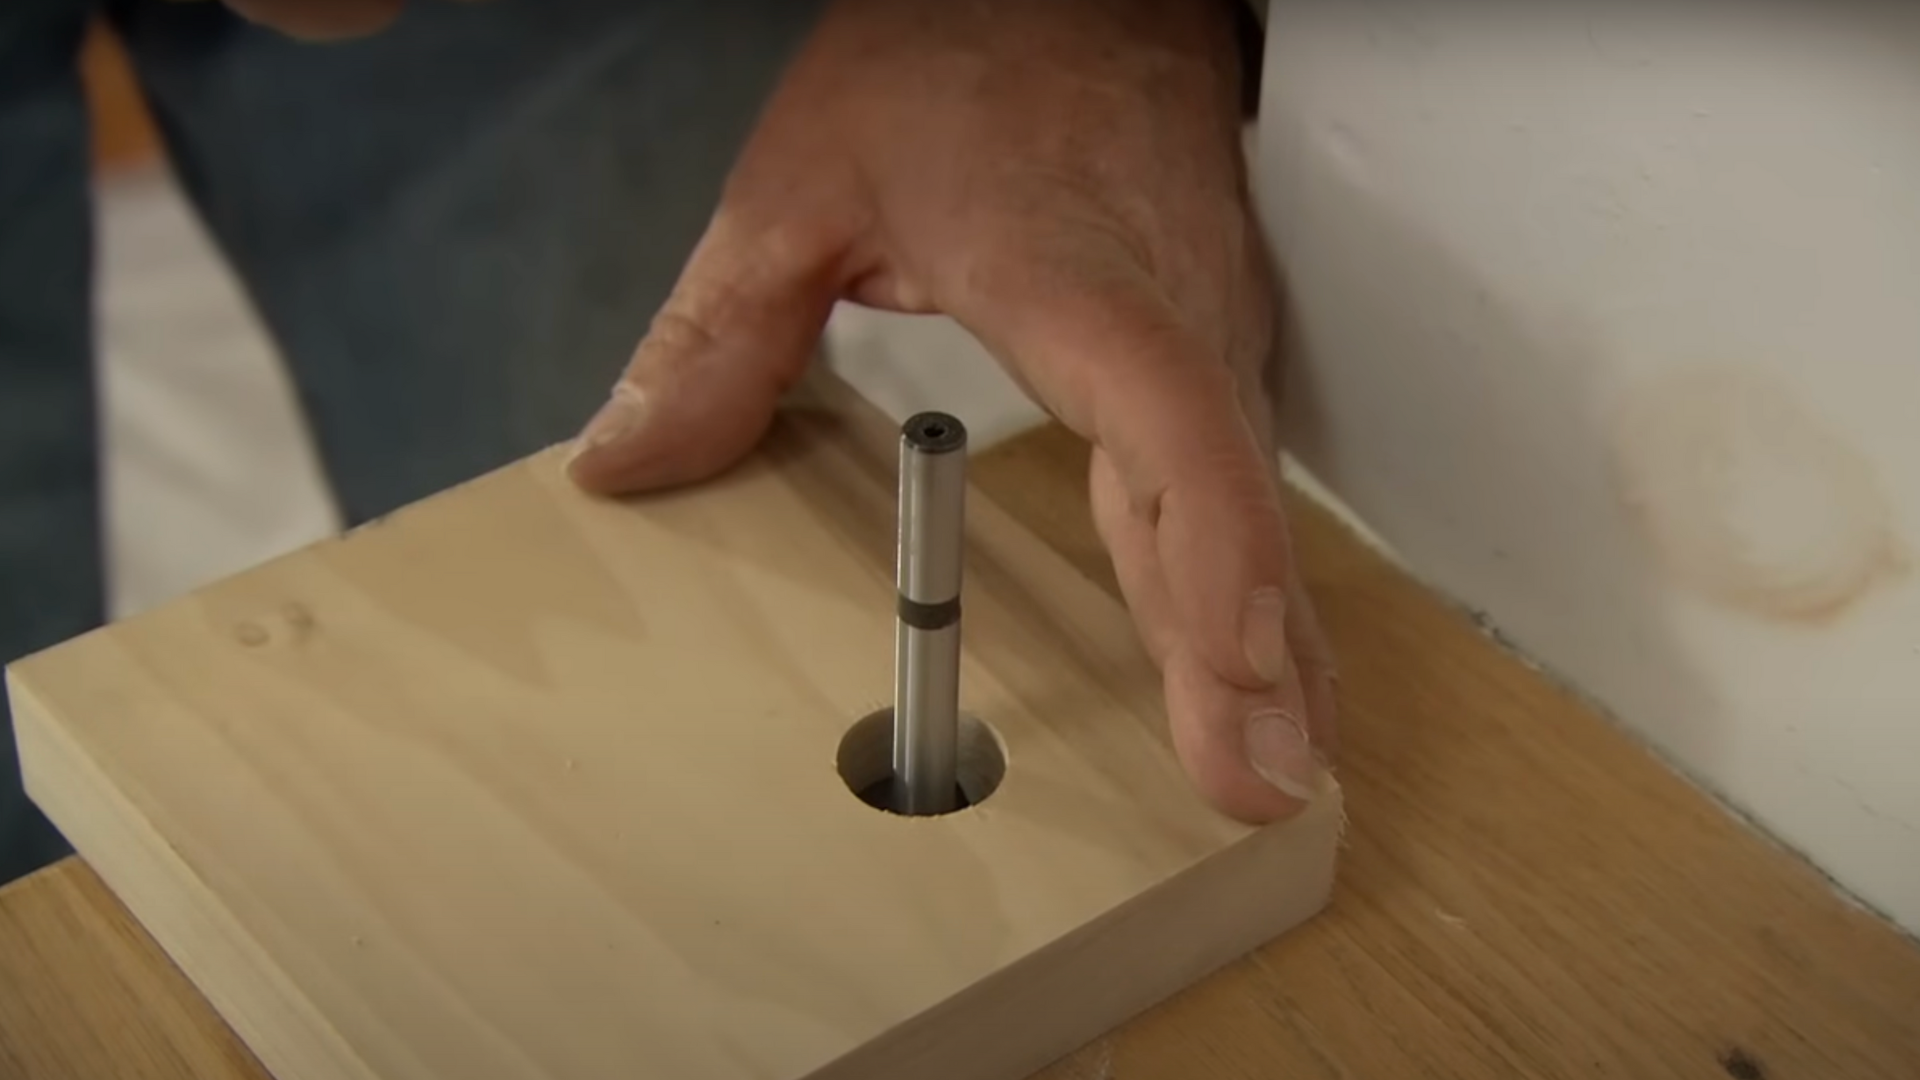
Begin by filling any holes left behind from the previous railing or balusters. Use 1-inch diameter oak plugs or wood filler to cover them.
To keep the drill bit from wandering when drilling over plugs, use a block with a pre-drilled guide hole and center it over the area.
A depth stop or gauge block ensures consistent drilling depth.
Step 2: Re-Cut and Prepare the Turnout or End Fitting
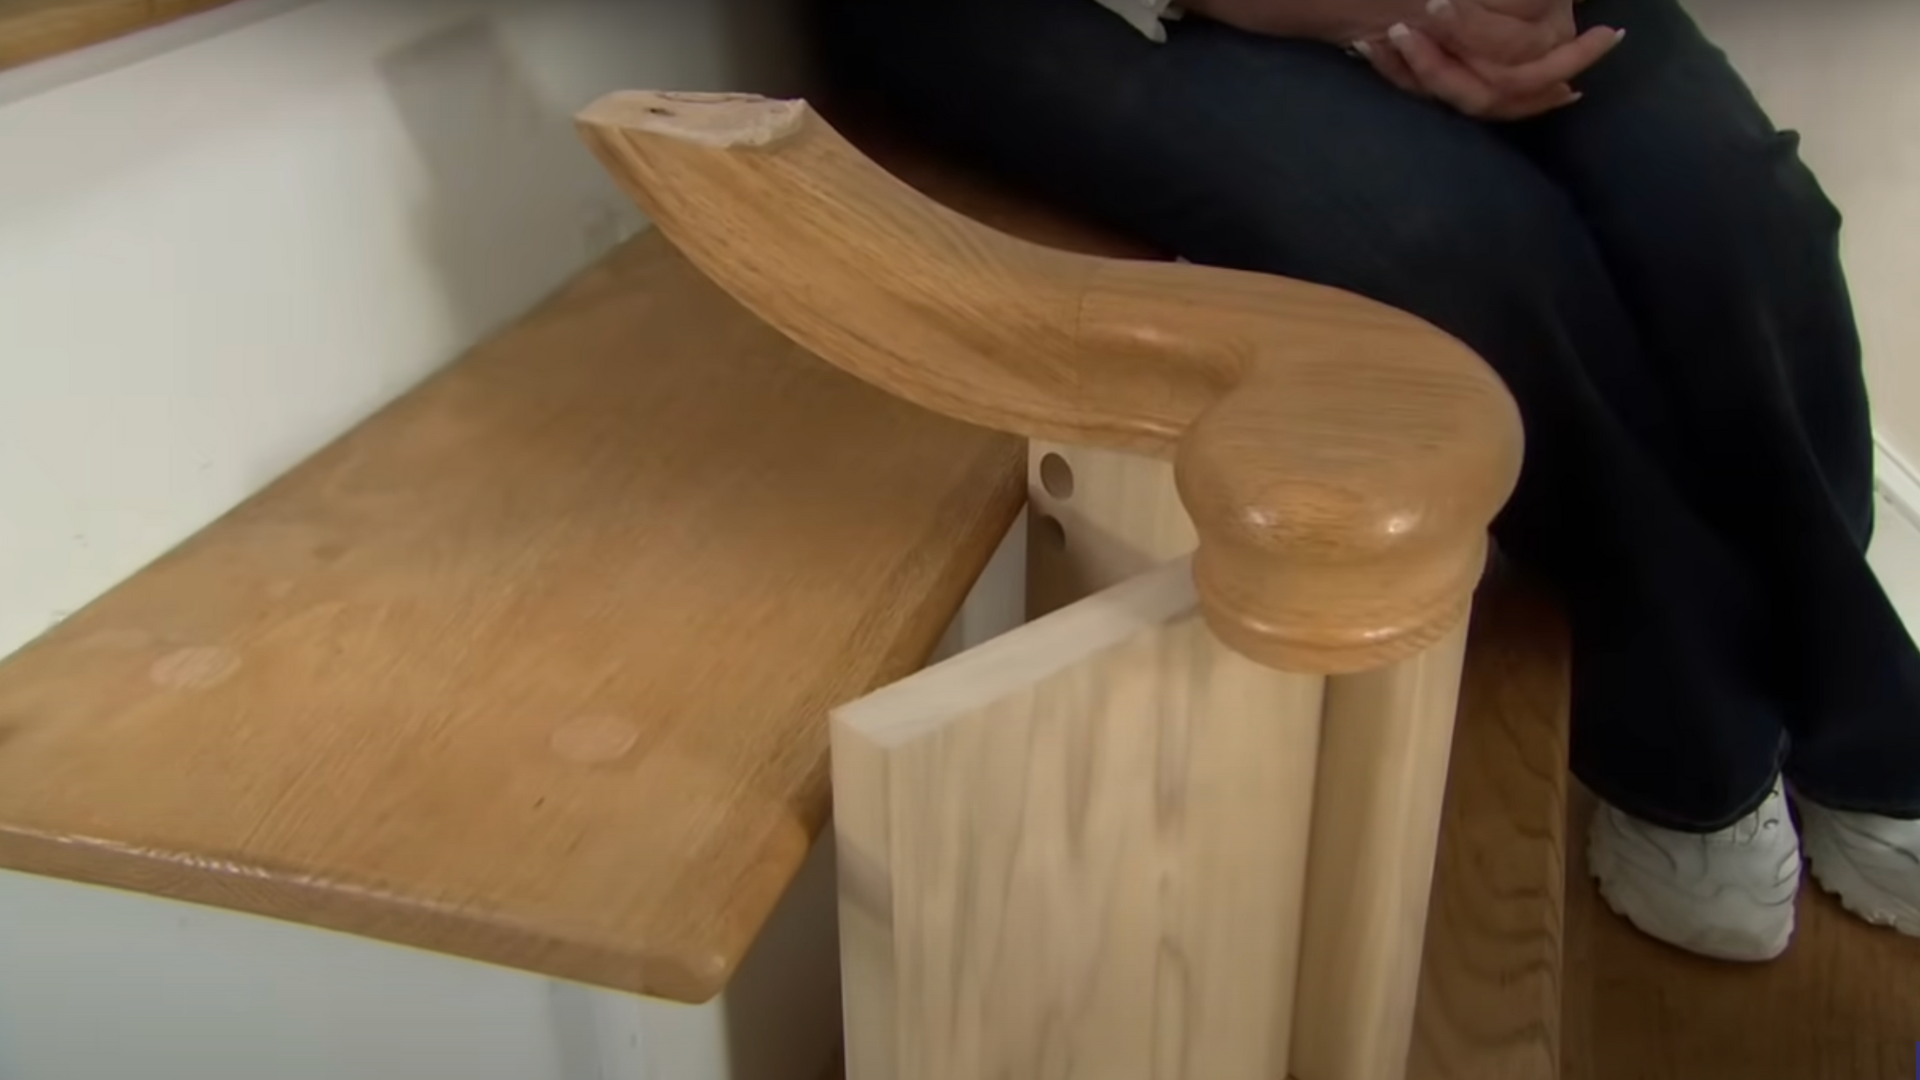
When reusing a turnout or decorative rail end, it may need to be re-cut to match the new handrail angle.
Create a support jig with scrap wood to keep the turnout stable and properly aligned.
Place the handrail on the stair nosing and slide the turnout into position until both tops are level.
Mark the correct angle and cut it cleanly using a miter saw.
Step 3: Join the Turnout and Handrail with a Railing Bolt
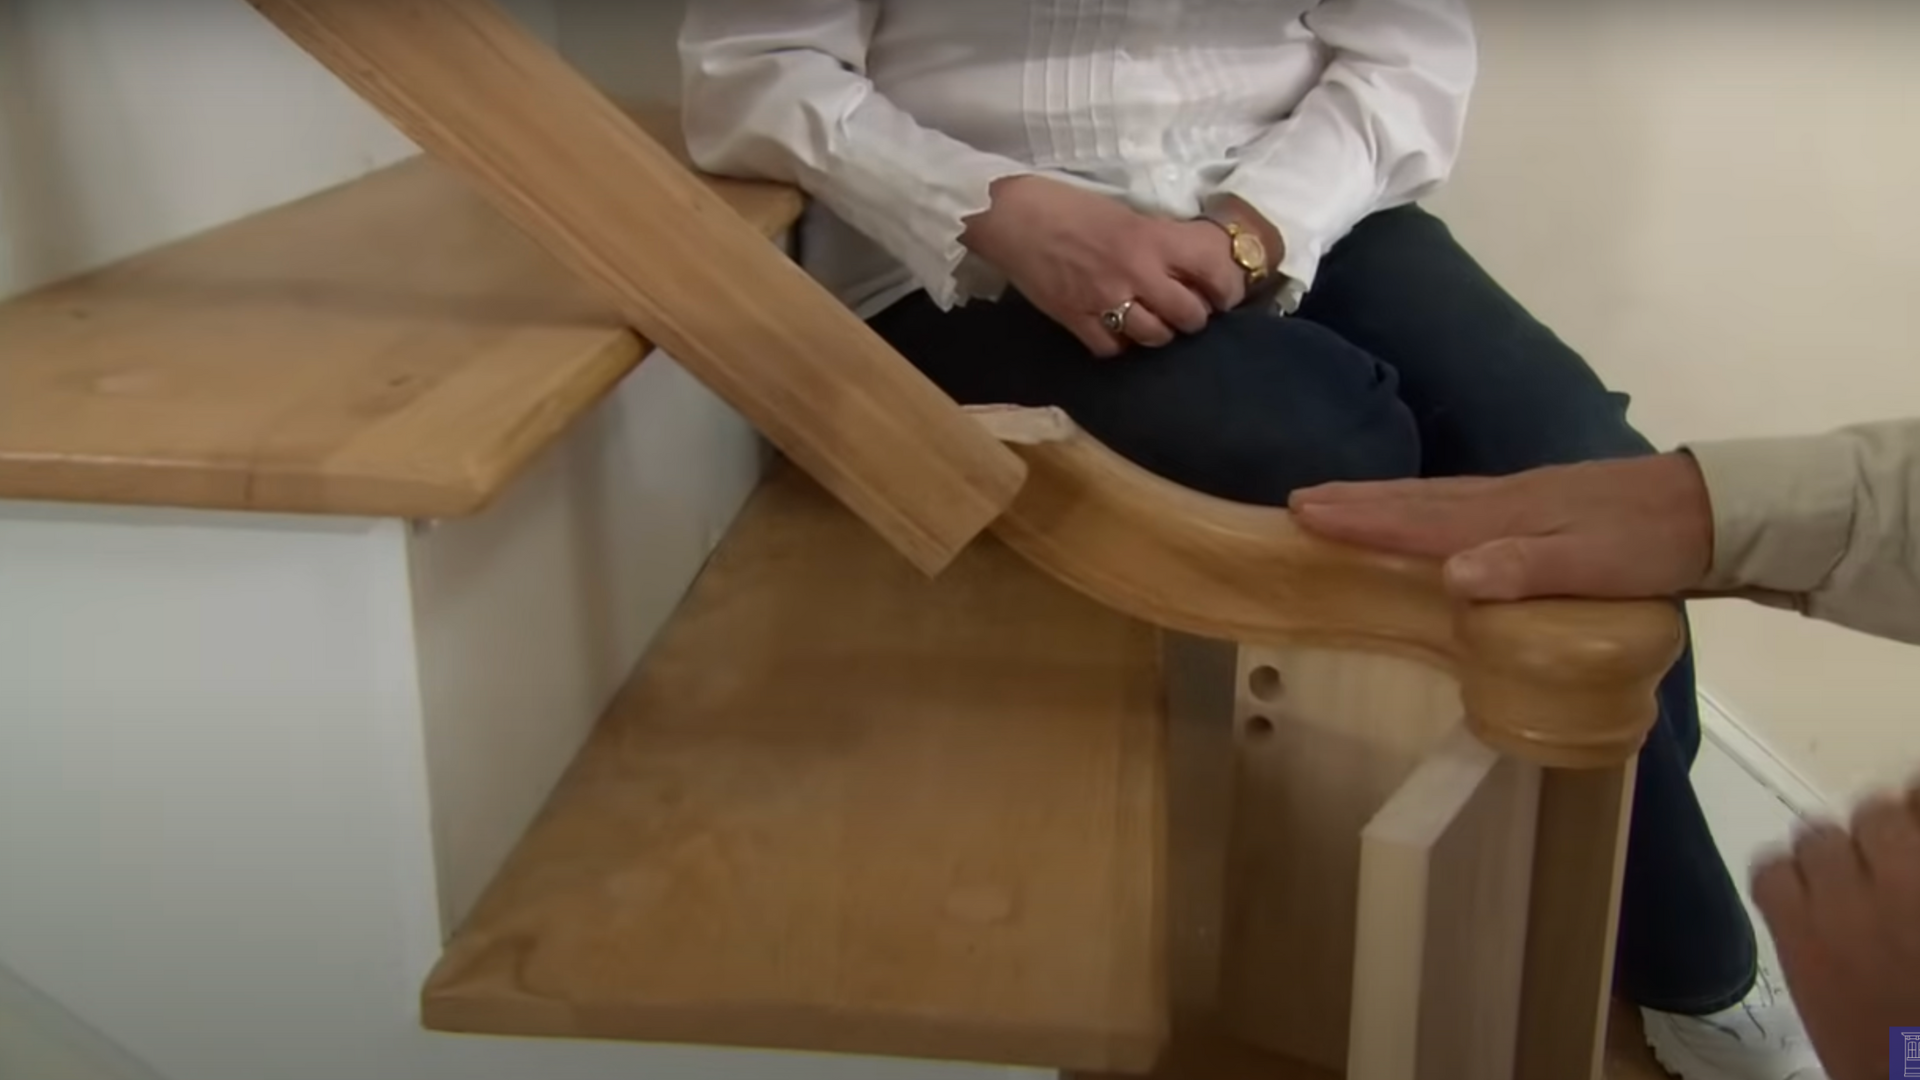
To connect the turnout and handrail securely, use a railing bolt that has a wood thread on one end and a machine thread on the other.
Drill centered holes into both pieces. Then drill an access hole on the bottom side of the handrail to reach the bolt’s nut.
After inserting the bolt, apply wood glue, attach the washer and nut, and tighten everything to create a solid joint.
Step 4: Mark Baluster Locations on Treads and Transfer to the Rail
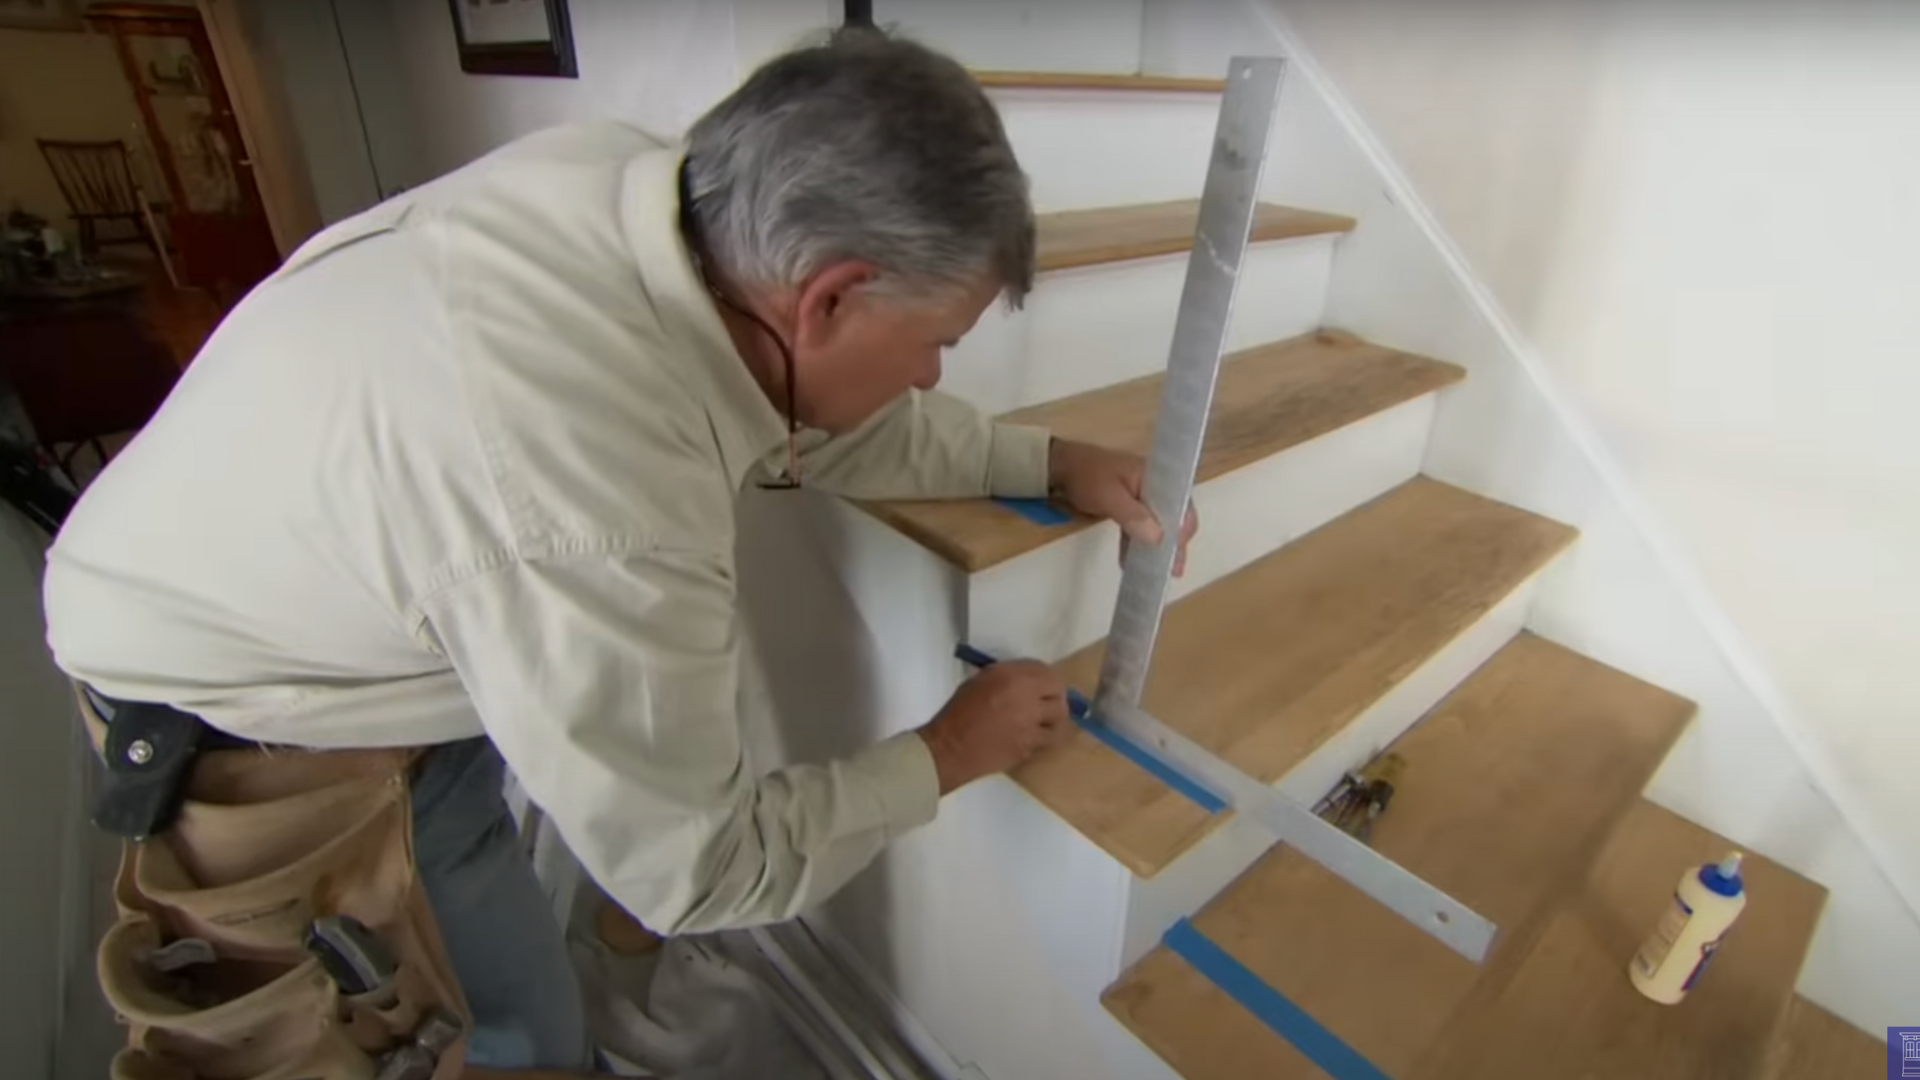
Mark where each baluster will sit using blue painter’s tape on each stair tread.
Measure and space balusters evenly, ensuring gaps do not exceed 4 inches. Center each one on the tread.
Once spaced properly, rest the handrail on the stair nosing and use a spacer block to maintain height. Transfer each tread mark to the side of the handrail using a square.
Step 5: Drill Angled Holes in the Handrail for Balusters
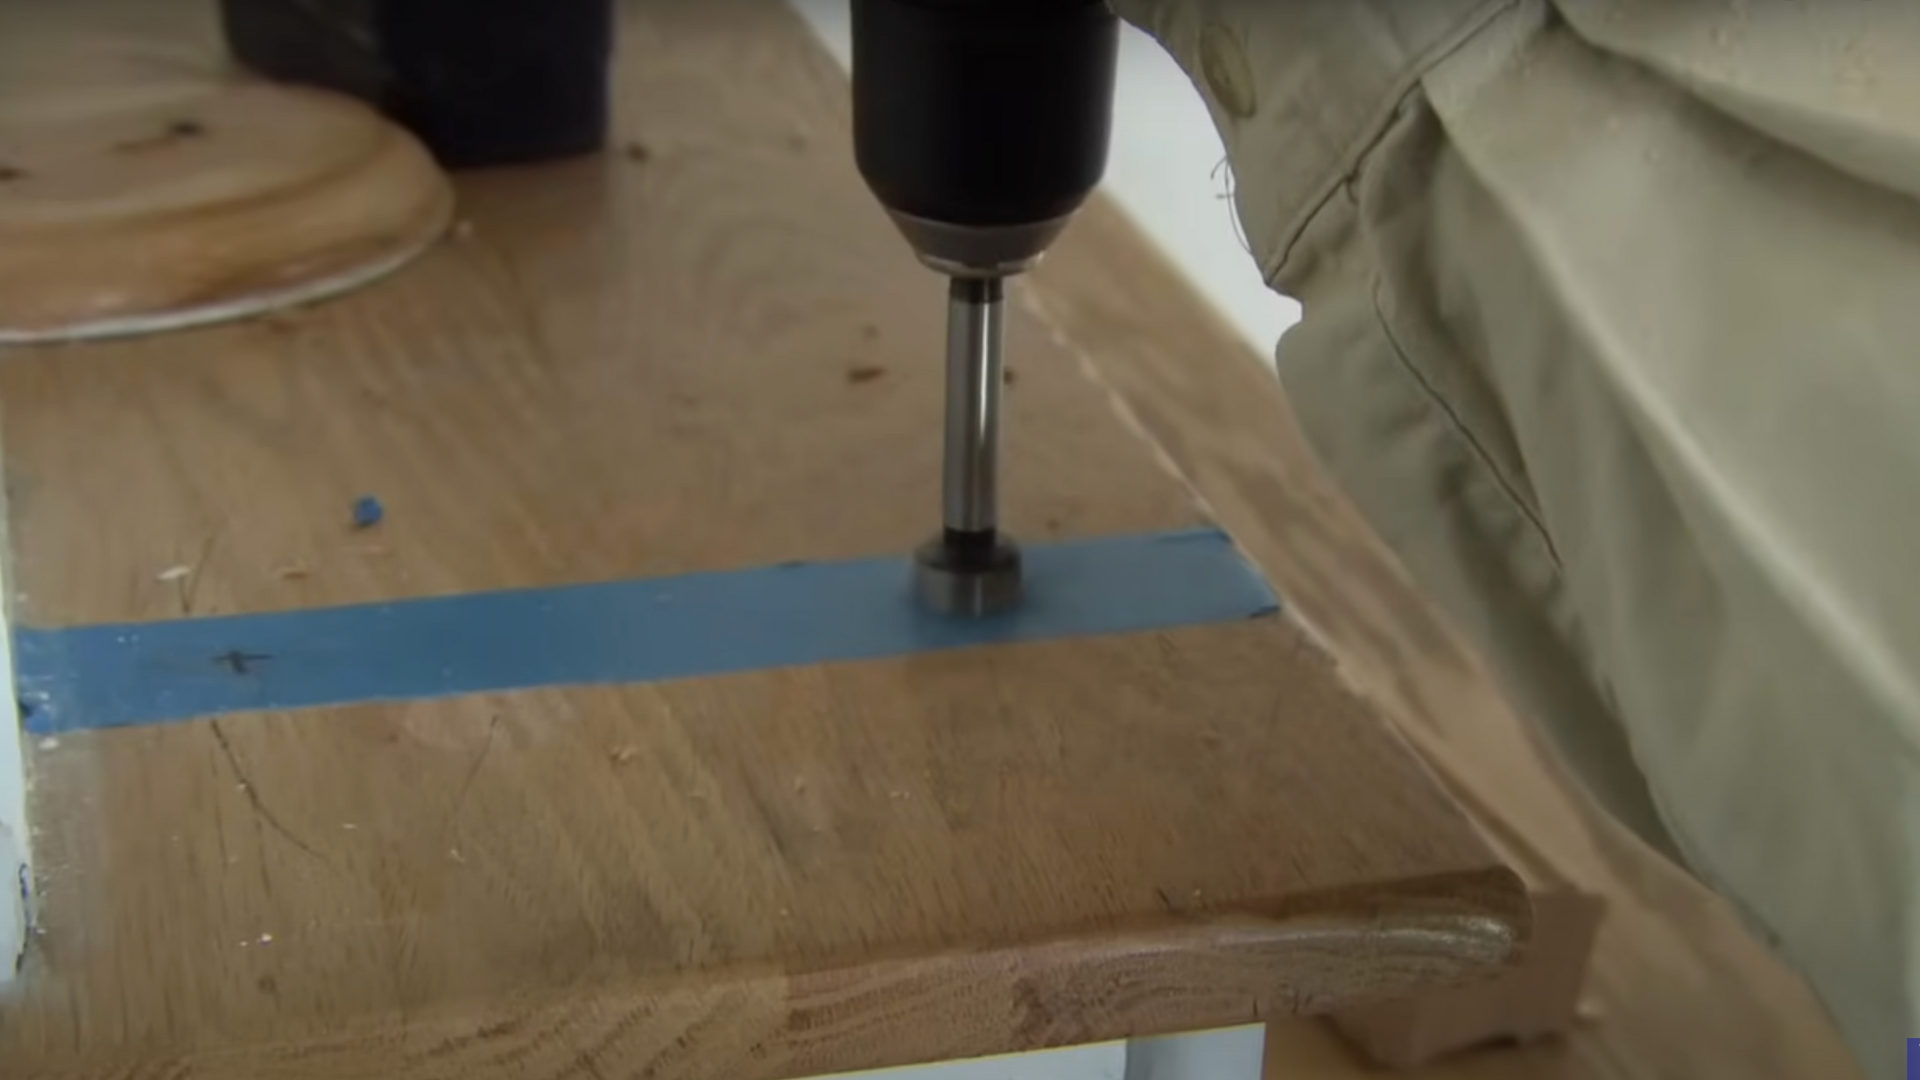
Drill holes at an angle so balusters will stand plumb when installed.
To achieve accurate angles, use a cutoff piece of the same handrail as a drill guide.
Hold the guide behind the bit while starting the hole, then adjust the angle so the bit runs parallel to the stair slope. This helps ensure all balusters remain upright and consistent.
Step 6: Dry Fit, Attach, and Check Alignment
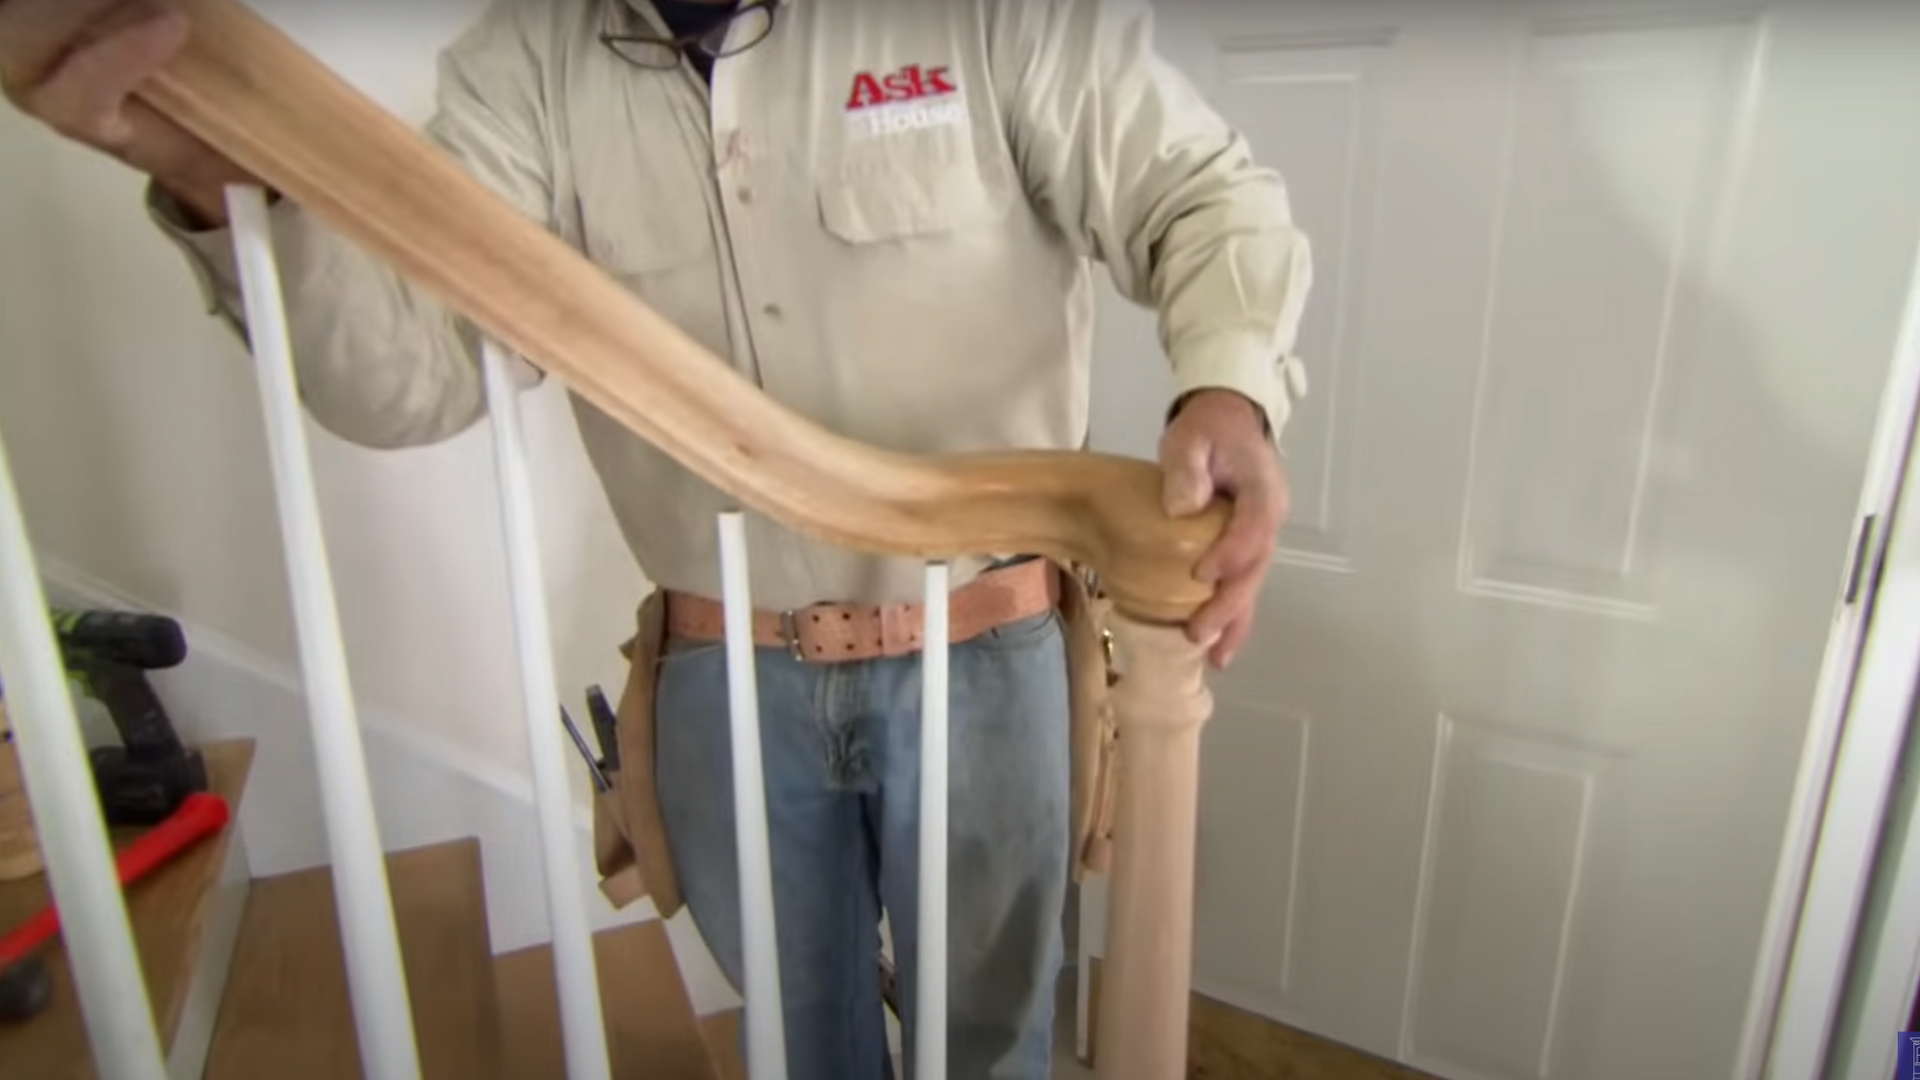
Lay out all components, handrail, balusters, and turnout, before final installation.
Fit the balusters into the stair and rail holes, confirming spacing and vertical alignment.
Check the handrail height and make any adjustments needed before securing anything. Having a second person assist can help maintain proper alignment throughout.
Step 7: Secure the Handrail and Balusters
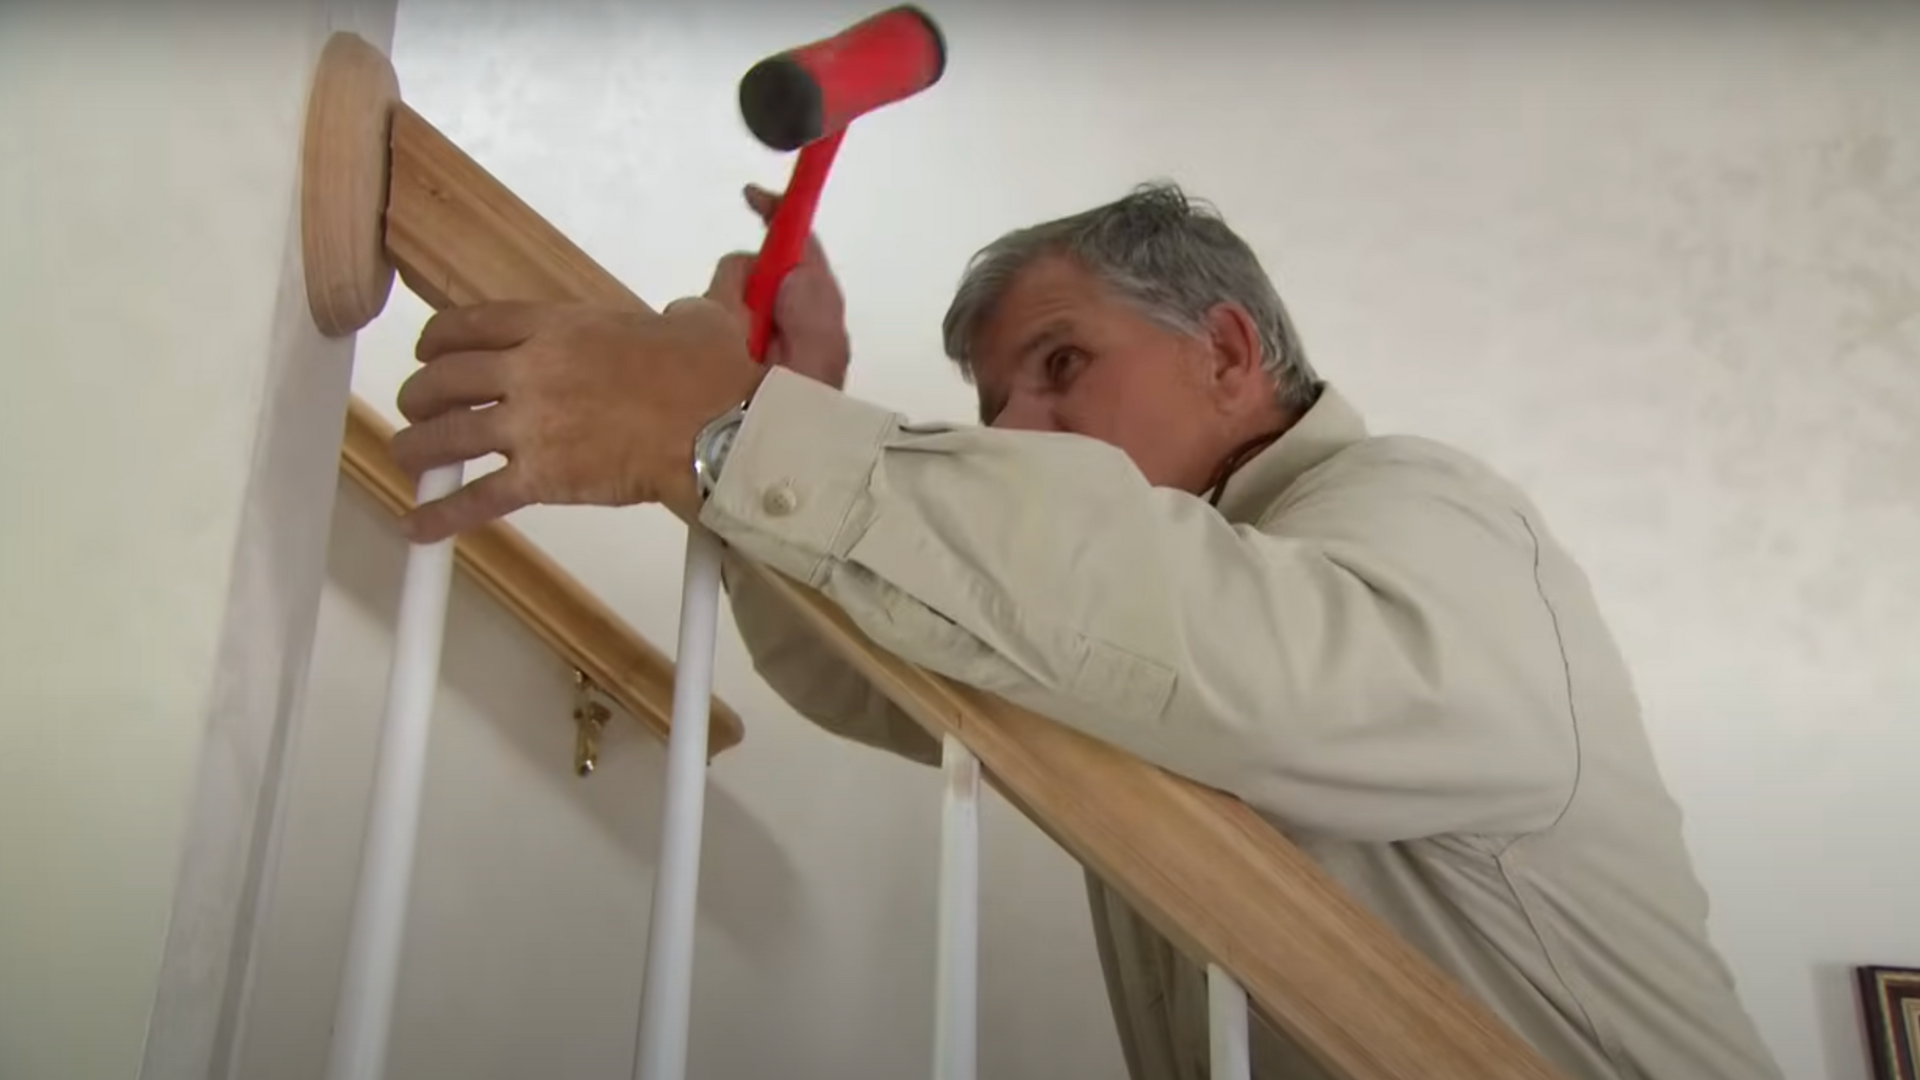
Attach the handrail to posts or brackets using screws or bolts.
Next, install the balusters from the bottom up, using either wood glue or screws to hold them in place at both ends.
Ensure each piece is firmly attached and positioned according to spacing guidelines for both safety and appearance.
For a visual guide, refer to this tutorial on replacing the stair railing by @thisoldhouse on YouTube.
Stair Replacement: Tips to Consider
Following a few simple tips can help ensure your stair railing replacement goes smoothly, safely, and looks professionally done.
- Always check local building codes for handrail height and baluster spacing before starting.
- Measure twice, cut once—accurate measurements help avoid costly mistakes.
- Use painter’s tape to clearly mark baluster locations on stair treads.
- Dry fit all parts before final installation to check alignment and fit.
- Use a guide block or scrap rail to drill precise angled holes.
- Apply wood glue at key joints for added strength and long-term stability.
- Have a second person help hold pieces steady during assembly.
- Sand patched areas before installing new components for a clean, smooth finish.
- Label each part before disassembly to stay organized during the process.
- Take your time – precision matters more than speed when installing handrails and balusters.
These tips can help you achieve a safe, stable, and polished result.
Conclusion
Replacing a stair railing might seem like a big task, but with the proper steps and a little patience, it’s something I’ve managed, and you can too.
From removing the old parts to aligning and installing the new railing, each step in the process contributes to a significant transformation. It not only improves safety but also gives your staircase a whole new look.
Just take it slow, measure carefully, and stay consistent. There’s something satisfying about stepping back and seeing a sturdy, fresh railing you installed yourself.
If you’re thinking about giving your stairs an upgrade, now’s the perfect time to start. Grab your tools, plan your layout, and go for it, you’ve got this.
And if anything feels unclear or you get stuck along the way, leave a comment or message me, I’m here to help you finish strong.

