When strong winds sweep through, I always take a moment to check the roof, it’s the part of the house that shields everything beneath it.
Even if a storm seems minor, wind can loosen shingles, shift flashing, or cause damage that isn’t easy to see at first. I’ve learned that early detection can make all the difference.
A few minutes spent checking for signs now can prevent expensive repairs, leaks, or even mold growth later on.
In this blog, I’ll walk through the most common signs of wind damage, simple ways to check your roof safely, and how to decide if professional help is needed.
I’ll also share some quick temporary fixes to hold things together until repairs can be made.
What Is Roof Wind Damage?
Roof wind damage happens when strong gusts lift, bend, or tear away parts of your roofing system.
I’ve seen how even moderate winds can curl shingles, break sealants, or dislodge flashing, issues that often go unnoticed until water starts leaking in.
High winds create pressure differences that lift roofing materials, especially around the edges or corners. Once that outer layer is compromised, water, pests, and debris can sneak in and make things worse over time.
Wind damage doesn’t always mean missing shingles either. Sometimes it’s subtle, like creases, lifted edges, or exposed underlayment.
These signs may seem minor, but they reduce the roof’s protective barrier and leave it vulnerable to rain or further storms.
I always tell people to look for signs after a storm passes because early detection can save you from major repair bills. It’s not just about what blew off; it’s about what’s now exposed and unprotected.
Common Types of Wind Damage to Roofs
Learn how wind can damage different roofing materials and structures, from surface-level wear to structural vulnerabilities.
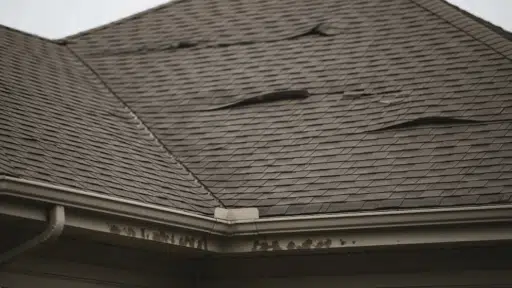
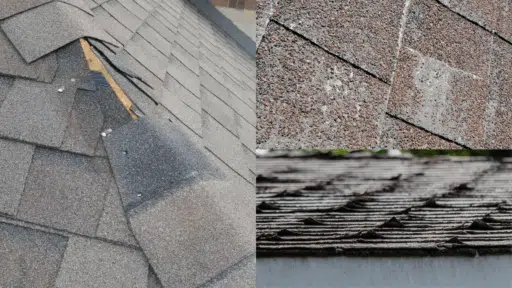
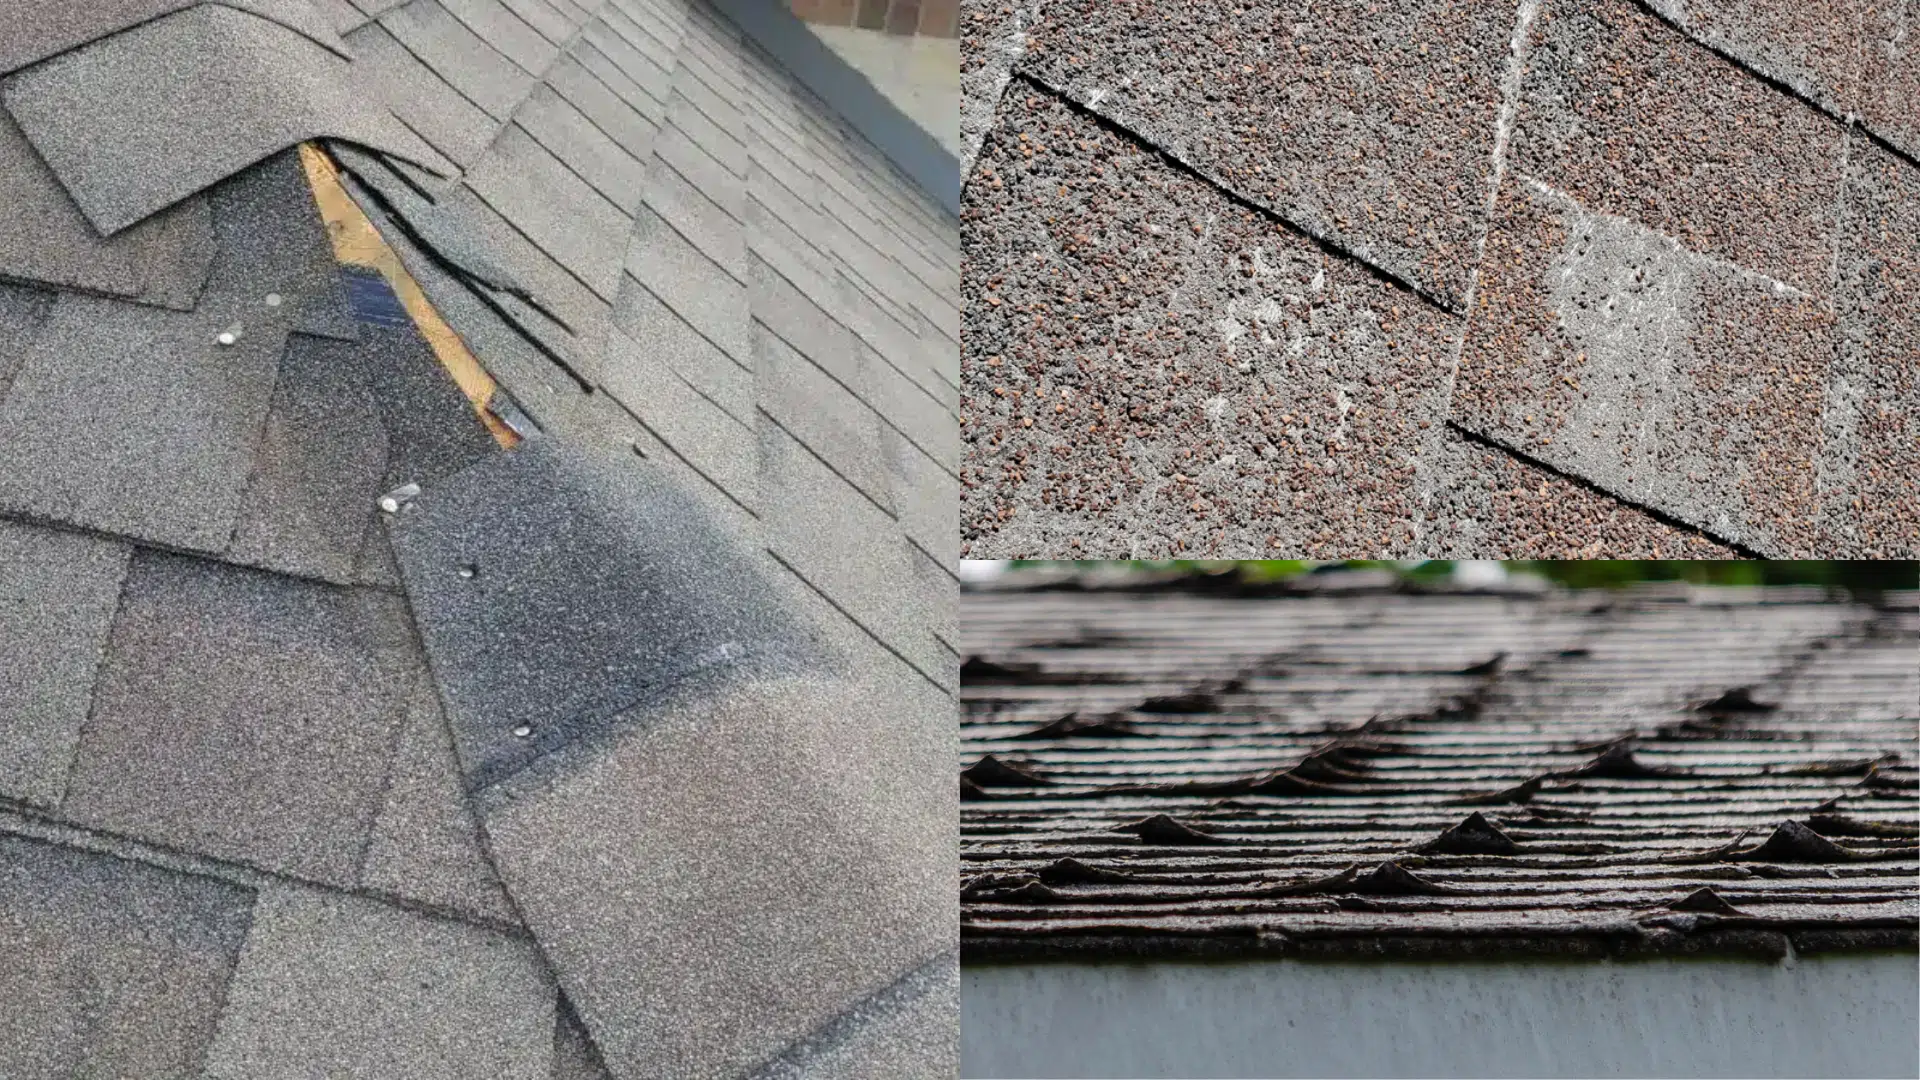
1. Shingle Lifting or Curling
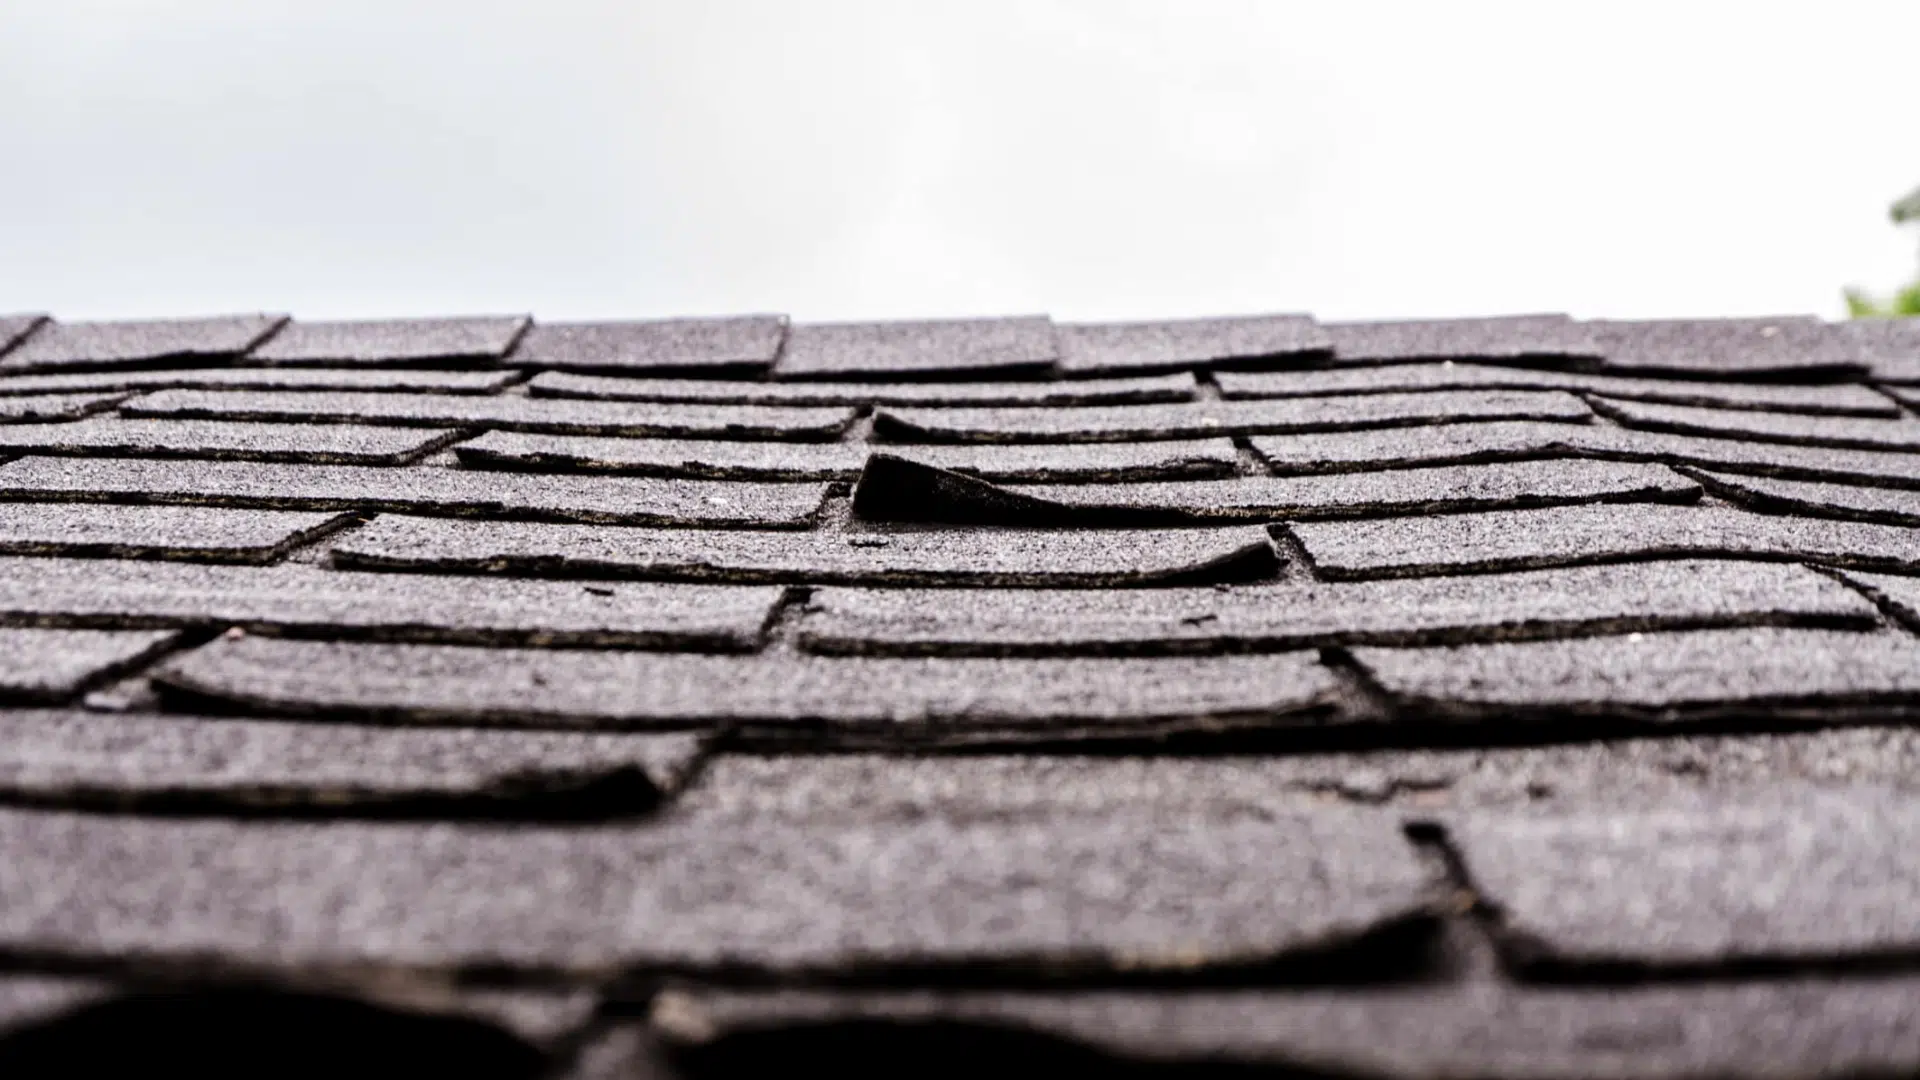
High winds can slip beneath shingles and cause them to lift or curl at the edges. This might seem minor, but once a shingle loses its seal, water can easily seep underneath and cause rot or leaks.
Over time, curled shingles may crack or tear off completely, creating more exposed areas and compromising the roof’s ability to repel moisture.
2. Granule Loss from Asphalt Shingles

Asphalt shingles rely on protective granules to shield against UV rays and water. Wind-driven debris and shaking can dislodge these granules, leaving shingles patchy and vulnerable.
Once granules fall away, the shingle surface wears faster and can’t deflect sunlight or moisture as well. This type of damage might not be visible from the ground, but it can reduce your roof’s lifespan significantly over time.
3. Torn or Missing Shingles
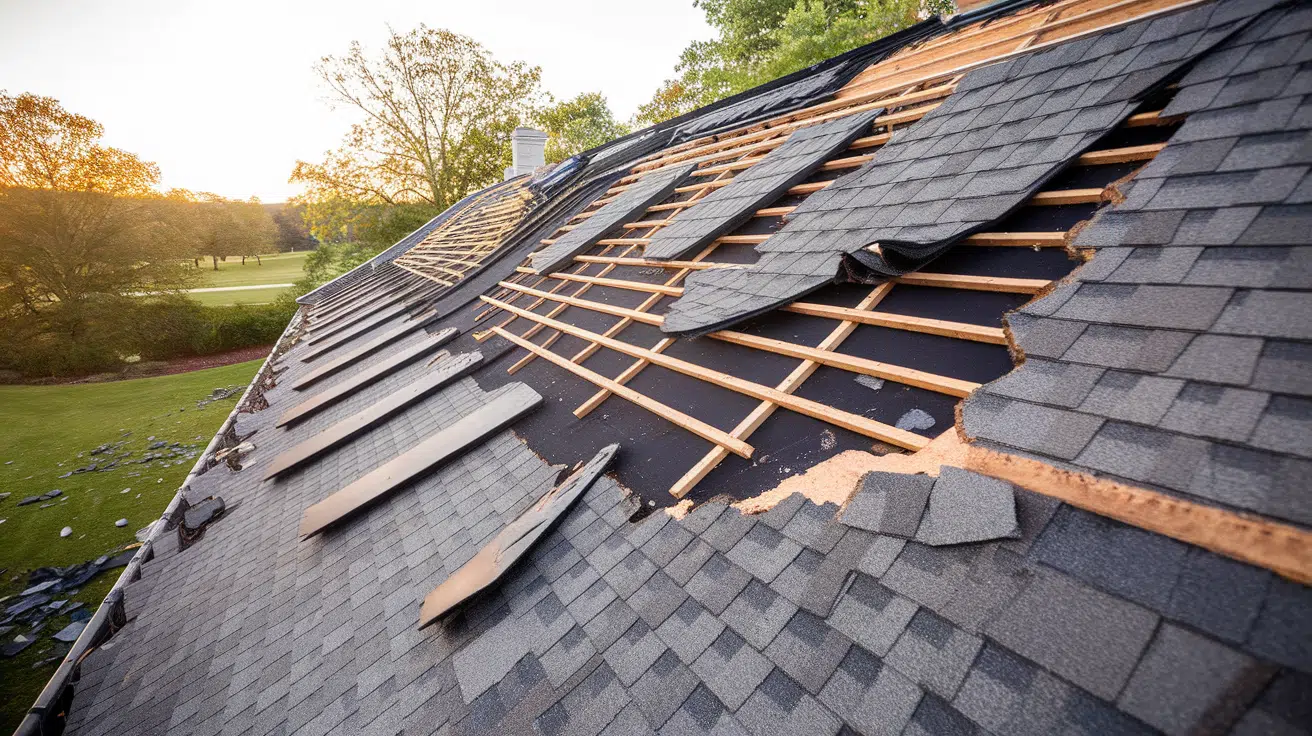
Powerful gusts may rip shingles right off the roof deck. Torn or missing shingles expose the underlayment and potentially the decking underneath, increasing the risk of water damage.
Even a few missing shingles can lead to interior leaks, especially during the next rainstorm. This type of damage often requires immediate repair to prevent a larger issue from developing quickly.
4. Flashing and Ridge Cap Damage
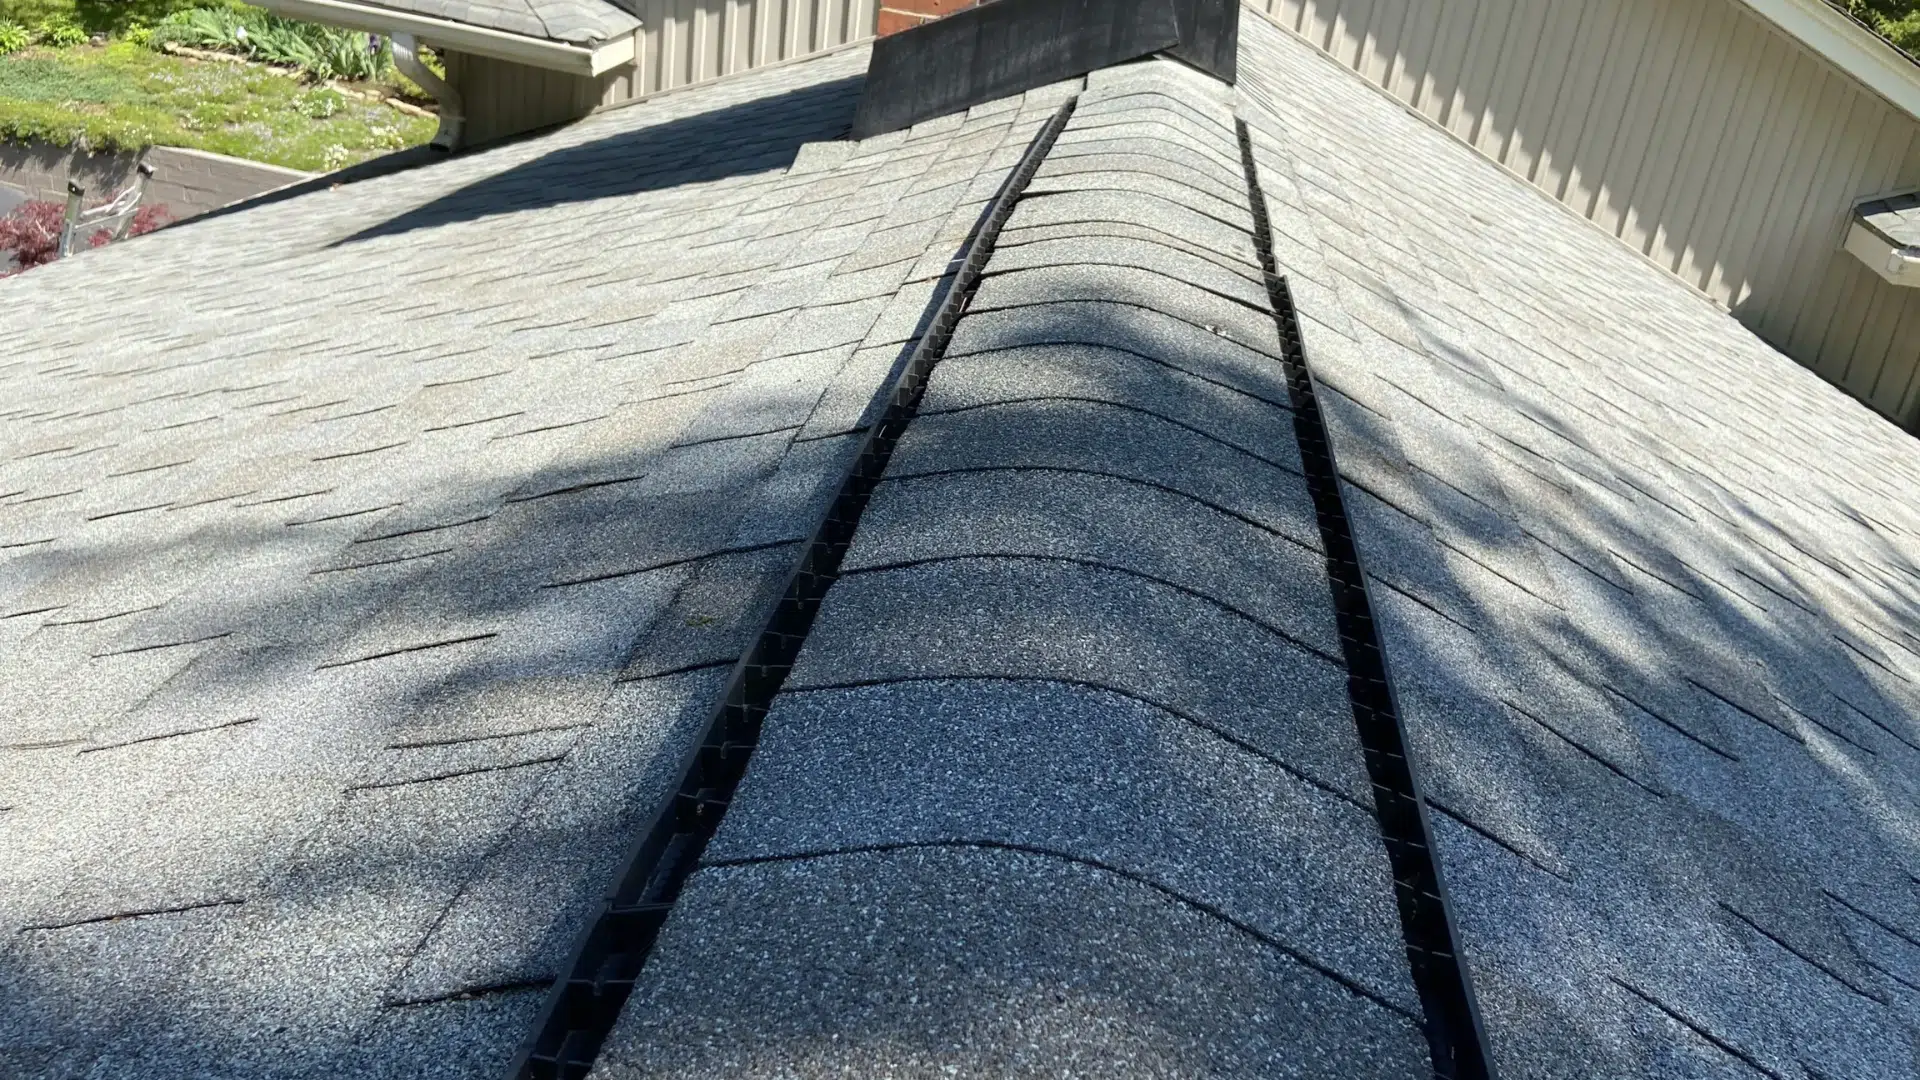
Wind can twist, lift, or completely dislodge metal flashing around chimneys, vents, and roof valleys. It may also loosen ridge caps, the coverings at the peak of your roof, making them prone to leaks.
Once flashing is compromised, it creates a direct path for water infiltration. These components are essential for sealing joints and transitions, so checking them after a storm is a key part of roof maintenance.
How to Safely Inspect Your Roof After a Windstorm
Check your roof with caution after a storm using these safe and simple inspection steps.
Visual Check from the Ground
Use binoculars to scan your roof from a safe distance. Look for lifted shingles, missing pieces, or debris buildup.
This method helps you spot obvious signs of damage without climbing, which is safer, especially if the roof is wet or slick. Always inspect from multiple angles to ensure you don’t miss critical areas.
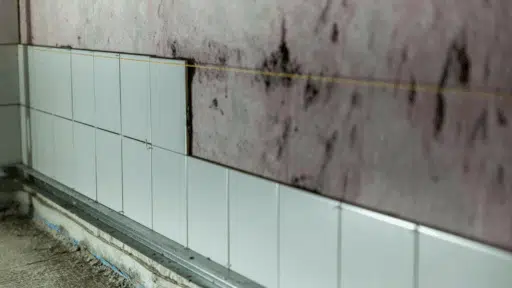
Inspect Attic and Ceilings
Go inside your attic with a flashlight and examine the roof decking for water stains, damp insulation, or sunlight seeping through gaps. These are clear signs of potential wind damage.
Check ceilings throughout your home for new water marks or discoloration. Indoor clues often appear before exterior damage is noticed, making this a key step in early detection.
Check for Fallen Debris
Inspect the area around your home for branches, shingles, or other debris that may have struck your roof. Even if the roof looks intact from below, impact from debris can crack shingles or dislodge flashing.
Clearing this material also prevents future blockages in gutters and downspouts, which could cause additional issues.
Use a Ladder with Caution (or Call a Pro)
If you’re comfortable and it’s safe, use a sturdy ladder to check the roof edges. Always have someone spot you and never climb after dark or in high winds.
If you’re unsure or see major signs of damage, it’s best to call a professional roofer. Safety should always come first during post-storm inspections.
Do You Need to Check the Attic for Wind Damage?
Absolutely, inspecting the attic is just as important as checking the outside of the roof. After a windstorm, the attic often reveals signs of damage you can’t see from the ground.
I always grab a flashlight and check the space for water stains, damp insulation, or any streaks of sunlight coming through the roof decking.
These small signs can indicate torn shingles, flashing damage, or lifted nails that may lead to leaks.
What makes the attic so valuable during inspection is that it gives you a direct view of the roof’s underside. If there’s any weakness in your roofing system, the attic is usually the first place it’ll show up.
A quick scan can help you catch damage early, before it leads to mold, rot, or interior wall damage. If you spot moisture or daylight, it’s a clear sign that your roof may need repairs right away.
When Is Wind Speed Strong Enough to Cause Damage?
Wind doesn’t have to be hurricane-level to harm your roof. In fact, gusts as low as 45 to 50 mph can start causing issues, especially on older roofs or those with existing vulnerabilities.
| Wind Speed (mph) | Potential Roof Damage |
|---|---|
| 0–30 | Minimal risk. Most roofs remain unaffected. |
| 45–50 | Possible shingle loosening or lifting, especially on aging or weakened roofs. |
| 60+ | Shingles may be torn off; debris impact likely; underlayment and flashing may be exposed. |
| 75+ | High risk of structural damage; sections of roof or flashing can detach. |
| 100+ | Severe structural failure possible; widespread roof and attic damage. |
It’s important to remember that wind doesn’t hit every part of the roof equally. Edges, corners, and ridges take the brunt, making them more prone to damage.
So anytime wind speeds exceed 45 mph, it’s worth giving your roof a close look.
When to Call a Roofing Professional?
After a windstorm, it’s important to assess the roof carefully, but some signs call for expert attention.
Torn or missing shingles, sagging sections, or interior water stains are clear indicators that a professional roofer should step in.
These issues can escalate quickly into serious problems like leaks, mold growth, or even structural instability.
A roofing professional should also be contacted if the roof is steep, elevated, or otherwise difficult to inspect safely. Without the proper gear and experience, attempting a DIY roof check can be dangerous.
Experts can detect less obvious damage, evaluate overall roof health, and recommend effective repair solutions.
Even if no immediate damage is visible, homes in areas hit by strong winds may still benefit from a professional inspection.
Tips for Protecting Against Wind Damage
Simple precautions and upgrades can reduce the risk of wind-related roof damage and extend the life of your roofing system.
- Secure Loose Shingles: Nail down or replace shingles that show signs of lifting or curling.
- Trim Overhanging Branches: Cut back nearby trees to prevent broken limbs from hitting the roof during storms.
- Check Flashing and Fasteners: Ensure flashing, ridge caps, and nails are tight and sealed properly.
- Install Wind-Resistant Shingles: Use shingles rated for high wind speeds, such as Class F or H shingles.
- Reinforce Roof Edges: Add extra adhesive or fasteners to vulnerable eaves and corners.
- Keep Gutters Clear: Clean gutters and downspouts regularly to prevent water backup during high winds.
- Schedule Routine Inspections: Have a professional check the roof annually, especially after major storms.
- Seal the Attic: Insulate and seal attic spaces to reduce internal pressure that lifts roofing material.
Conclusion
After a windstorm, I always make it a point to check for signs of roof damage. Even the smallest issue, like a lifted shingle or a water stain in the attic, can turn into a costly repair if ignored.
I’ve learned that early detection is key to protecting not just the roof, but the entire home. Knowing what to look for and how to inspect safely helps me stay one step ahead of any damage.
If you’ve just experienced high winds, don’t wait. Walk around your home, check inside and out, and make notes of anything unusual. If something looks off or you’re unsure, it’s smart to contact a roofing expert.
I hope this guide gives you the confidence to assess your roof after a storm. Stay proactive, stay safe, and feel free to share your experience or ask a question in the comments below.

With a Master in Architectural Studies from University of Pennysylvania, Marwa Haydar has pioneered living spaces since 2005. Her expertise, initially honed in a prestigious architectural firm, is evident in her approach to creating environments. Marwa became part of our team in 2019 and has since been a driving force in our home improvement section, known for her practical yet stylish solutions. She’s been spearheading our design workshops since then, infusing her passion for teaching into her work. In her leisure time, Marwa enjoys exploring historic architecture and is an enthusiastic pottery hobbyist, further enriching her understanding of form and texture.