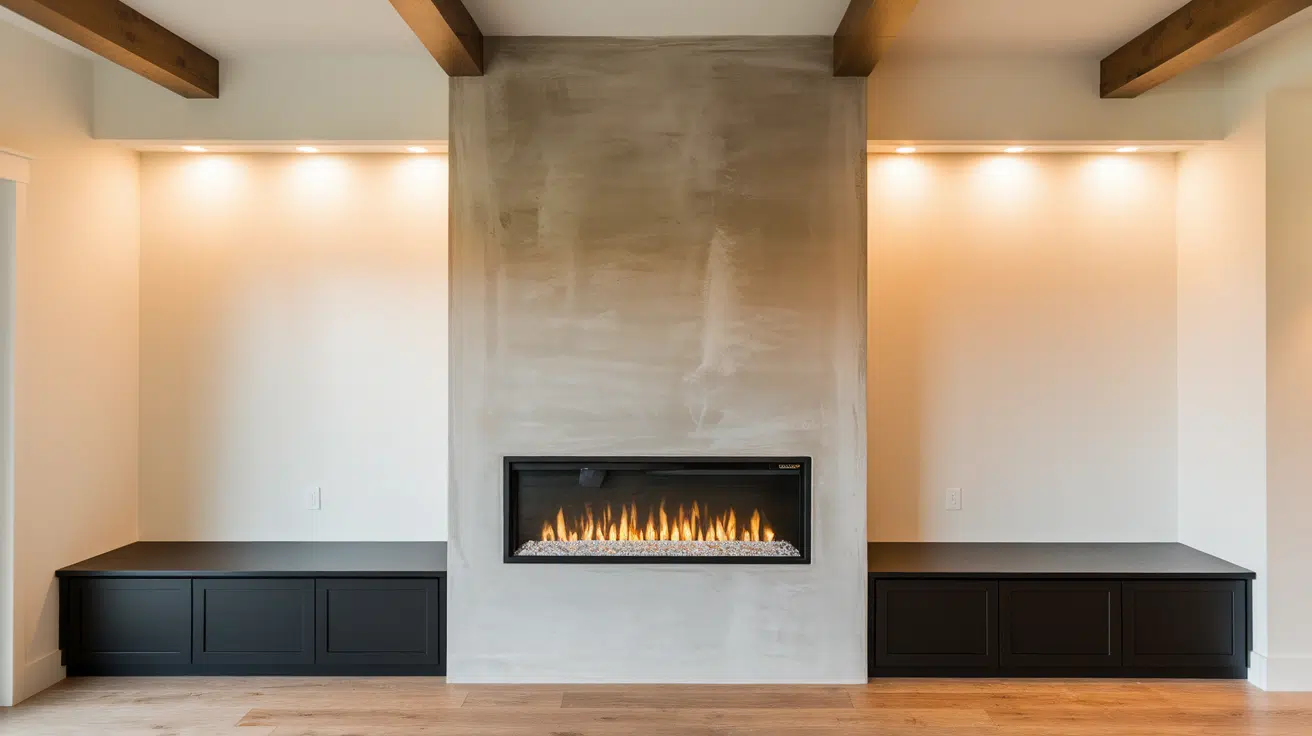
Thinking about adding warmth and style to your living room? I was, too, and building a DIY electric fireplace surround turned out to be a simple, budget-friendly way to do it.
I’m not a pro carpenter, and I don’t have a workshop full of tools. But with just a few basics and a little planning, I was able to create a custom surround that looks like it was always part of the room.
In this post, I’ll share the exact framing plans I used and walk you through each step, from measuring and building the frame to finishing and installing the electric fireplace insert.
It’s easier than you might think, and it really transformed the space in my home.
Why Build Your Own Electric Fireplace Surround?
Buying a pre-made fireplace surround might seem easier, but building your own has real benefits, especially if you want something that truly fits your space and style.
When you go the DIY route, you’re not stuck with standard sizes or generic designs. You get to create a surround that works with your room’s layout and your taste.
It also saves money. Store-bought options can be expensive, especially for quality materials. By doing it yourself, you can control the budget and still get a high-end look.
And finally, there’s the satisfaction of making something with your own hands. A custom-built surround doesn’t just warm the room; it adds character and becomes part of your home’s story.
Step-by-Step Fireplace Framing Plans
New to framing? Don’t worry, you’ll learn how to measure, cut, and build a solid base with the right opening for your electric insert. Everything is beginner-friendly and easy to follow.
Materials Used
Each item plays an important role in the project, from the framing and drywall to the finish details that bring everything together.
- 2×4 lumber for framing: Used to build the structure of the fireplace surround and bench
- Screws and Kreg jig for joinery: Secures framing pieces together with strong, angled joints
- Drywall sheets (3 total): Covers the frame to create smooth, finished surfaces
- Drywall screws: Fasten drywall panels securely to the wooden frame
- Mesh tape and metal corner bead: Reinforces seams and corners to prevent cracking
- Joint compound (regular and fine finish): Smooths out drywall seams and imperfections
- Oscillating multi-tool: Cuts detailed shapes in drywall for a precise fit around the insert
- ¾-inch plywood for bench: Forms the seat and trim of the built-in storage bench
- Wood glue and finish nails: Bonds and secures plywood pieces with clean, hidden fasteners
- Wood putty: Fills gaps, nail holes, and imperfections before painting
- Primer and black paint: Seals and finishes the bench surface for a clean, modern look
- 36-inch piano hinge: Allows the bench top to open and close for hidden storage
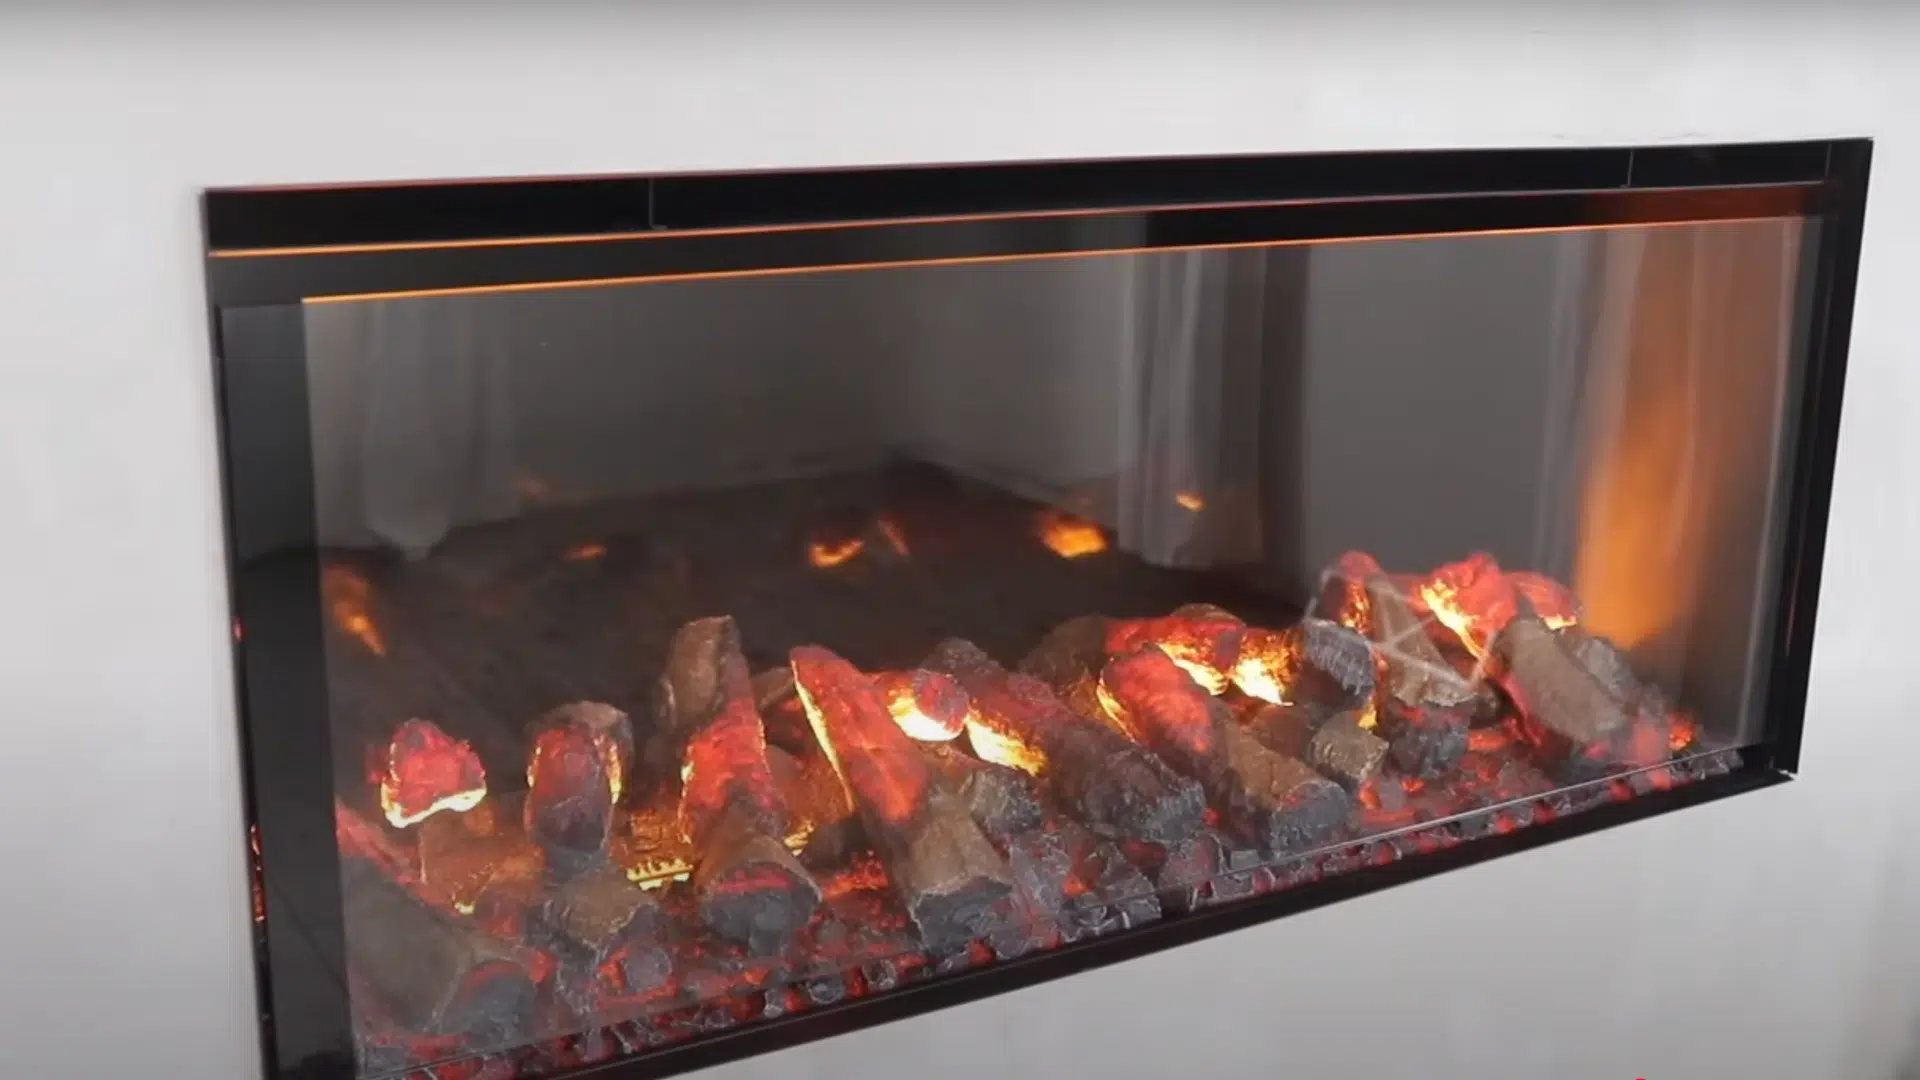
- Dimplex Opti-Myst Pro 1000 fireplace: The electric insert that creates heat and realistic flame effects
- Flame cassette and plug kit: Produces the 3D flame effect and provides safe, removable power access
- Optional log kit and glass front: Adds glowing logs and a polished, protective cover to the fireplace
- Faux concrete finish kit: Creates a textured, modern concrete appearance over drywall
- Caulk and painter’s tape: Seals edges and ensures clean lines during finishing work
Step 1: Frame the Fireplace Structure
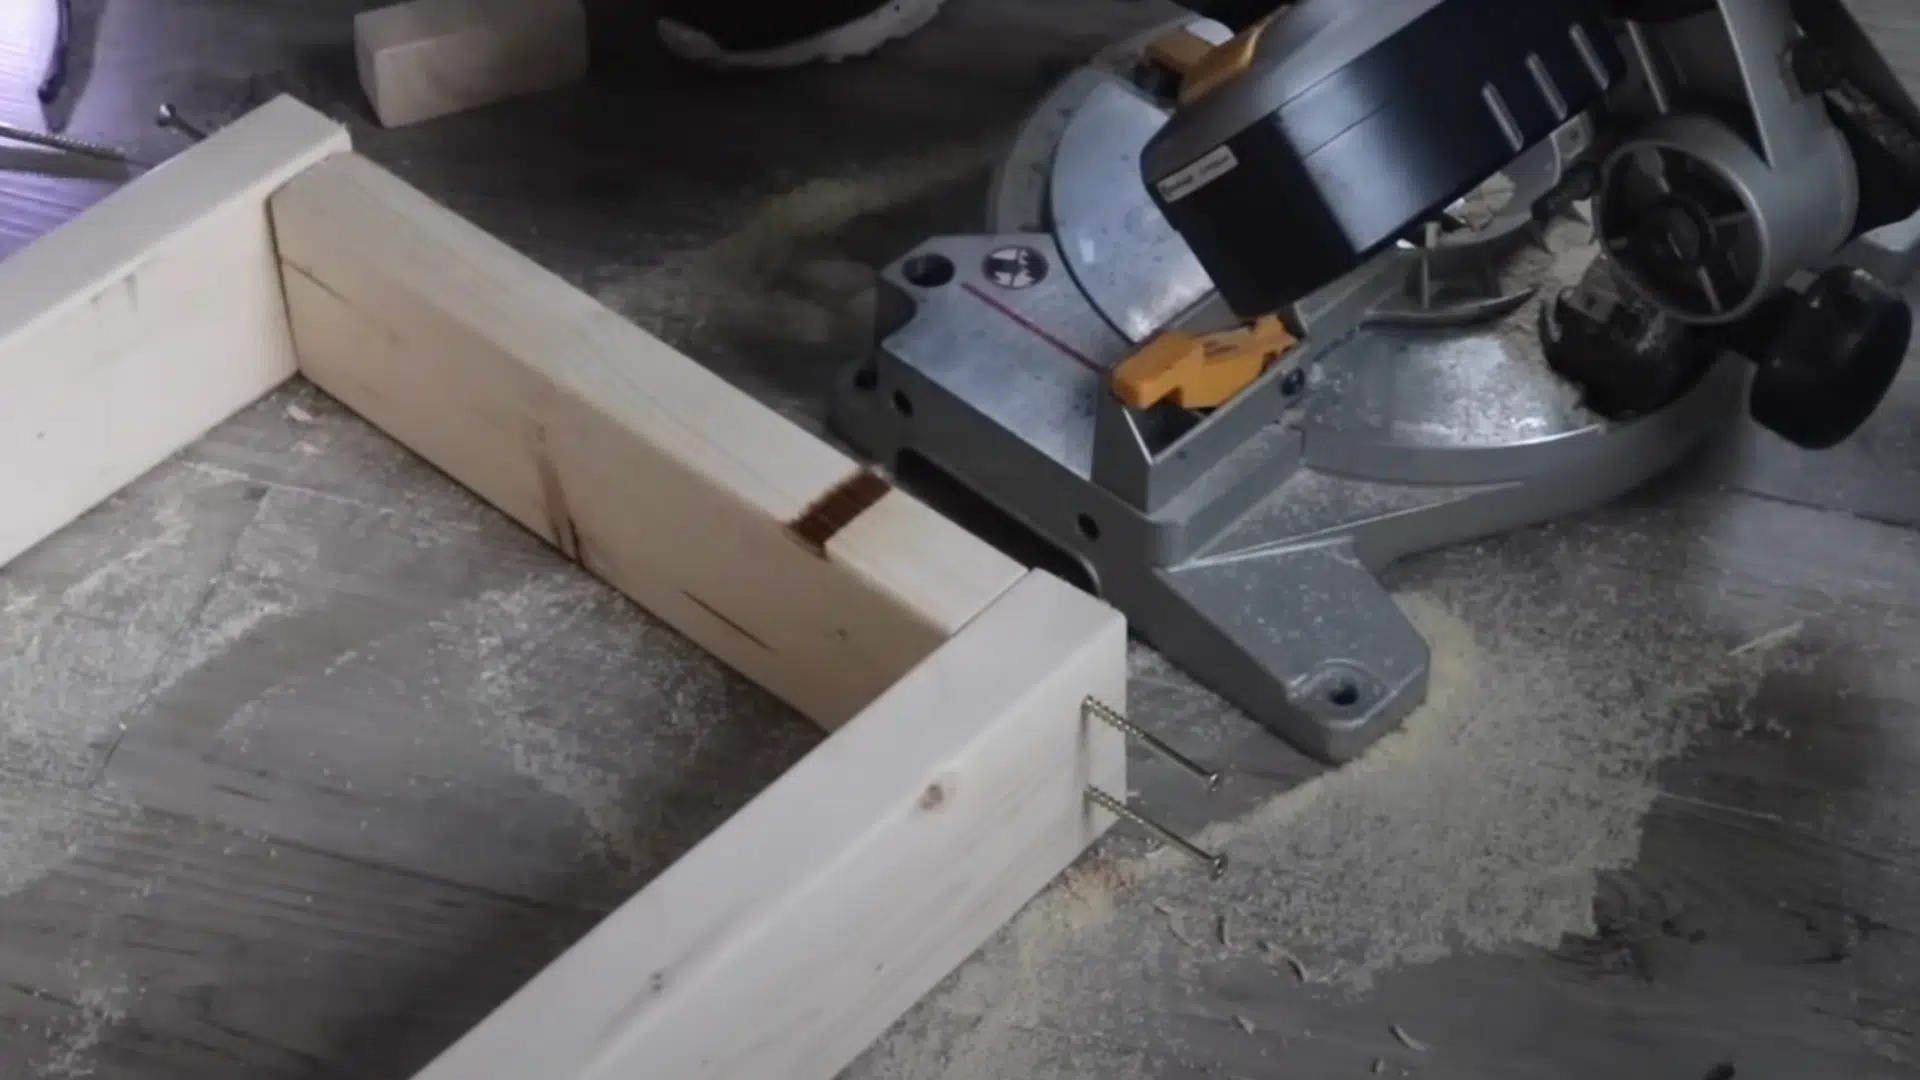
Begin by building the frame using 2×4 lumber.
Space the studs 16 inches on center and create box-shaped sections. Anchor the frame securely to the wall, floor, and ceiling.
For a built-in look, frame the surround to a depth of approximately 15.5 inches and match the height to the ceiling, which is typically around 9 feet tall.
Step 2: Create the Fireplace Opening
Plan the surround width based on the fireplace insert dimensions.
For a 40-inch insert, allow approximately 67–68 inches total width.
Frame a large central opening with horizontal 2x4s and add vertical blocks spaced 16 inches apart to provide a stable, level base and leave enough space for proper airflow.
Step 3: Add Blocking and Prepare for a Possible TV
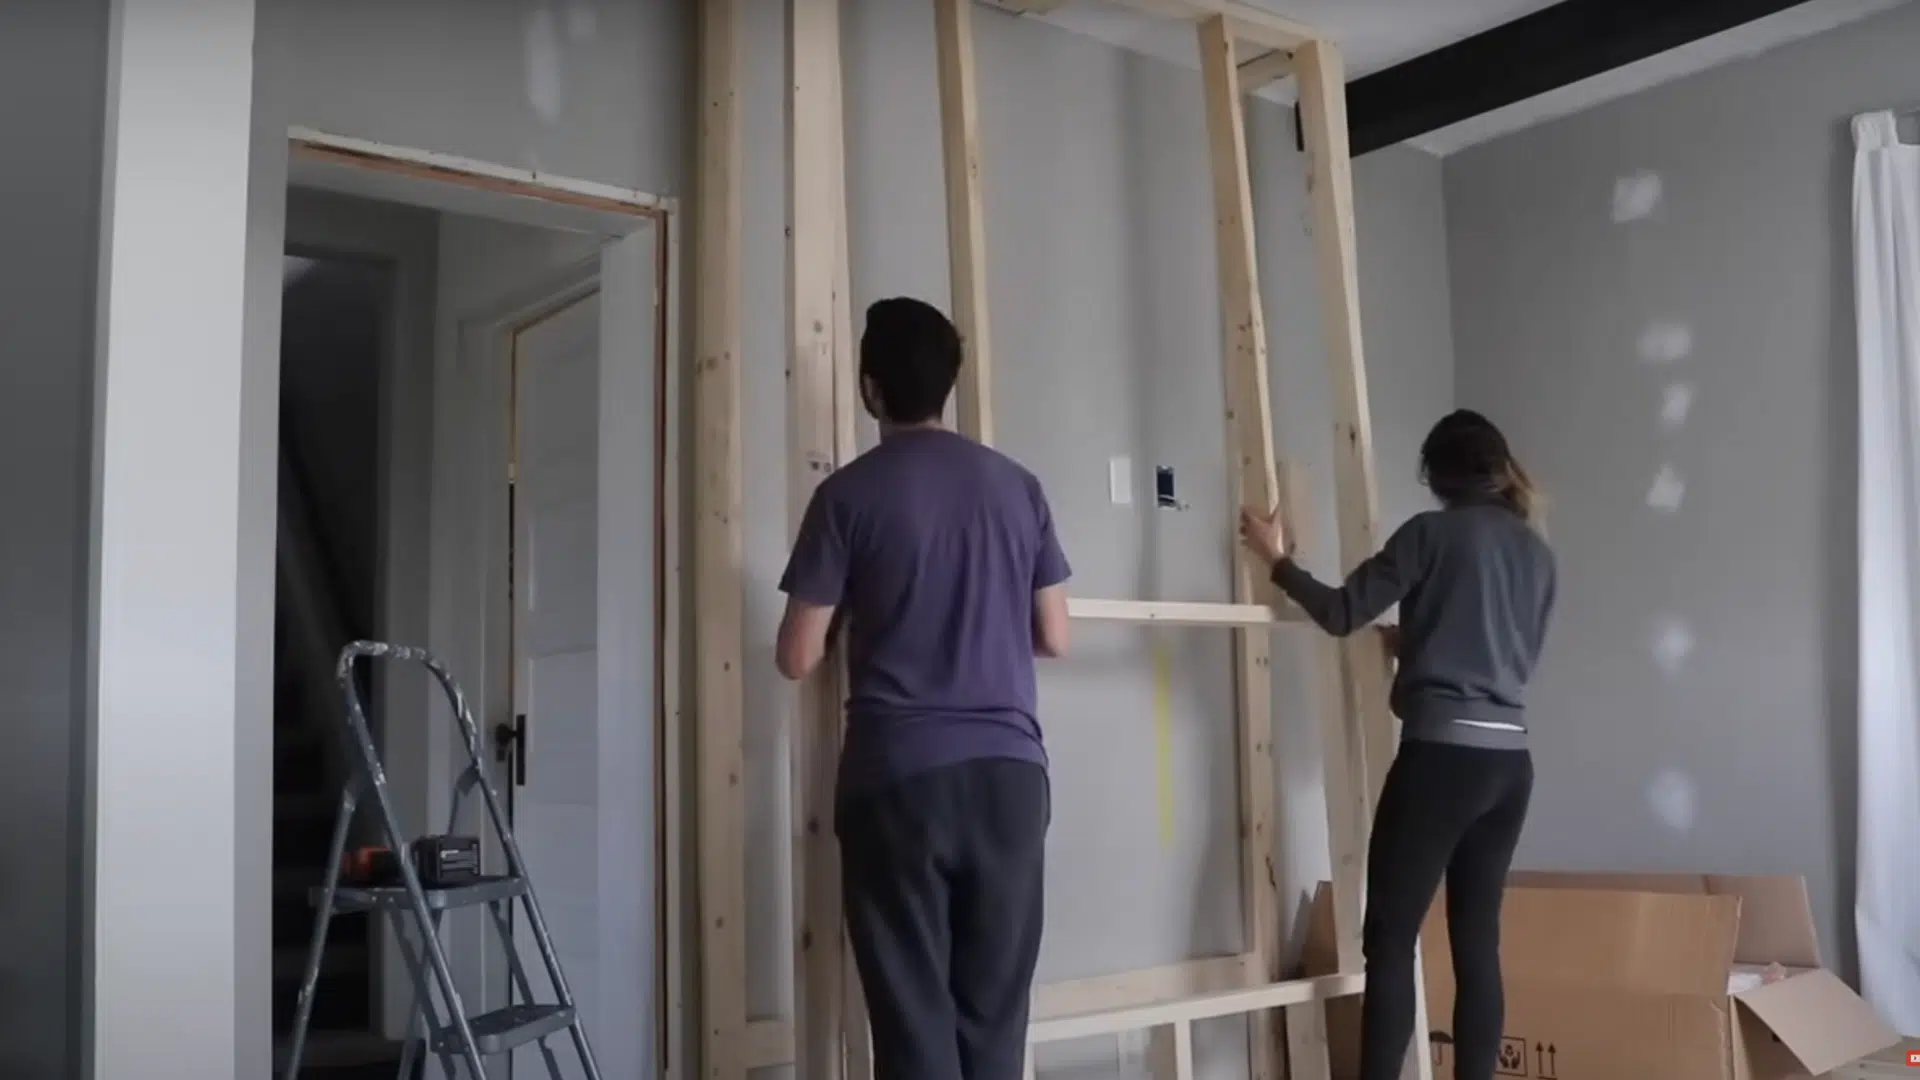
Install extra horizontal blocking near the top of the frame to support a potential wall-mounted TV in the future.
Keep existing wall outlets and cable connections accessible by enclosing them within the frame and planning for future reach-through access from nearby built-in features.
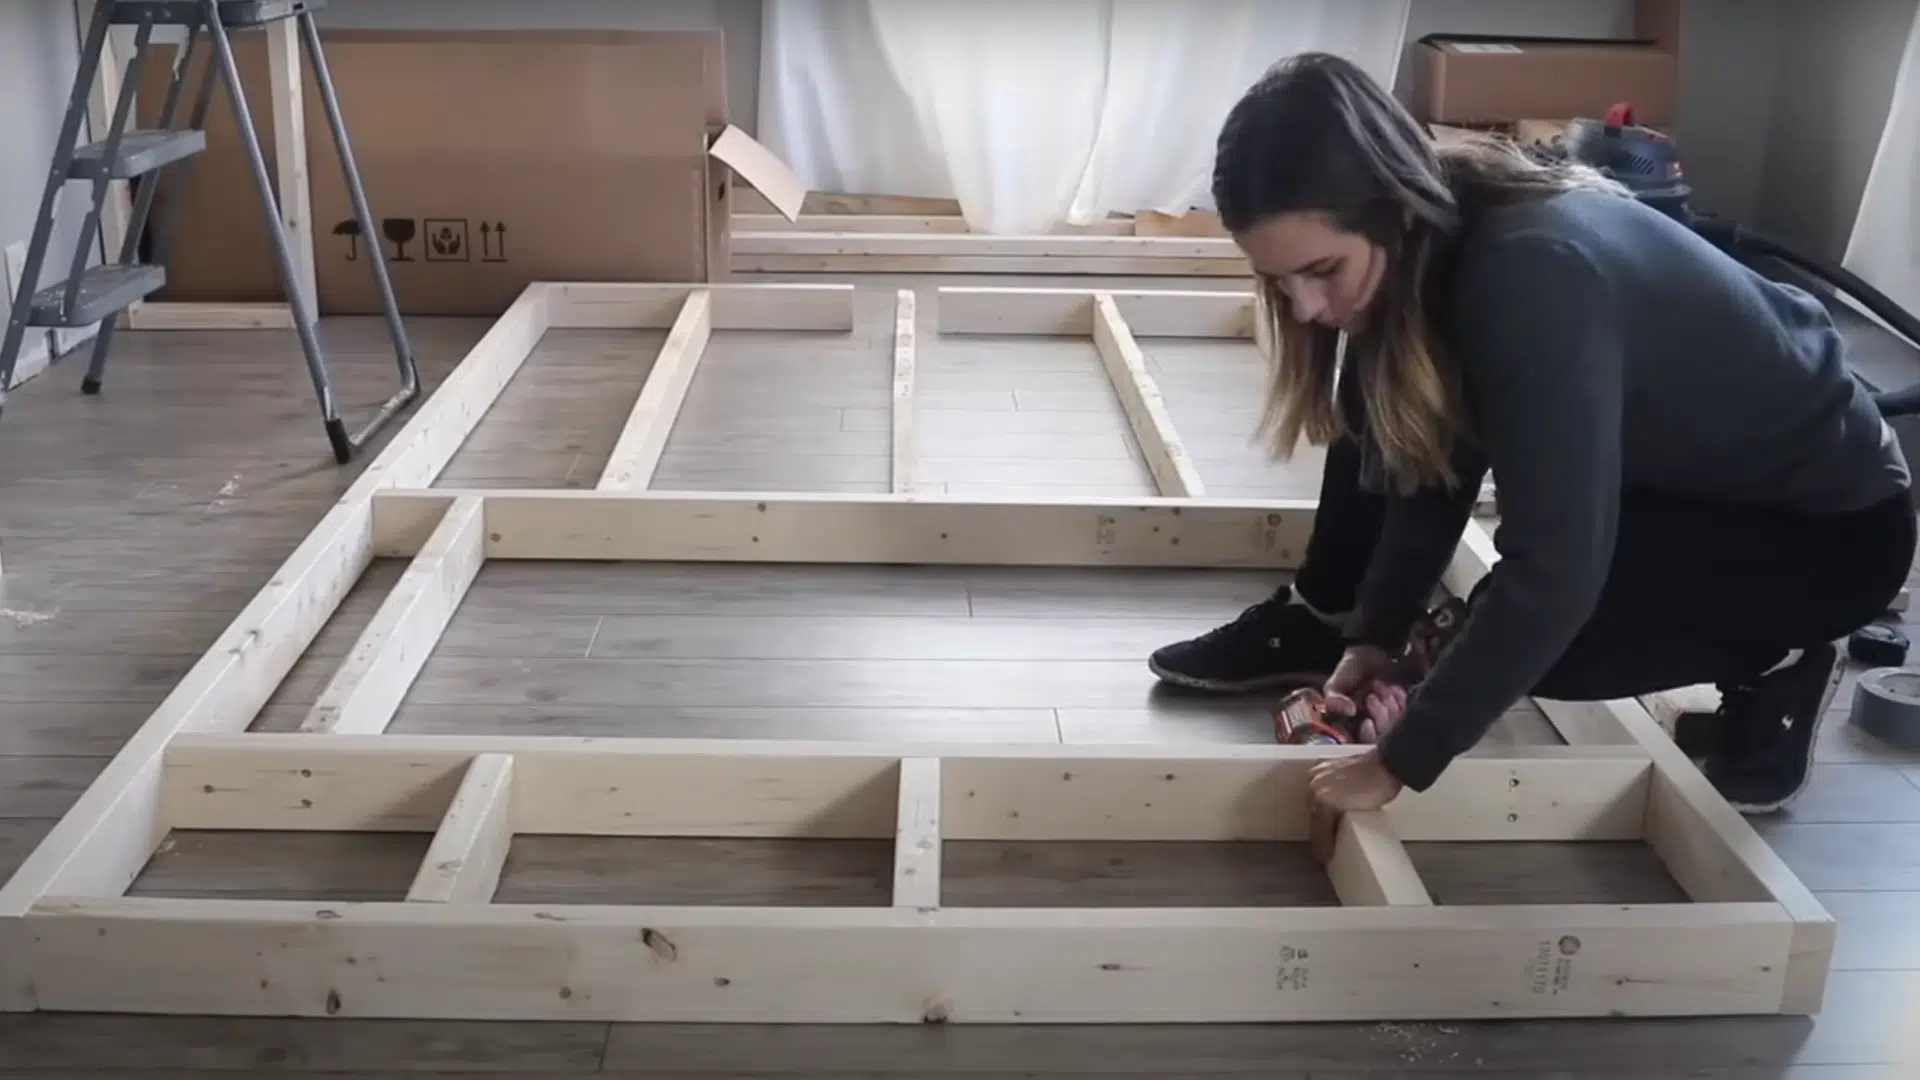
Step 4: Anchor to Ceiling Beams and Add Bench Framing
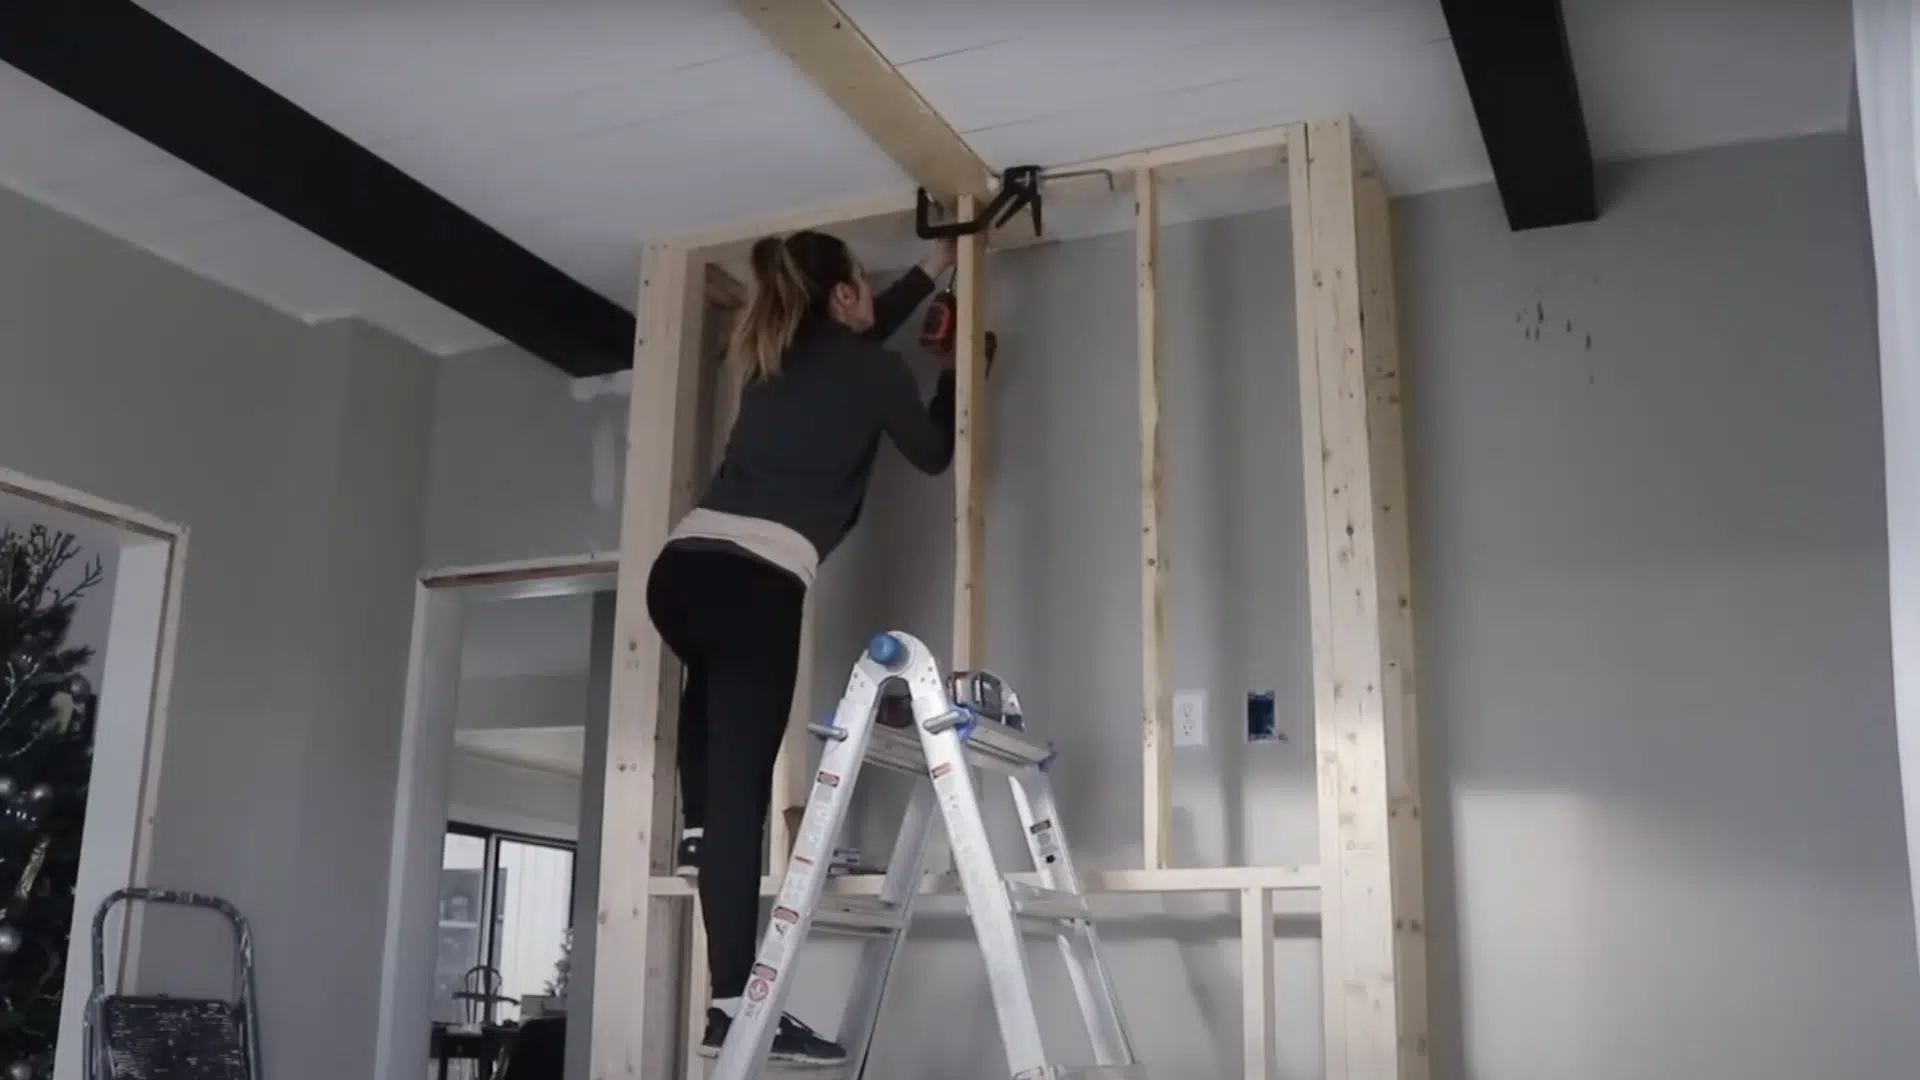
Secure the top of the fireplace frame to any existing ceiling framing using pocket hole screws or a Kreg jig.
Then frame a built-in bench beside the surround by constructing box shapes from 2x4s. Anchor the bench framing to both the wall studs and the fireplace structure for added durability.
Step 5: Reinforce and Prepare for Drywall
Add extra support along the front of the bench to reinforce the structure and provide a secure attachment point for the drywall panels.
Build a horizontal ledge inside the fireplace surround using a 2×4 to support the weight of the electric fireplace insert during final installation.
Step 6: Begin Drywall Installation
Measure and cut drywall panels to cover the surround and bench. Plan cuts carefully to minimize waste and make full use of each sheet.
For detailed cutouts around the fireplace insert, use an oscillating multi-tool to create smooth, accurate openings that reduce the need for trim.
Step 7: Tape, Mud, and Sand the Drywall
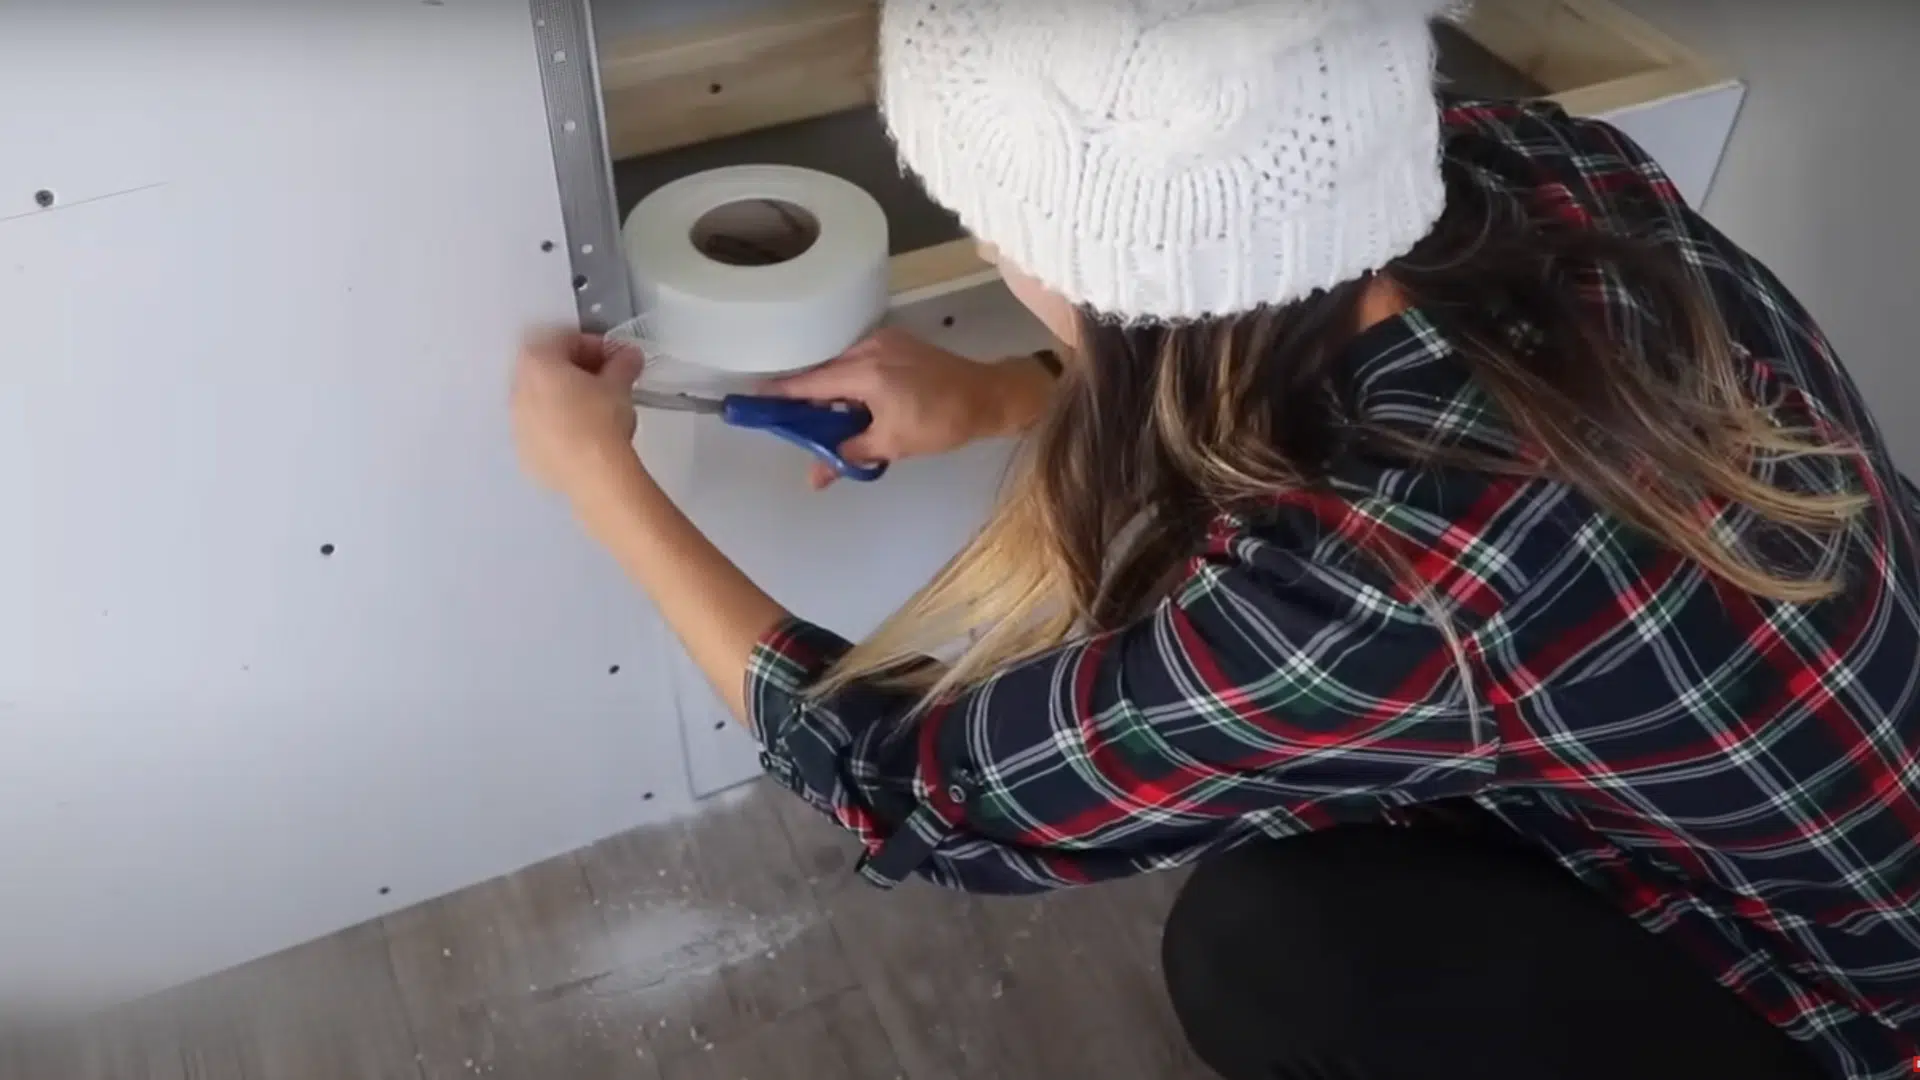
Reinforce seams with mesh tape and protect edges with metal corner bead. For outer wall corners, use adhesive corner tape for strength and flexibility.
Apply multiple layers of joint compound, sanding between each coat. Use a wide drywall knife for the final coat to create a smooth, seamless surface.
Step 8: Build and Install the Bench Seat
Cut the bench top from ¾-inch plywood and add a front trim piece to create the appearance of a thicker slab.
Fill any gaps or seams with wood putty, then sand smooth.
Apply primer and paint in the desired color – black provides a modern, high-contrast finish.
Step 9: Add a Hinged Storage Lid
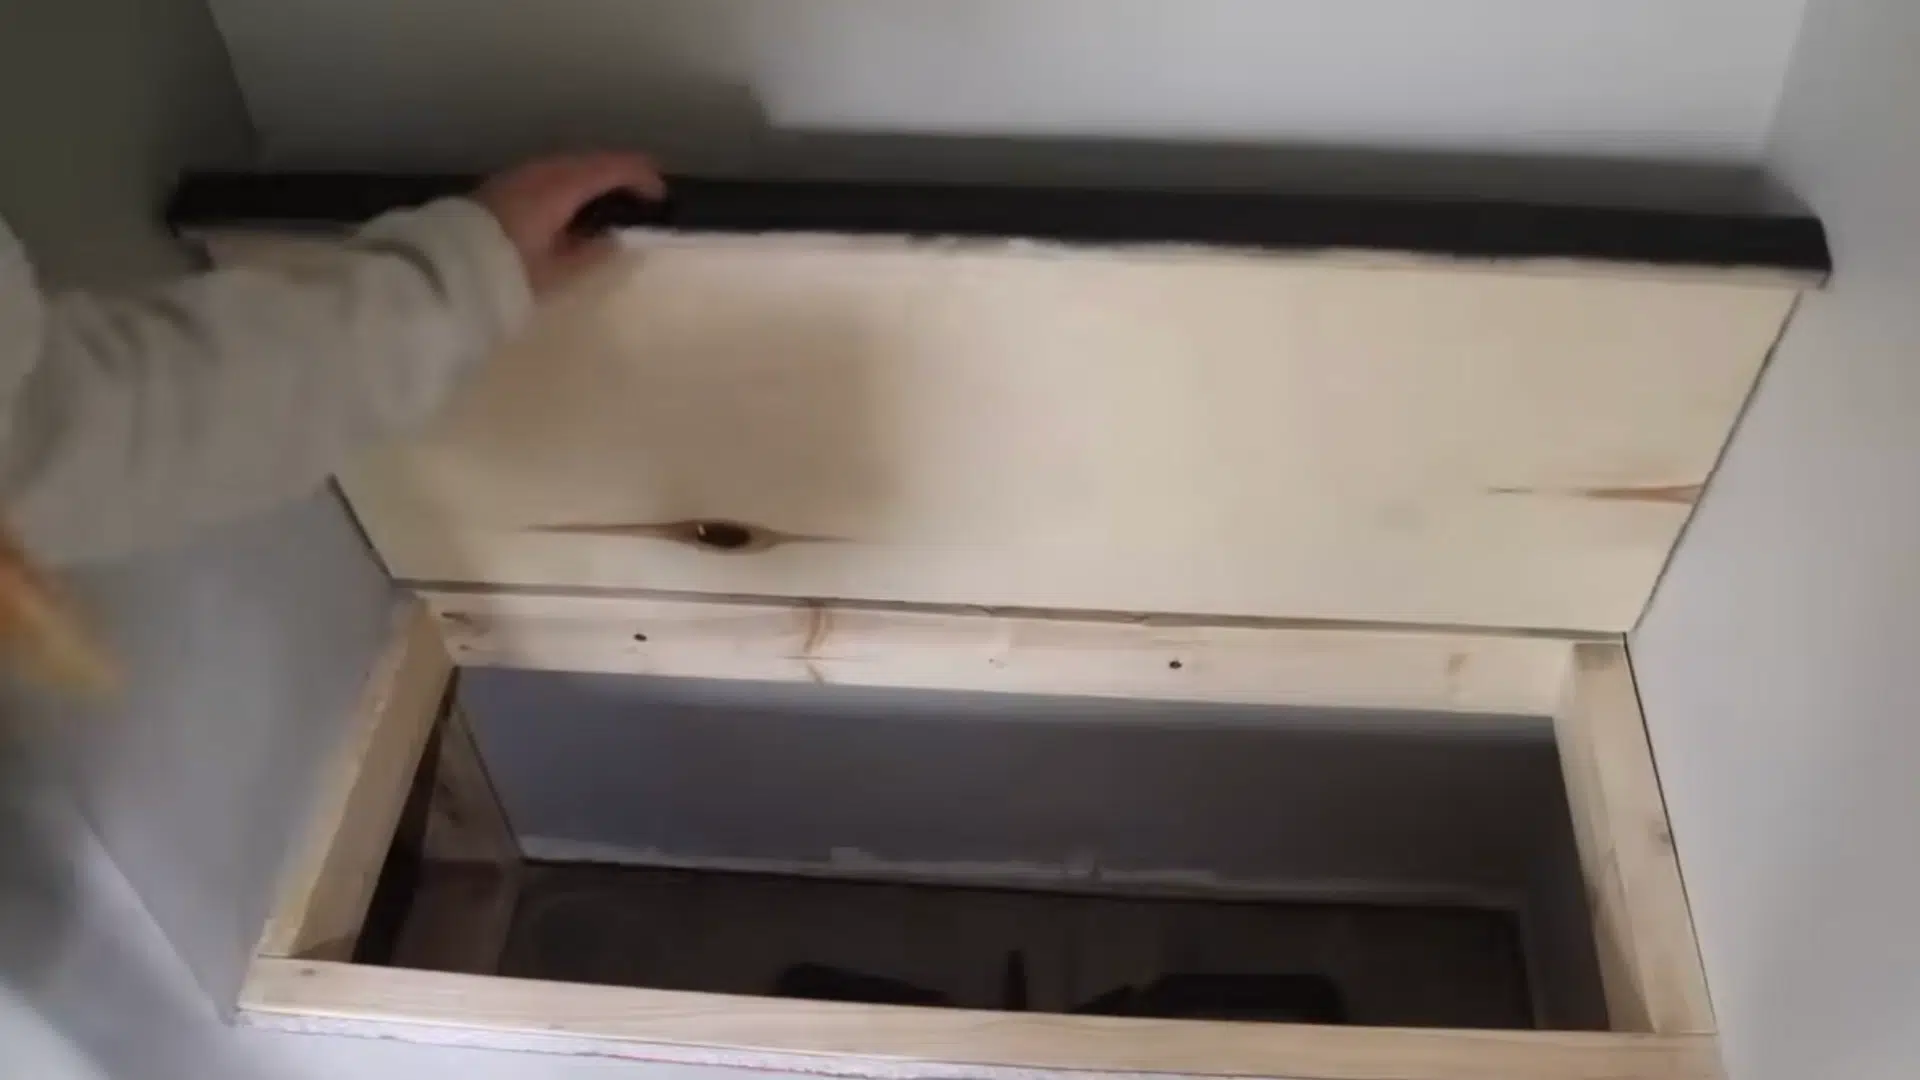
Attach a 36-inch piano hinge to the back edge of the plywood bench top to create a lift-up lid.
Secure a narrow support strip beneath the hinge using glue and finish nails.
This allows the bench to serve as hidden storage while maintaining a sleek and functional design.
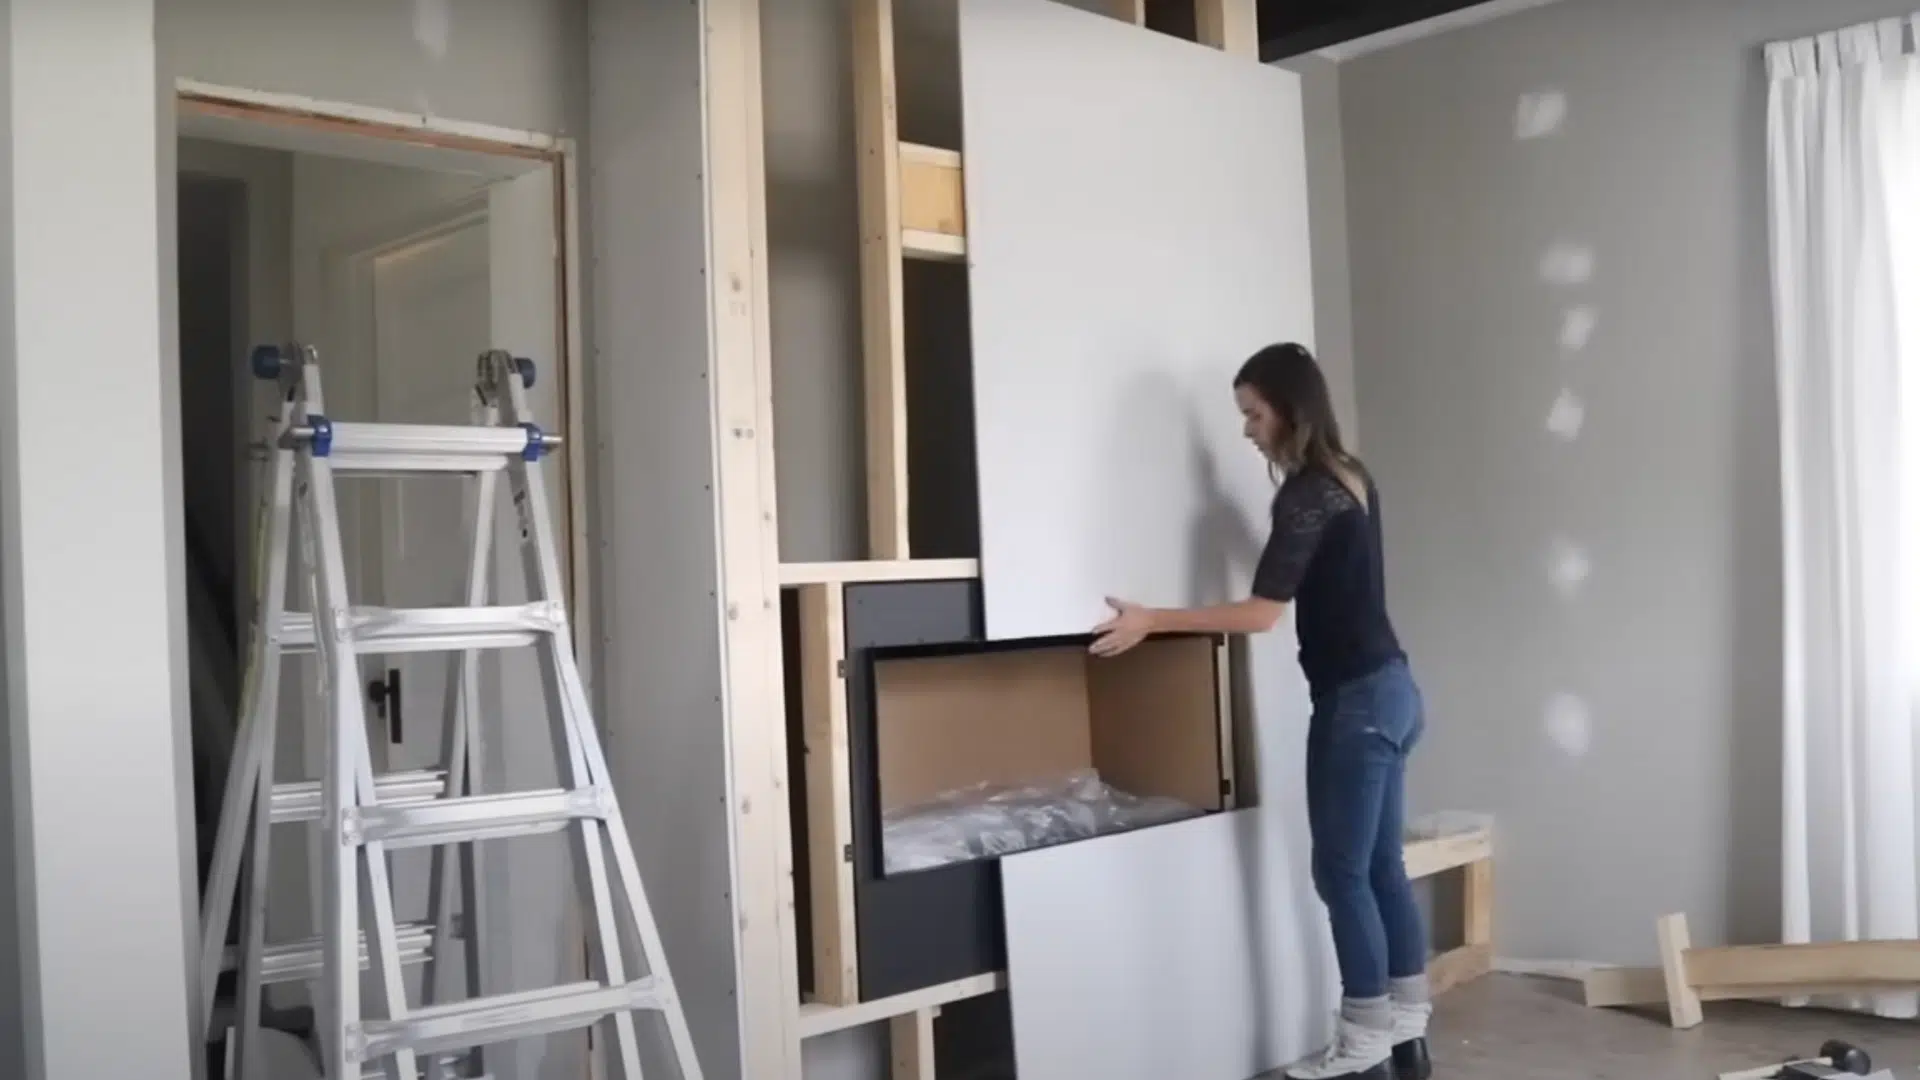
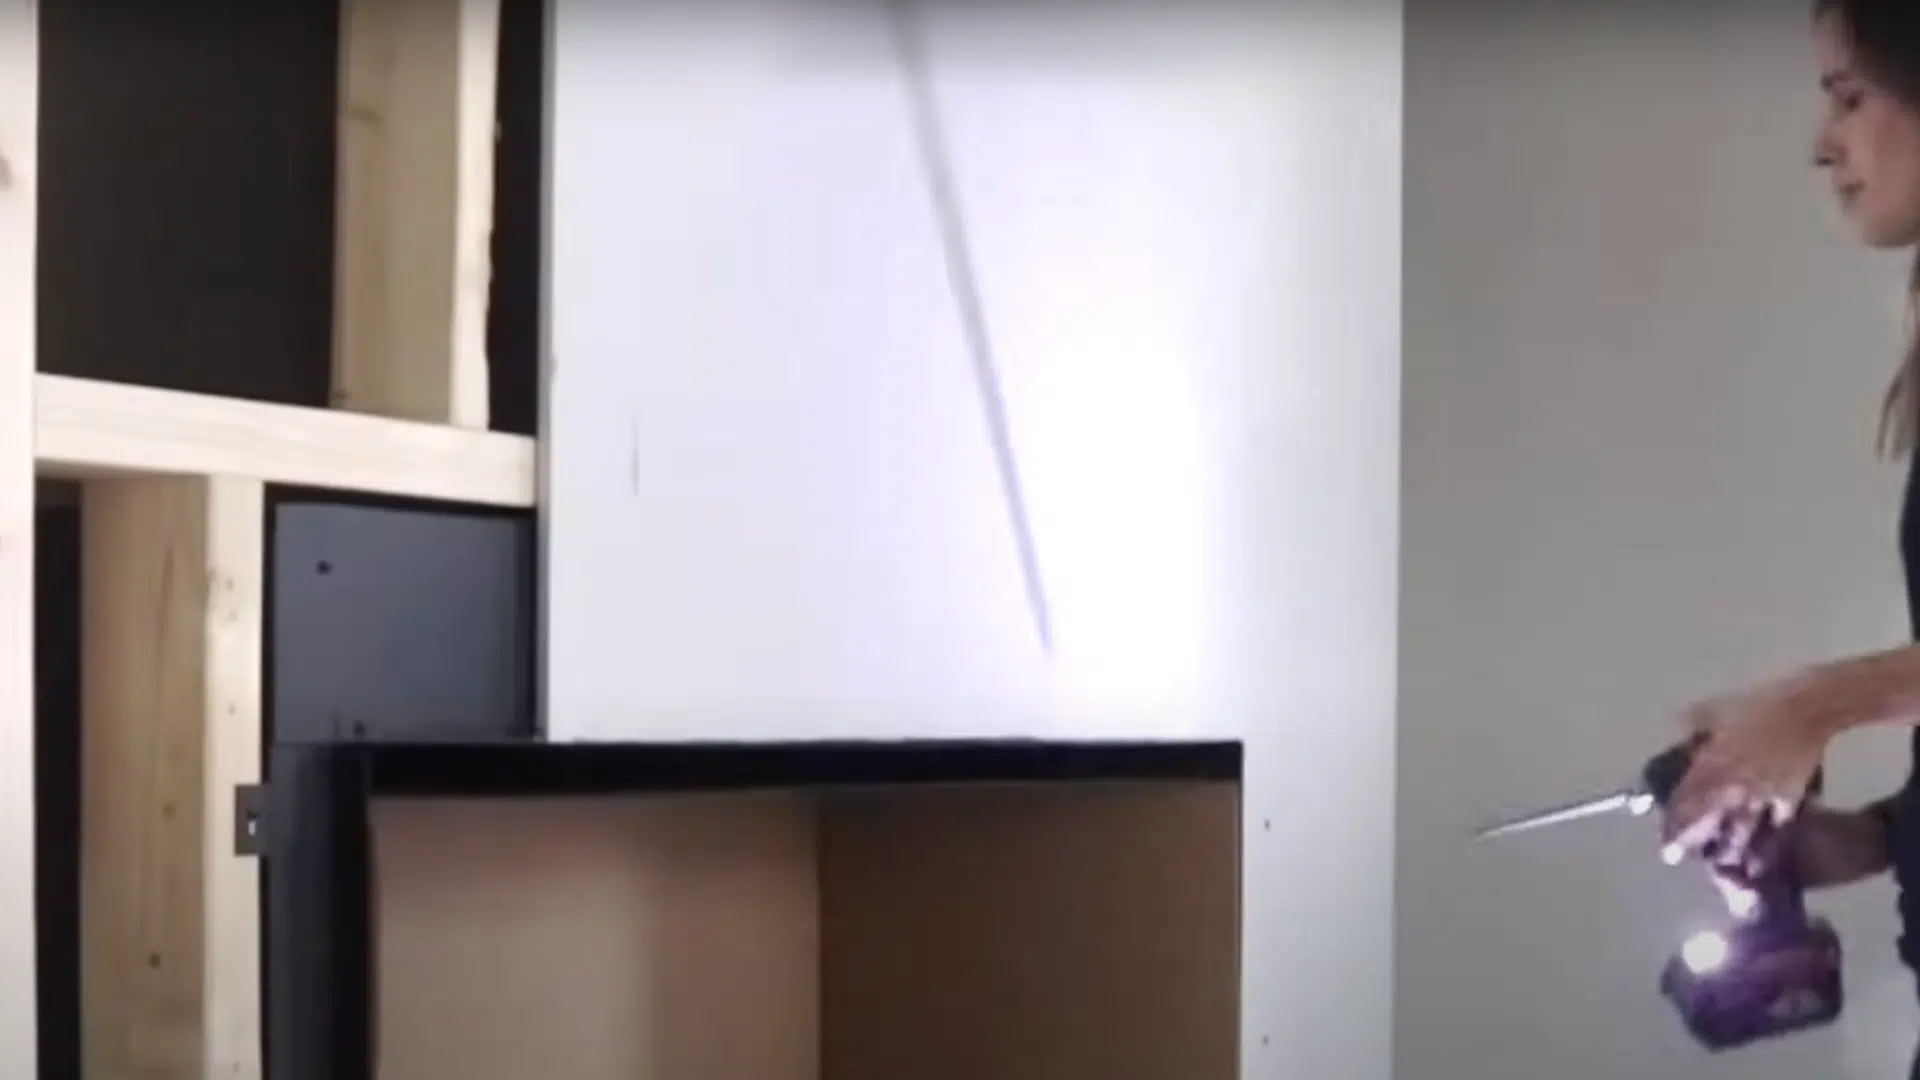
Step 10: Prep the Fireplace Unit and Install
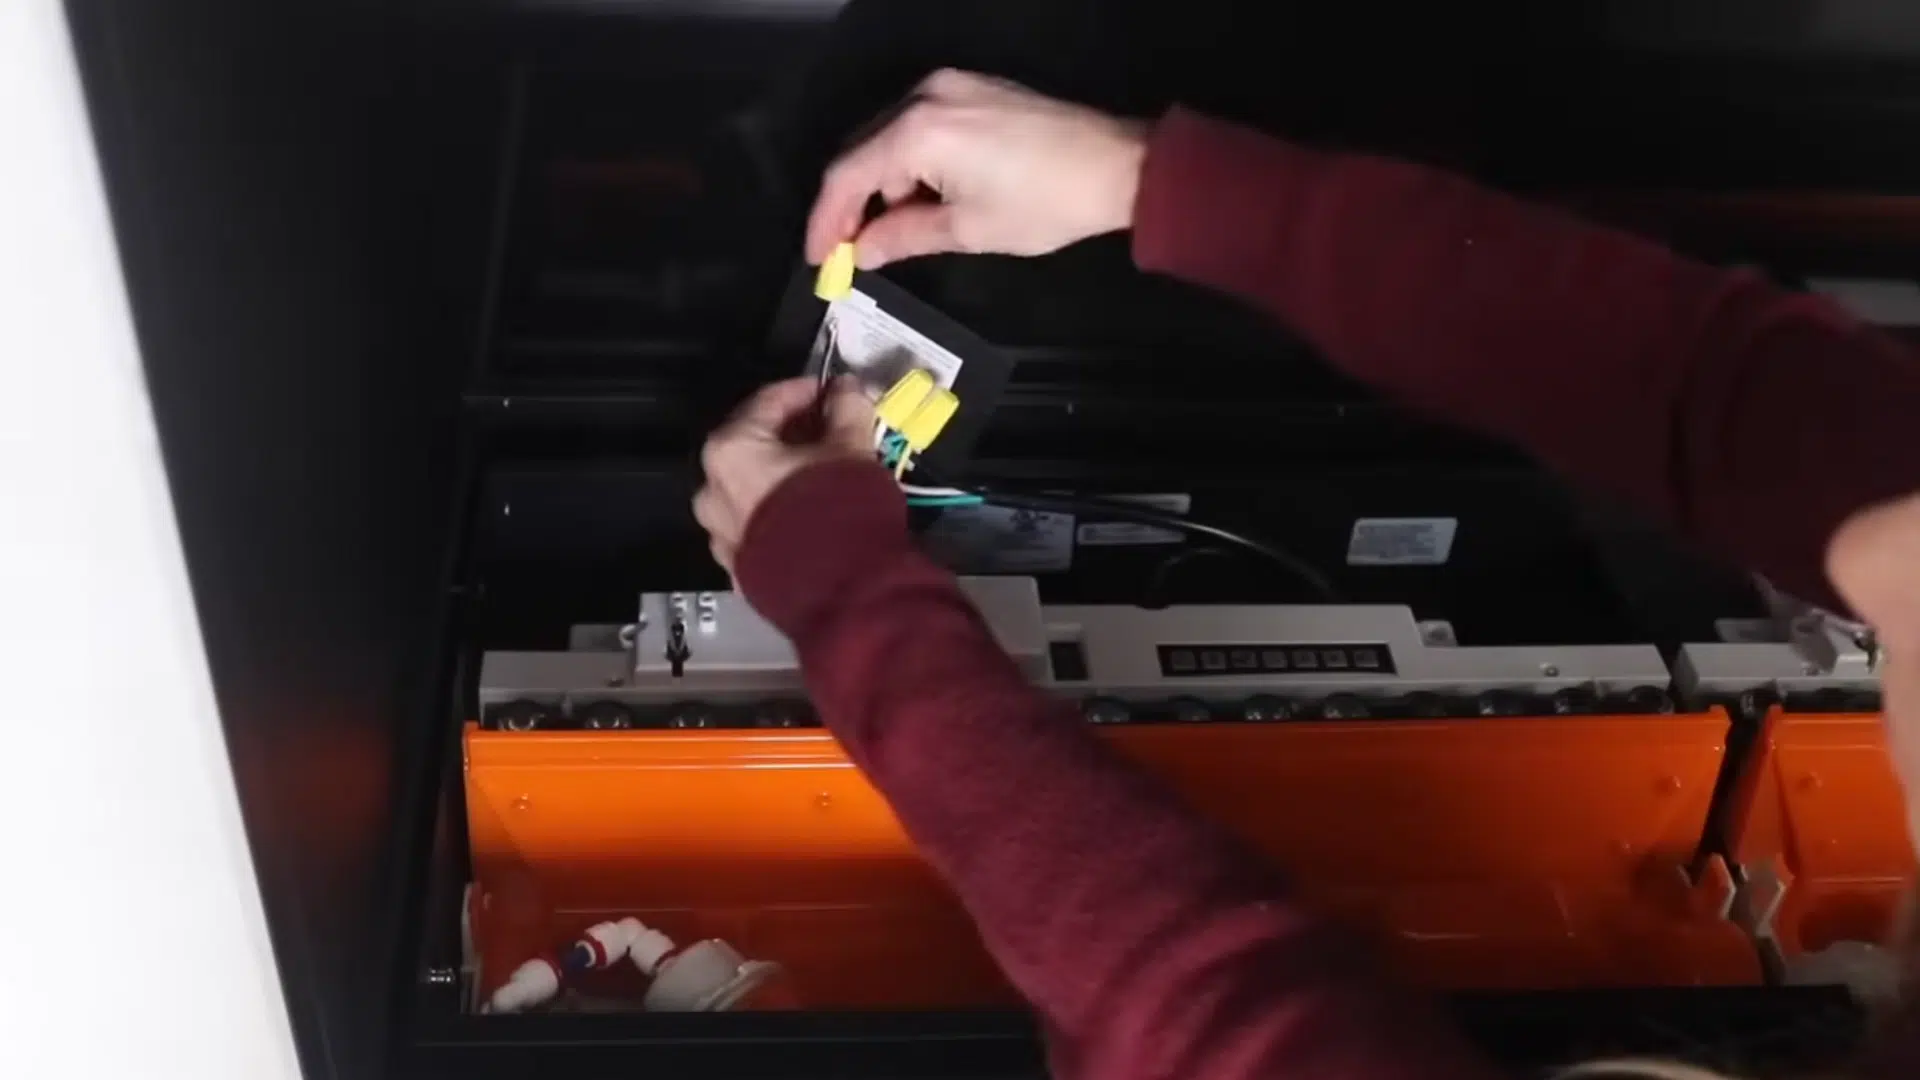
Place the electric fireplace insert on the internal 2×4 support ledge inside the frame.
Install the flame cassette, but keep the protective film in place during drywall work to prevent damage.
You can use a plug kit to wire the unit so that it can be easily unplugged from an outlet hidden within the bench.
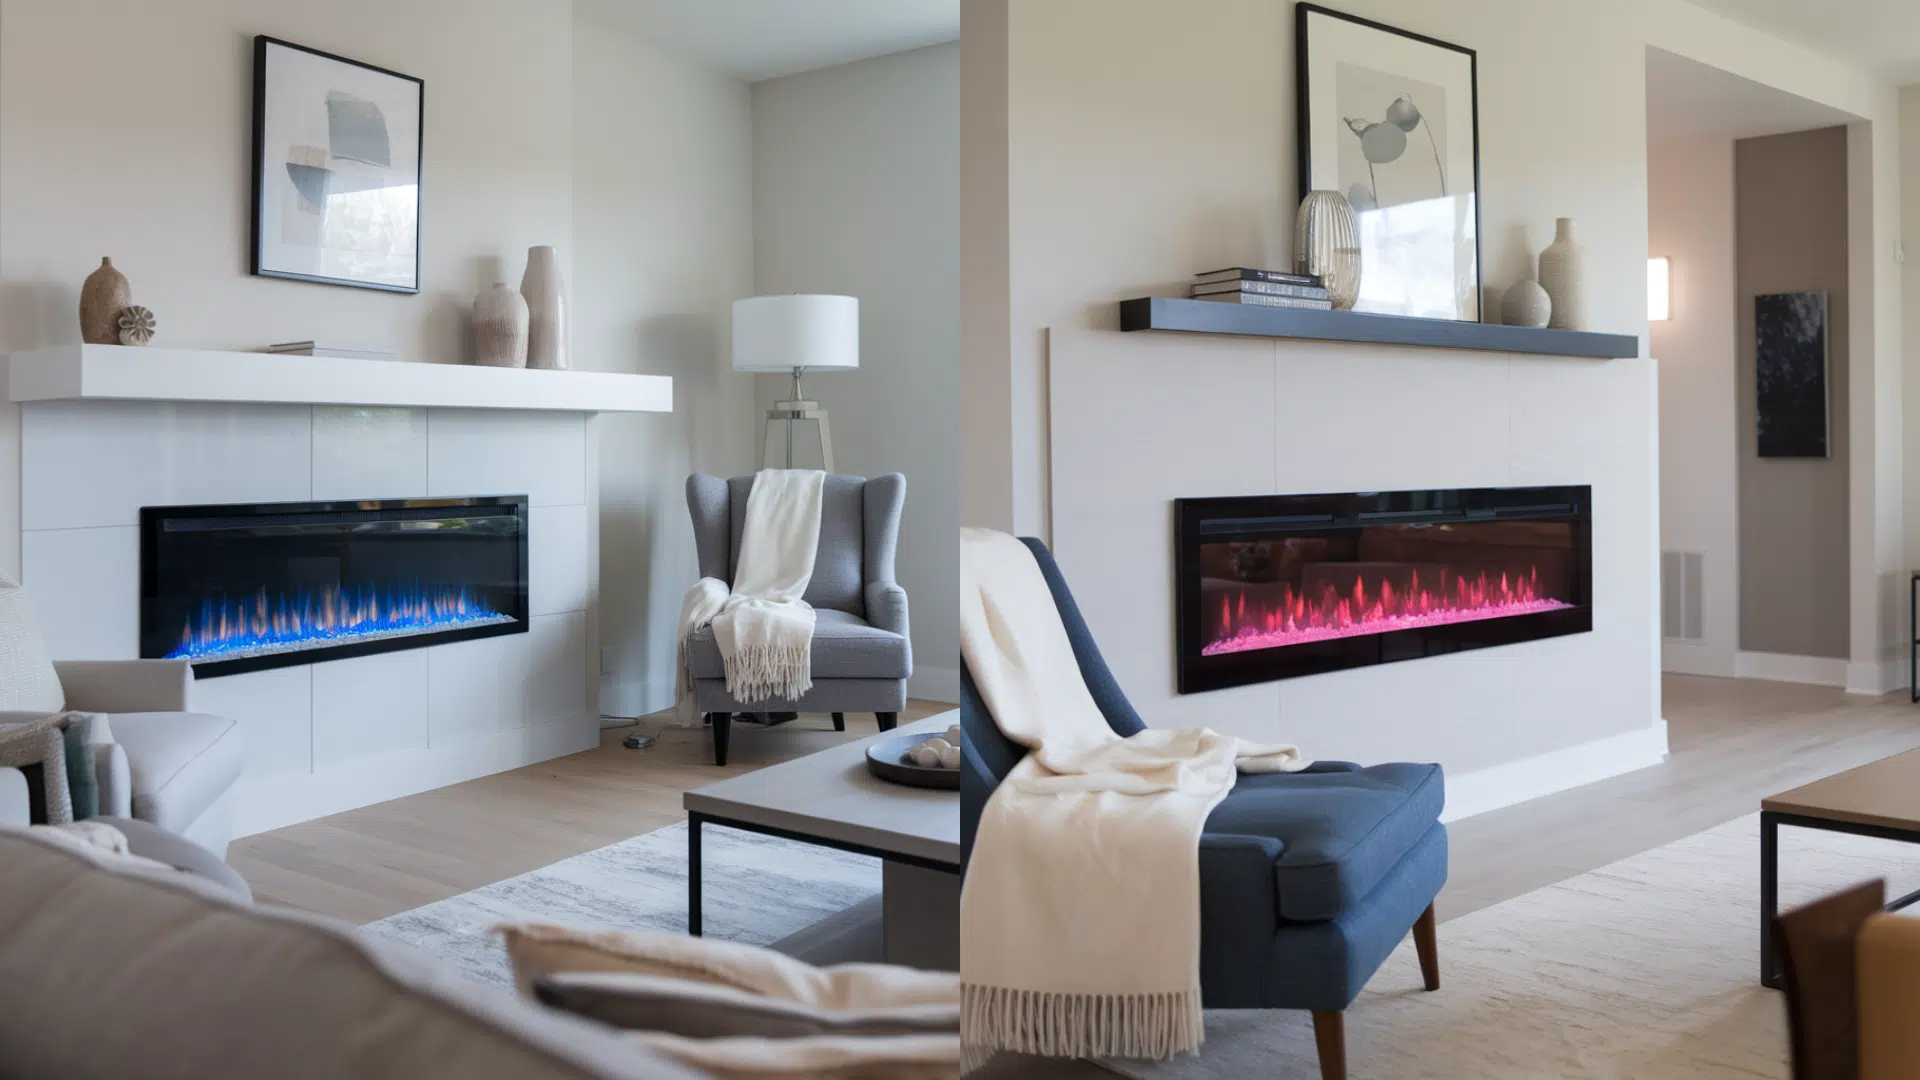
Step 11: Finish with Faux Concrete
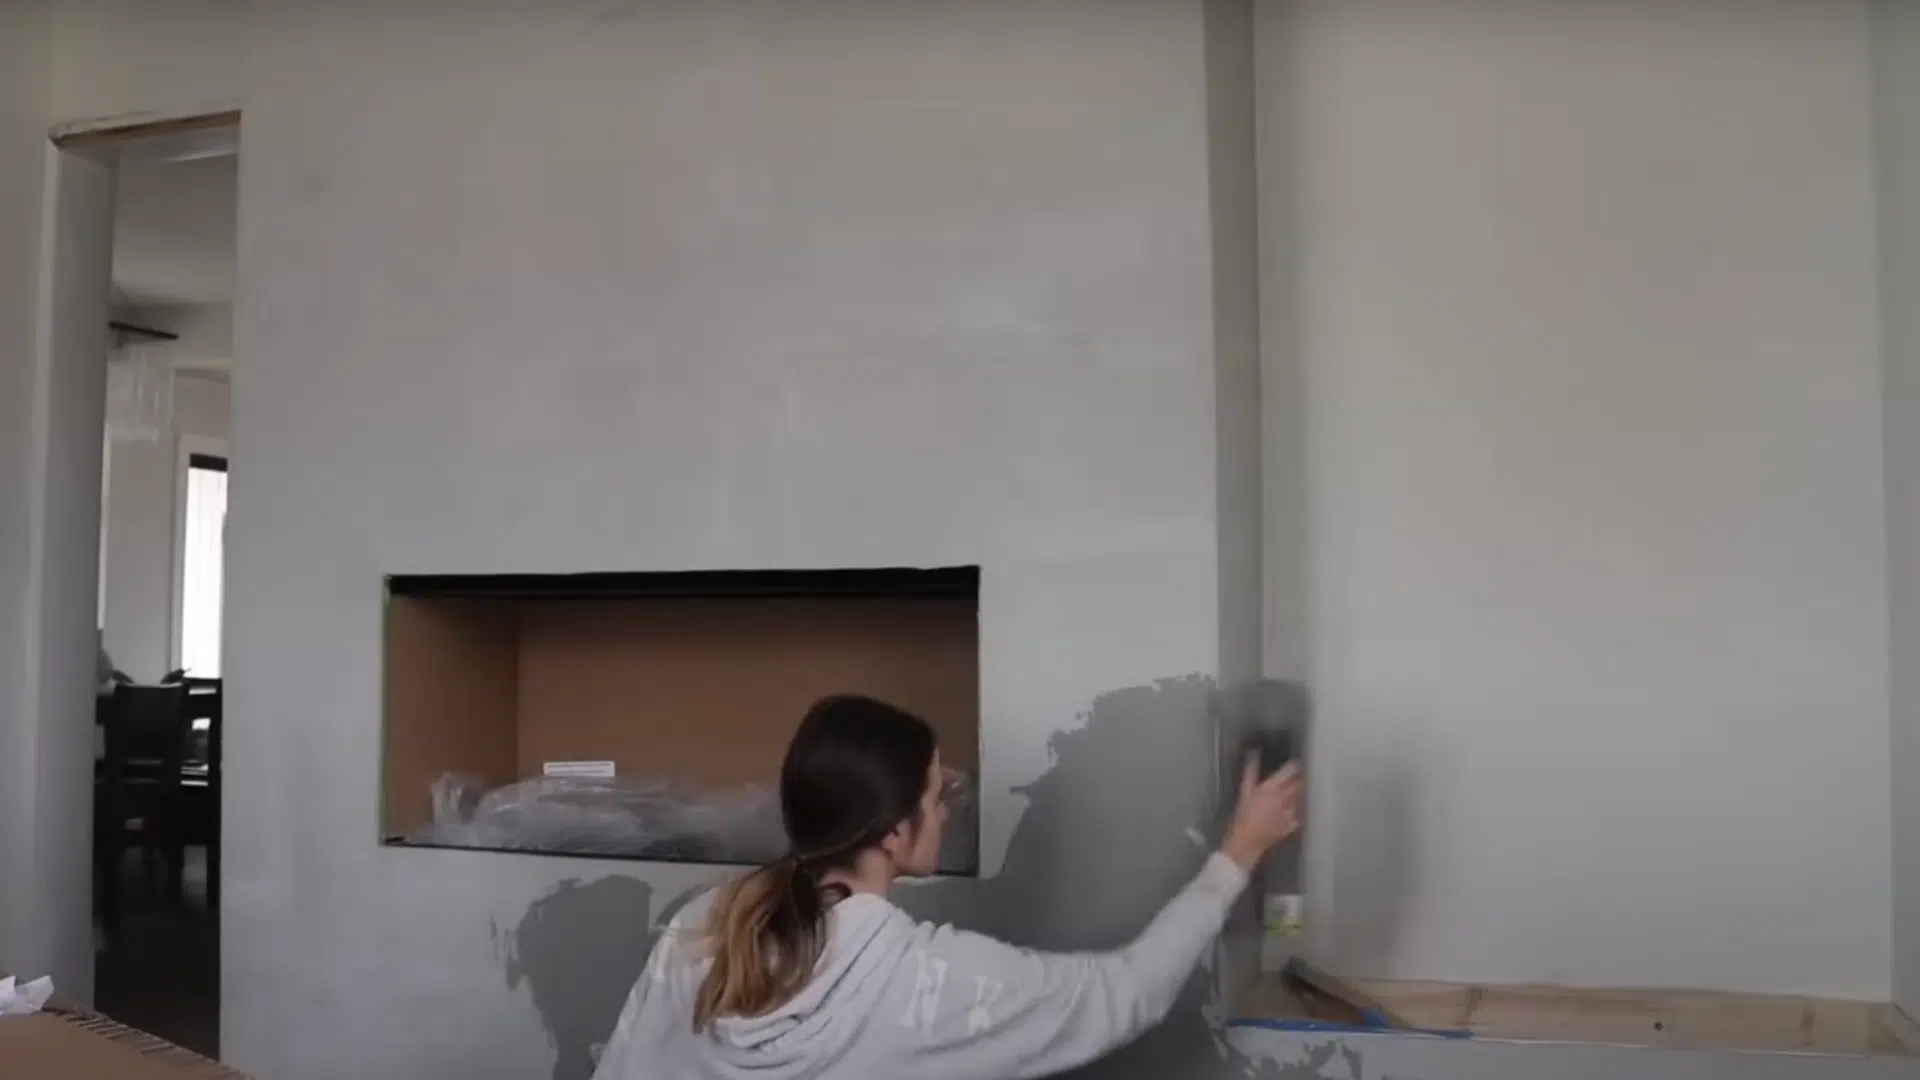
Apply a specialty faux concrete finish over the drywall surface to give the surround a soft, clouded texture. This creates a sleek, modern appearance that contrasts beautifully with painted walls.
Follow the product instructions carefully for best results and allow time for full drying.
Step 12: Final Details and Flame Setup
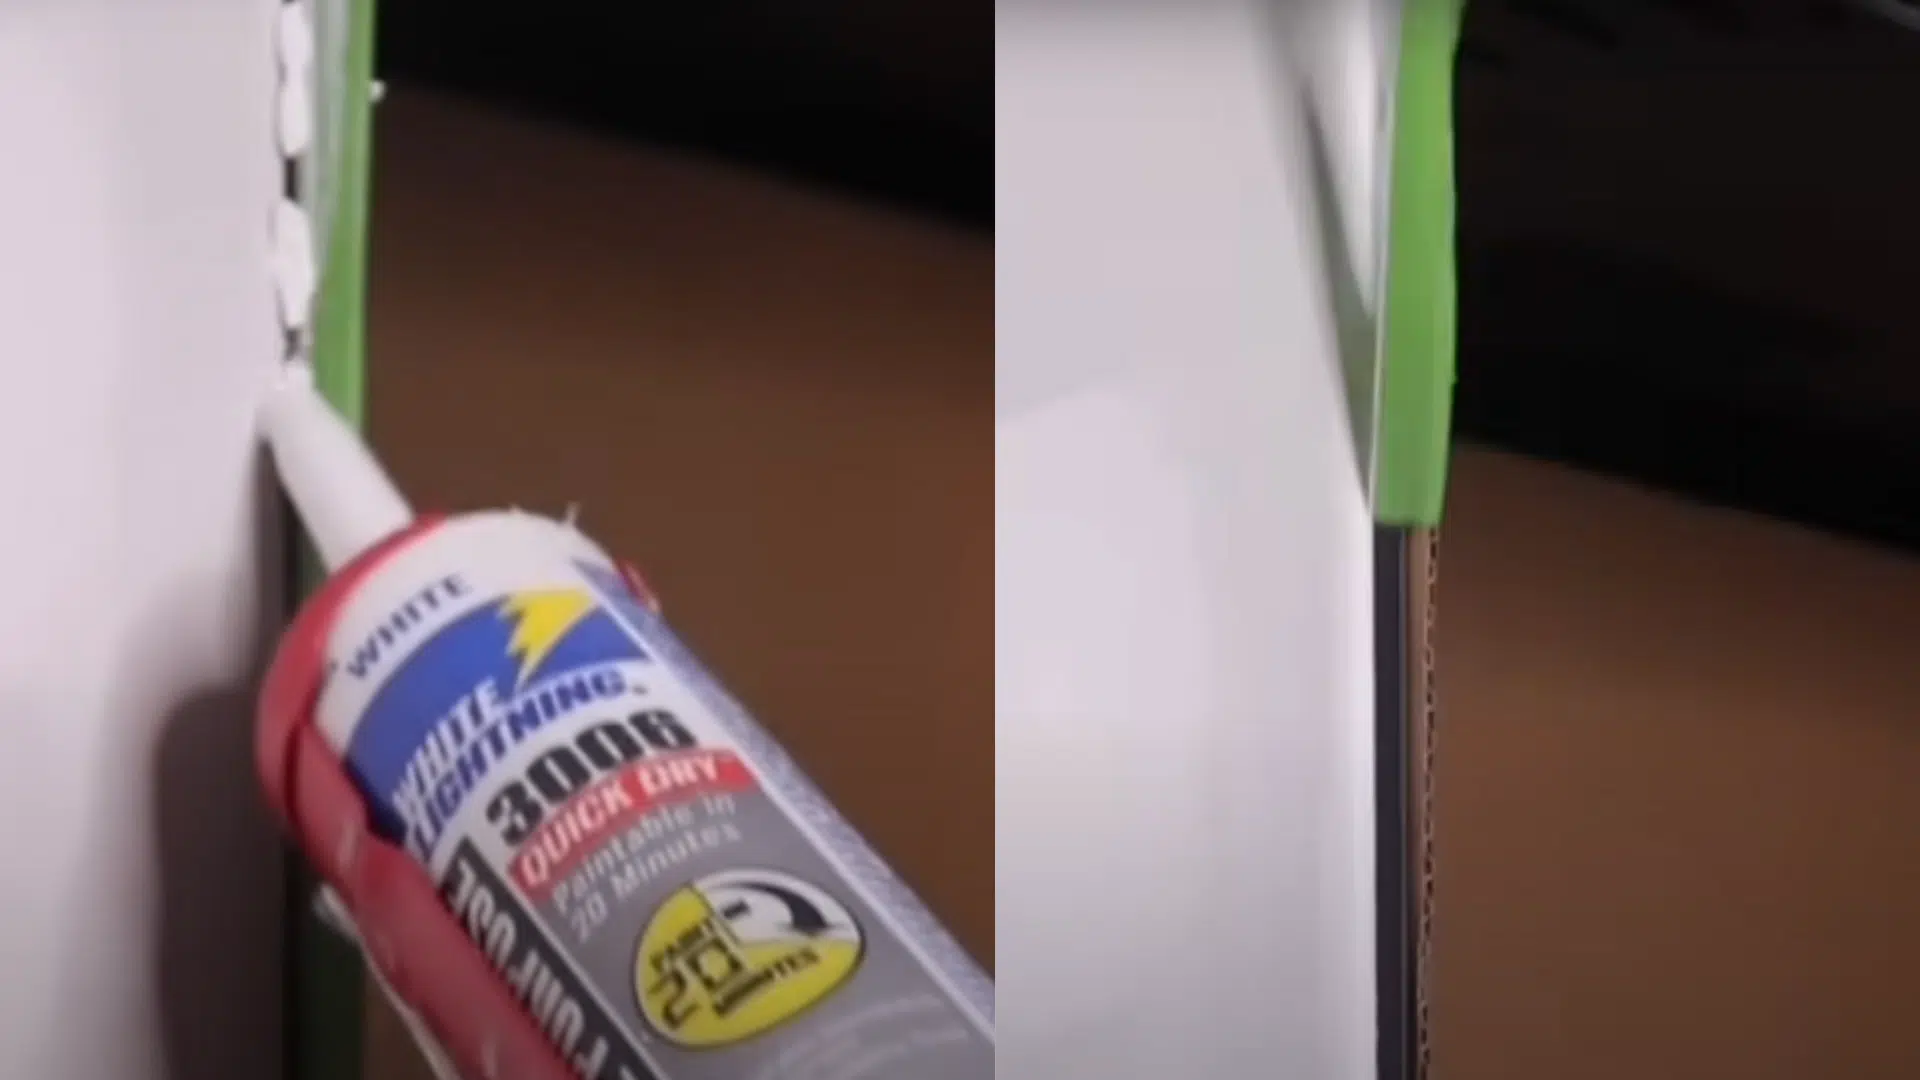
Caulk all seams between drywall edges, walls, and floors for a clean, seamless look.
Install any additional fireplace accessories such as a glowing log kit and glass front.
Once powered on, the water vapor flame effect and soft crackling sounds create a realistic, calming atmosphere.
Recommended: For a closer look at the techniques and tools used, check out the full video tutorial by @WelcometotheWoodsBlog on YouTube.
Choosing the Right Electric Fireplace Insert
Before framing your surround, it’s important to pick the right electric fireplace insert for your space. You’ll want one that fits your wall, matches your style, and meets your heating needs.
| Factor | What to Consider |
|---|---|
| Wall Size | Measure width and height where the unit will be installed |
| Ventilation Space | Ensure enough clearance around the insert for proper airflow |
| Heating Option | Decide between decorative-only or built-in heater models |
| Wattage Rating | Check how many square feet the unit can effectively heat |
| Flame Features | Look for realistic flame visuals, LED lights, sound effects, or mist features |
| Style & Finish | Choose glass fronts, built-in logs, or other visual details that match your room |
Choosing the right insert sets the tone for your whole project. Find one that fits your layout, looks the way you want, and gives you the comfort or heat you need. Once you’ve got that part right, the framing becomes a whole lot easier.
How Much Does It Cost to Build a Fireplace Surround?
The cost to build your electric fireplace surround can vary depending on the size, style, and materials you choose, but it’s usually much more affordable than buying a pre-made unit or hiring a contractor.
On average, most DIY fireplace surrounds cost between $150 and $600. Basic framing materials, such as 2x4s and plywood or MDF, typically cost between $70 and $175.
Finishing materials such as trim, shiplap, paint, or tile can add $50 to $200, depending on the level of simplicity or decoration you choose.
Don’t forget to budget a little extra for screws, glue, and other small supplies.
The biggest cost is usually the electric fireplace insert itself, which can range from $100 for a basic model to $500 or more for something with extra features.
Still, even at the higher end, doing it yourself often saves hundreds compared to a custom-built or store-bought option.
Safety Tips for Electric Fireplace Installation
Before I finished my build, I made sure the electric fireplace was safely installed. It may not use real flames, but it still gives off heat and needs proper support. A few simple steps made all the difference.
- Follow clearance instructions: Always leave the required space around the top, sides, and back of the unit as listed in the fireplace manual.
- Don’t block vents: Ensure air can move freely around the insert to prevent overheating.
- Use a grounded outlet: Plug your fireplace directly into a properly grounded wall outlet—never use an extension cord.
- Hire help for electrical work: If you need extra outlets or lighting, it’s best to call a licensed electrician.
- Choose heat-safe materials: Use fire-rated drywall or cement board near the insert, especially if finishing with wood or tile.
- Secure everything firmly: Make sure your frame is solid and the insert is supported according to the manufacturer’s instructions.
Conclusion
Building your own electric fireplace surround might have felt a little overwhelming at first but look at what you’ve done.
With just a few basic tools, some lumber, and a little time, you’ve created something that not only adds warmth to your space but also gives it a personal touch that store-bought options can’t match.
This isn’t just a home upgrade, it’s a project you saw through from start to finish. That’s something to be proud of.
Now, take a step back, turn on the flames, and enjoy the cozy atmosphere you’ve created. You earned it.
If this guide helped you build your fireplace surround, I’d love to hear about it.
I’d love to see what you created – feel free to share your project or leave a comment below. It’s always inspiring to see how others bring their spaces to life.

Stephanie Grace, a graduate with a degree in Fine Arts from the Savannah College of Art and Design, has been inspiring DIY enthusiasts with her creative and practical guidance for over 14 years. Her career in design and crafting began in a small artisan workshop, where she developed a passion for transforming everyday materials into beautiful and functional items. Stephanie joined our website in 2018, rapidly gaining popularity for her easy-to-follow DIY tutorials and innovative project ideas. Since then, she has been the creative mind behind our DIY section, helping readers bring their artistic visions to life. Outside her professional pursuits, Stephanie enjoys pottery and urban gardening, hobbies that showcase her love for hands-on creativity and nature.