Tired of looking at ugly cracks that make your driveway look terrible and hurt your home’s curb appeal?
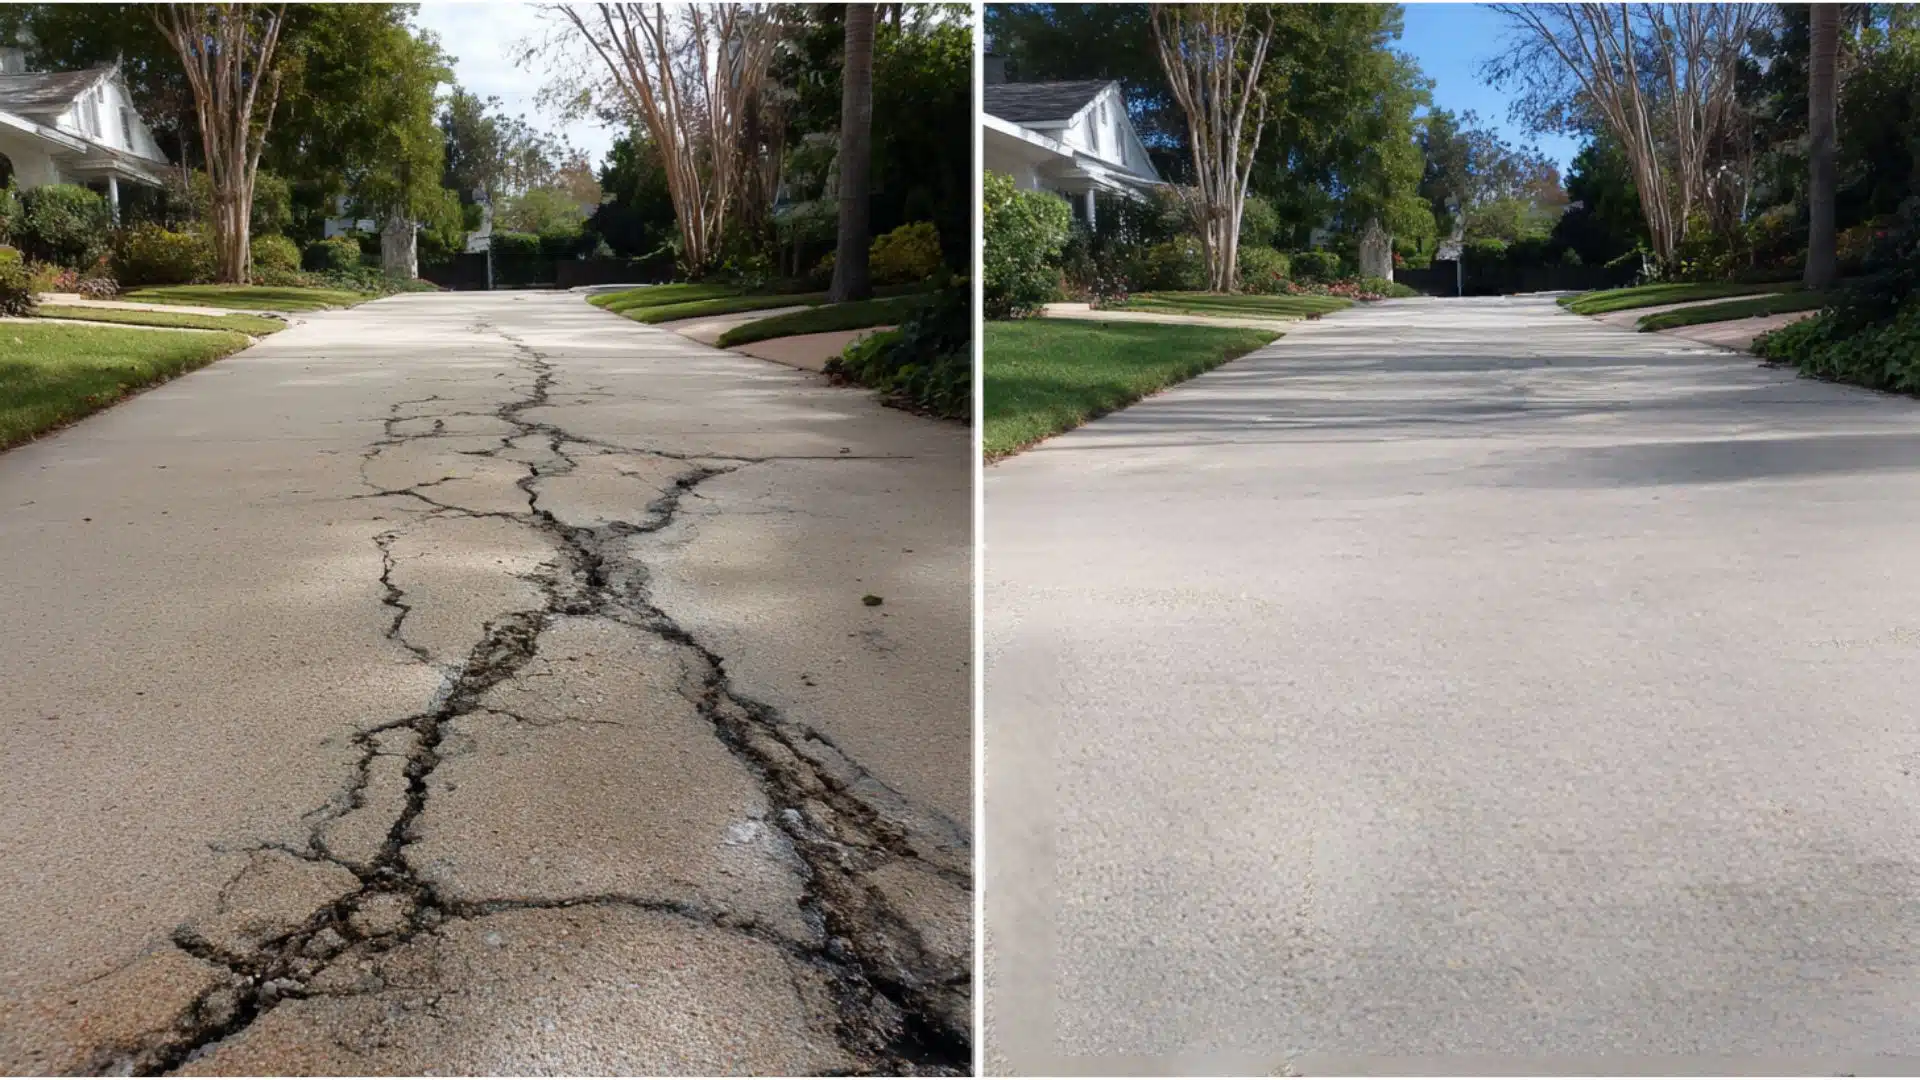
Driveway crack repair before-and-after changeovers prove that fixing these eyesores is worth the effort and investment.
Cracks happen from weather changes, settling, and normal aging, but they quickly turn into expensive problems if ignored.
These excellent driveway crack repair before-and-after results show what’s possible when homeowners tackle their projects.
You’ll see simple steps, basic tools, and clear results that convert damaged driveways into smooth, beautiful surfaces again.
Get ready to uncover how a weekend project can make your driveway look like new.
Why Driveway Crack Repair Matters?
Cracks in your driveway create a terrible first impression, conveying neglect to neighbors, visitors, and potential homebuyers.
Even small hairline cracks can make your entire property look run-down and poorly maintained, which can significantly hurt your home’s value.
What starts as tiny cracks quickly becomes major damage when water seeps in and freezes during the winter months.
The freeze-thaw cycle forces cracks to widen and deepen, turning simple repairs into expensive replacement projects that cost thousands more.
Cracked driveways also pose safety hazards, putting your family and guests at risk of tripping or falling.
Deep cracks can damage car tires and suspension systems, while uneven surfaces become a liability issue if someone gets hurt on your property.
Types of Driveway Cracks and Their Causes
Driveway cracks are more than just a cosmetic issue; they’re your pavement’s way of telling you what’s happening beneath the surface.
Understanding the different types and their root causes is the first step toward effective, long-lasting repairs.
| CRACK TYPE | CAUSES |
|---|---|
| Hairline Cracks | Settling, temperature changes, and aging |
| Wide Cracks | Structural shifts, soil expansion/contraction |
| Spiderweb Cracking | Repeated stress, shrinkage, and aging of concrete |
| Edge Cracking | Poor perimeter support, water drainage issues |
Remember that early intervention is crucial in preventing minor cracks from developing into significant structural problems.
When in doubt, consult a professional to assess whether you’re dealing with normal wear or signs of a more serious foundation issue.
Before Repair: How Bad Can It Get?
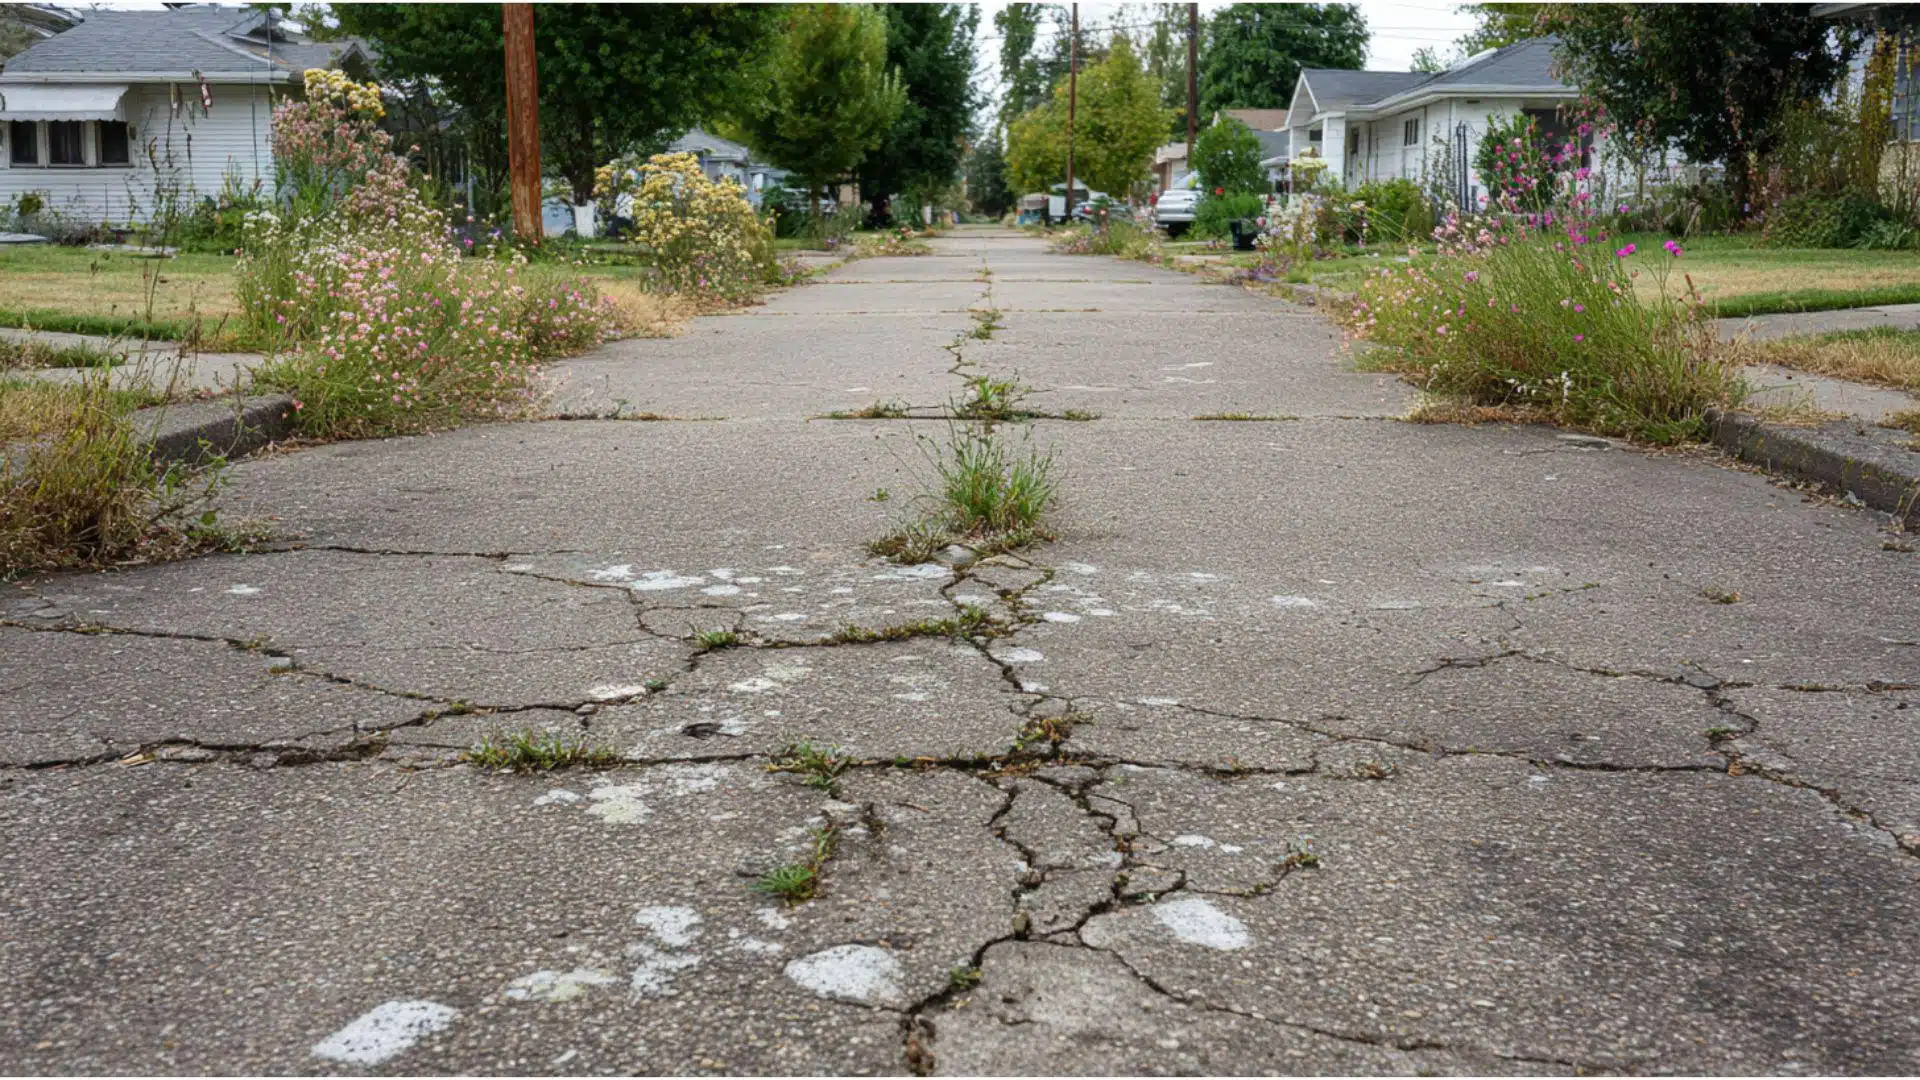
Damaged driveways can look terrible and make your entire property appear neglected and poorly maintained by the homeowners.
Wide cracks often collect dirt, weeds, and water, creating ugly, dark stains that run across your driveway’s surface.
You might see grass and dandelions growing right through the cracks, making your driveway look more like a sidewalk.
Deep cracks create serious trip hazards that could cause injuries to family members, guests, or delivery people walking to your door.
Water sitting in cracks during winter freezes and expands, making the damage spread faster and deeper each season.
What starts as small hairline cracks can quickly turn into major structural problems that require expensive full driveway replacement instead of simple repairs.
DIY vs. Professional Repair Methods
Small hairline cracks?
Grab some crack filler from the hardware store!
You can handle these weekend warriors yourself.
But see wide cracks or spiderweb patterns?
Time to call the pros.
They have special tools and materials that last longer.
Ask yourself: “Is this crack bigger than a pencil?” If yes, get help!
For a project that requires precise curves and proper grading to ensure longevity, it’s wise to consult with experienced, reputable pavers, such as Sommerset Paving.
They can help translate your design ideas and space requirements into a functional, beautiful driveway.
DIY Crack Repair Options
If the cracks in your driveway are small or shallow, there are many simple DIY methods you can try yourself.
These repairs don’t require pricey tools; most materials are available at hardware stores or online.
- Crack Fillers: They work on hairline cracks using squeeze bottles or pourable spouts for quick, no-fuss application.
- Asphalt Patch Kits. They help fill small holes or wide cracks using a simple pour-and-tamp process with a tamper tool.
- Concrete Sealants: They are flexible, fast-drying products that help keep dirt and moisture out of medium-sized surface cracks.
- Cold Patch Compounds: They are suitable for deeper or wider cracks and don’t require special tools, heat, or professional help.
DIY repairs work well for minor wear and tear, but significant cracks or growing damage may require professional attention soon.
They’re ideal for short-term fixes or tight budgets, but may not always withstand extreme weather or heavy traffic.
Professional Repair Techniques
When your driveway has larger cracks or structural problems, calling a professional is usually the safest and most effective choice.
They have access to stronger materials and tools that give longer-lasting results and better protection against future cracking.
- Hot Crack Sealing: This method utilizes melted rubber that fills deep cracks and flexes with changes in temperature, ground movement, and seasonal fluctuations.
- Routing and Sealing: Widens cracks before filling to block water and prevent damage from spreading underneath the surface.
- Infrared Asphalt Repair: It heats both old and new asphalt to smooth out patchwork and blend repairs seamlessly with your driveway.
- Epoxy or Polyurethane Injection: This method fills deep concrete cracks from the inside, providing long-term strength and waterproof protection.
Professional help may cost more upfront, but it often saves you money and hassle in the long run by preventing repeated repairs.
For long-term durability, appearance, and safety, professional methods are the better choice for major or ongoing driveway damage.
Tools Required for Repair
Getting the right tools and materials is the first step to fixing driveway cracks. Here’s a list of typical price ranges.
| TOOL/MATERIAL | ESTIMATED COST RANGE (USD) |
|---|---|
| Crack filler | $0.35–$1.50 per ft |
| Wire brush | $4–$25 |
| Pressure washer | $75–$379 |
| Caulking gun | $10–$60 |
| Trowel | $10–$30 |
| Putty knife | $6–$9 |
| Backer rod | $5–$15 |
| Driveway sealer | $15–$50 |
| Total (typical project, all tools and materials) | $160–$718 |
Material costs for crack filler, backer rod, and sealer range from $55 to $215 per 100 linear feet, assuming you have the necessary tools.
NOTE: These prices are estimates and may vary depending on your location, the brands you select, and the project size.
DIY Driveway Crack Repair: Step-by-Step Process
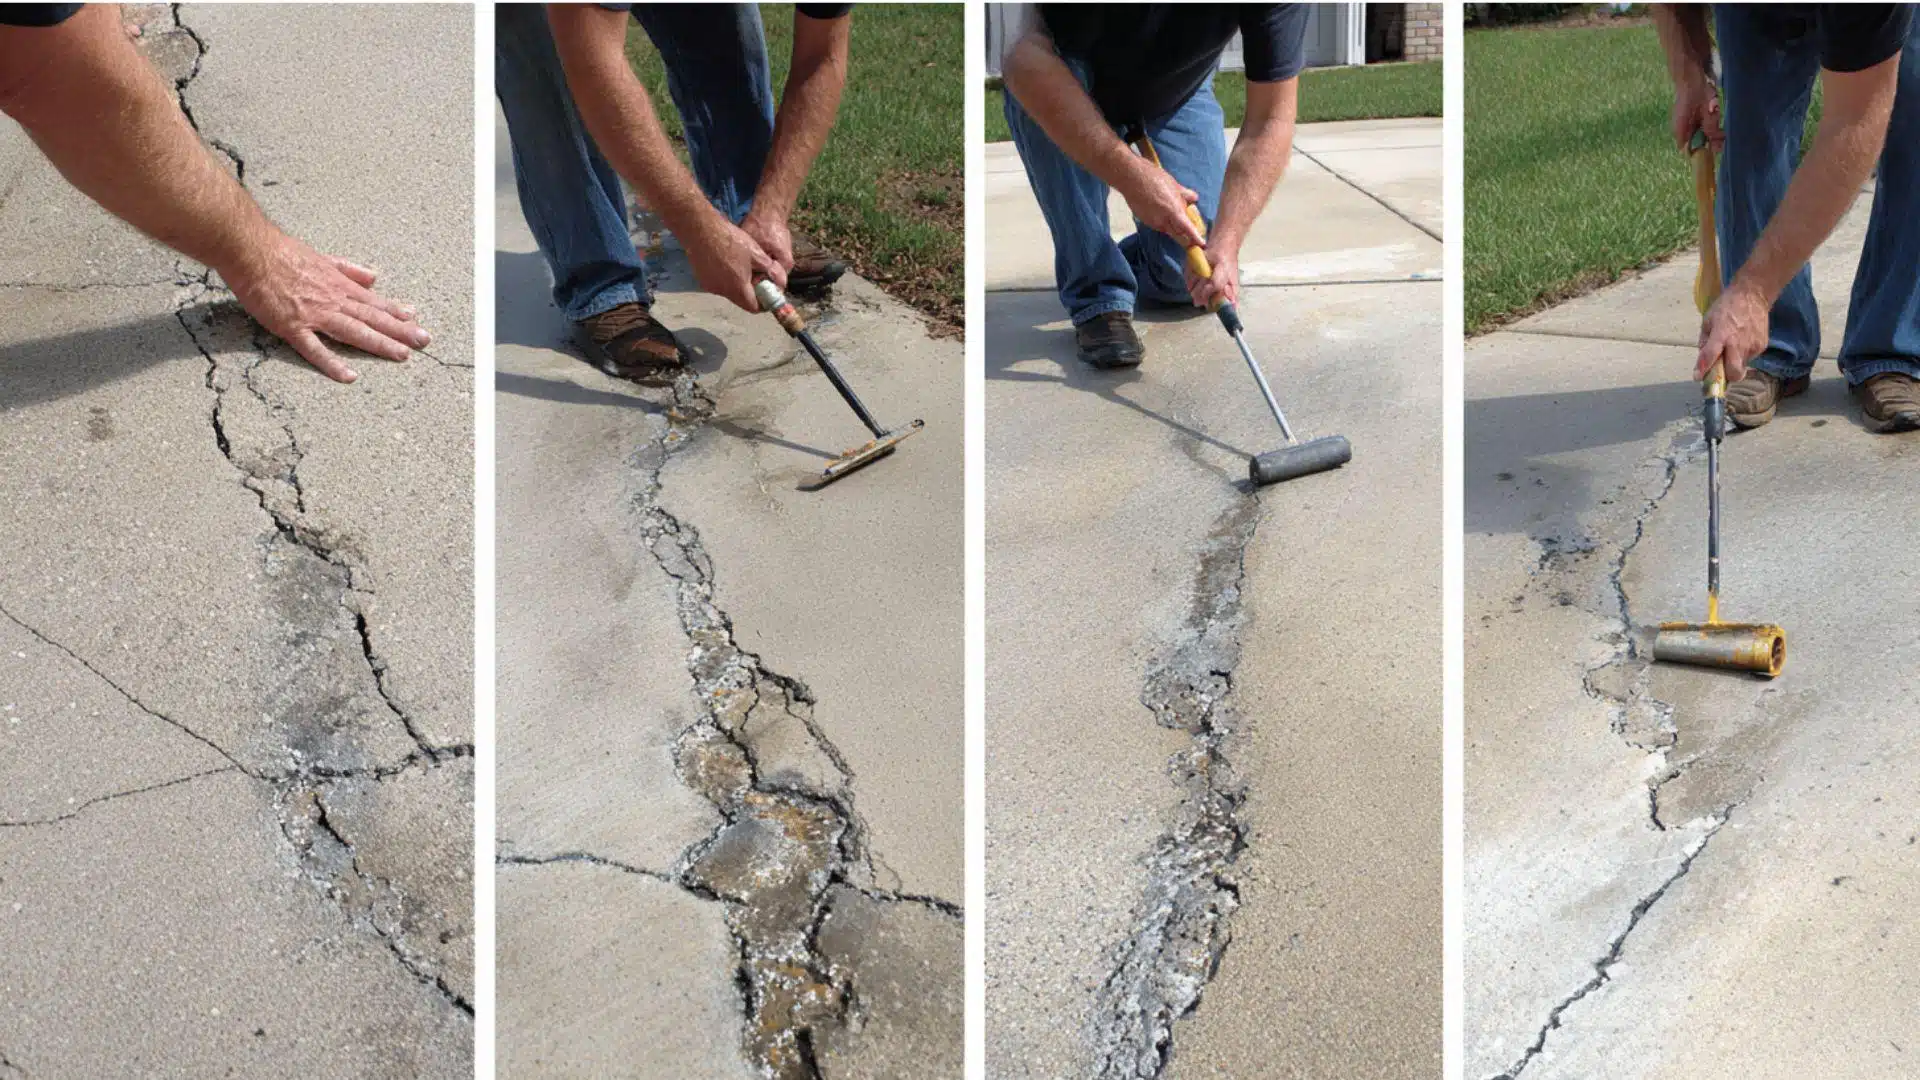
Fixing driveway cracks yourself can save hundreds of dollars and give you great satisfaction when you see the results.
Following these five simple steps ensures your repairs look professional and last for years to come.
- Assess the damage: Identify crack types, such as hairline, deep, or spreading cracks, and note whether your driveway is asphalt or concrete.
- Clean thoroughly: Remove weeds, dirt, and loose debris with a wire brush or pressure washer, then let the area dry completely
- Fill properly: Use crack filler suited to your driveway material and apply in layers for deep cracks, smoothing with a trowel
- Cure and seal: Let filler dry fully according to product instructions, then apply driveway sealer for a uniform finish and protection
- Review and maintain: Inspect the entire driveway for missed areas, touch up if needed, and take before and after photos
Take your time with each step, as rushing can lead to poor results that won’t last.
With proper preparation and patience, your driveway will look dramatically better and stay protected from future damage.
After Repair: What a Difference
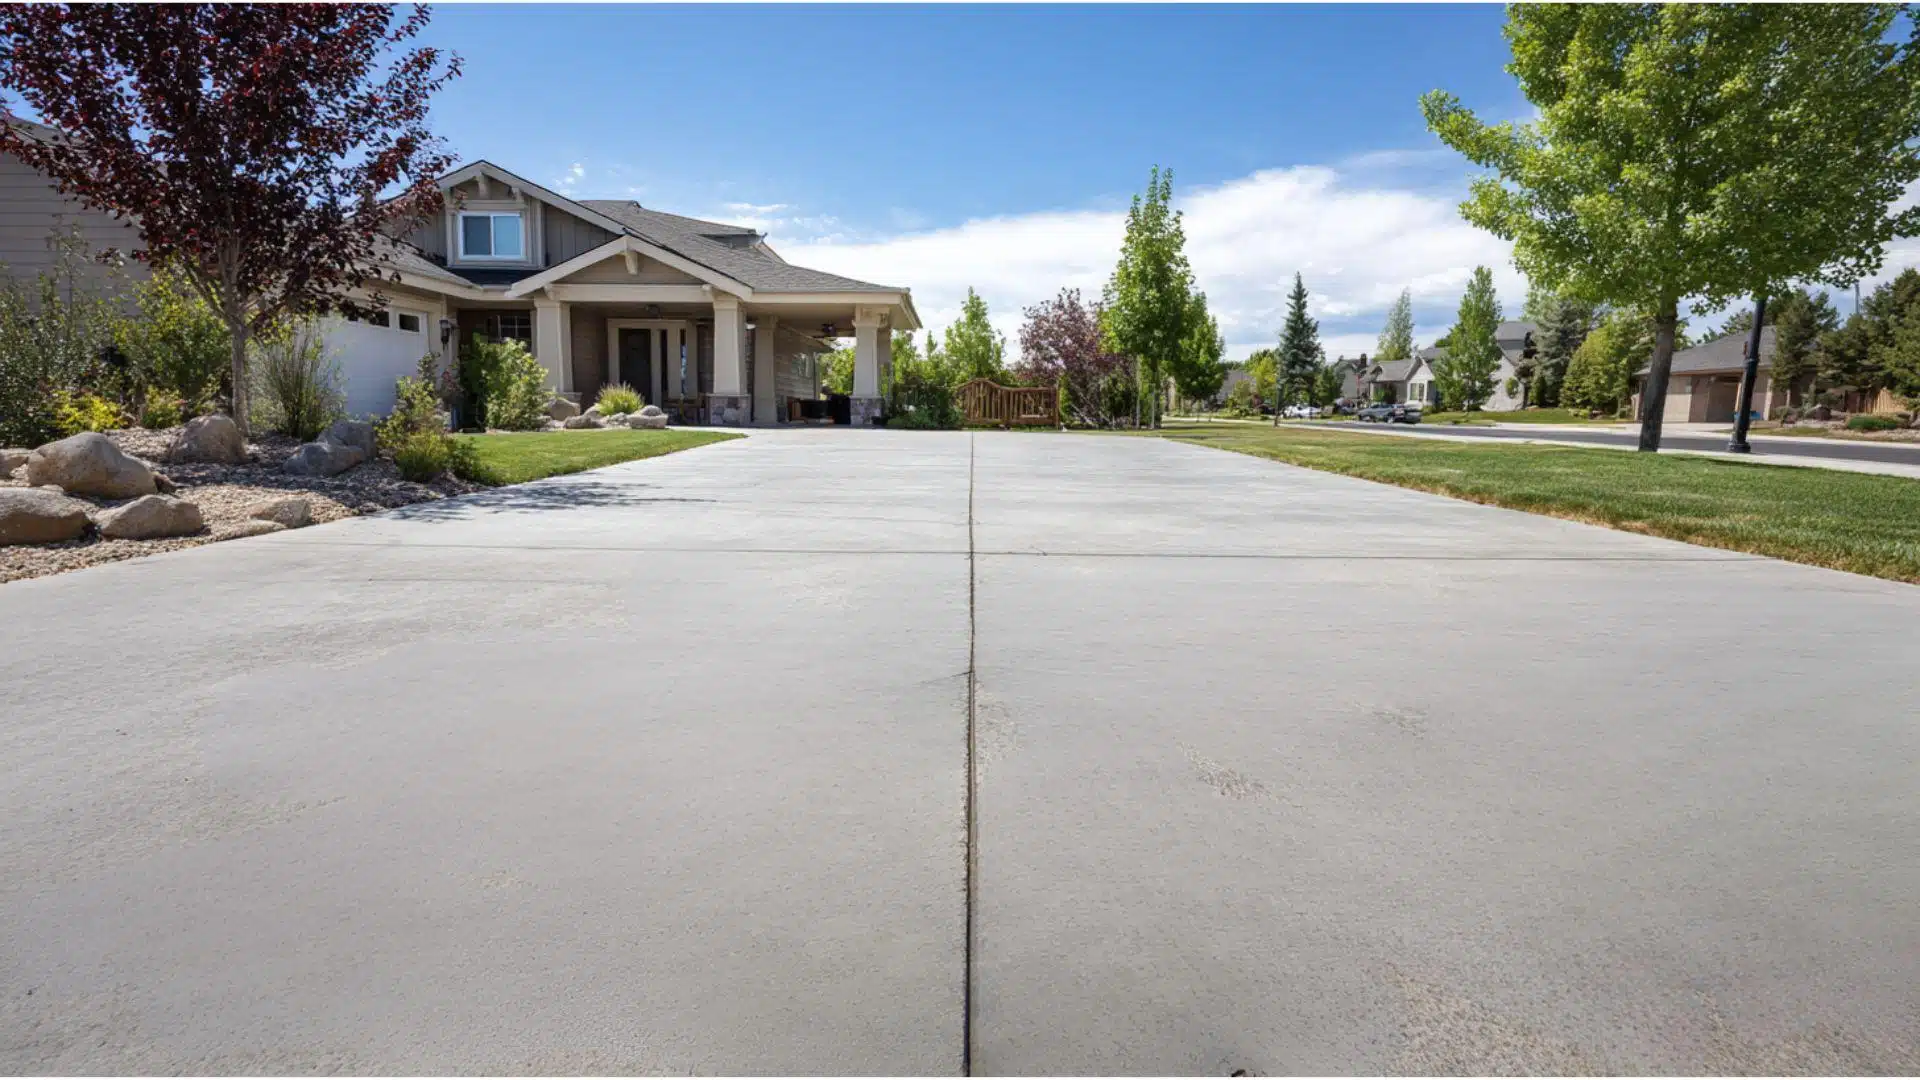
The change after crack repair is honestly notable and makes your entire driveway look like new again.
Where you once had ugly cracks collecting dirt and weeds, you now have smooth, even surfaces that feel solid underfoot.
Your driveway becomes safe to walk on, without worrying about tripping over raised edges or deep gaps.
Water flows properly instead of pooling in cracks, which prevents future freeze damage and keeps your driveway healthier longer.
The visual upgrade is dramatic, as the repaired surface appears uniform and well-maintained, rather than neglected and broken.
Friends and neighbors will notice the difference immediately, and your home’s curb appeal gets a major boost, making you proud to pull into your driveway.
Tips to Keep Your Driveway Crack-Free
Preventing cracks is much easier and cheaper than fixing them after they become major problems.
These simple maintenance habits will keep your driveway looking great and save you money in the long run.
- Seal the driveway every 2-3 years with a high-quality sealer to protect the surface from weather damage and water infiltration.
- Clear debris often by sweeping away leaves, dirt, and standing water that can weaken your driveway over time
- Fill tiny cracks immediately before they grow into expensive problems that require professional repair or replacement.
- Control water drainage by keeping gutters clean and directing water away from your driveway edges and surface
Following these easy steps takes just a few hours each year but can extend your driveway’s life by decades.
Your future self will thank you for addressing small issues before they become big, expensive headaches.
Summing It Up
These driveway crack repair before-and-after examples show what’s possible with basic tools and a weekend of focused work.
The visual difference between cracked, damaged surfaces and smooth, repaired driveways is impressive to see in person.
Don’t let those ugly cracks keep making your home look neglected when the fix is so straightforward.
Your neighbors will notice the transformation immediately, and you’ll feel proud every time you pull into your driveway.
Ready to alter your own cracked driveway into something beautiful that adds value to your home?
Share your experiences in the comments below!
If you’re interested in more Home Maintenance content, check out our other blogs that you might enjoy.

Tommy Hardy, an alumnus of the Georgia Institute of Technology with a degree in Mechanical Engineering, has been a go-to figure in residential upkeep and innovation for over 18 years. His career commenced in a leading home appliance manufacturing company, where he mastered the intricacies of household systems. Joining our platform in 2020, Tommy quickly became a reader favorite for his practical and easy-to-follow guides. He took the helm of our DIY section in 2019, consistently delivering content that empowers homeowners. Beyond his professional pursuits, Tommy is a passionate gardener and enjoys woodworking, skills enhancing his hands-on approach to home care.