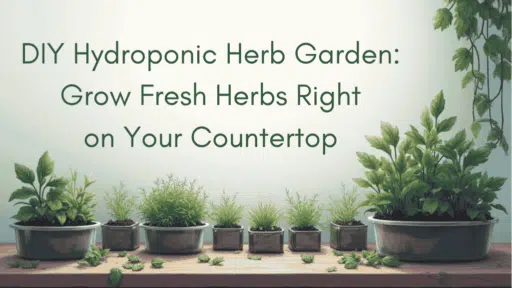

Imagine snipping fresh basil for your pasta sauce or mint for your tea, without ever stepping outside. For many, the dream of a kitchen garden is stopped by a lack of space, poor lighting, or the mess of soil. But what if you could grow vibrant, flavorful herbs year-round, right on your countertop, using a method that’s cleaner, faster, and surprisingly simple? Welcome to the world of DIY hydroponics.
It might sound like something from a science lab, but at its core, hydroponics is just the art of growing plants without soil. Instead, you provide all the nutrients they need directly through water. This gives you incredible control over your plants’ environment, leading to healthier growth and more consistent harvests.
Why Choose Hydroponics for Your Kitchen Herbs?
So, why go soil-free? The benefits of a small hydroponic setup in your kitchen are surprisingly practical. For starters, it’s incredibly clean. There’s no soil to spill, no mud to track in, and far fewer pests to worry about. Plants also tend to grow faster because nutrients are delivered directly to their roots, meaning they don’t have to waste energy searching for food in the soil. This efficiency also means you can grow more in a smaller footprint, perfect for a sunny corner of your kitchen.
Gathering Your Supplies: What You’ll Need
Convinced that soil-free is the way to go? Great. The good news is you don’t need a complex laboratory to get started. This simple project uses a method called Deep Water Culture (DWC), which is one of the easiest entry points into hydroponics. Here’s a basic list of what to grab:
- A Container: A 5-gallon bucket or an opaque storage tote works perfectly. It needs to be opaque to block light, which prevents algae from growing in your nutrient solution.
- A Lid: The lid will hold your plants. You’ll need to cut holes in it for the net pots.
- Net Pots: These small, slotted plastic baskets hold the plants and allow their roots to reach the water. 2-inch or 3-inch pots are ideal for herbs.
- Growing Medium: Instead of soil, you’ll use an inert medium to support the plant. Clay pebbles (hydroton) or perlite are excellent, reusable choices.
- Aquarium Air Pump & Air Stone: This is the heart of your DWC system. The pump pushes air through a tube to the air stone, which sits at the bottom of your container and creates bubbles. This oxygenates the water, keeping the plant roots healthy and preventing them from “drowning.”
- Hydroponic Nutrients: This is the plant food. You’ll need a liquid nutrient solution formulated specifically for hydroponics, which contains all the macro and micronutrients your herbs need to thrive.
- Herb Seedlings: You can start from seed, but for your first project, it’s much easier to buy small, established herb seedlings from a local nursery.
Step-by-Step: Assembling Your DIY System
Now for the fun part, putting it all together. This process should take less than an hour, and once it’s set up, it requires very little maintenance.
1. Prepare the Lid
Using a drill with a hole saw bit that matches the diameter of your net pots, carefully cut holes in the lid of your container. Space them out enough to give each herb room to grow.
2. Set Up the Air System
Place the air stone at the bottom of your container. Run the airline tubing from the stone up and out of the container (you can drill a small hole or cut a notch for it). Connect the other end of the tubing to your air pump.
3. Mix the Solution
Fill your container with water, leaving an inch or two of space at the top. Follow the instructions on your hydroponic nutrient bottle to add the correct amount of nutrients to the water. Mix it well. Studies and home growers alike report that a simple hydroponic system can use much less water than traditional soil gardening, making it an incredibly efficient choice for a small space.
4. Plant Your Herbs
Gently remove your herb seedlings from their soil, and carefully rinse the roots to remove as much dirt as possible. Place a layer of your growing medium in the bottom of a net pot, position the plant inside, and fill in the surrounding space with more medium to hold it securely.
5. Go Live
Place the filled net pots into the holes in your lid. Put the lid on the container, ensuring the plant roots are submerged in the nutrient solution. Plug in the air pump, and you’re officially a hydroponic gardener!
Planting and Maintaining Your Garden
Your system is built, but the journey isn’t over. Your new garden will need a little care to flourish. Place the container in a spot that gets at least six hours of bright, indirect sunlight per day, like a south-facing window. When deciding what to grow, consider herbs that do well indoors; it is a great starting point. Every week or two, check the water level and top it off with fresh water and nutrients as needed. About once a month, it’s a good idea to completely empty the container and refill it with a fresh batch of nutrient solution to keep your plants happy.
FAQs
Do I need a special grow light for my hydroponic herbs?
If you have a window that receives at least six hours of direct sunlight, you may not need a grow light. However, for darker kitchens or to ensure consistent, bushy growth, a simple LED grow light can make a huge difference, especially during winter months.
How often should I change the water and nutrient solution?
For a small system like this, a complete water change every 2-3 weeks is a good rule of thumb. This prevents nutrient imbalances and keeps the root environment clean. If the water starts to look cloudy or smell off, change it sooner.
Can I grow vegetables this way, or just herbs?
Absolutely! This simple DWC system is fantastic for growing leafy greens like lettuce and spinach. Fruiting plants like tomatoes or peppers are also possible, but they typically require larger containers and more powerful lighting to produce a good harvest.
What are the first signs that something is wrong with my plants?
The most common issues are related to nutrients or root health. Yellowing leaves can indicate a nutrient deficiency. If the roots look brown and slimy instead of white and healthy, you may have root rot, which is often caused by insufficient oxygen. Ensure your air pump is running 24/7 to prevent this.

Stephanie Grace, a graduate with a degree in Fine Arts from the Savannah College of Art and Design, has been inspiring DIY enthusiasts with her creative and practical guidance for over 14 years. Her career in design and crafting began in a small artisan workshop, where she developed a passion for transforming everyday materials into beautiful and functional items. Stephanie joined our website in 2018, rapidly gaining popularity for her easy-to-follow DIY tutorials and innovative project ideas. Since then, she has been the creative mind behind our DIY section, helping readers bring their artistic visions to life. Outside her professional pursuits, Stephanie enjoys pottery and urban gardening, hobbies that showcase her love for hands-on creativity and nature.