Choosing the best paint finish for bathroom walls can feel confusing, especially with all the moisture, tight corners, and constant cleaning that bathrooms deal with.
I’ve seen enough rooms to know that the wrong finish can peel, stain, or fade way faster than you expect.
Today, in this guide, I’ll walk you through everything you need to know so you can avoid those mistakes.
Stick with me, because the right finish makes a huge difference, and by the end, you’ll feel confident choosing the one that keeps your bathroom looking fresh for years.
Why Bathroom Paint Finish Matters
Bathrooms deal with a lot of steam and moisture every single day.
Hot showers raise humidity fast, and the water in the air settles on your walls. This constant moisture can make paint peel, bubble, or fade if the finish isn’t made to handle it.
Damp walls also create the perfect place for mold and mildew to grow. These can leave stains, damage the surface, and make the room smell musty.
A strong, moisture-resistant paint finish helps stop this from happening. Regular wall paint isn’t built for bathroom conditions.
It soaks up moisture, is harder to clean, and breaks down faster. That’s why choosing the right bathroom-safe finish matters so much for long-lasting, good-looking walls.
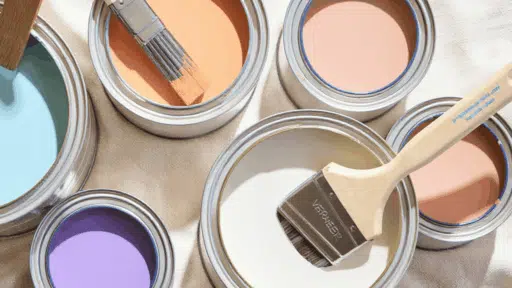
Best Paint Finish for Bathroom
Different paint finishes handle moisture differently. Some are tougher, some are shinier, and some work better in low-moisture rooms.
1. Satin Finish
Satin is a balanced finish that works well in most bathrooms. It’s durable enough to handle daily moisture and regular cleaning without wearing down.
The mild sheen gives the walls a smooth, non-shiny look. Because it stays strong in busy spaces, satin is an ideal choice for family bathrooms used by kids and adults every day.
2. Semi-Gloss Finish
Semi-gloss offers the best protection in humid bathrooms. It stands up well to constant steam, making it perfect for windowless spaces or bathrooms with weak ventilation.
The finish is also very easy to clean, which helps keep walls looking fresh. Its strong moisture resistance makes it a great option for areas near showers or tubs that get splashed often.
3. Matte or Eggshell Finish
Matte and eggshell can work in bathrooms if you choose a formula made for moisture. These paints look smooth and hide wall flaws better than shiny finishes.
They’re ideal for powder rooms or bathrooms that don’t get a lot of steam. When used properly, they give the space a soft, clean look without drawing attention to dents or imperfections.
4. Gloss Finish
Gloss has a very shiny surface that reflects a lot of light, which can make bathroom walls look harsh. It’s not a popular choice for full walls because the high sheen highlights every flaw.
Instead, gloss works better for small accent areas or detail work where added shine can be helpful. It’s rarely recommended for main bathroom surfaces.
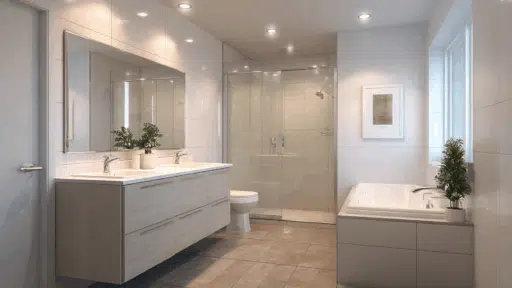
Best Paint Finish by Bathroom Surfaces
Different parts of your bathroom need different finishes to stay protected. Each surface handles moisture, cleaning, and daily use in its own way, so choosing the right sheen makes a big difference.
| Bathroom Surface | Recommended Finishes | Why It Works | Extra Notes |
|---|---|---|---|
| Walls | Satin or Semi-Gloss | Handles moisture and daily cleaning; strong in rooms with steam and frequent use | Matte works only if it’s a bathroom-formulated paint designed to resist humidity. |
| Ceilings | Flat or Matte (Bathroom-Specific) | Hides marks and reduces glare from uneven areas | Choose mold-resistant formulas to prevent mildew and staining. |
| Trim & Doors | Semi-Gloss or Gloss | Resists scuffs, fingerprints, and daily wear; easy to wipe clean | Higher shine gives a crisp, finished look and holds up well against moisture. |
| Cabinets & Vanities | Semi-Gloss or Satin | Stands up to splashes, fingerprints, and cleaners | Semi-gloss offers more durability; satin gives a softer look with good moisture resistance. |
Choosing the right finish for each surface helps your bathroom stay cleaner, look better, and handle daily wear far more effectively.
How to Choose the Right Finish for the Bathroom
Every bathroom has different moisture levels and needs. The right finish depends on how much steam builds up and how you use the space.
- Poor Ventilation: Bathrooms without windows or a strong vent fan stay humid longer. Semi-gloss works best because it handles moisture without peeling. A high-quality satin finish can work if you want less shine.
- Low Shine Walls: If you want a soft look, choose bathroom-safe matte paints like Benjamin Moore Aura Bath & Spa or Sherwin-Williams Emerald Matte. These offer better moisture resistance than regular matte paint.
- Easy Cleaning for Families: In busy bathrooms, semi-gloss is the easiest to clean. It stands up well to scrubbing, splashes, and fingerprints, making it great for families.
- Walls With Imperfections: Matte and eggshell help hide dents and bumps because they don’t reflect much light. Satin softens the wall’s look while staying durable. Semi-gloss and gloss reflect more light and make flaws easier to see.
Choosing the right finish makes your bathroom easier to maintain and helps your walls look their best.
Best Bathroom Paint Products (Expert Picks)
Choosing the right paint brand makes a big difference in how well your bathroom walls handle moisture, steam, and daily cleaning.
| Brand / Product | Finish Options | Best For | Pros | Cons |
|---|---|---|---|---|
| Sherwin-Williams Emerald Matte | Matte | Low-shine bathrooms that still need moisture protection | Strong moisture and mildew resistance; easy to clean; high durability | Higher cost; matte still needs good ventilation |
| Sherwin-Williams Duration Home Satin | Satin | Most bathrooms with daily use | Durable, washable, and good moisture resistance | Premium pricing |
| Benjamin Moore Aura Bath & Spa | Matte | High-humidity bathrooms where a matte look is preferred | Designed for bathrooms; resists moisture and mildew; smooth look | Expensive; matte may show wall flaws |
| Benjamin Moore Regal Select | Satin / Pearl | General bathroom use | Good coverage and durability | Not as moisture-specialized as Aura |
| Glidden Bathroom Paint | Satin / Semi-Gloss | Budget projects and low-moisture bathrooms | Affordable; easy to find | Not as strong in high humidity |
| Behr Premium Plus | Flat / Satin / Semi-Gloss | Guest bathrooms or lighter-use spaces | Low cost; good basic durability | May need more coats; less mold resistance |
Choosing the right paint product helps your bathroom stay cleaner, last longer, and handle moisture better, no matter how often the space is used.
How to Paint a Bathroom: Step-by-Step Guide
Painting a bathroom takes extra care because of the moisture, tight corners, and detailed prep work. With the right tools and a clear plan, you can get a smooth, long-lasting finish.
Tools & Materials Required
These bathroom-specific items aren’t usually found at home but are important for a good result:
- Medium and fine sanding block
- Floor protection roll
- Extension pole and locking roller cage
- Microfiber roller sleeves (standard and mini)
- Quality angled paintbrush
- Drywall primer and sealer
- Bathroom-suitable wall paint
- Semi-gloss trim paint
- Acrylic latex caulk
- 4-inch drywall/putty knife
These tools help you manage moisture, tight corners, and detailed edges that bathrooms always have.
Steps to Follow
- Sand and smooth the walls to remove bumps, ridges, and defects so the paint goes on evenly.
- Protect the floor and fixtures using a self-adhesive floor protector for a clean, safe working space.
- Prime new drywall and patched areas with drywall primer using firm pressure to seal the mud.
- Fix imperfections while priming by filling dents or gaps with acrylic caulk and smoothing them.
- Paint trim and casings first, using semi-gloss, so the wall paint can be cut cleanly up to the finished trim later.
- Cut in the walls around corners, edges, and fixtures using a good angled brush.
- Roll on the first coat with a microfiber roller using light pressure to avoid drips and uneven texture.
- Blend brush lines with a mini roller so the texture matches the rest of the wall.
- Let the first coat dry and complete installations like the vanity, toilet, or trim before finishing the walls.
- Apply the final coat and allow it to cure, keeping the bathroom ventilated and avoiding heavy steam while the paint hardens.
With these steps, your bathroom will get a clean, even finish that stays strong and looks good even in humid conditions.
Want to see how this process looks in real time? Watch the full step-by-step bathroom painting video: How to Paint Your Bathroom(DIY For Beginners) by Jeff Thorman.
Estimated Cost for Bathroom Painting
Painting a bathroom is one of the quickest ways to refresh the space without a big budget.
| Category | Typical Cost | What’s Included |
|---|---|---|
| Basic Painting | $2–$6 per sq ft | Labour, paint, light prep |
| With Repairs/Prep | $7–$10 per sq ft | Sanding, patching, mold treatment |
| Standard Paint (per gallon) | $25–$40 | Regular interior paint |
| Moisture-Resistant Paint | $50–$80 | Bathroom-specific or mildew-resistant formulas |
| Premium Brands | $90+ | High-end products from Benjamin Moore, Sherwin-Williams |
| Extra Costs | Varies | Primers, multiple coats, damaged walls, stain blocking |
Your final cost comes down to the paint quality you choose, the number of coats needed, and how much prep the walls require
Dry Time & Ventilation Tips
Good drying and ventilation help your bathroom paint last longer and stay smooth. These simple steps protect the finish from steam and daily moisture:
- Let Each Coat Dry Fully: Give the paint enough time to dry between coats so it bonds well and doesn’t peel or bubble later.
- Use Proper Ventilation: Turn on the exhaust fan or open windows to move out steam. Good airflow helps the paint dry evenly and prevents moisture buildup.
- Allow Curing Time: Even when the paint feels dry, it still needs time to harden. Fully cured paint becomes stronger, more washable, and more resistant to humidity.
- Avoid Long, Hot Showers at First: Keep the steam low for a few days to help the paint set. Too much moisture too soon can cause streaks or bubbling.
- Clean Gently During the First Month: Use mild cleaners and soft cloths while the paint finishes curing. Harsh scrubbing can damage the new surface.
Proper drying and ventilation keep the bathroom paint looking fresh and help it stay durable over time.
Conclusion
Finding the best paint finish for bathroom spaces comes down to choosing what can handle moisture while still giving your room a clean, smooth look.
A good finish not only protects your walls but also keeps your bathroom looking newer for longer. It also makes cleaning easier, which is a big help in a room that gets used every day.
When you choose the right finish, you’re investing in long-term durability and a better-looking space.
Now that you understand your options and how to apply them, you’re ready to update your bathroom with confidence.

Millie Anderson, a graduate of Textile Design from the Fashion Institute of Technology, has carved her name in fabric and material finishes for over 16 years. Her career took flight in a renowned textile manufacturing company, where she mastered combining textures and patterns. Millie joined our team in 2018, becoming a cornerstone for readers interested in the latest trends in textiles. Since then, she has been the lead editor for our home decor fabrics section, blending her deep knowledge of materials with a flair for contemporary design. Beyond her professional achievements, Millie is an enthusiastic quilter and often participates in community arts and crafts workshops, further nurturing her passion for fabrics and design.