That bumpy, outdated ceiling has been staring back at you for years, and you’re finally done ignoring it.
Removing it sounds logical, but the mess, the cost, and the asbestos risk in older US homes? Not worth it for most people
From quick weekend fixes to full-on transformations. This breakdown covers practical, budget-friendly DIY methods, so you can finally get a ceiling you’re actually happy with.
Why Cover a Popcorn Ceiling Instead of Removing It?
Popcorn ceilings were huge in the US from the 1950s through the 1980s. They were fast to apply, cheap, and did a decent job of hiding ceiling flaws.
Homes built before 1978 may contain asbestos in the texture, and scraping it releases dangerous fibers into the air.
Removal creates a massive mess, and the drywall underneath is often damaged or uneven.
It’s expensive when done professionally, often $1,000 to $3,000+, depending on room size. Covering is faster, cheaper, and often looks just as good.
What to Check Before You Cover a Popcorn Ceiling
Before touching anything, do a quick safety check. If your home was built before 1978-1980, there’s a real chance the popcorn texture contains asbestos.
- Pick up an asbestos test kit from Home Depot or Lowe’s (around $30-$50)
- Send your sample to a certified lab, and the results usually come back within a few days
- If asbestos is detected, do NOT proceed with DIY removal. Call a licensed abatement professional instead
- If covering, asbestos-containing ceilings can often be safely encapsulated, but confirm with a pro first
Pro Tip: Even if you only suspect asbestos, test before you start. It’s a small investment that protects your health and your family’s.
Smart Ways to Cover a Popcorn Ceiling: No Scraping Required
Each method below works differently depending on your budget, skill level, and the look you’re going for. Let’s get into it.
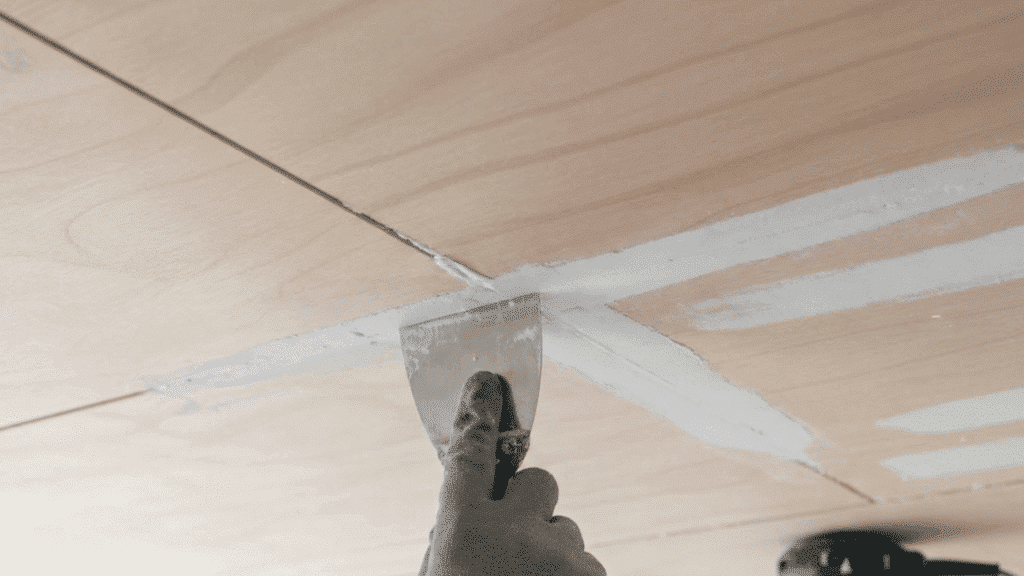
1. Skim Coating with Joint Compound
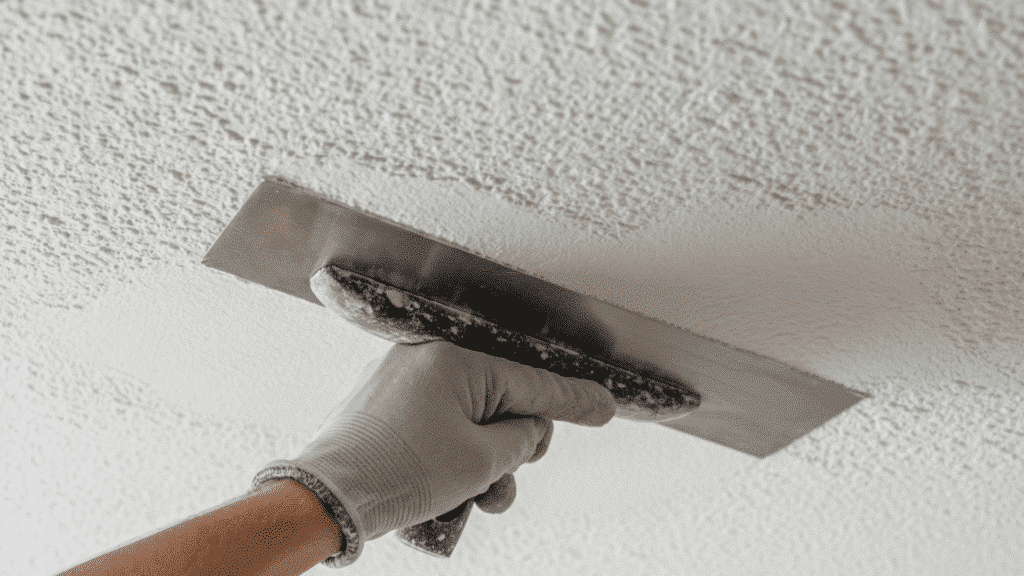
If you’re looking to achieve a smooth, flat ceiling with minimal height loss and at the lowest cost, this method is perfect for you. It’s an affordable and straightforward way to get your ceiling paint-ready, without compromising on ceiling height.
Tools needed: 10–12” drywall knife, mud pan, sanding pole with 120-grit paper, primer, paint roller
Steps to Follow:
- Apply a thin first coat of joint compound using long, overlapping strokes with your drywall knife – don’t try to make it perfect on the first pass.
- Let each coat dry fully (usually overnight), then apply 2–3 coats total, feathering the edges as you go.
- Sand, prime, and paint once the final coat is completely dry
With just a few coats of joint compound, sanding, and painting, you can transform your ceiling into a smooth, flat surface. This approach is ideal for homeowners aiming to preserve room height while keeping costs down.
2. Drywall Over the Existing Ceiling

If you’re looking for a cost-effective solution that delivers a lasting, professional finish with only a minor reduction in ceiling height, this method is perfect for you.
Tools needed: Stud finder, drill, drywall screws, 3/8” drywall panels, drywall tape, joint compound, sanding pole, primer, paint roller
Steps to Follow:
- Use a stud finder to locate and mark ceiling joists — your screws must hit the joists, or the panels won’t hold
- Screw 3/8” drywall panels directly into the joists with 1-5/8” drywall screws, 12” apart.
- Tape all seams, mud, sand, prime, and paint.
Watch out: This method lowers your ceiling by about half an inch, so it may not work in rooms with already-low ceilings.
3. Beadboard Ceiling Panels
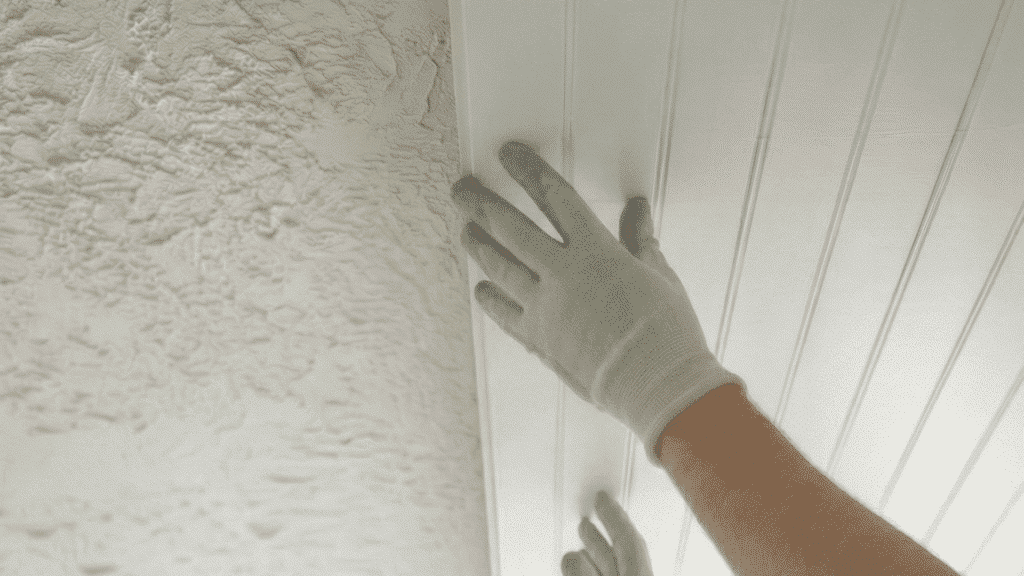
For first-time DIYers seeking a clean, classic farmhouse or coastal style, this approach offers a straightforward way to achieve that look. With minimal installation complexity, you can enjoy a beautiful, timeless design without the need for advanced skills or tools.
Tools needed: Circular saw or jigsaw, adhesive (construction-grade), finishing nailer or hammer and nails, caulk gun, primer, paint
Steps to Follow:
- Cut panels to size using a circular saw, accounting for any light fixtures or vents.
- Apply construction adhesive to the back of each panel, then secure it to the joists with finishing nails for a firm hold.
- Caulk seams, prime, and paint. White is the most popular finish, but any color works.
This is a 1–2-person job that can often be done in a single weekend.
4. Wood Planks or Tongue-and-Groove Boards
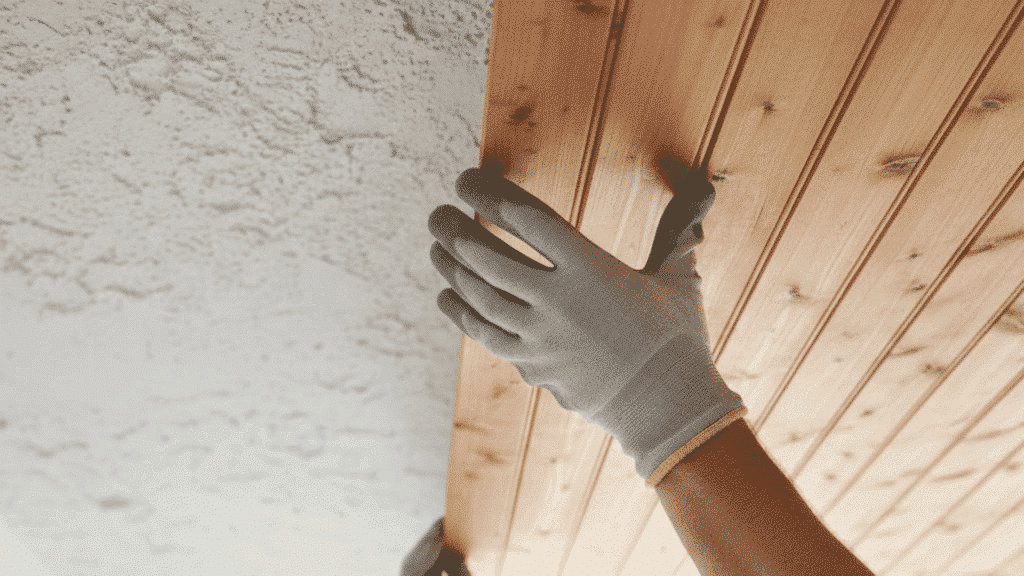
For homeowners looking to add warmth and true character to their living rooms, bedrooms, or dining areas, this approach is a great way to create a cozy, inviting atmosphere.
Tools needed: Stud finder, furring strips, circular saw, nail gun or hammer, stain or paint
Steps to Follow:
- Attach 1×3 furring strips across the ceiling joists
- Nail or clip planks (cedar, pine, or barn wood are popular US options) directly into the furring strips, working from one wall to the other
- Stain, paint, or whitewash to your desired finish
5. Adhesive Ceiling Tiles
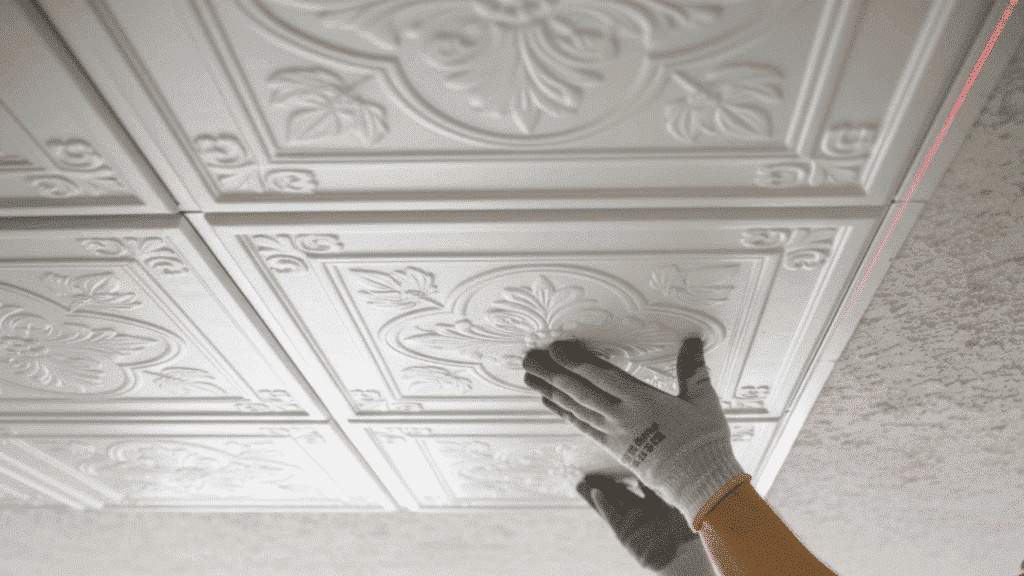
In basements, home offices, and utility spaces where efficiency is key, this approach provides a quick, practical solution. It prioritizes speed and functionality over intricate design, allowing you to get the job done without compromising on quality or wasting time.
Tools needed: Level, chalk line, utility knife or tin snips, adhesive or track-and-clip system
Steps to Follow:
- Find the center of the room and snap a chalk line.
- Use a track-and-clip system rather than direct adhesive on a heavy popcorn texture; direct adhesive often fails over time on bumpy surfaces.
- Cut-edge tiles to fit using a utility knife.
Tip: Always use a level to keep your grid straight. Crooked tile lines are hard to ignore once you notice them.
6. Shiplap or Plywood Panels
This method offers an affordable alternative to solid tongue-and-groove. It delivers a polished, contemporary style while being mindful of your budget, making it a smart choice for those who want a fresh, clean aesthetic without the higher costs.
Tools needed: Stud finder, furring strips, circular saw, nail gun, wood filler, primer, paint
Steps to Follow:
- Attach furring strips to the ceiling joists. This is essential for shiplap since the ceiling surface won’t be perfectly flat
- Attach shiplap boards with screws or nails, maintaining a consistent 1/8” gap between boards using a nickel as a spacer
- Fill any screw holes with wood filler, sand, prime, and paint
7. Wallpaper on the Ceiling
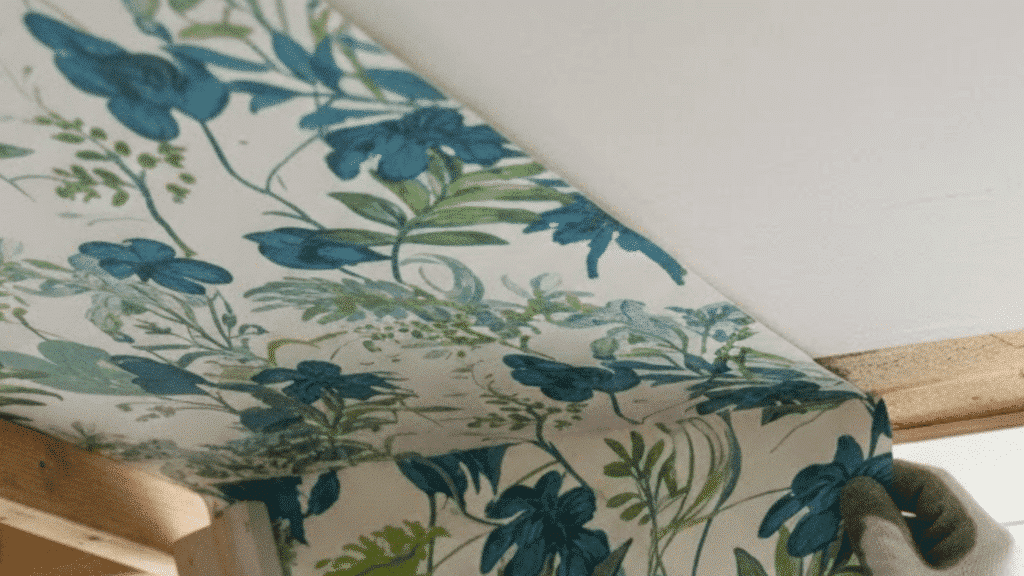
If you’re a renter or homeowner wanting to create a bold, design-forward focal point without altering the structure, this option is the ideal choice.
Tools needed: Paste-the-wall wallpaper, wallpaper paste, smoothing brush, utility knife, seam roller, painter’s tape
Steps to Follow:
- If your texture is heavy, apply one quick skim coat first and let it dry fully. Wallpaper works best on a reasonably flat surface.
- Use paste-the-wall wallpaper for ceiling application.
- Trim edges cleanly with a utility knife and roll all seams firmly to prevent peeling.
This is one of the most design-forward ways to cover a popcorn ceiling and create a true focal point in a space.
8. Fabric Draping
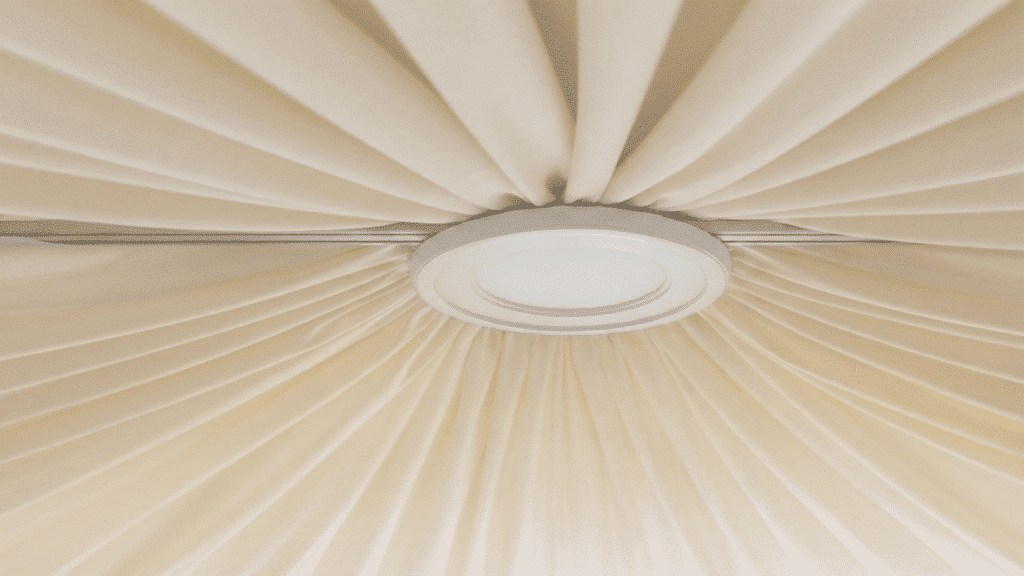
For renters, temporary spaces, or anyone seeking a completely damage-free and fully removable solution, this option is the perfect fit.
Tools needed: Fabric panels, sewing machine (or iron-on hem tape), curtain rod pockets, hooks or tension rods, ceiling medallions
Steps to Follow:
- Sew fabric panels together, and add curtain rod pockets along the edges
- Hang from hooks, tension rods, or a ceiling track system
- Cut a hole around any light fixtures and finish with a ceiling medallion
And the best part? It’s fully removable. Great for renters or anyone who likes to switch things up.
9. Bold Paint Pattern or Stencil Design
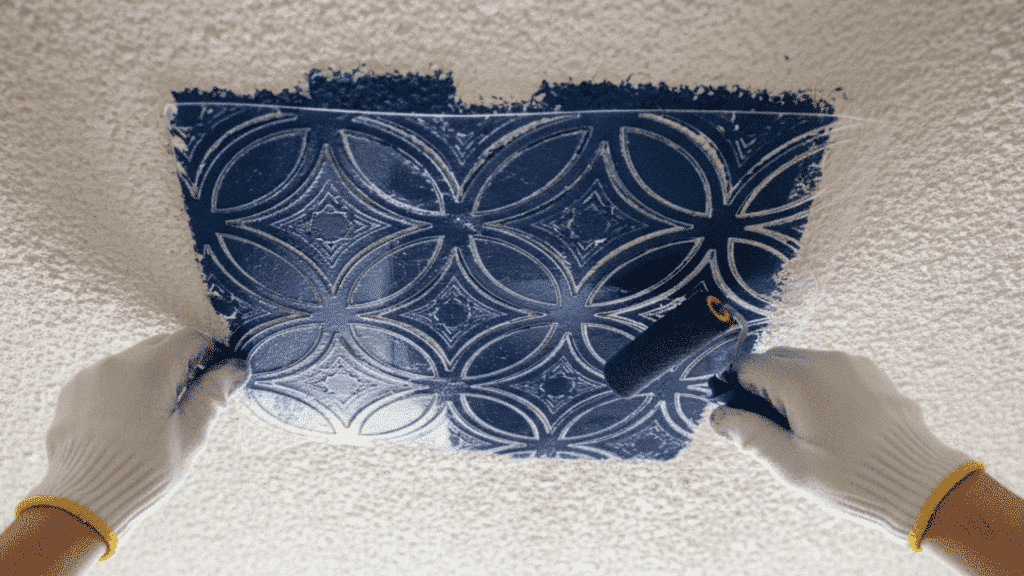
If you’re dealing with lightly textured ceilings and want a fast, cost-effective visual update without any structural changes, this option is perfect. It allows you to quickly and affordably enhance the space, giving your ceiling a refreshed look with minimal hassle.
Tools needed: Flat/matte ceiling paint, stencil (purchased or DIY), painter’s tape, foam roller
Steps to Follow:
- If your texture is heavy, apply a light skim coat first and let it dry. Stenciling works best on a relatively flat surface.
- Secure your stencil firmly with painter’s tape and apply paint with a lightly loaded foam roller using an up-and-down stippling motion.
- Move the stencil carefully, aligning the repeat pattern as you work in sections, so the paint doesn’t smudge
It’s the fastest, cheapest fix on this list. And honestly, it can look really good.
How Much Does It Cost to Cover a Popcorn Ceiling?
Costs vary a lot depending on your method and room size. Here’s a quick overview to help you plan:
Method | DIY Cost | Pro Cost (Est.) | Difficulty | 200 Sq Ft Est. | Height Loss? | Renter OK? |
Skim Coating | $50–$150 | $300–$450 | Moderate | $50–$450 | No | No |
Drywall | $300–$600 | $600–$1,200+ | Moderate–Hard | $600–$1,200+ | ~½ inch | No |
Beadboard Panels | $200–$400 | $400–$800 | Easy–Moderate | $200–$400 | ~¼ inch | No |
Wood / T&G Planks | $400–$1,000 | $800–$2,000+ | Moderate | $400–$1,000 | ~½–1 inch | No |
Ceiling Tiles | $200–$800 | $400–$1,000 | Easy | $200–$800 | Slight | Partial |
Shiplap / Plywood | $300–$700 | $600–$1,400 | Moderate | $300–$700 | ~½ inch | No |
Wallpaper | $60–$200+ | $200–$500 | Easy–Moderate | $60–$200+ | None | Partial |
Fabric Draping | $20–$80 | N/A – DIY only | Easy | $20–$80 | None | Yes |
Paint Stencil | $20–$50 | N/A – DIY only | Easy | $20–$50 | None | Yes |
For a 200 sq ft living room, expect to spend anywhere from $40 on the low end (paint stencil) to $1,200+ for professional drywall installation. Most homeowners find that a middle-ground solution works perfectly for their budget.
Conclusion
The good news is clear: you don’t have to tear anything down to get a ceiling you’re proud of. Each method above gives you a real, practical path forward, with no scraping, no demolition, and no huge contractor bill required.
Start small if you’re unsure. Pick one room, choose a method that fits your budget and skill level, and get moving.
If this helped you out, share it with a friend who’s been staring at the same bumpy ceiling for way too long.

Tommy Hardy, an alumnus of the Georgia Institute of Technology with a degree in Mechanical Engineering, has been a go-to figure in residential upkeep and innovation for over 18 years. His career commenced in a leading home appliance manufacturing company, where he mastered the intricacies of household systems. Joining our platform in 2020, Tommy quickly became a reader favorite for his practical and easy-to-follow guides. He took the helm of our DIY section in 2019, consistently delivering content that empowers homeowners. Beyond his professional pursuits, Tommy is a passionate gardener and enjoys woodworking, skills enhancing his hands-on approach to home care.