Feed prices keep rising, which can make caring for chickens feel expensive over time. Many backyard keepers look for simple ways to cut costs without affecting their flock’s health.
That’s where a DIY chicken feeder can really help. Some work well for a few hens in a small yard, while others suit larger flocks.
This blog covers both easy builds and slightly advanced options, so there’s something here for every setup.
Why Build a DIY Chicken Feeder at Home?
Building a chicken feeder at home is a smart way to manage both cost and daily feeding. Store feeders can be pricey, and they don’t always fit your setup.
A feeder gives better control over how much feed is used and how it’s stored. This helps cut down waste, which means less money spent on feed over time.
It also helps keep the feeding area cleaner by reducing spillage and keeping dirt out. Many homemade designs can deter rodents and wild birds, helping protect your feed.
You can adjust the size, height, and design based on your flock. This makes feeding easier and more efficient for both small and large setups.
How to Build a DIY Chicken Feeder
Skip the store-bought options and build a chicken feeder that actually fits your flock size and setup. Go through the following guide to get to know how you can build a DIY chicken feeder.
Tools and Materials Needed
| Tools | Materials |
|---|---|
| Cordless drill | 2 × 5-gallon buckets |
| 2-inch hole saw | Feeding tray/pan |
| ½-inch drill bit | Water tray/pan |
| Sharpie | Scrap wood piece |
| Phillips head bit | Screws |
| Utility knife (optional) | Washers |
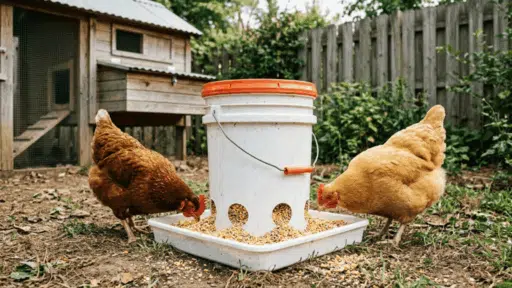
Step 1: Mark the Feeding Holes
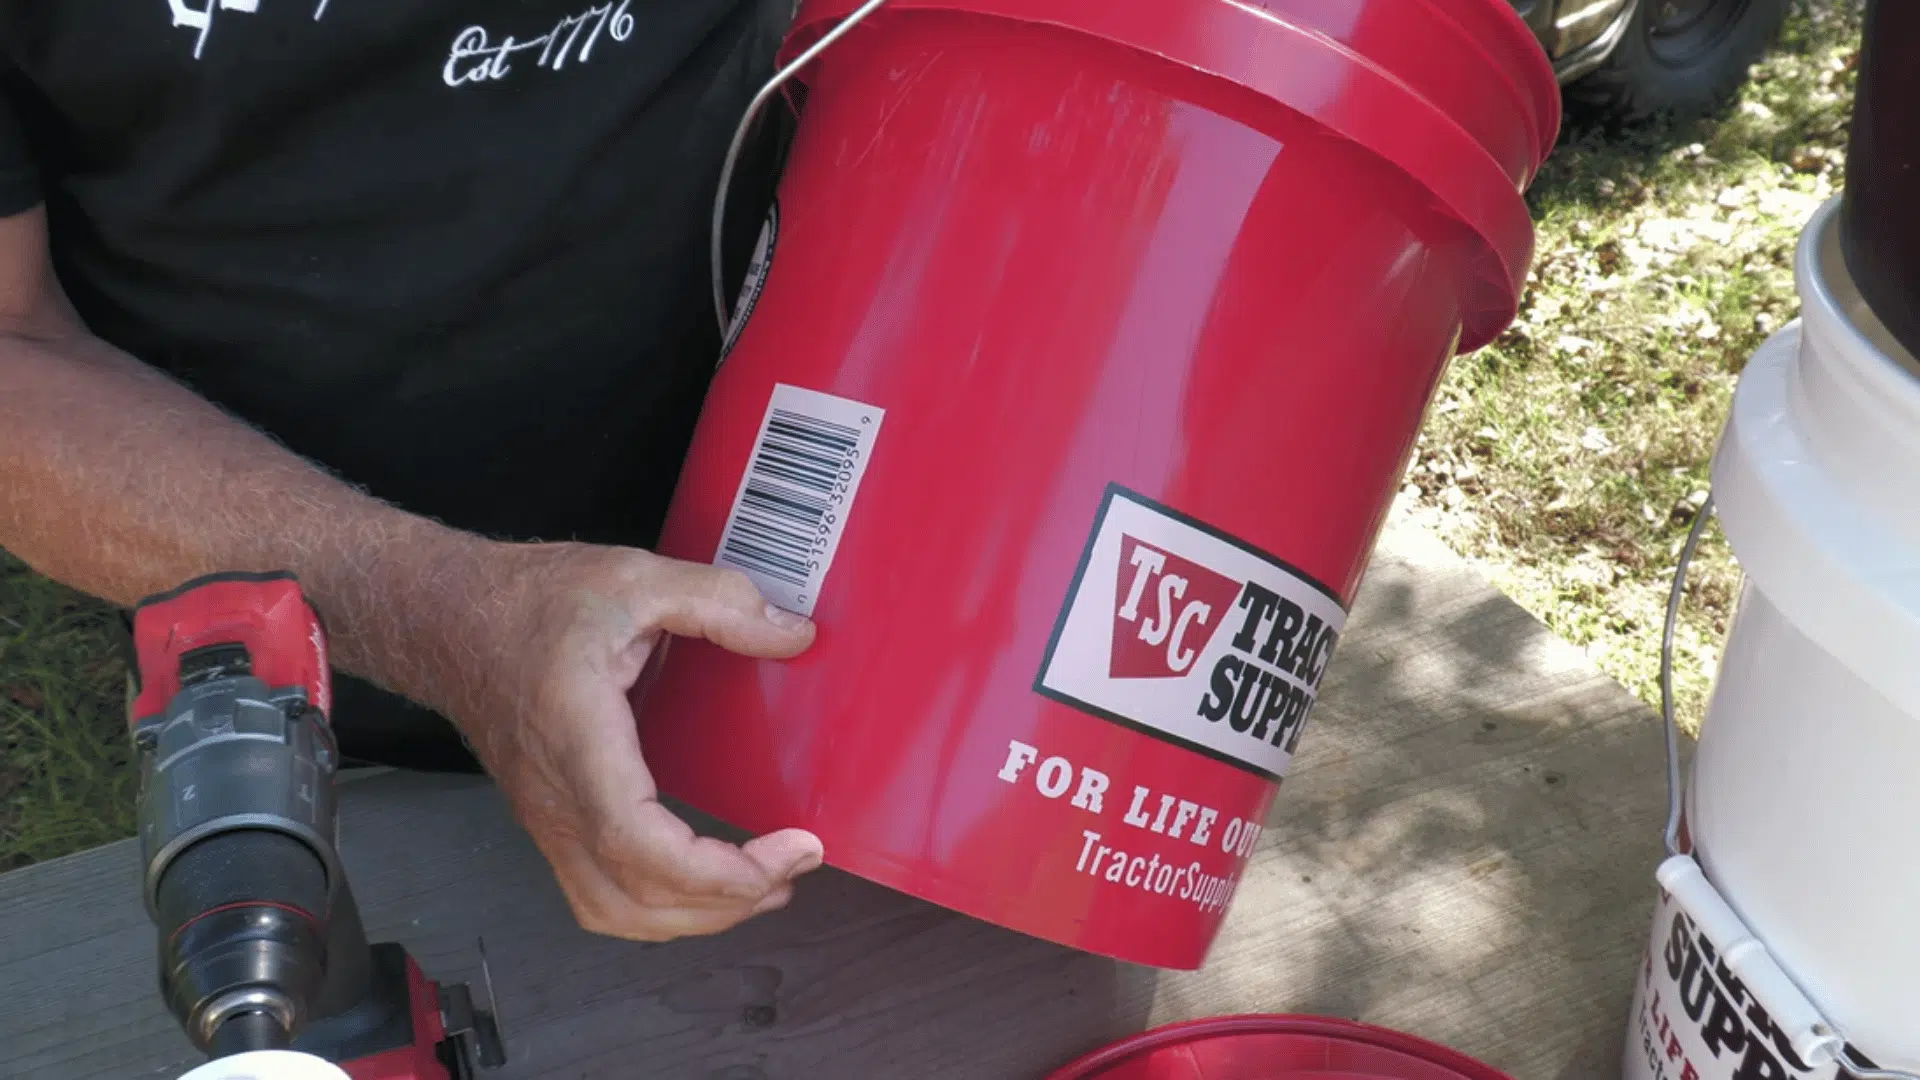
Take your 5-gallon bucket and draw circles near the bottom edge using a marker. Try to keep all the circles at the same height so the feed flows out evenly from all sides.
Place them as close to the base as possible so most of the feed can move down into the tray. Spacing them evenly around the bucket will also help with balanced feeding.
Step 2: Cut the Holes
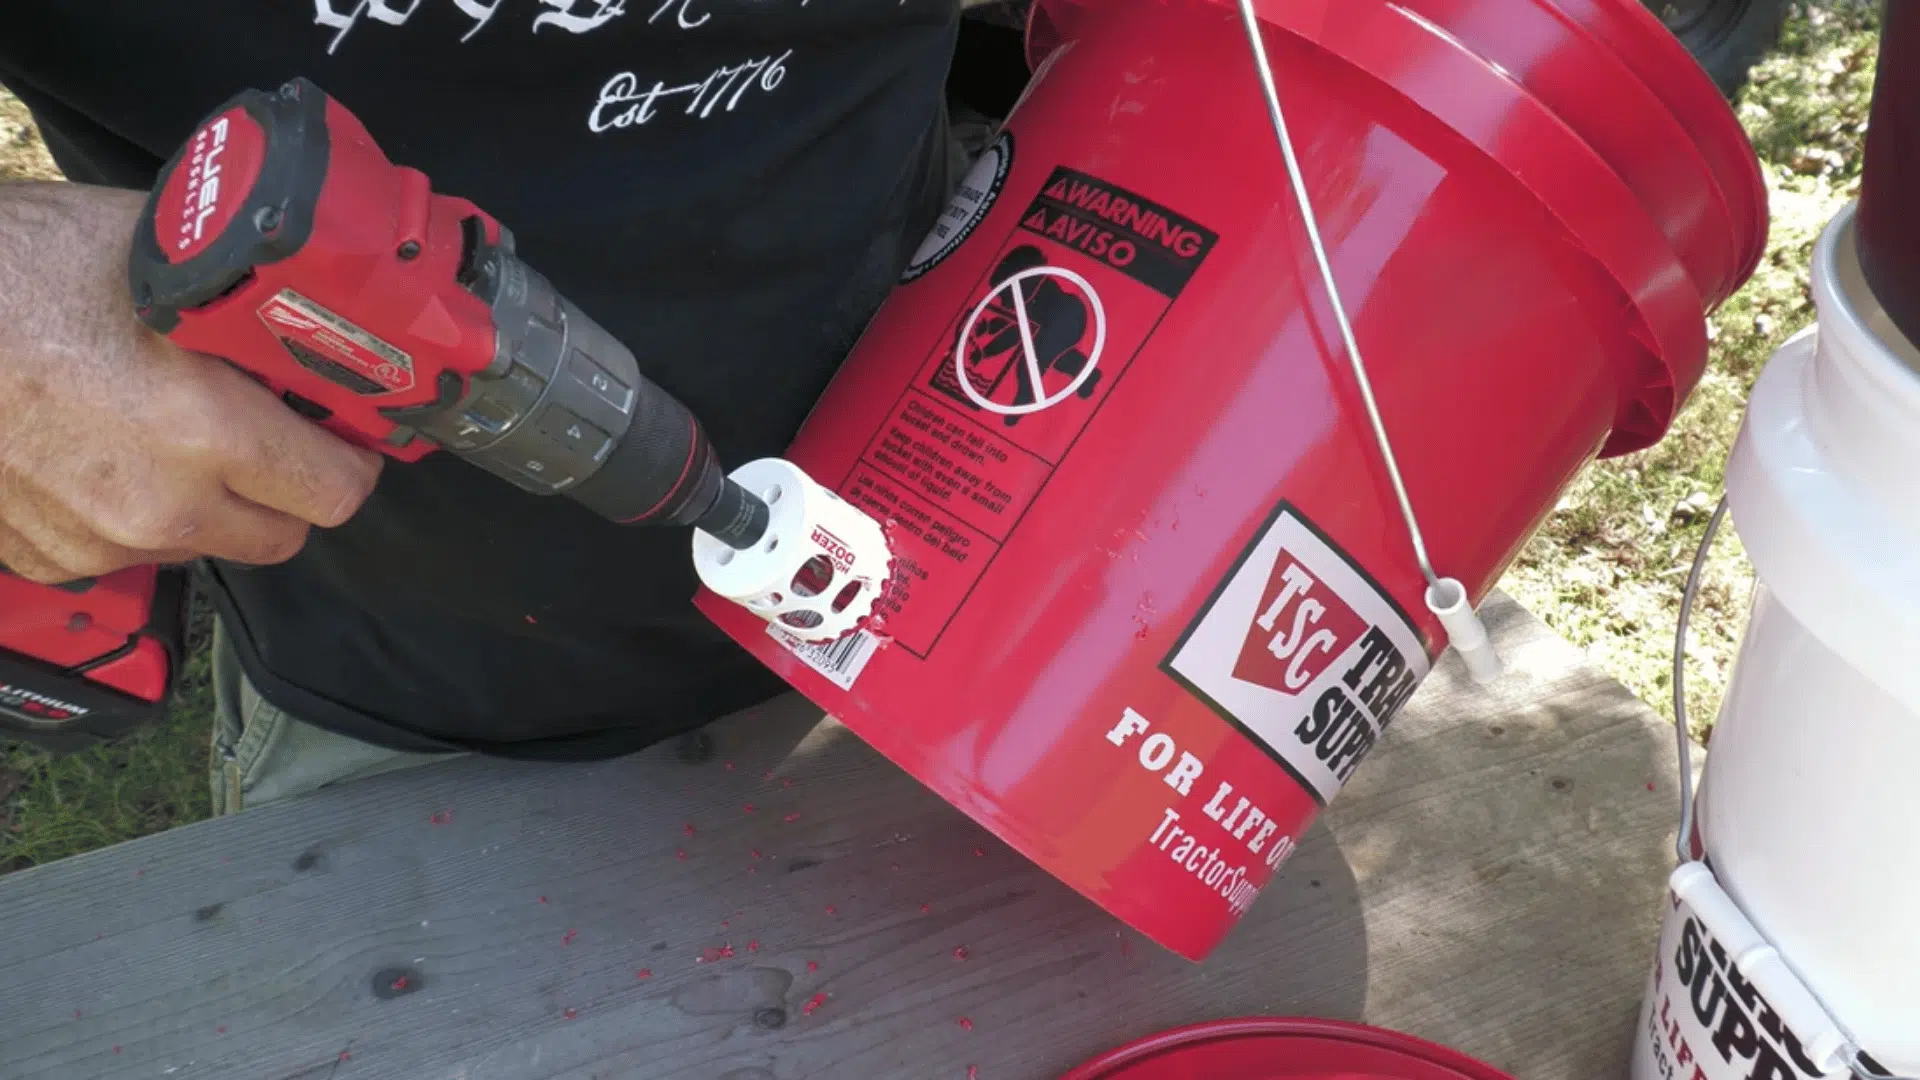
Use a 2-inch hole saw or drill bit to carefully cut out each marked circle on the bucket. Take your time while drilling to keep the holes clean, smooth, and even throughout.
After cutting, check both the inside and outside of the bucket for any sharp or rough edges. Sand them down if needed to keep your chickens safe from any jagged plastic.
Step 3: Add Support Inside the Bucket
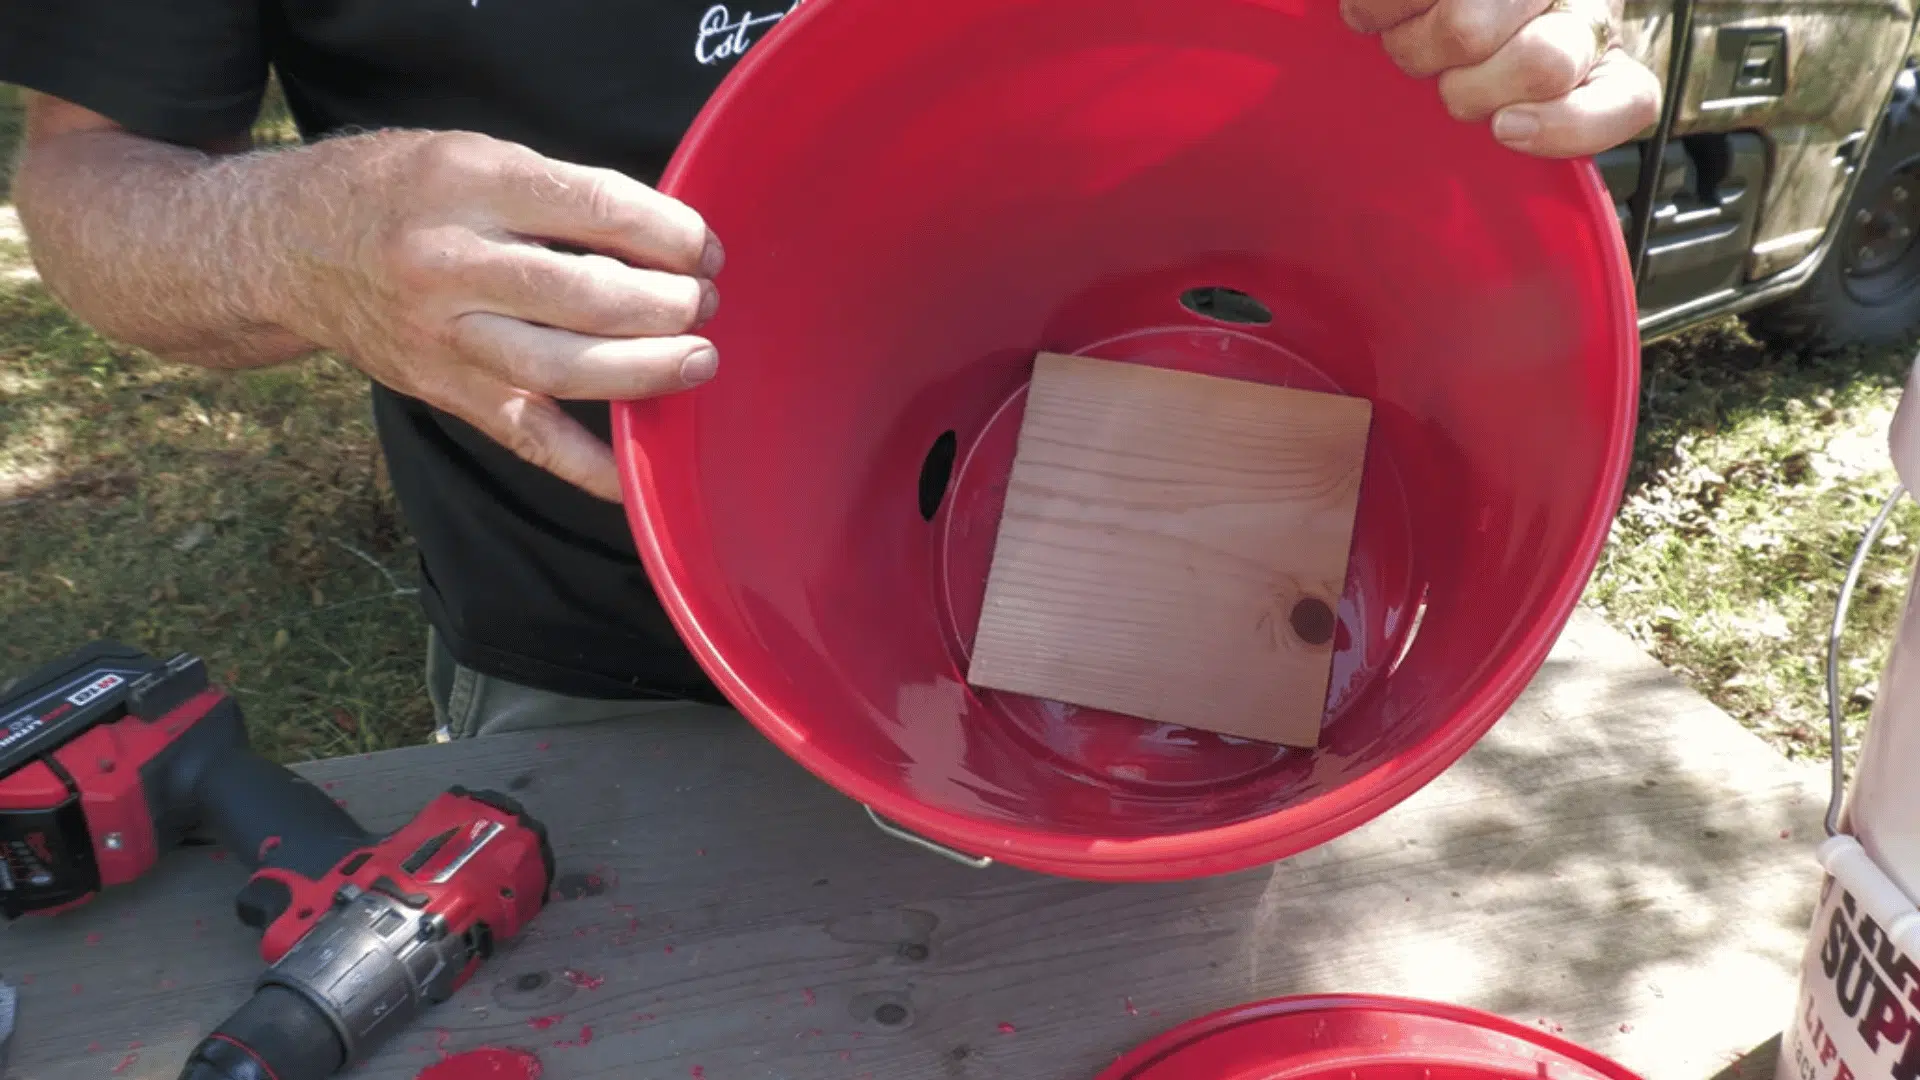
Place a small piece of scrap wood flat at the bottom inside the bucket before adding feed. Try to center it so the weight stays evenly balanced when the feeder is in use.
This piece of wood adds extra strength and prevents the bottom from bending under pressure. It also helps the feed settle more evenly as it moves down toward the holes.
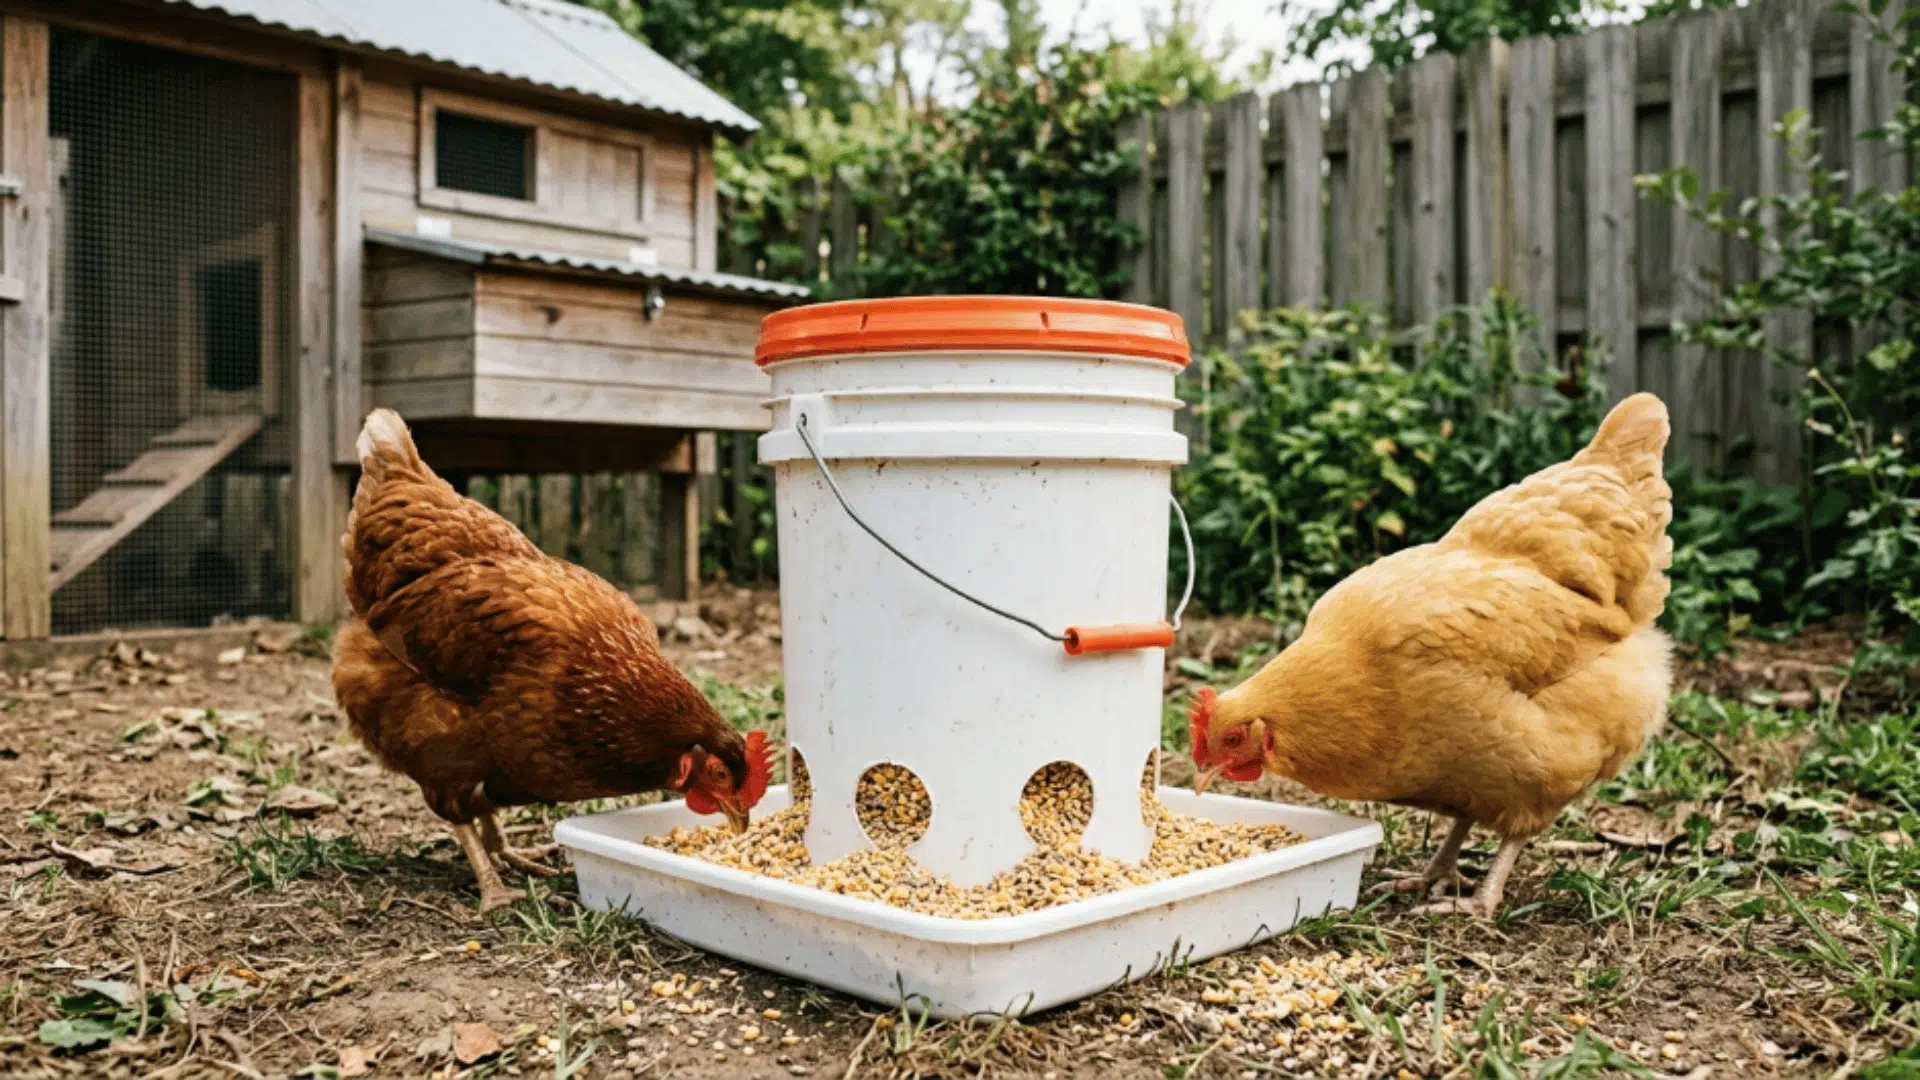
Step 4: Attach the Feeding Tray
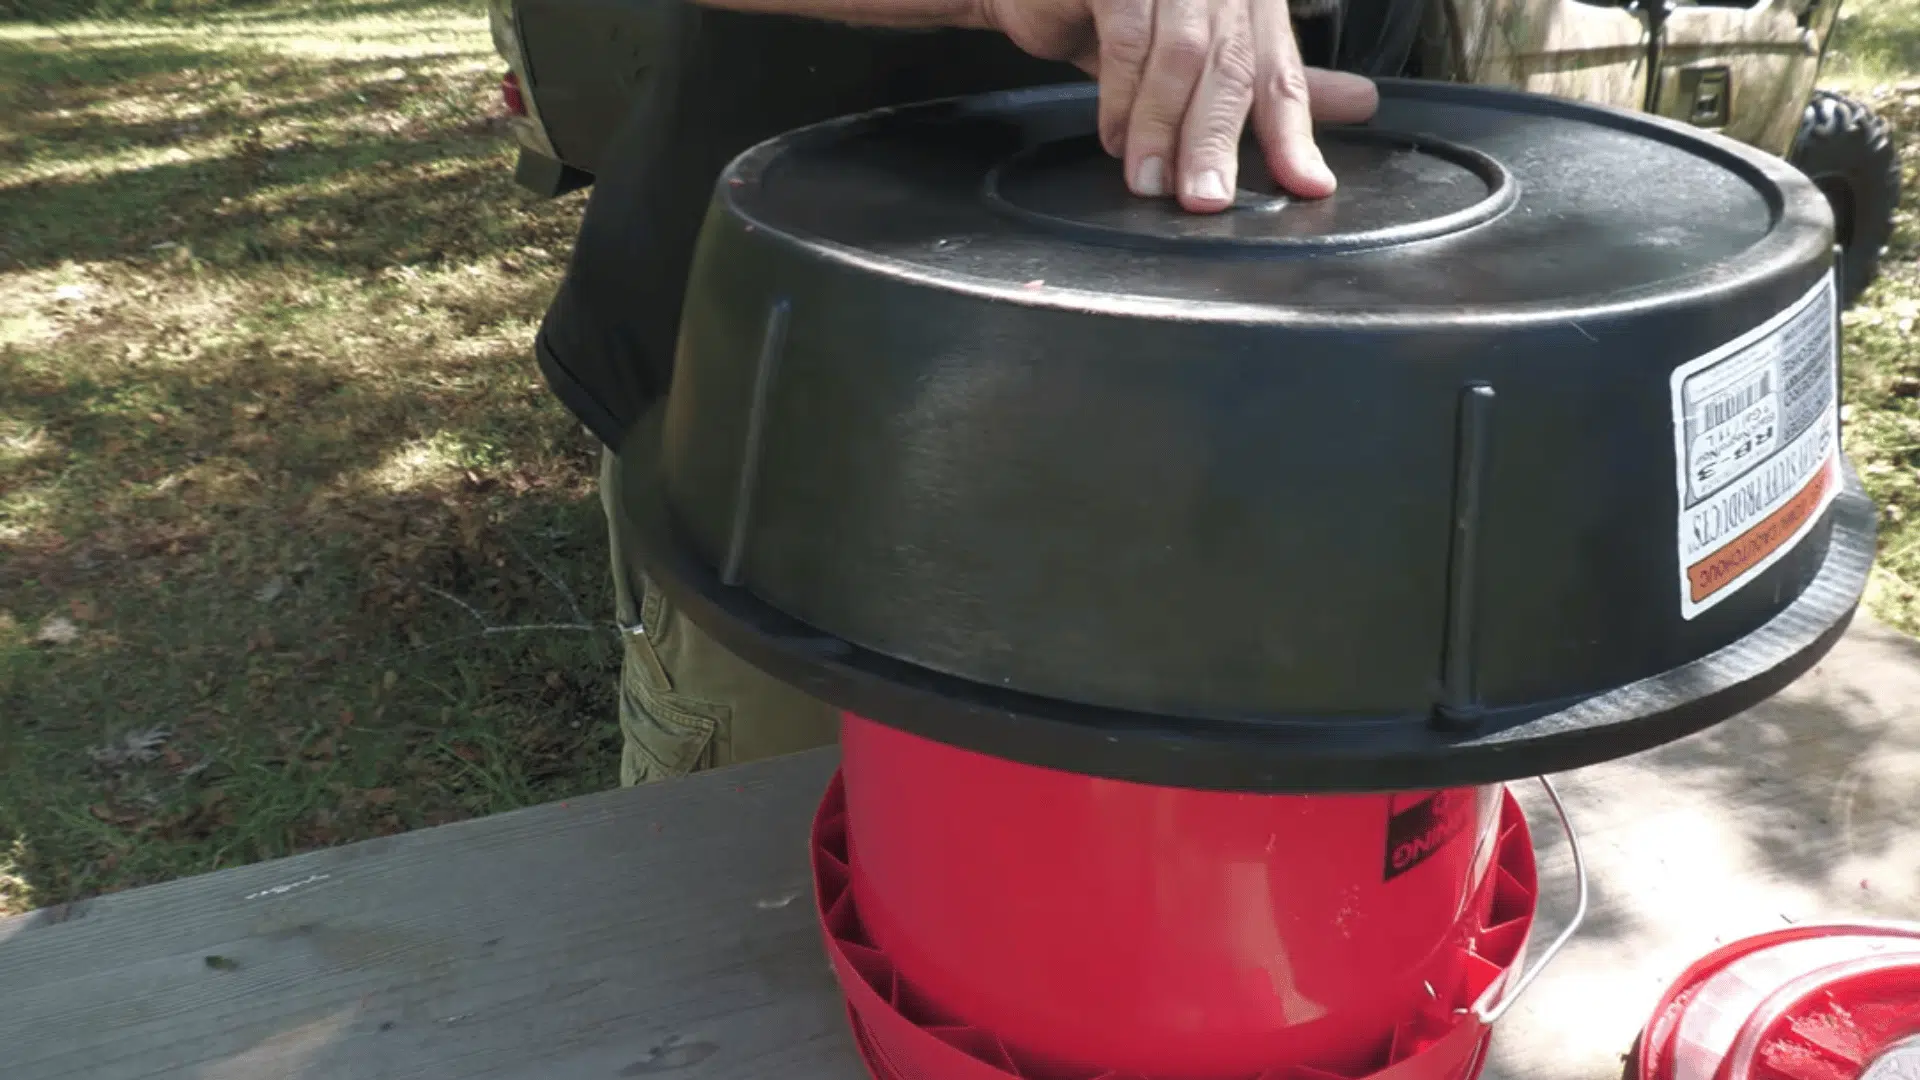
Turn the bucket upside down and center it carefully on top of the feeding pan. Use screws and washers to secure the bucket firmly to the tray through the bottom.
Make sure it is stable and evenly positioned so the feed spreads out on all sides. Give it a gentle shake to confirm everything is tightly fastened before moving on.
Step 5: Fill the Feeder
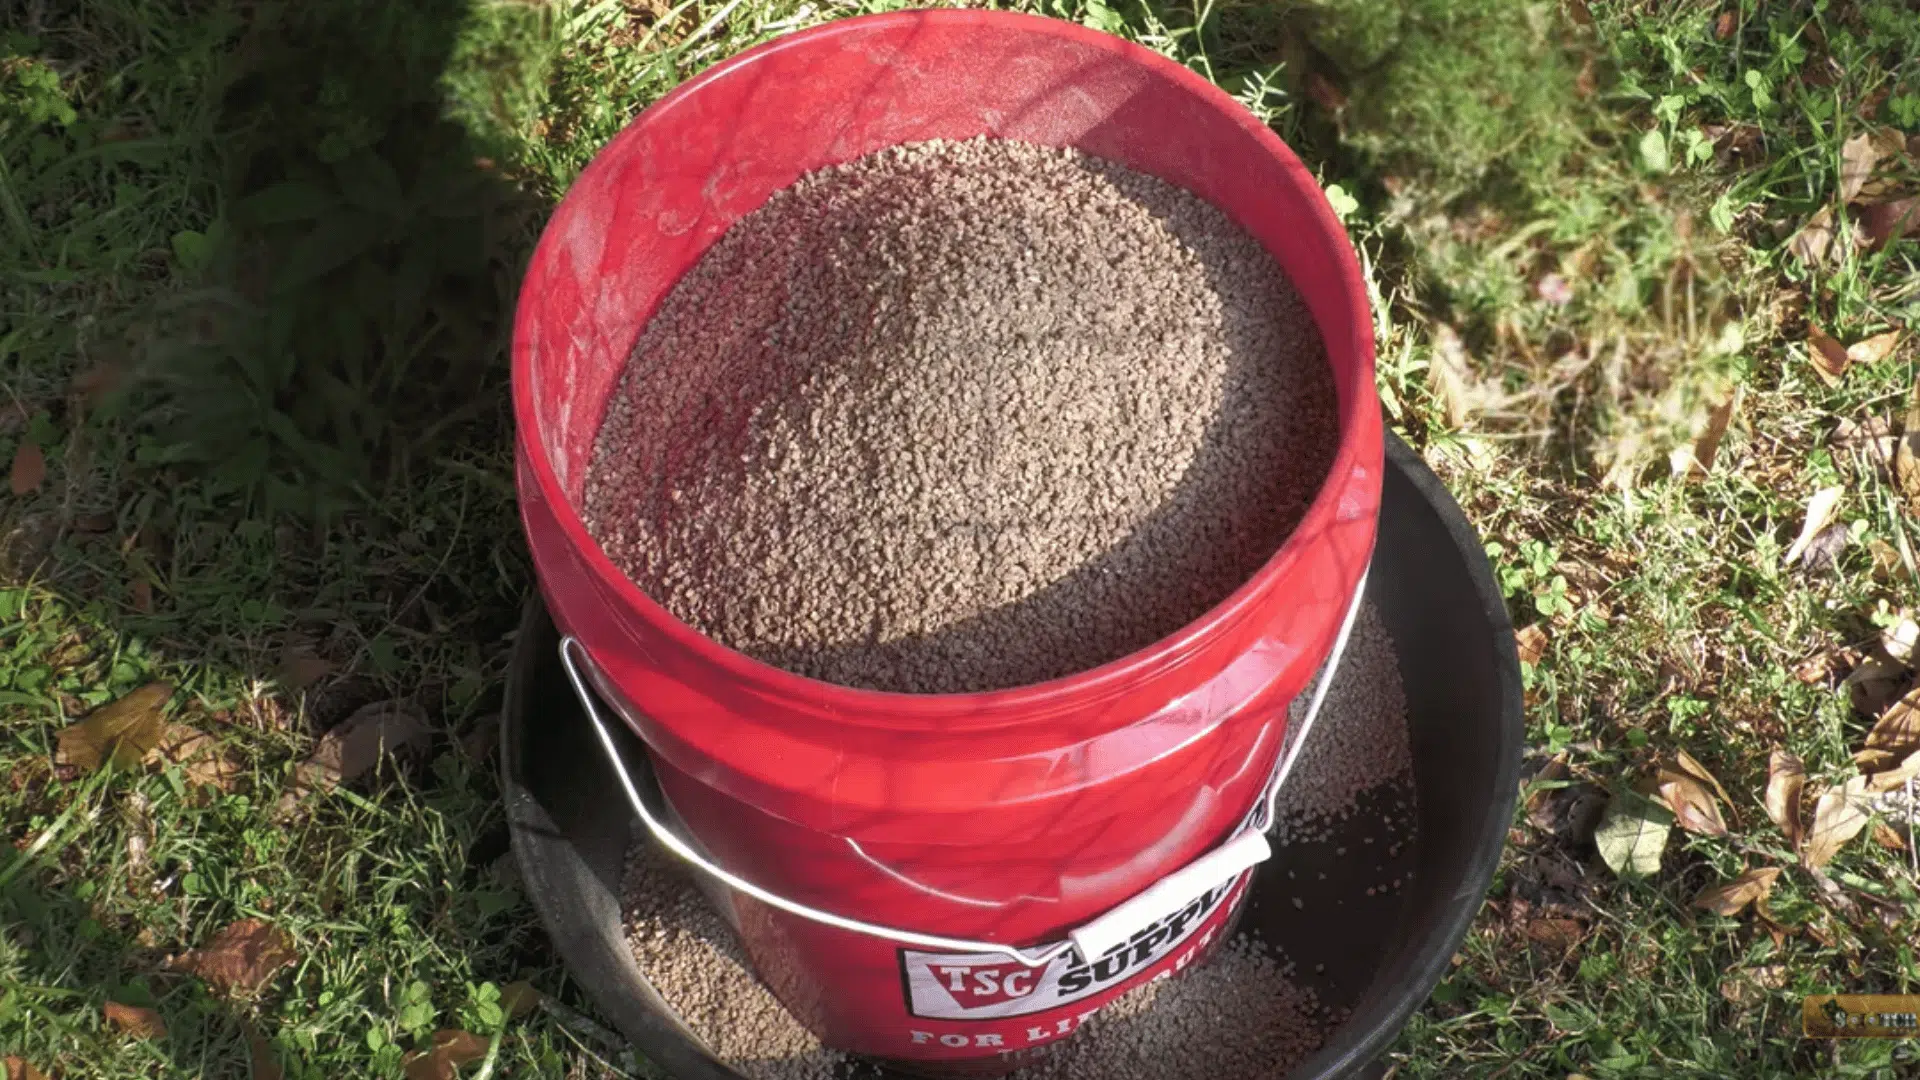
Turn the bucket upright and slowly pour the chicken feed into it through the open top. Fill it based on how many chickens you have, so it lasts at least a day or two.
Make sure the feed settles properly inside the bucket so it can flow down into the tray. Tap the sides gently to help any stuck feed shift toward the feeding holes.
Step 6: Cover the Feeder

Place the lid securely on top of the bucket and press it down firmly so it stays in place. A tight cover helps keep dirt, rain, and insects out of the feed.
It also stops chickens from climbing in and making a mess inside the feeder over time. Check the lid regularly to make sure it has not loosened or shifted out of position.
Step 7: Place and Start Using the Feeder
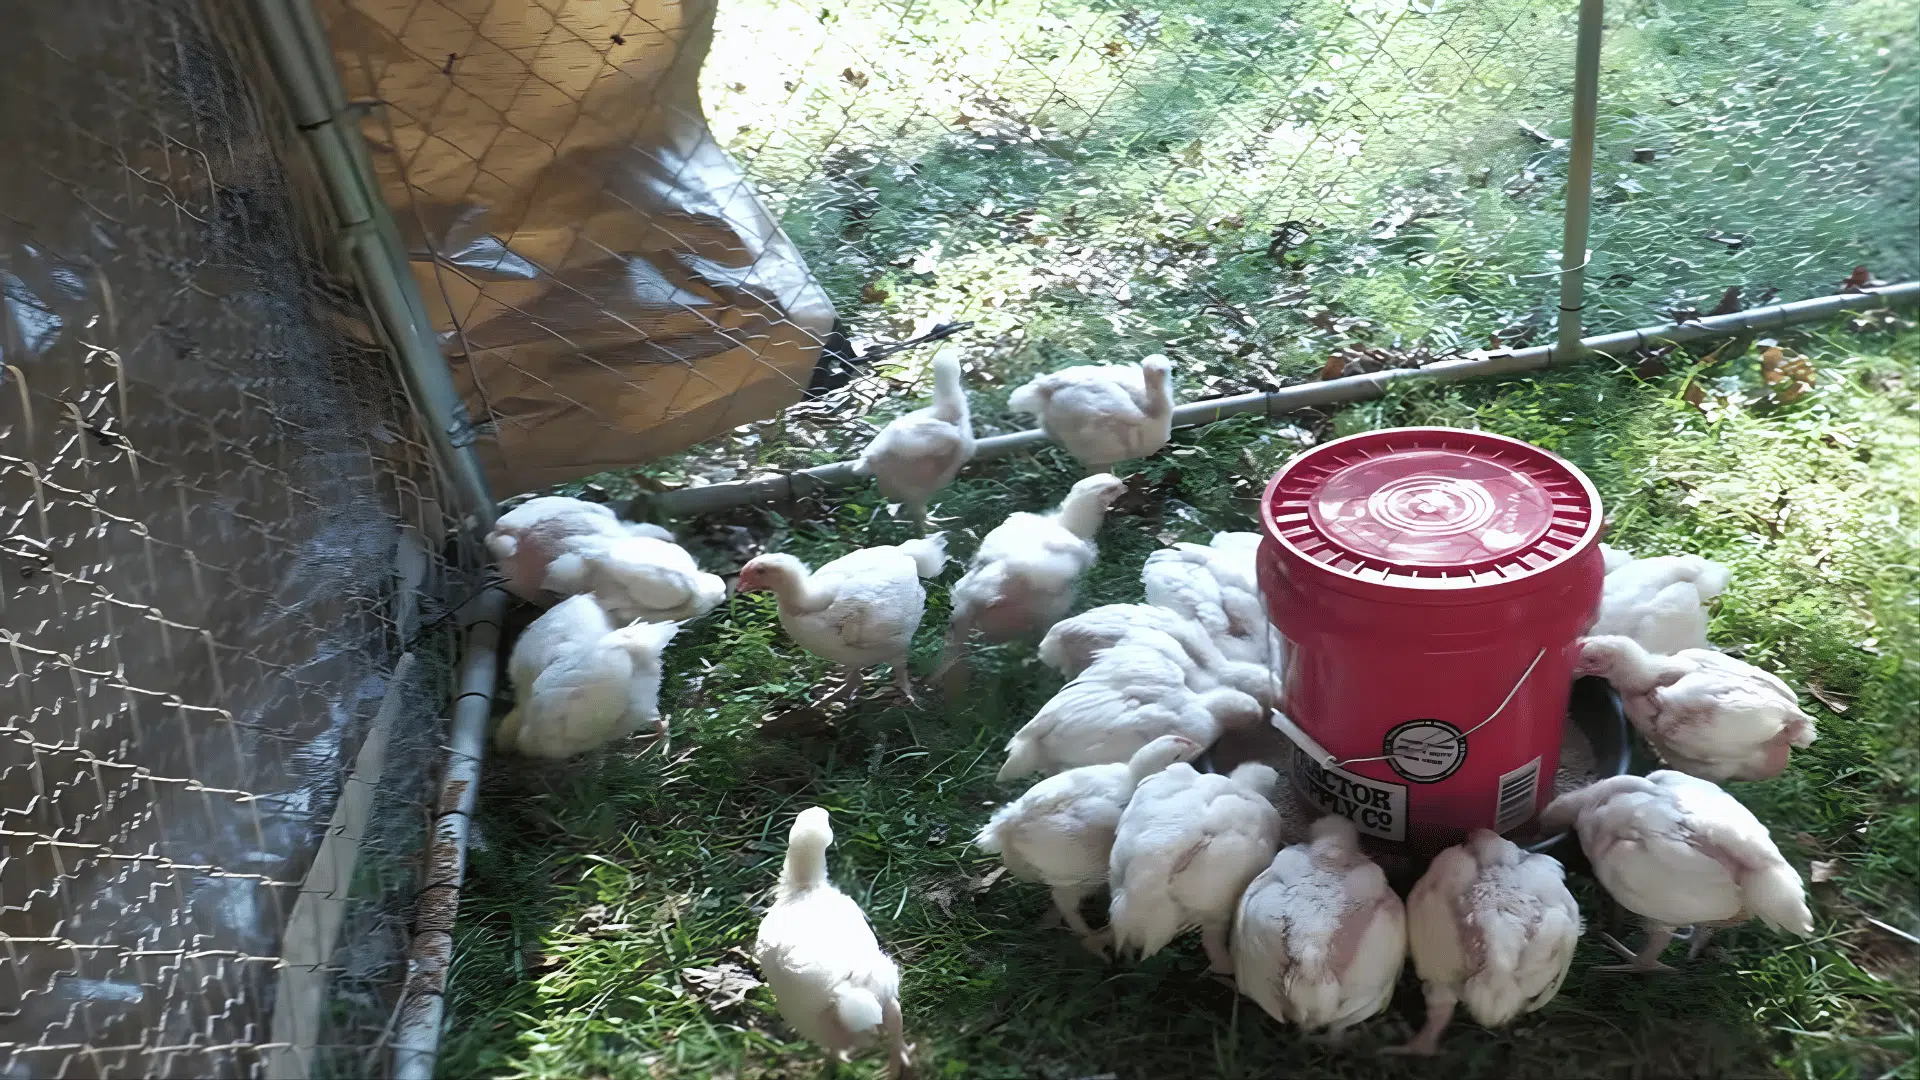
Set the finished feeder in your coop or outdoor area where your chickens usually gather to eat. Make sure it is placed on a flat, stable surface so it does not tip over during use.
Watch your chickens use it for a few minutes to see how they interact with the feeder. Adjust the position slightly if needed to make feeding more comfortable for the whole flock.
For a more detailed explanation and visual guidance, kindly refer to the video below.
DIY Chicken Feeder Ideas to Try at Home
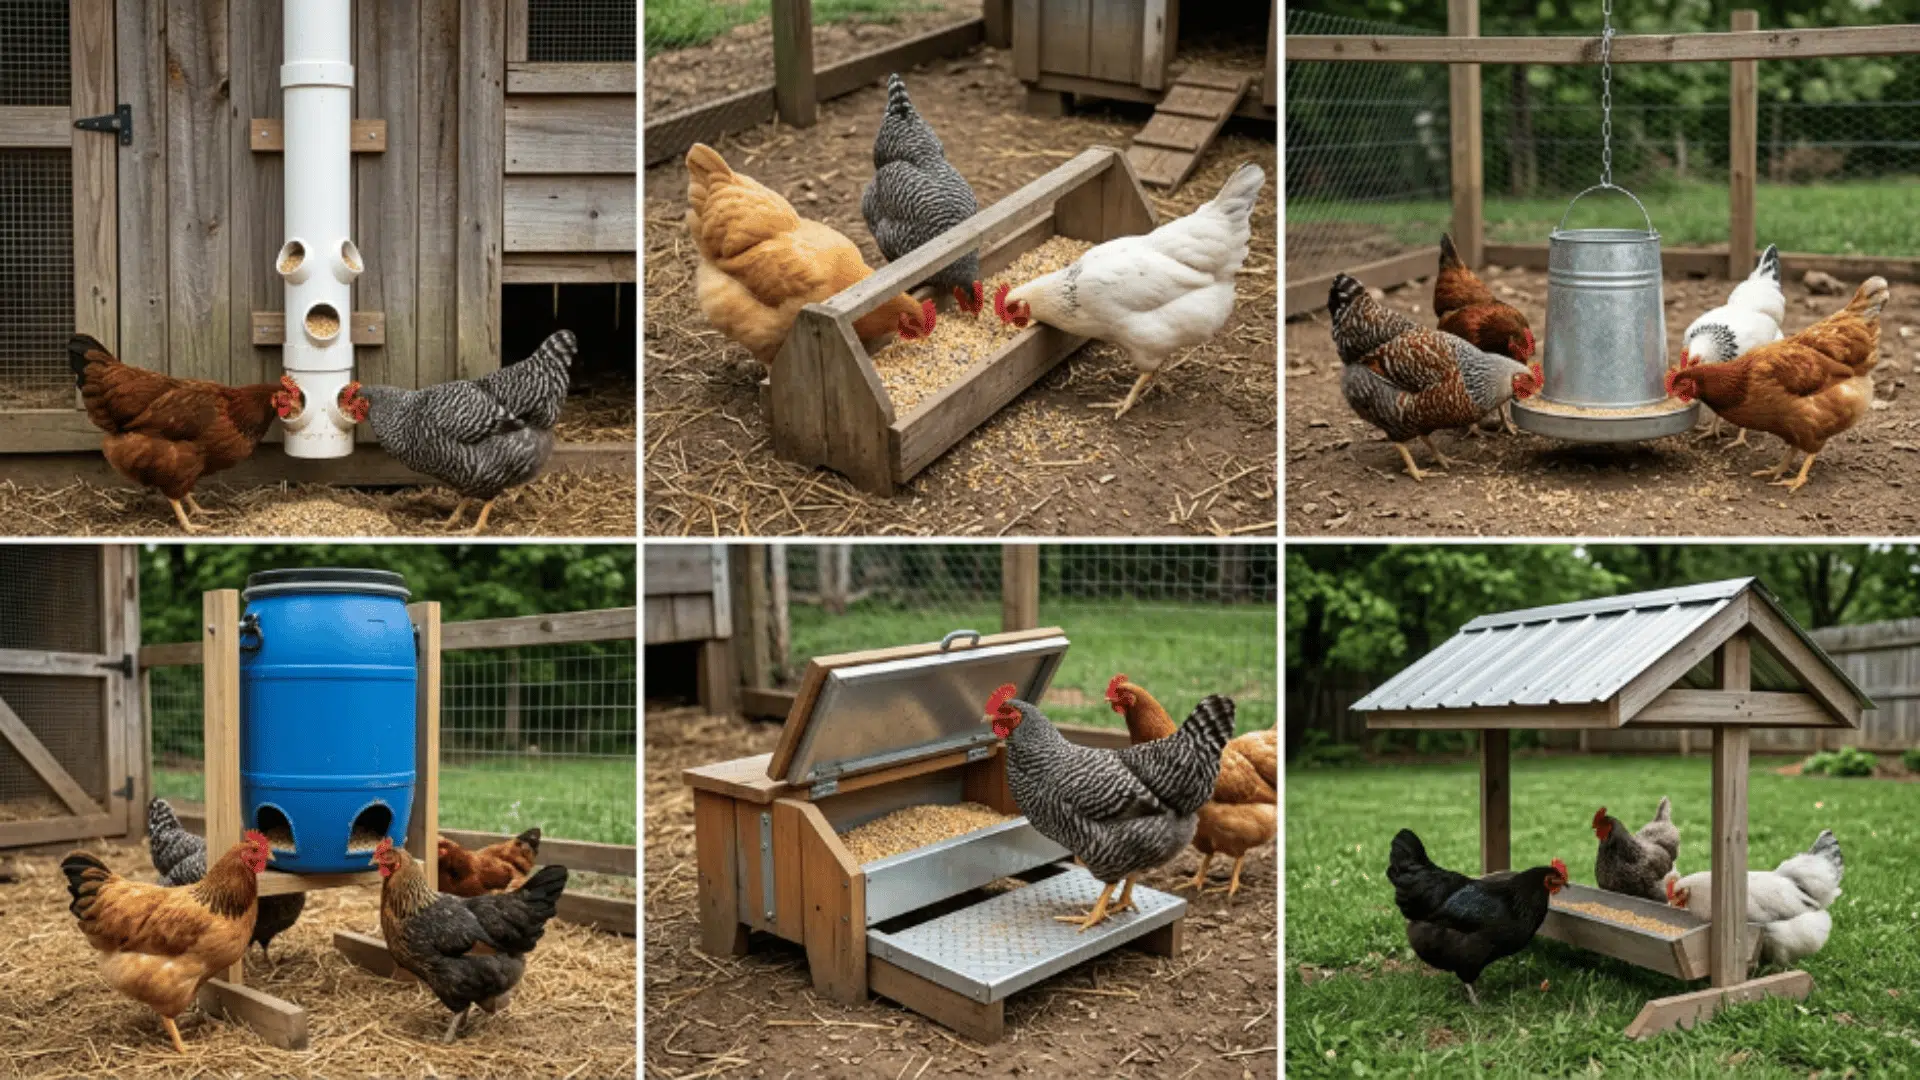
These chicken feeder ideas are simple to build, budget-friendly, and help keep feeding clean and organized for your flock.
1. Plastic Bottle Chicken Feeder
This chicken feeder uses large plastic bottles to hold and dispense feed. Small openings are cut near the bottom to allow chickens to eat easily.
It is a low-cost option and works well for small flocks. It is also lightweight and easy to move around your coop. You can replace bottles easily when needed without much effort.
2. PVC Pipe Chicken Feeder
This DIY chicken feeder uses PVC pipes to create a clean and low-waste feeding system. Feed flows through the pipe openings, making it easy for chickens to access.
It helps keep the feed dry and reduces mess on the ground. A PVC chicken feeder is a great option for long-term use.
3. Wooden Trough Chicken Feeder
A wooden trough is a simple chicken feeder that can be built using basic tools. It allows multiple chickens to eat at the same time without crowding.
You can adjust the size based on your flock. This chicken feeder is strong and works well in covered areas. It is a good option for daily feeding and is easy to refill when needed.
4. Hanging Chicken Feeder
A hanging chicken feeder keeps feed off the ground and cleaner. It is usually made using a bucket or container with a hook or rope.
Raising it to chicken height helps reduce scratching and waste. It also helps prevent dirt and bedding from mixing into the feed. You can easily adjust the height as your chickens grow.
5. Gravity-Fed Barrel Feeder
This DIY chicken feeder uses a larger container or barrel to store more feed. It slowly releases feed into a tray as chickens eat. It is perfect for people who don’t want to refill feeders daily.
A gravity-style chicken feeder works well for bigger flocks. It helps maintain a steady feed supply throughout the day. This type of feeder is useful when you are away for a long time.
6. Treadle Chicken Feeder
A treadle chicken feeder opens only when chickens step on a small platform. This design helps keep rodents and wild birds away from the feed.
This feeder is a good choice for outdoor setups. It also helps save feed by limiting access to your chickens only. With a little training, chickens quickly learn how to use it.
7. Rain-Proof Outdoor Chicken Feeder
This DIY chicken feeder features a cover to protect feed from rain. It keeps the feed dry and safe from moisture damage. You can use simple materials like buckets, lids, or small roofs.
A rain-protected feeder is useful for outdoor feeding areas. It works well in all weather and helps prevent feed spoilage. Placing it on a raised surface can further improve its performance.
Common Mistakes to Avoid
Paying attention during DIY chicken feeder setup can help keep feed clean, reduce waste, and make daily use easier for both you and your chickens.
- Ground Placement: Keeping the feeder on the ground mixes dirt into the feed.
- Toxic Materials: Always use safe, clean, non-toxic items when building your chicken feeder.
- Rain Protection: Without a cover, feed can get wet and spoil, so always use a proper lid.
- Large Openings: Oversized holes cause chickens to scratch out feed and create waste.
- Pest Control: Feed left exposed attracts rodents and wild birds, so use a secure design.
Conclusion
Building your own chicken feeder at home is a practical way to simplify daily feeding while keeping things clean and organized.
With so many design options available, it becomes easy to choose one that fits your space, flock size, and routine.
A well-made DIY chicken feeder can help control feed usage, reduce mess, and make care more manageable over time. It also gives the freedom to adjust and improve the setup as needed.
Starting with a simple design can make the process feel less overwhelming. Try one of these ideas today and see what works best for your chickens.

With a Master’s in Landscape Architecture from the University of Virginia, Sophia Stephenson has dedicated the last 20 years to creating and maintaining vibrant outdoor spaces. Her professional journey started in landscape design, where she gained a reputation for innovative and sustainable approaches. Sophia became a part of our editorial team as a freelancer in 2019, offering a fresh perspective on outdoor living. Since 2020, she has been the chief for our outdoor design content, blending aesthetic appeal with environmental stewardship. In her leisure time, Sophia is a keen photographer, capturing the beauty of natural landscapes, a hobby that complements her professional expertise.