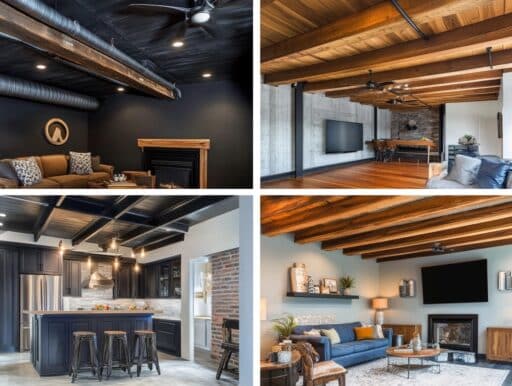
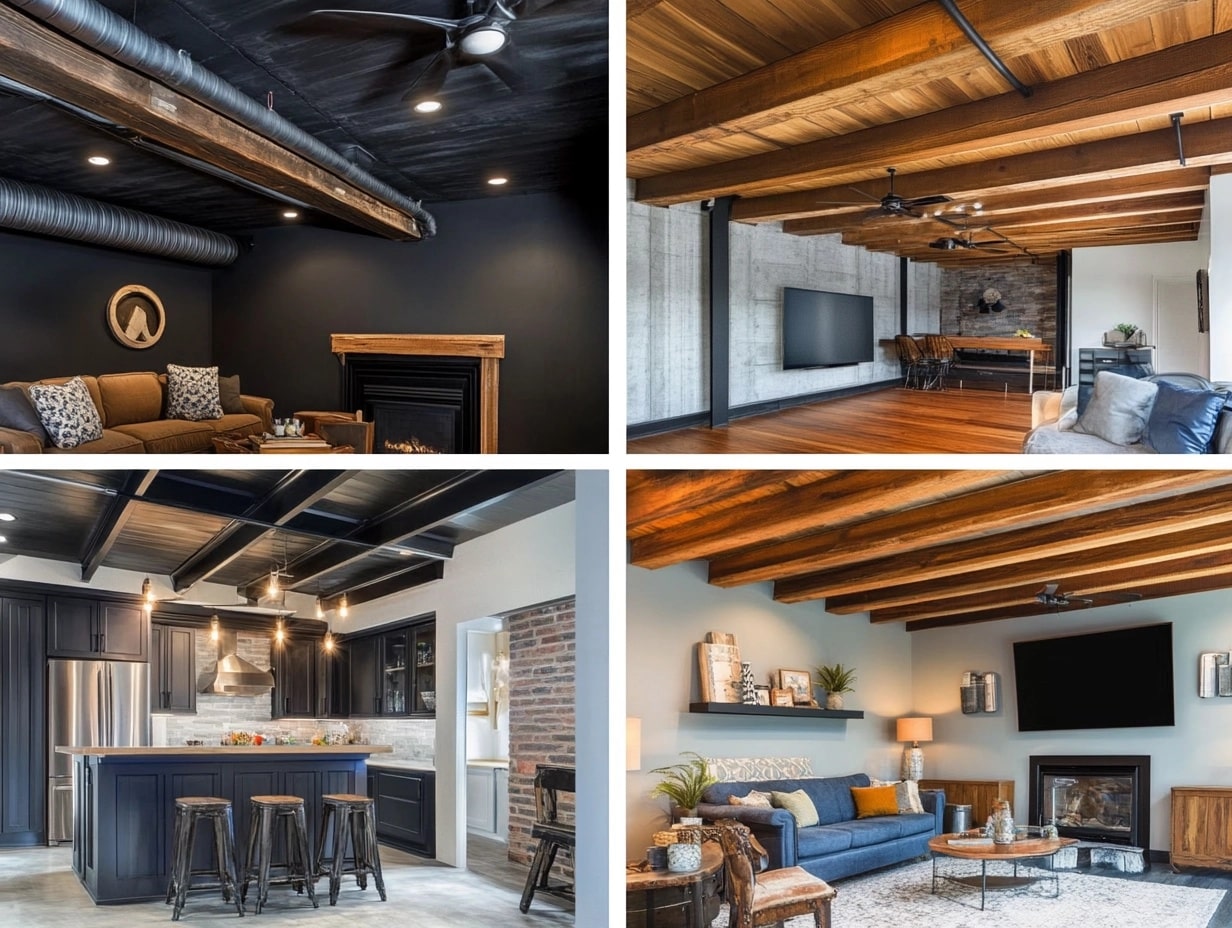
Exposed basement ceilings can completely transform a room.
They add charm, style, and even practicality to an often neglected space.
I’ve worked on plenty of basements and seen how different ceiling treatments can make a big impact.
Whether you’re aiming for a rustic vibe or a sleek modern look, there’s an exposed ceiling idea to suit every taste.
The best part? Many of these designs can be done yourself, even on a budget.
Let me guide you through these inspiring ideas and show you how to achieve them step by step.
What is an Exposed Basement Ceiling?
An exposed basement ceiling is a design in which structural and mechanical elements—such as beams, pipes, wires, and ductwork—are left uncovered.
Instead of installing drywall, drop ceilings, or traditional finishing methods, these ceilings highlight the raw framework of the basement.
This approach originated from industrial design trends, which celebrate practicality and simplicity.
Exposed ceilings blend practicality and aesthetics, making them ideal for creating a modern, loft-like vibe in a basement space.
Aesthetic Exposed Basement Ceiling Ideas
1. Industrial Black Ceiling
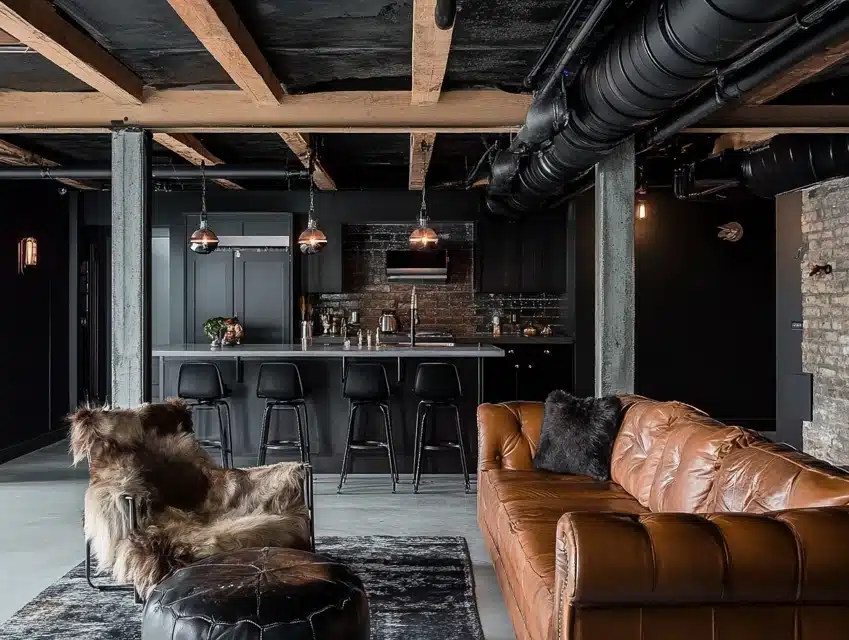
An industrial black ceiling adds drama and sophistication to any basement.
Painting black beams, pipes, and ducts creates a cohesive, modern look that hides imperfections and unifies the space.
I’ve seen how this bold choice makes exposed ceilings feel intentional, turning something raw into a design feature.
The dark color also reduces visual clutter, especially in spaces with multiple exposed elements like wires or ducts.
Pair the black ceiling with modern lighting fixtures for a polished industrial feel. This look works beautifully in media rooms, or basements converted into sleek hangouts.
DIY Steps:
- Clean and dust all beams, pipes, and ducts thoroughly to ensure the paint adheres properly.
- Use painter’s tape to cover walls and areas you want to protect from overspray.
- Apply a coat of primer to all surfaces for better paint coverage.
- Use a spray gun or a roller to apply black matte or semi-gloss paint evenly.
- Let the paint dry, then add a second coat if necessary.
2. Rustic Wood Beams
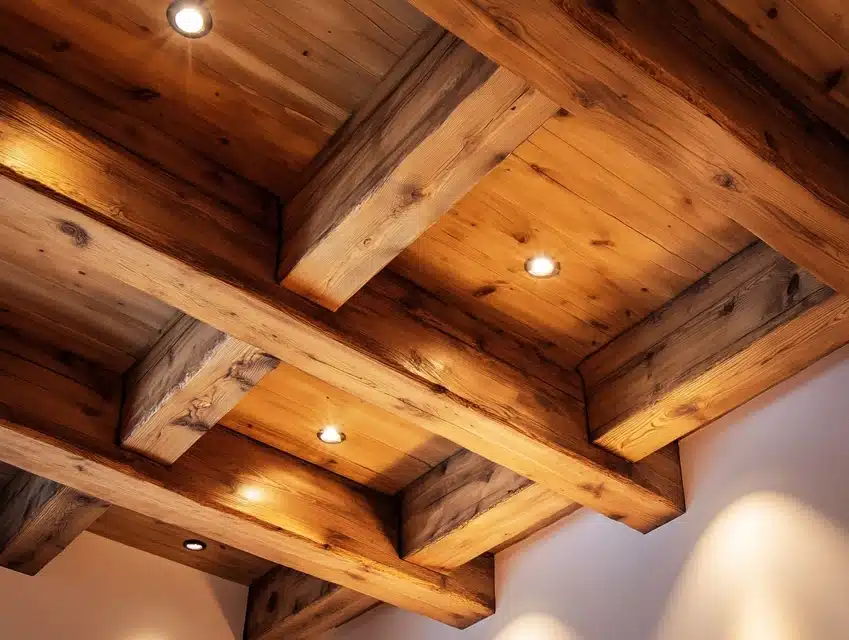
Rustic wooden beams give a cozy, cabin-like aesthetic to a basement.
I’ve worked on spaces where simply exposing and staining existing wooden beams completely changed the atmosphere.
The warmth of the wood creates an inviting feel, perfect for basements used as family rooms or entertainment spaces.
Rustic beams pair well with other natural elements, like stone or leather furniture, to create a cohesive look.
This style is timeless and versatile, blending effortlessly with farmhouse or vintage decor. Adding recessed lighting between beams can modernize the look while maintaining the rustic charm.
DIY Steps:
- Remove old paint or finishes from the beams using a sander or paint stripper.
- Clean the beams thoroughly to remove dirt and dust.
- Choose a wood stain that complements your decor and apply it evenly with a brush or cloth.
- Let the stain dry completely, then seal with a clear wood finish for protection.
- If beams are not already exposed, consider removing drywall or paneling to reveal them.
3. White Painted Ceiling
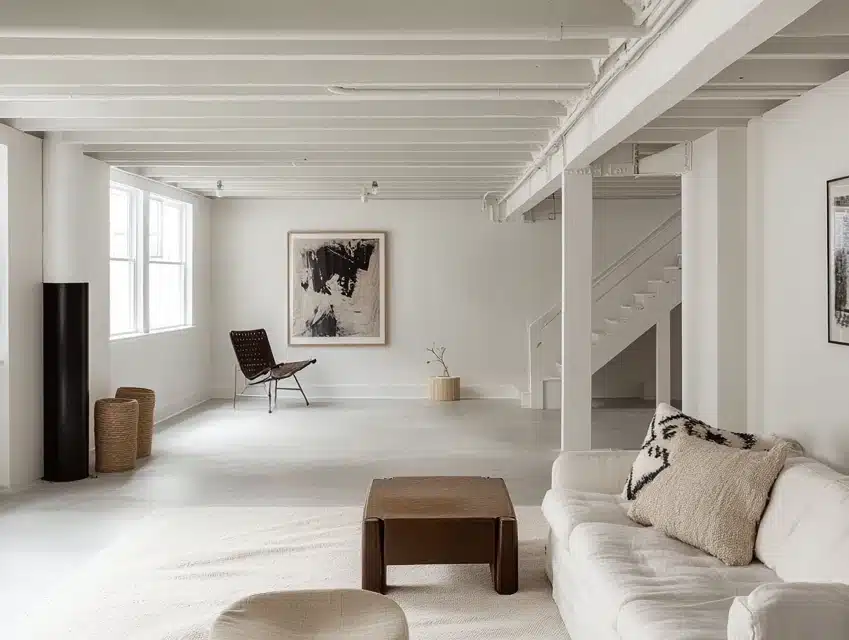
Painting an exposed white ceiling brightens the space and creates an airy, open feel.
I’ve seen this approach work wonders in basements with limited natural light. White paint reflects light beautifully, making the room feel larger and more welcoming.
It’s also a great choice for minimalist or modern designs, as it keeps the focus on other elements of the room.
This idea works particularly well in basements used as home offices, gyms, or playrooms, where a clean and bright environment is essential.
DIY Steps:
- Clean all exposed beams, ducts, and pipes to remove dust and debris.
- Cover walls and floors with plastic sheeting to protect them from paint splatter.
- Apply a primer coat to ensure even paint coverage.
- Use a spray gun or roller to paint all surfaces white, working in sections for consistency.
- Allow the first coat to dry, then apply a second coat for full coverage.
4. Metallic Silver Finish
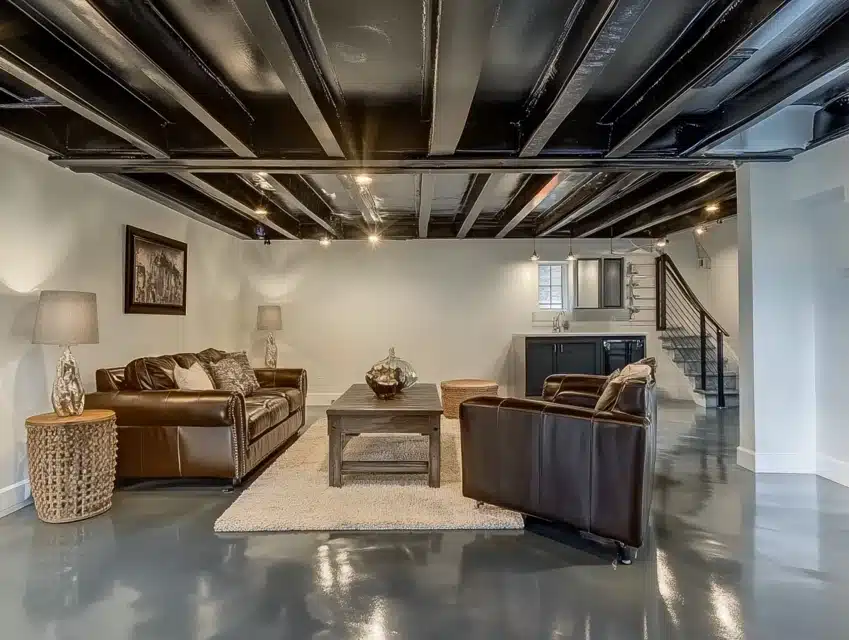
A metallic silver finish adds a modern and industrial vibe to exposed ceilings.
This style is perfect for basements with a contemporary aesthetic. Silver-painted beams and pipes catch the light beautifully, creating a sleek and polished look.
This design works particularly well in game rooms or home theaters, where the reflective surfaces enhance the ambiance.
Pairing the metallic ceiling with neutral furniture or bold accent colors creates a striking contrast, making the space feel stylish and cohesive.
DIY Steps:
- Clean the ceiling elements thoroughly and sand any rough spots.
- Protect the surrounding area with painter’s tape and plastic sheeting.
- Apply a primer coat to all surfaces.
- Use metallic silver spray paint or a roller with metallic paint for an even finish.
- Apply a second coat if necessary, allowing ample drying time between coats.
5. Natural Wood Finish
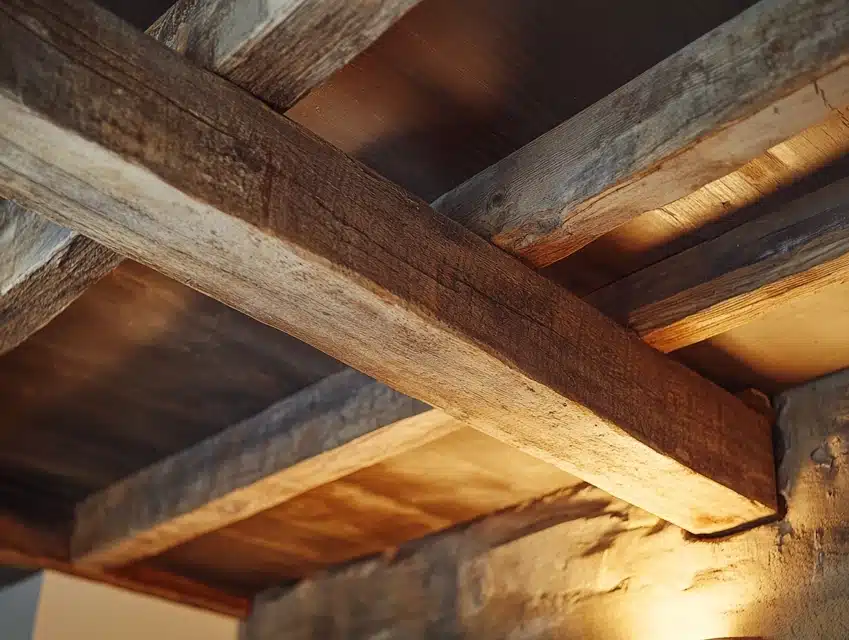
A natural wood finish is perfect for creating a warm, organic look in your basement.
Leaving the beams and panels in their raw, unpainted state highlights the wood’s natural grain and texture.
This approach works beautifully in basements that aim for a rustic or earthy aesthetic. The exposed wood complements various decor styles, from modern farmhouse to industrial chic.
Pair the natural wood ceiling with soft lighting and neutral furnishings to enhance the cozy, inviting atmosphere. This style is perfect for family rooms or relaxing lounge areas.
DIY Steps:
- Sand the wooden beams and panels to remove rough edges and splinters.
- Clean the wood thoroughly to eliminate dust and debris.
- Apply a clear sealant to protect the wood from moisture and enhance its natural color.
- If desired, use a light stain to bring out the grain and add depth to the wood.
6. Gray Matte Ceiling
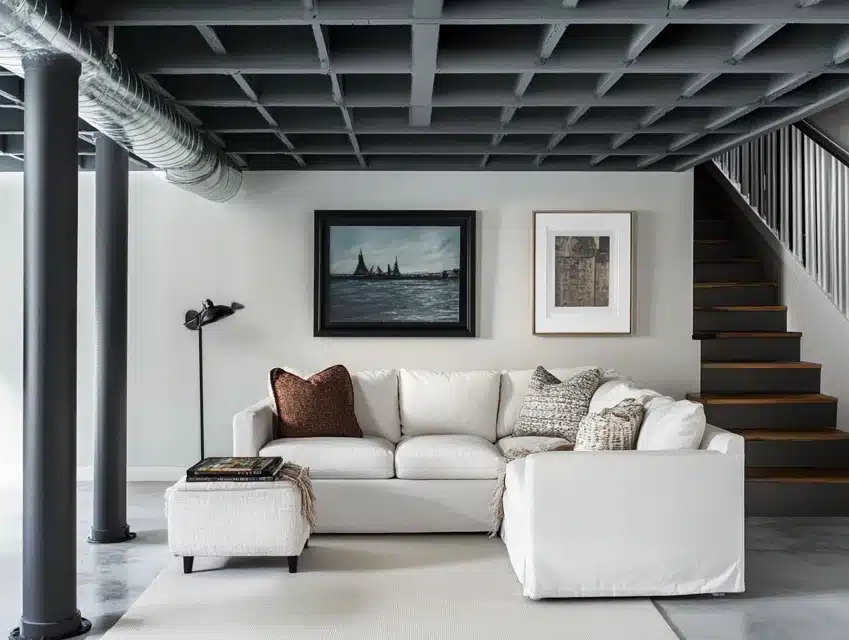
A matte gray ceiling offers a neutral and modern look, perfect for contemporary basements.
I’ve used this design in spaces where clients wanted a subtle, understated ceiling that didn’t overpower the room’s decor.
The soft, matte finish gently absorbs light, reducing glare and creating a calm, balanced atmosphere.
Gray also complements a wide range of color schemes, making it an easy choice for basements with mixed styles.
This idea works well for media rooms, home gyms, or minimalist living spaces, offering a clean yet modern touch.
DIY Steps:
- Dust and clean all ceiling surfaces to prepare them for painting.
- Use painter’s tape to protect walls and fixtures.
- Apply a primer coat to ensure the paint adheres evenly.
- Use a roller or spray gun to apply matte gray paint across the exposed beams and pipes.
- Allow the first coat to dry completely, then apply a second coat for full coverage.
7. Exposed Concrete Ceiling
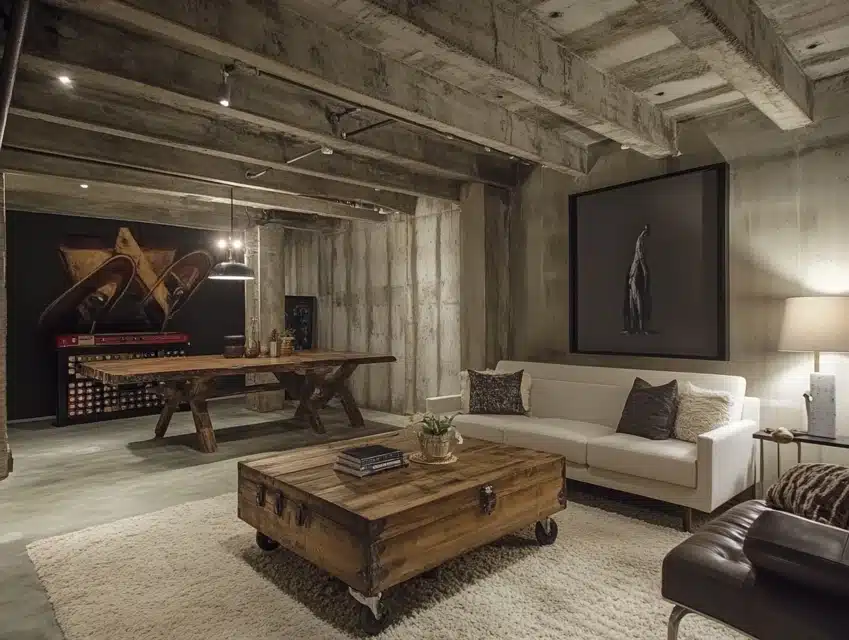
An exposed concrete ceiling delivers a minimalist, urban-inspired aesthetic.
I’ve worked with this design in basements where clients wanted a raw, industrial look. The bare concrete adds texture and character to the space, making it modern and edgy.
This design pairs well with other industrial elements, like steel furniture, brick walls, or exposed piping.
Add warm lighting or plush furnishings to soften the look, creating a balance between rugged and cozy. This style works perfectly for loft-inspired basements or creative workspaces.
DIY Steps:
- Clean the concrete surface thoroughly to remove dust and stains.
- If needed, patch cracks or imperfections with concrete filler.
- Apply a clear matte sealant to protect the surface and enhance its natural color.
- Add lighting fixtures, such as recessed lights or hanging bulbs, to highlight the texture.
8. Dark Navy Ceiling
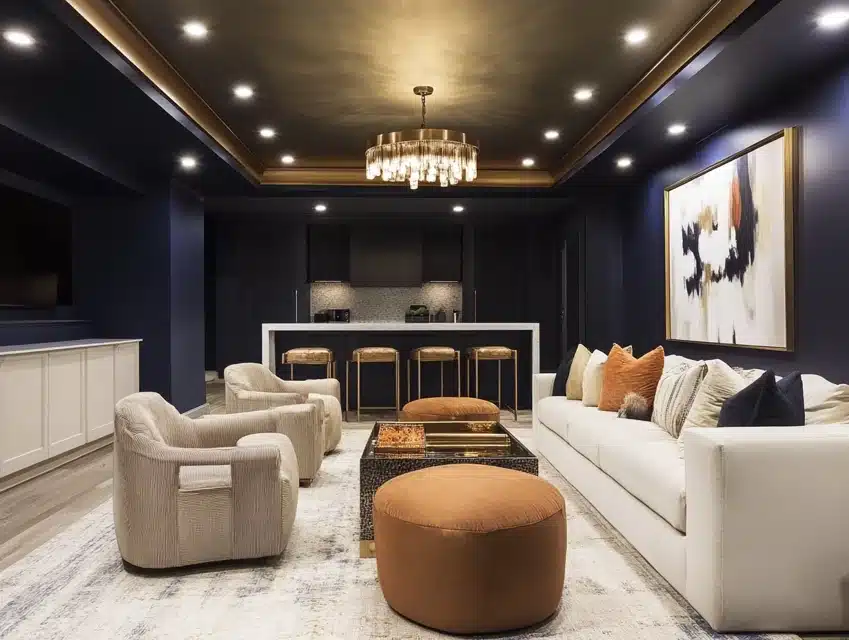
A dark navy ceiling creates a dramatic and sophisticated atmosphere.
I’ve seen this bold choice work beautifully in basements used as entertainment spaces or lounges.
The deep navy tone adds depth to the room, making it feel cozy yet elegant. When paired with gold or metallic accents, it creates a luxurious vibe.
This ceiling color works especially well in spaces with lighter walls, as the contrast adds visual interest. It’s a great choice if you’re aiming for a modern or nautical theme.
DIY Steps:
- Clean all exposed beams and pipes thoroughly.
- Apply a primer coat to ensure the navy paint adheres smoothly.
- Use a roller or spray gun to apply navy paint, ensuring even coverage.
- Allow the first coat to dry, then add a second coat for a rich, deep finish.
9. Exposed Ceiling with String Lights
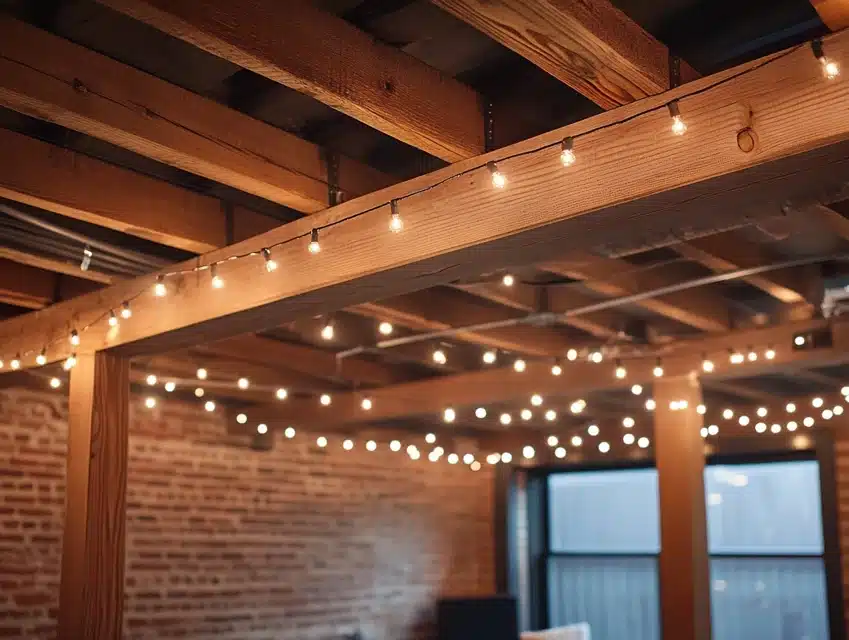
Adding string lights to an exposed ceiling creates a cozy, inviting glow in your basement.
I’ve used this idea in family rooms and casual hangout spaces where warm lighting adds a sense of comfort.
The lights draped across beams or pipes give the room a whimsical, festive feel.
You can choose soft, warm bulbs for a relaxed atmosphere or colorful ones for a playful touch. String lights are also a great budget-friendly option to elevate the design of an exposed ceiling.
DIY Steps:
- Choose string lights that complement your room’s aesthetic, such as warm white or Edison-style bulbs.
- Attach hooks or clips to the ceiling beams or pipes at regular intervals.
- Drape the lights across the hooks, arranging them evenly for a balanced look.
- Plug in the lights and test the placement, adjusting as needed for the perfect glow.
10. Black and White Contrast
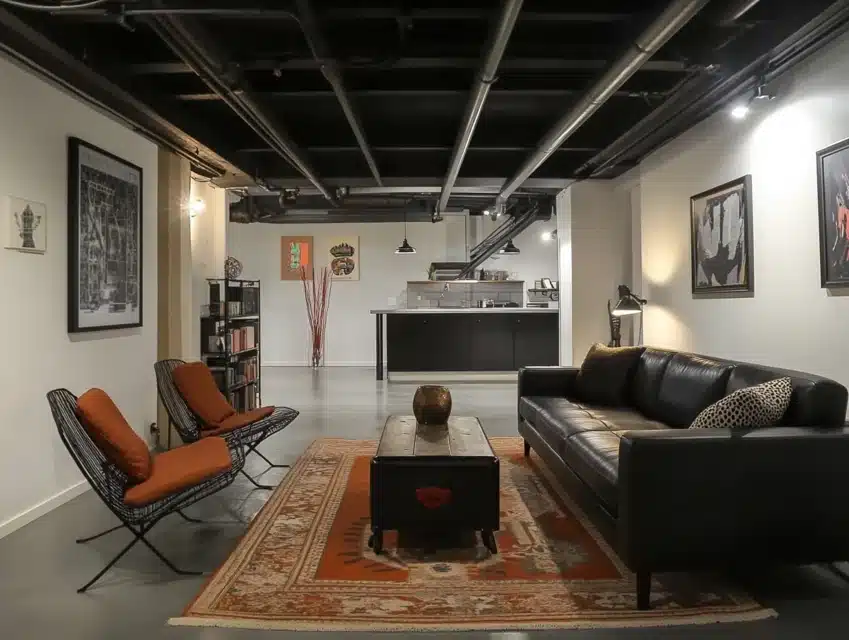
A black ceiling paired with white walls creates a striking, bold contrast that adds depth to your basement.
I’ve seen this look work particularly well in modern or industrial designs.
The black paint on the ceiling highlights the exposed pipes and beams, while the white walls keep the space feeling bright and open.
This high-contrast style is perfect for media rooms or sleek, minimalist basements. Adding metal or wood accents can enhance the modern vibe even further.
DIY Steps:
- Clean the ceiling and walls thoroughly to prepare for painting.
- Use painter’s tape to protect the walls while painting the ceiling black.
- Apply a primer coat to the ceiling, then use a roller or spray gun for even application of black paint.
- Once the ceiling is dry, paint the walls white for a clean, crisp finish.
- Remove the tape carefully and touch up any edges for a polished look.
11. Textured Wooden Panels
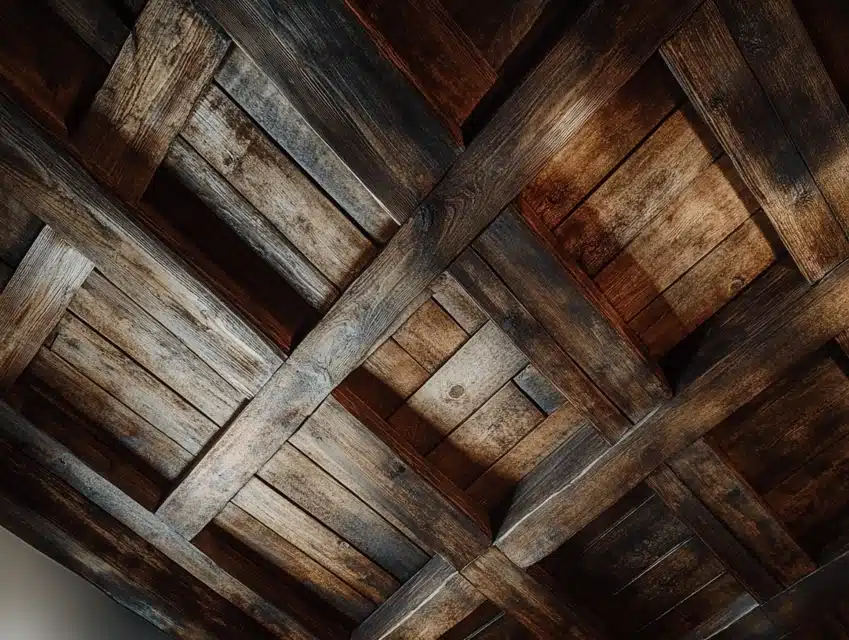
Installing textured wooden panels between beams adds warmth and character to an exposed ceiling.
I’ve used this idea in basements where clients wanted a rustic yet polished look. The natural texture of the wood brings depth to the ceiling, making the space feel cozy and inviting.
This design pairs beautifully with neutral tones and soft lighting, creating a balance between rustic and modern styles. It’s a great option for basements used as family rooms or creative spaces.
DIY Steps:
- Measure the gaps between beams to determine the size of the wooden panels needed.
- Cut panels to fit, or purchase pre-cut options.
- Sand and stain the panels to achieve the desired finish.
- Attach the panels to the beams using screws or adhesive, ensuring they are evenly spaced.
- Add lighting or decorative elements to enhance the overall design.
12. Ceiling with Exposed Brickwork
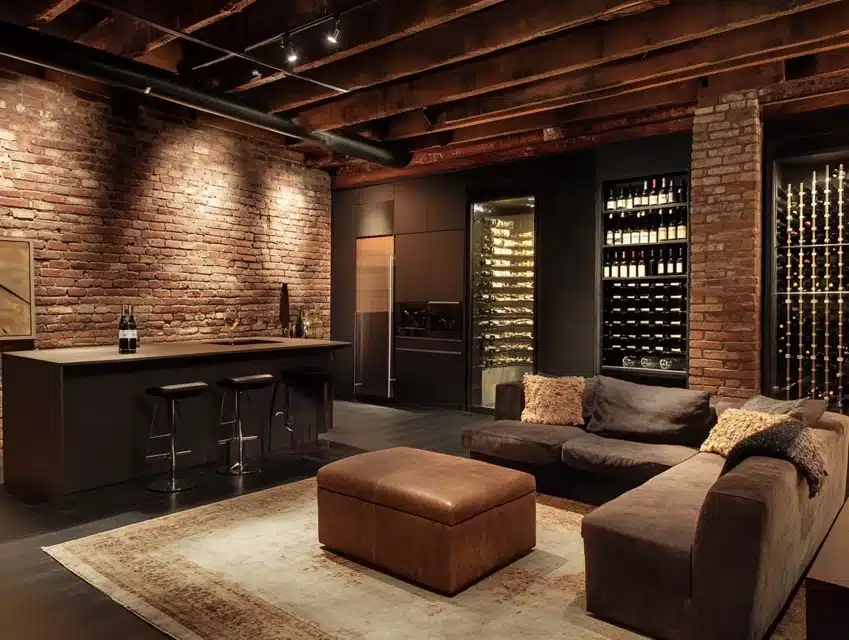
Exposed brickwork on the ceiling adds a rustic-industrial touch that’s both bold and timeless.
I’ve seen this style work wonders in basements with high ceilings, where the exposed bricks add texture and visual interest. The warm tones of the bricks pair well with wood, metal, or neutral furnishings.
This look is perfect for basements transformed into wine cellars, cozy lounges, or game rooms. Adding dim, warm lighting enhances the natural beauty of the bricks.
DIY Steps:
- Clean the exposed bricks to remove dust and dirt.
- Seal the bricks with a clear matte finish to protect them and enhance their color.
- Install recessed lighting or wall-mounted fixtures to highlight the brickwork.
- Pair the ceiling with complementary decor, such as industrial furniture or natural materials, for a cohesive design.
13. Light Gray Beams with White Ducts
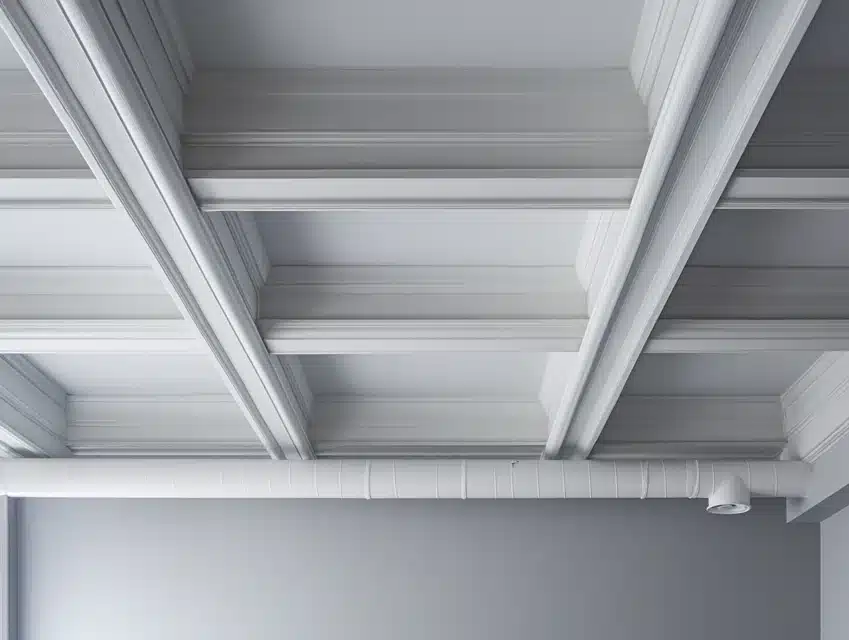
Light gray beams combined with white ducts create a soft, balanced look that’s clean and modern.
I’ve used this idea in basements where clients wanted a subtle yet stylish design.
The gray tones on the beams add just enough contrast to highlight the structure, while the white ducts keep the space feeling airy.
This style works particularly well in multifunctional basements, such as home offices or playrooms. It’s simple yet sophisticated, allowing you to focus on the rest of the decor without overwhelming the room.
DIY Steps:
- Clean and dust the beams and ducts to prepare for painting.
- Use painter’s tape to section off the beams from the ducts for precise painting.
- Apply light gray paint to the beams and white paint to the ducts, using a roller for large surfaces and a brush for detailed areas.
- Let the paint dry, then apply a second coat for a polished finish.
14. Industrial Exposed Pipes

Exposing and emphasizing pipes can turn them into a design feature rather than something to hide.
I’ve worked on several basements where simply painting the pipes a metallic silver or black created an edgy, industrial vibe.
The pipes add character to the space and are particularly striking when paired with raw concrete or brick walls.
This look is perfect for game rooms or creative spaces that embrace a raw, urban aesthetic. Adding complementary industrial lighting, like Edison bulbs, completes the look beautifully.
DIY Steps:
- Clean and sand the pipes to remove any dirt or rust.
- Apply a metal primer to ensure the paint adheres properly.
- Paint the pipes in your chosen color, such as silver, black, or even bold hues for a fun twist.
- Add lighting or decor elements that highlight the industrial charm of the exposed pipes.
15. Farmhouse-Inspired Ceiling
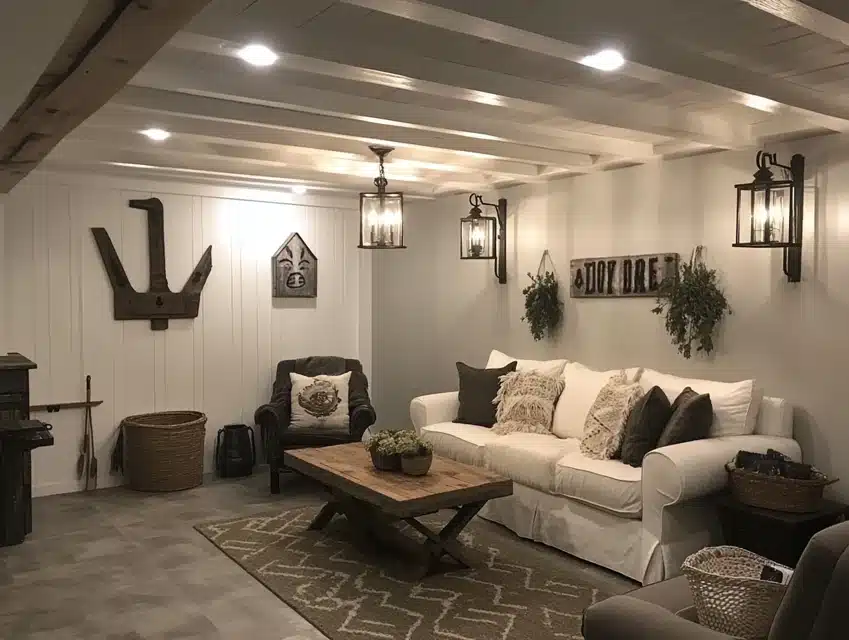
A farmhouse-inspired ceiling brings warmth and charm to your basement.
I love combining white-painted beams with rustic lantern-style lighting for a cozy, inviting atmosphere.
The contrast between the soft white and the rugged design elements makes the space feel balanced and approachable.
This style pairs wonderfully with wooden furniture and earthy tones, creating a space that feels like a retreat from the rest of the house. It’s perfect for family gathering areas or a guest suite.
DIY Steps:
- Paint exposed beams white to achieve a fresh, farmhouse look.
- Install rustic lanterns or pendant lights to enhance the theme.
- Sand and stain any wooden elements to match the overall aesthetic.
- Add finishing touches like soft rugs or neutral furnishings to complement the ceiling design.
16. Exposed Ceiling with Recessed Lighting
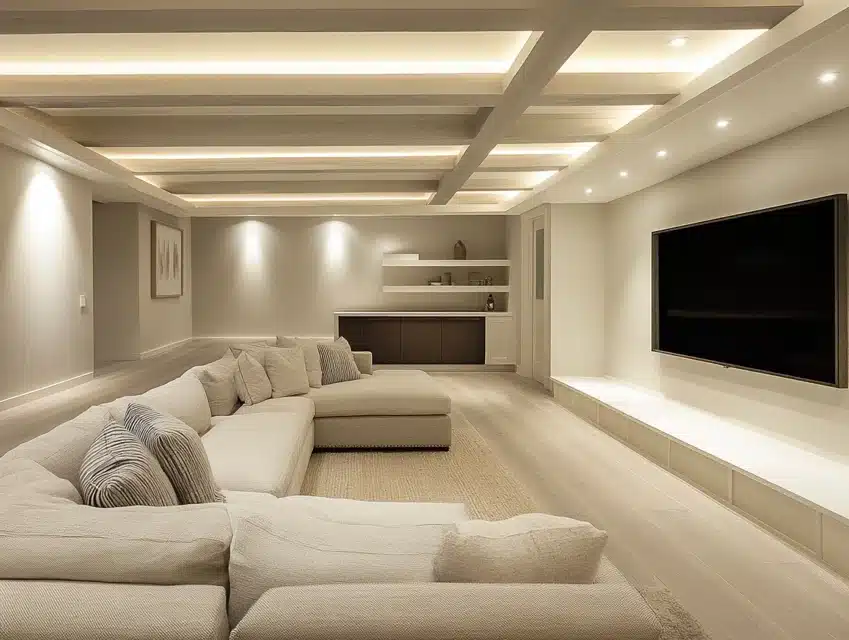
Recessed lighting in an exposed ceiling adds a sleek, contemporary touch.
I’ve worked on basements where recessed lights were integrated into exposed beams or panels, creating a clean and streamlined look.
This style is modern and practical, as it provides excellent lighting without taking up additional space.
The soft glow of recessed lights works especially well in media rooms or basements designed for entertaining. Pair it with neutral-colored ceilings to enhance the effect of the lighting.
DIY Steps:
- Plan the layout of the recessed lights, ensuring they’re evenly spaced and highlight key areas of the room.
- Hire an electrician to wire and install the lights safely and professionally.
- Paint or finish the exposed beams or panels to complement the lighting.
- Test the lights to ensure they create the desired ambiance and adjust if needed.
17. Black Ceiling with Spotlights

A black ceiling paired with spotlights creates a bold, dramatic vibe.
This style works wonders in basements designed as media rooms or personal theaters.
The dark ceiling absorbs light, reducing glare, while the spotlights highlight specific areas like seating or artwork.
It’s a sophisticated look that balances function with style.
This design pairs beautifully with neutral walls and plush furnishings, creating an upscale yet cozy atmosphere perfect for entertainment spaces.
DIY Steps:
- Clean and prepare the ceiling for painting by removing dust and debris.
- Paint the ceiling black using a roller or spray gun for even coverage.
- Install adjustable spotlights along the beams or exposed pipes, focusing on key areas of the room.
- Test and adjust the lighting to create the perfect ambiance for your space.
18. Stained Wood Exposed Ceiling
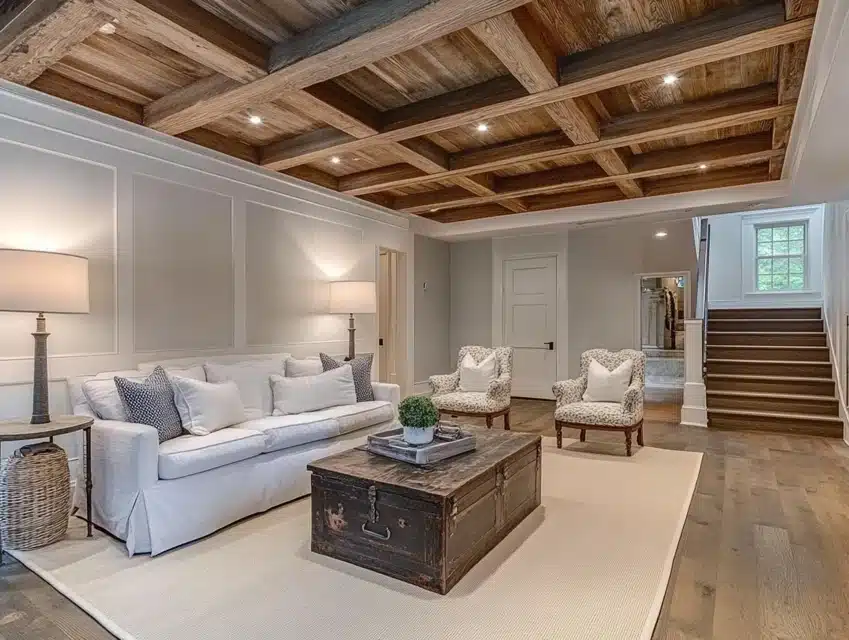
Staining wooden beams in a rich tone brings out their natural texture and adds elegance to your basement.
I’ve worked with clients who wanted their ceilings to be a focal point, and this design never disappoints. The stain enhances the grain of the wood, creating a warm, inviting look that pairs beautifully with rustic or traditional decor.
It’s an excellent choice for basements used as living rooms, guest areas, or even home libraries, adding a sense of sophistication to the space.
DIY Steps:
- Sand the wooden beams to remove old finishes and smooth out rough edges.
- Choose a stain color that complements your overall decor.
- Apply the stain evenly with a brush or cloth, working along the grain of the wood.
- Allow the stain to dry completely, then seal the beams with a clear protective finish.
19. Ceiling with Painted Ductwork

Painting ductwork in bold or metallic colors transforms them into a design statement.
I’ve used this approach in basements where clients wanted an industrial edge with a pop of personality.
Bright colors like teal or mustard create a playful vibe, while metallics like copper or silver lean into a modern, industrial aesthetic.
This design is great for home gyms, playrooms, or creative spaces, where a bit of fun and boldness adds energy to the room.
DIY Steps:
- Clean and sand the ductwork to remove dirt or rust.
- Apply a primer to ensure the paint adheres smoothly.
- Paint the ducts using a roller or spray paint in your chosen color.
- Let the paint dry and touch up any areas for a flawless finish.
20. Bare Ceiling with Skylights
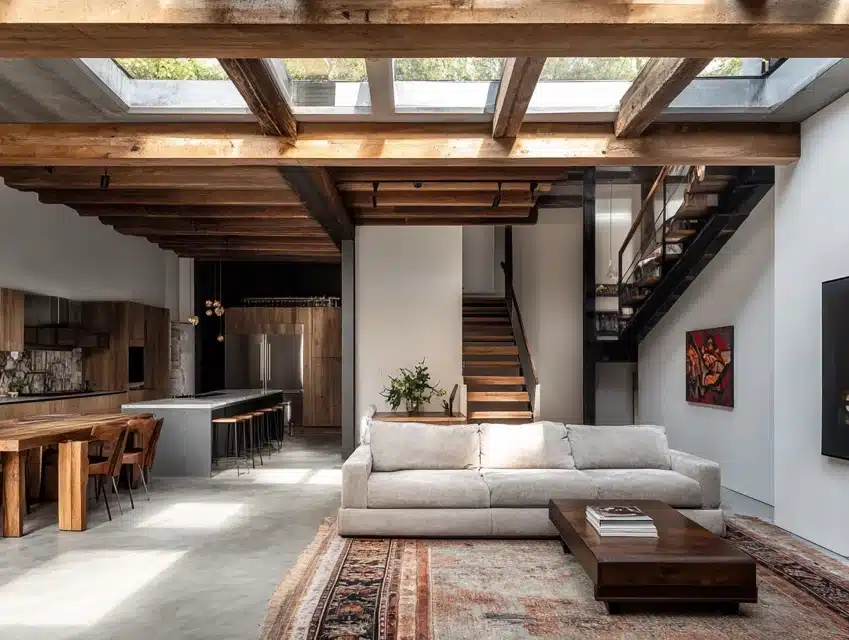
A bare ceiling with skylights brings in natural light and creates an open, airy feel.
I’ve seen this design completely transform dark, enclosed basements into bright, welcoming spaces.
The raw, unfinished look of the ceiling contrasts beautifully with the clean, modern lines of skylights, making the space feel both raw and polished.
This idea is perfect for basements converted into art studios, home offices, or play areas where natural light is essential.
DIY Steps:
- Consult a contractor to ensure your basement’s structure can support skylights.
- Choose skylight styles that suit your aesthetic, such as flat or domed designs.
- Install the skylights to maximize natural light without compromising insulation.
- Pair the bare ceiling with neutral furnishings to keep the focus on the light-filled design.
21. Raw Steel Beams
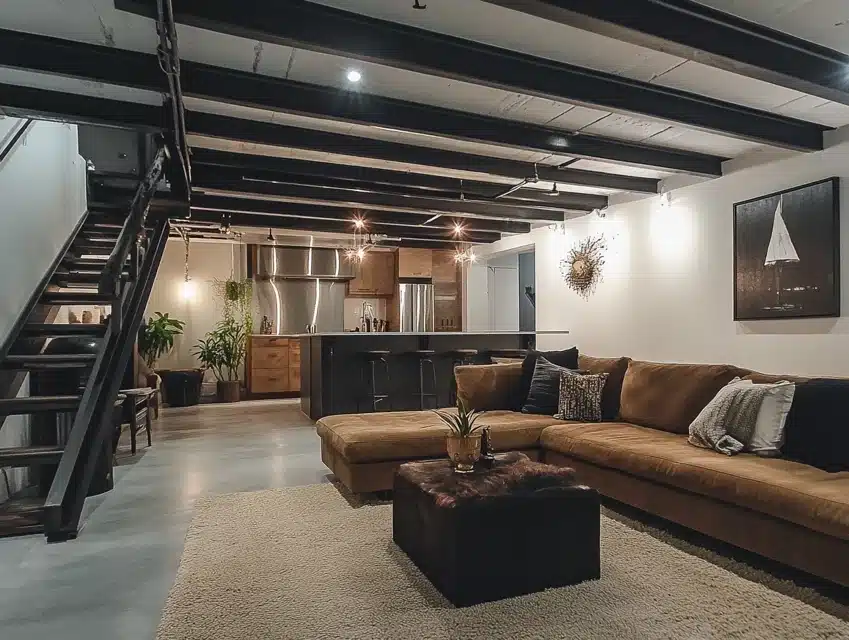
Raw steel beams bring an unapologetically industrial look to your basement.
I’ve worked on projects where leaving steel beams untreated created a bold, rugged vibe that perfectly suited urban-inspired spaces. The raw finish showcases the material’s natural strength and texture, making it a standout feature.
This style pairs beautifully with concrete floors and brick walls, creating a cohesive industrial aesthetic. It’s ideal for basements converted into workshops, gyms, or creative studios.
DIY Steps:
- Clean the steel beams to remove dirt, rust, and debris.
- Apply a clear protective sealant to prevent corrosion while maintaining the raw finish.
- Add complementary industrial lighting, such as Edison bulbs or metal pendants, to highlight the beams.
- Pair with minimalist or industrial decor to enhance the overall look.
22. Whitewashed Wooden Ceiling
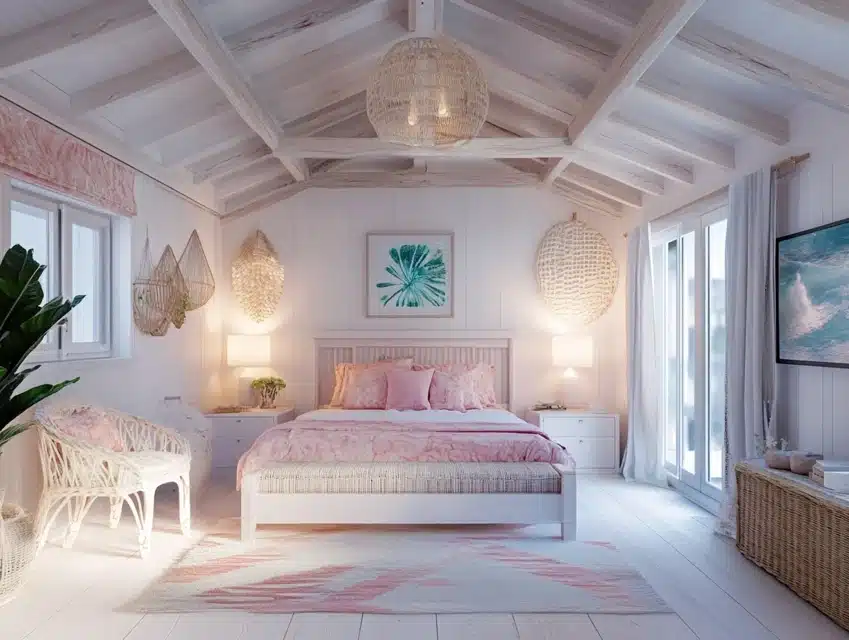
A whitewashed wooden ceiling adds a soft, beachy vibe to your basement.
I’ve found this look particularly charming in spaces designed for relaxation or family gatherings.
The whitewashed finish tones down the wood’s natural warmth, creating a light and airy feel while still showing off the texture of the grain.
This style works wonderfully with pastel tones, neutral furnishings, or coastal decor, making the basement feel open and inviting.
DIY Steps:
- Sand the wooden beams to remove any existing finish.
- Mix white paint with water to create a whitewash solution.
- Apply the whitewash with a brush, wiping off excess paint with a cloth to achieve the desired look.
- Seal the beams with a matte finish to protect the wood while maintaining the rustic effect.
23. Open Ceiling with Hanging Pendant Lights

Hanging pendant lights add a functional and decorative element to an open ceiling.
I’ve used this design in basements where clients wanted a mix of modern and industrial styles. The exposed ceiling paired with sleek pendant lights creates a striking visual effect.
You can customize the pendants to suit your decor, choosing materials like metal, glass, or even fabric shades.
This approach works well in dining areas, bars, or game rooms where focused lighting is needed.
DIY Steps:
- Select pendant lights that match your style and space requirements.
- Install electrical wiring for the lights, ensuring safety and proper placement.
- Attach the pendant lights to the ceiling beams or pipes using brackets or hooks.
- Adjust the height of the lights to balance functionality and aesthetics.
24. Ceiling with Accent Paint
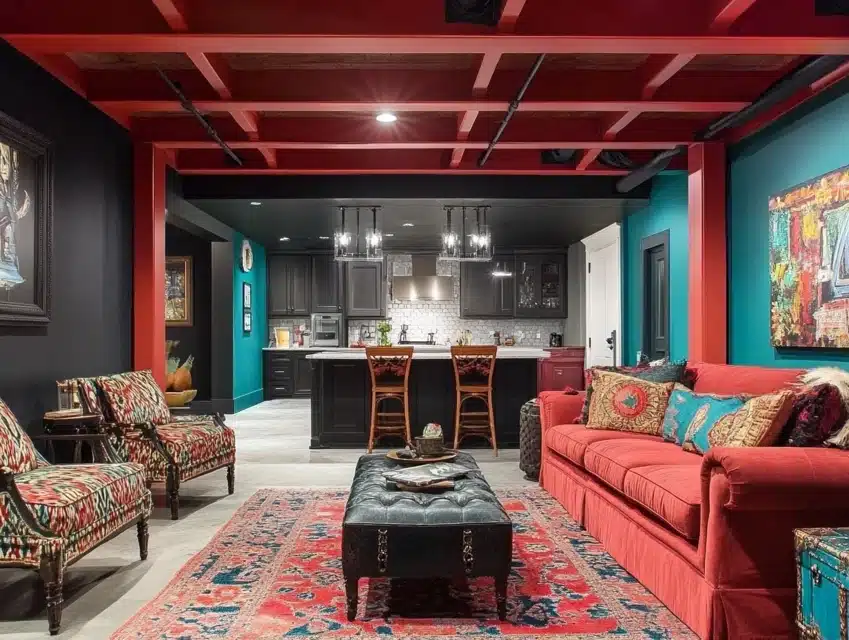
Using accent paint on an exposed ceiling adds personality and flair to your basement.
I’ve seen how painting beams or ducts in bold colors like teal, mustard, or deep red can make a space feel playful and unique. This idea is perfect for basements used as playrooms, hobby spaces, or casual lounges.
The accent paint creates visual interest while allowing you to experiment with color without overwhelming the room.
DIY Steps:
- Choose an accent color that complements your overall decor.
- Clean and sand the beams, ducts, or pipes to prepare for painting.
- Apply a primer coat to ensure the paint adheres smoothly.
- Use a brush or roller to apply the accent paint, adding a second coat if needed for full coverage.
- Let the paint dry completely before adding any additional decorative elements.
25. High-Gloss Black Finish
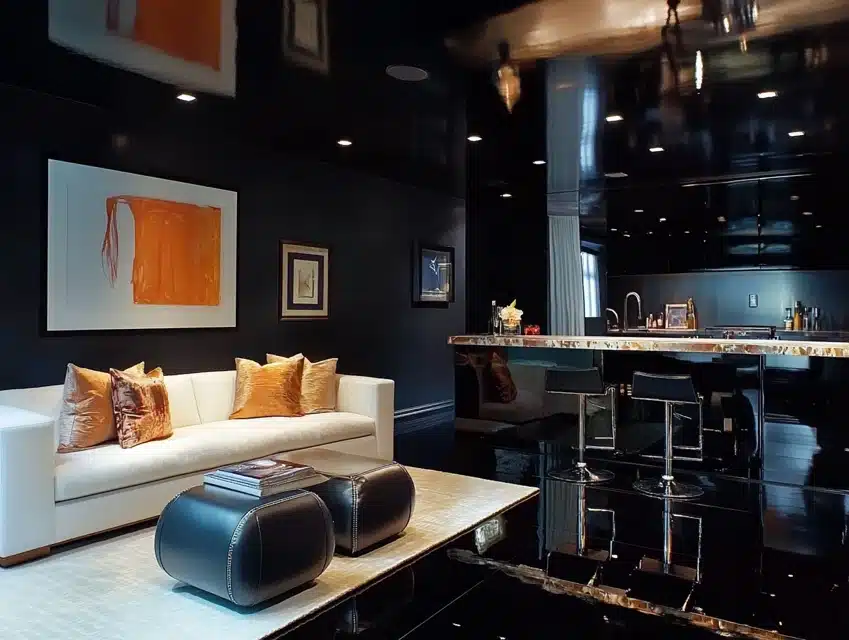
A high-gloss black ceiling adds a sleek, polished industrial vibe to your basement.
This approach works wonders in entertainment spaces like home theaters or game rooms. The glossy finish subtly reflects light, adding depth and sophistication to the room.
Paired with neutral walls or metallic accents, it creates a striking, modern look.
This design is perfect for basements where you want to combine drama with a touch of elegance.
DIY Steps:
- Clean and prep the ceiling by dusting and smoothing any rough spots.
- Apply a primer to help the paint adhere evenly.
- Use a high-gloss black paint, applying it with a roller or spray gun for a smooth finish.
- Let the first coat dry, then apply a second coat to ensure a flawless, reflective surface.
- Add lighting fixtures to highlight the glossy texture.
26. Exposed Ceiling with Fabric Panels
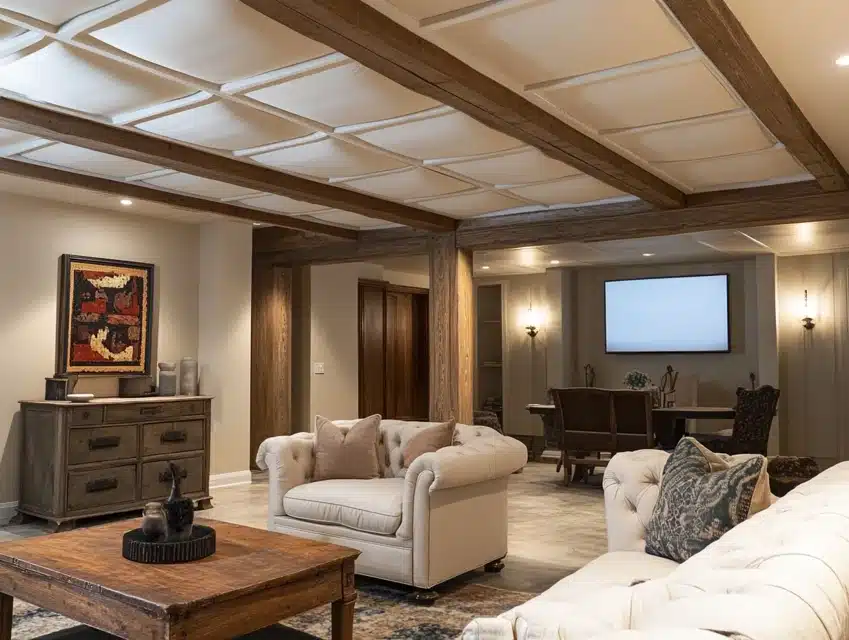
Hanging fabric panels between beams softens the look of an exposed ceiling while improving acoustics.
I’ve used this design in basements converted into music rooms, playrooms, or quiet retreat areas.
The fabric adds a touch of elegance and can be customized in different colors or patterns to match your decor.
This idea is not only stylish but also functional, as it helps reduce noise and echoes in open spaces.
DIY Steps:
- Measure the spaces between beams to determine the size of fabric panels needed.
- Choose fabric that complements your room’s design and is durable enough for ceiling use.
- Attach the fabric to the beams using staples, hooks, or rods for a tailored look.
- Smooth out wrinkles and secure the edges to create clean lines.
27. Bare Ceiling with Hanging Plants

Adding hanging plants to an exposed ceiling brings a natural, vibrant touch to your basement.
I’ve found this idea particularly refreshing in basements that lack natural light. The greenery softens the industrial feel of exposed beams and pipes, creating a lively, organic atmosphere.
For low-maintenance decor, you can use real plants with grow lights or opt for lifelike artificial greenery.
This style is great for relaxing lounges or creative spaces where a touch of nature enhances the ambiance.
DIY Steps:
- Choose hanging planters that suit your decor and space requirements.
- Install hooks or brackets on the beams to hold the planters securely.
- Fill the planters with real or artificial plants, adding soil and moss if needed.
- Position the plants at varying heights for a dynamic, layered look.
28. Ceiling with Industrial Fans

Industrial ceiling fans add a functional and aesthetic element to an exposed ceiling.
I’ve installed these in basements used as home gyms, workshops, or lounge spaces where proper air circulation is essential.
The metal blades and bold design of industrial fans pair beautifully with exposed beams and pipes, reinforcing the industrial theme.
This approach keeps the space cool and adds a unique design feature to the room.
DIY Steps:
- Select an industrial-style fan that fits the size and design of your basement.
- Ensure proper electrical wiring is in place for safe installation.
- Mount the fan securely to a beam or ceiling joist, following the manufacturer’s instructions.
- Test the fan for stability and function, adjusting as needed.
29. Minimalist All-Natural Look
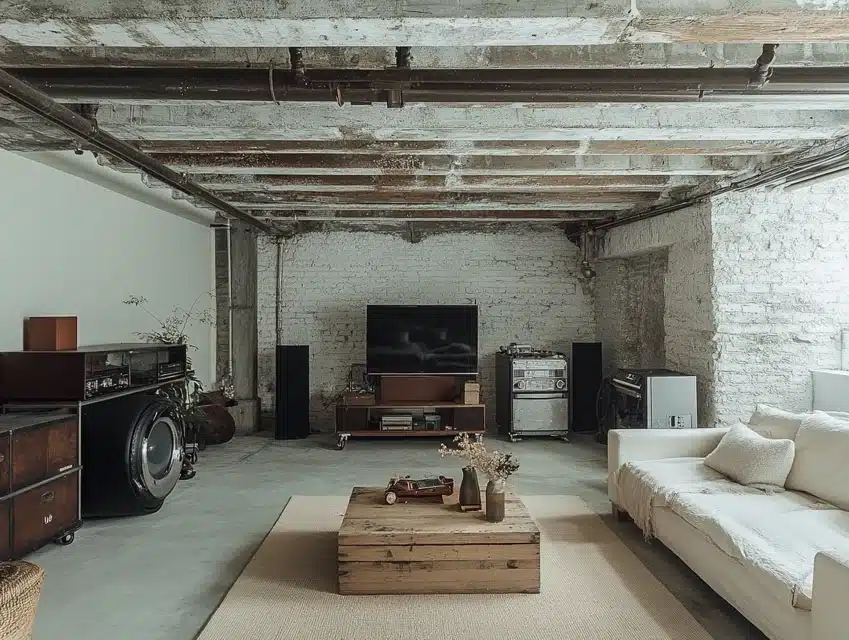
Leaving everything in its original state, including pipes, beams, and wires, creates an ultra-modern raw aesthetic.
This approach works wonders in basements designed for creative or industrial spaces. By embracing the untouched look, the room feels authentic and effortlessly stylish.
The key is to clean up and organize the exposed elements so the design appears intentional rather than unfinished.
This minimalist style pairs beautifully with neutral furniture and simple decor, making it perfect for loft-inspired basements or artistic studios.
DIY Steps:
- Clean the exposed beams, pipes, and wires thoroughly to remove dirt and dust.
- Seal any wooden or metallic surfaces with a clear protective finish to prevent wear.
- Organize wires and cables using clips or brackets for a clean look.
- Add minimalist furnishings and lighting to complement the natural aesthetic.
30. Color-Coordinated Ceiling
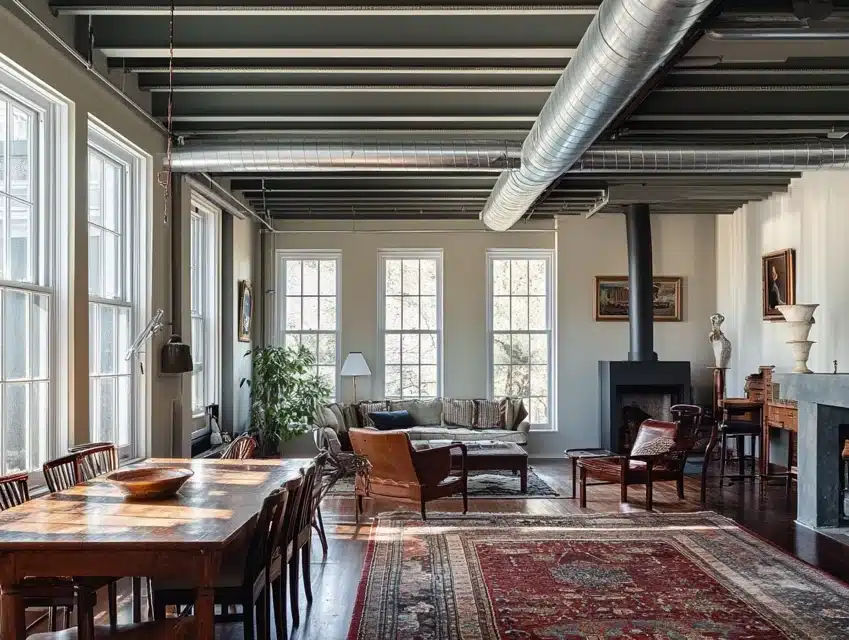
A color-coordinated ceiling ties the design of your basement together seamlessly.
I’ve used this idea in basements where clients wanted a cohesive, polished look.
Matching the ceiling’s paint color with the room’s decor creates a unified aesthetic, making the space feel balanced and intentional.
Whether you choose bold or neutral tones, this approach highlights the ceiling as part of the overall design.
This style works particularly well in basements that serve as multifunctional spaces, like guest rooms or lounges.
DIY Steps:
- Select a paint color that complements the room’s overall palette.
- Clean the ceiling elements and apply a primer coat.
- Use a roller or spray gun to paint beams, ducts, and pipes in the chosen color.
- Add decor elements that echo the ceiling’s color to enhance the coordinated look.
Pros & Cons of Exposed Basement Ceiling
Pros
1. Increased Ceiling Height Perception
Exposed ceilings eliminate the need for additional materials like drywall or drop panels, making the room feel taller.
This is especially valuable in basements with low ceilings, where every inch counts.
The open design creates a sense of spaciousness, even in smaller or more confined areas.
2. Cost Savings Compared to Traditional Ceilings
Finishing a ceiling with drywall or other materials can be costly, particularly if your basement has extensive mechanical systems to cover.
Exposed ceilings save on labor and material costs while offering an intentional, polished look with the right finishing touches.
3. Modern and Industrial Aesthetic Appeal
The raw, unfinished appearance of an exposed ceiling complements modern and industrial decor styles.
It brings character and visual interest to the space, blending seamlessly with elements like brick walls, metal fixtures, or minimalist furniture.
4. Easy Access to Mechanical Systems
One of the most practical advantages of an exposed ceiling is its easy access to plumbing, electrical, and HVAC systems.
Repairs or updates can be completed without tearing down or patching finished materials, saving time and money in the long run.
Cons
1. Potential Noise Issues
Without the soundproofing provided by traditional ceiling finishes, exposed ceilings can amplify noise from upstairs or mechanical systems.
Sound-absorbing materials like fabric panels or acoustic tiles can address this, but these additions may increase costs.
2. Exposure of Unsightly Mechanical Elements
While some find the raw look of pipes and ducts appealing, others may see them cluttered or unattractive.
Creative solutions, such as painting the elements to blend with the ceiling or incorporating decor to mask them, can help mitigate this issue.
3. Insulation and Energy Efficiency Concerns
Exposed ceilings often lack the insulation that finished ceilings provide, leading to energy loss.
Insulating pipes and ducts or adding radiant barriers can improve efficiency, but these measures require careful planning to maintain the aesthetic appeal.
Final Thoughts
Exposed basement ceilings can be a transformative design element that adds personality, style, and practicality to your space.
By embracing the raw structure of beams, pipes, and ductwork, you create an aesthetic that ranges from rustic to modern industrial.
The beauty of exposed ceilings lies in their versatility—you can enhance them with paint, natural finishes, or creative decor elements like lighting and greenery.
Whether working with a tight budget or aiming for a high-end look, there’s a solution to fit your needs.
Remember, ensuring functionality and safety while letting your style shine through is key.
With thoughtful planning and creativity, your exposed basement ceiling can become a standout feature in your home.
Frequently Asked Questions
How Can I Make My Exposed Basement Ceiling Look Better?
You can improve the look by painting it in cohesive colors, adding decorative lighting like string lights or pendants, and organizing wires and pipes for a cleaner appearance.
Consider incorporating textures like wood panels or fabric to soften the industrial feel while maintaining the exposed charm.
What Are Cost-Effective Methods to Finish My Basement Ceiling?
Painting the ceiling is one of the most budget-friendly options, requiring minimal materials and effort.
Another cost-effective solution is to use recycled or upcycled materials like pallet wood for decor. String lights or DIY fabric panels are affordable ways to enhance the space.
Which Colors Work Best for Painting an Exposed Ceiling?
Neutral tones like white, gray, and black are popular, as they adapt well to different styles.
Black adds a dramatic, industrial look, while white brightens and opens the space.
Gray offers a modern and balanced aesthetic, and bold accent colors can add personality to creative spaces.

