Are you willing to change the tiles of your home?
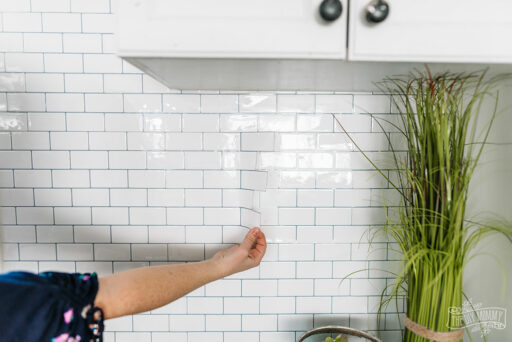
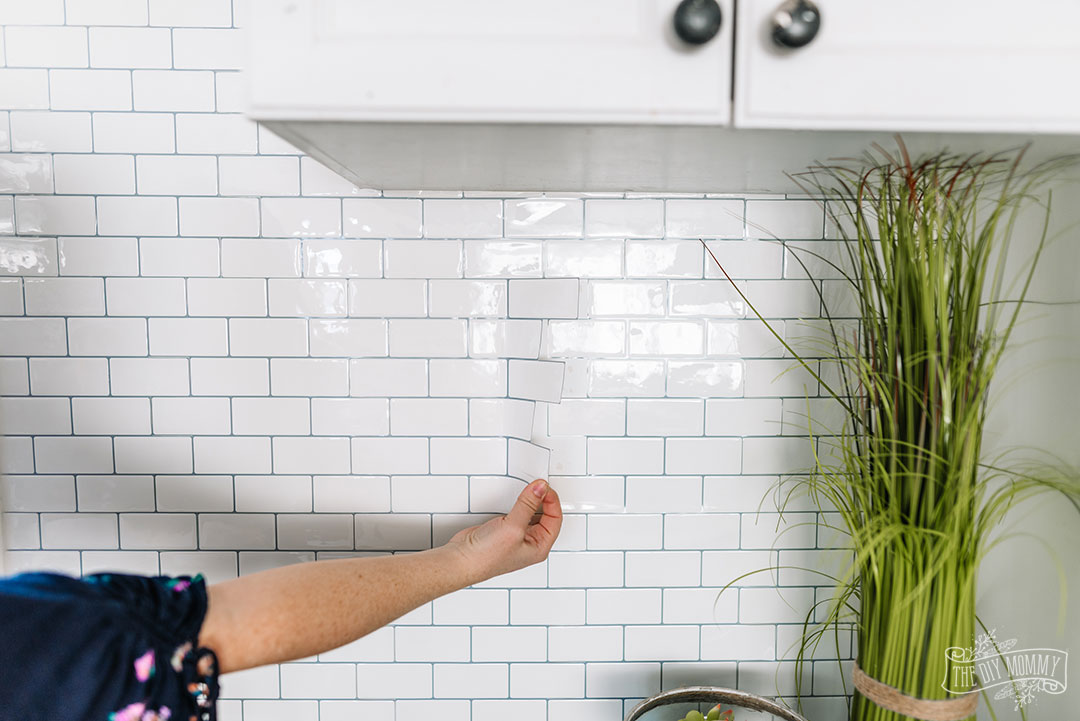
Peel and stick tiles are one of the easiest and most affordable options to bring newness to your space. The procedure to apply the tiles is comparatively easy and does not require professional help.
However, in some cases, a small mistake in placing the tile can result in a compromising look on the floor or wall. If you know how to grout for peel-and-stick tile, this problem can be solved.
Grouting is a process that enhances the overall look of your surface after applying the tiles. Knowing how to use the grout and when to apply it is necessary.
This article shares how grouting can help you while using peel-and-stick tiles. It also shares a detailed description of how the grouting process should look.
Read ahead to learn grout for peel-and-stick tile.
Why Are There Gaps in The Peel and Stick Tile?
Before jumping on to the question of grouts, let us understand the reason for the gaps between the peel-and-stick tiles. One of the main reasons people opt for such kinds of tiles is due to the easy installation process.
Having marble, stone, ceramic, or other tiles requires much more time and resources. As the peel-and-stick tiles are directly placed on the surface, there might be some leveling issues. This leads to the need for grout for peel-and-stick tiles.
Some of the main reasons why there are gaps are as follows.
- Improper Leveling: Old homes that have not been renovated for years do not have a smooth and leveled surface. When peel-and-stick tiles are applied on such surfaces, gaps are created between every tile. The best option is to level the surface before applying the tiles. This way, you will avoid the gaps and won’t need to go through the grouting process.
- Incorrect Tile Cutting: You need to know the exact area on which the tiles will be placed. Measure the area and cut the tiles according to the area in shapes of your choice. Use a sharper knife to make sure that the cuts are smooth and precise. If the material of your peel-and-stick tile requires trimming, don’t forget to do it.
- Excess Adhesive: Extra adhesive on the back of such tiles can lead to gaps between the different shapes. Some adhesive backing needs to be stripped away before sticking the tile. Read the instructions manual carefully before beginning the process. Follow the steps necessary to affix your specific tile material.
- Humidity in the Room: Excessive humidity can reduce the impact of adhesive. This can lead to peeling off of the tiles. Try using these kinds of tiles in a ventilated room. If you have to make it work in a humid environment, try using a dehumidifier.
These are some of the reasons why there might be gaps between the tiles. These gaps will lead to the process of grout for peel-and-stick tile. Let us understand what grouting is and how it helps.
What is Grout?
Once the tiles are installed, they sometimes leave a gap in between. Grout is a material used as a filler to fill the gaps and enhance the visuals of the floor or wall. It is a combination of cement, lime, color pigment, and sand.
It is mixed with water and applied to required spaces. The materials used in this mixture hold the tiles together and keep them grounded to the base surface.
Grouting a tile can be done at home with a simple understanding of the process. However, the process might differ when it comes to grout for peel-and-stick tile. If this is your first time, the article will help you understand it step-by-step.
Let us go through the process of grouting for peel-and-stick tiles.
How to Grout for Peel and Stick Tile?
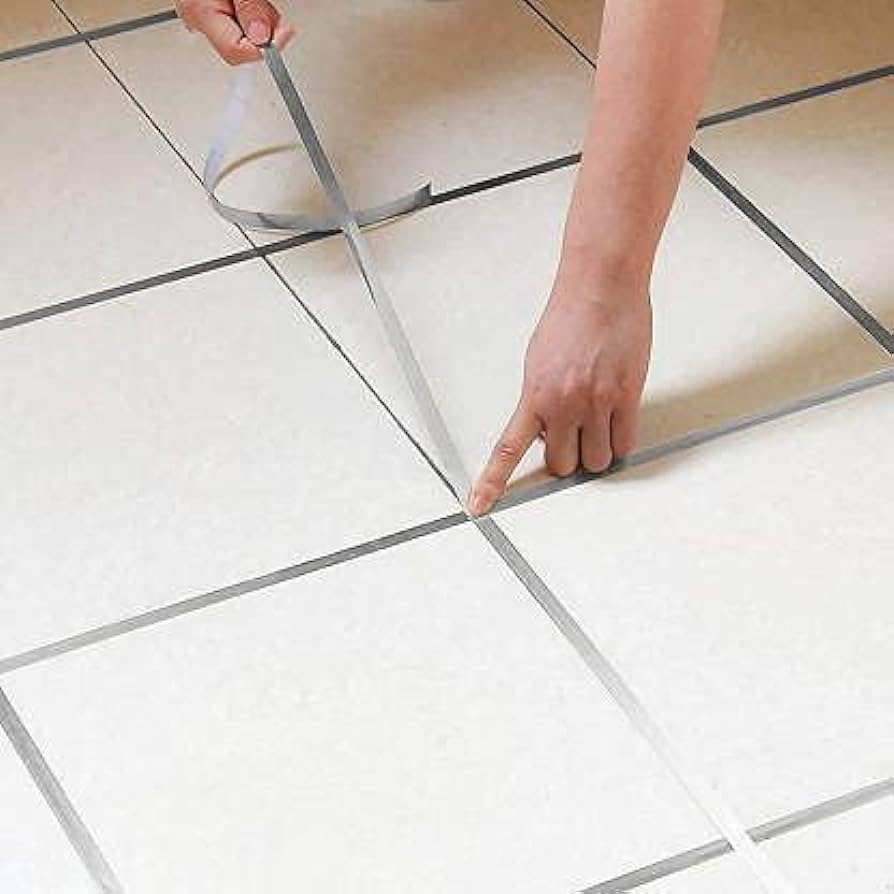
1. Affix the Tiles
The first and foremost step is to cut the tiles according to the measurement and stick them to the surface. You might want to consider leveling the floor so that you can avoid excessive unevenness afterward. Using peel-and-stick tile is just like a DIY process. It doesn’t matter if you are doing it for the first time. Just be focused and carry on the process.
Once you have covered the surface with tiles, it’s time to let them stick. If you are in a little hurry, apply some kind of pressure from the above so that they stick well. You can walk over the floor with lighter legs or get your kids to roam around on them. Within a few minutes, they will properly stick to the surface. Once they are affixed, it’s time to look for the gaps and apply the grout.
Now, it’s not always necessary to grout for peel-and-stick tile only in case of a gap. There can be a situation when your tiles might look perfectly aligned.
However, you wish to add the grout to the bond and work on the minutest and negligible gaps between the tiles. Grouting will strengthen the foundation of the structure.
2. Prepare the Mixture of Grout
Now, it’s time to prepare the grout mixture for application. You can get a readymade mixture from Amazon, depending on your choice. There are two main categories when it comes to grout mixture. You will either find a sanded grout or an unsanded grout.
Sanded grout is for wider gaps because it creates a hardened structure that doesn’t shrink. The unsanded grout is comparatively softer and shrinks with application.
Depending upon the gaps in between your tiles, you can select an appropriate grout mixture. Prepare the grout as per the instructions given on the packaging. Add water and create a consistency that is written on the mortar packet. Do not mix up large quantities of grout and create a mess. Use smaller quantities and keep making them as you need.
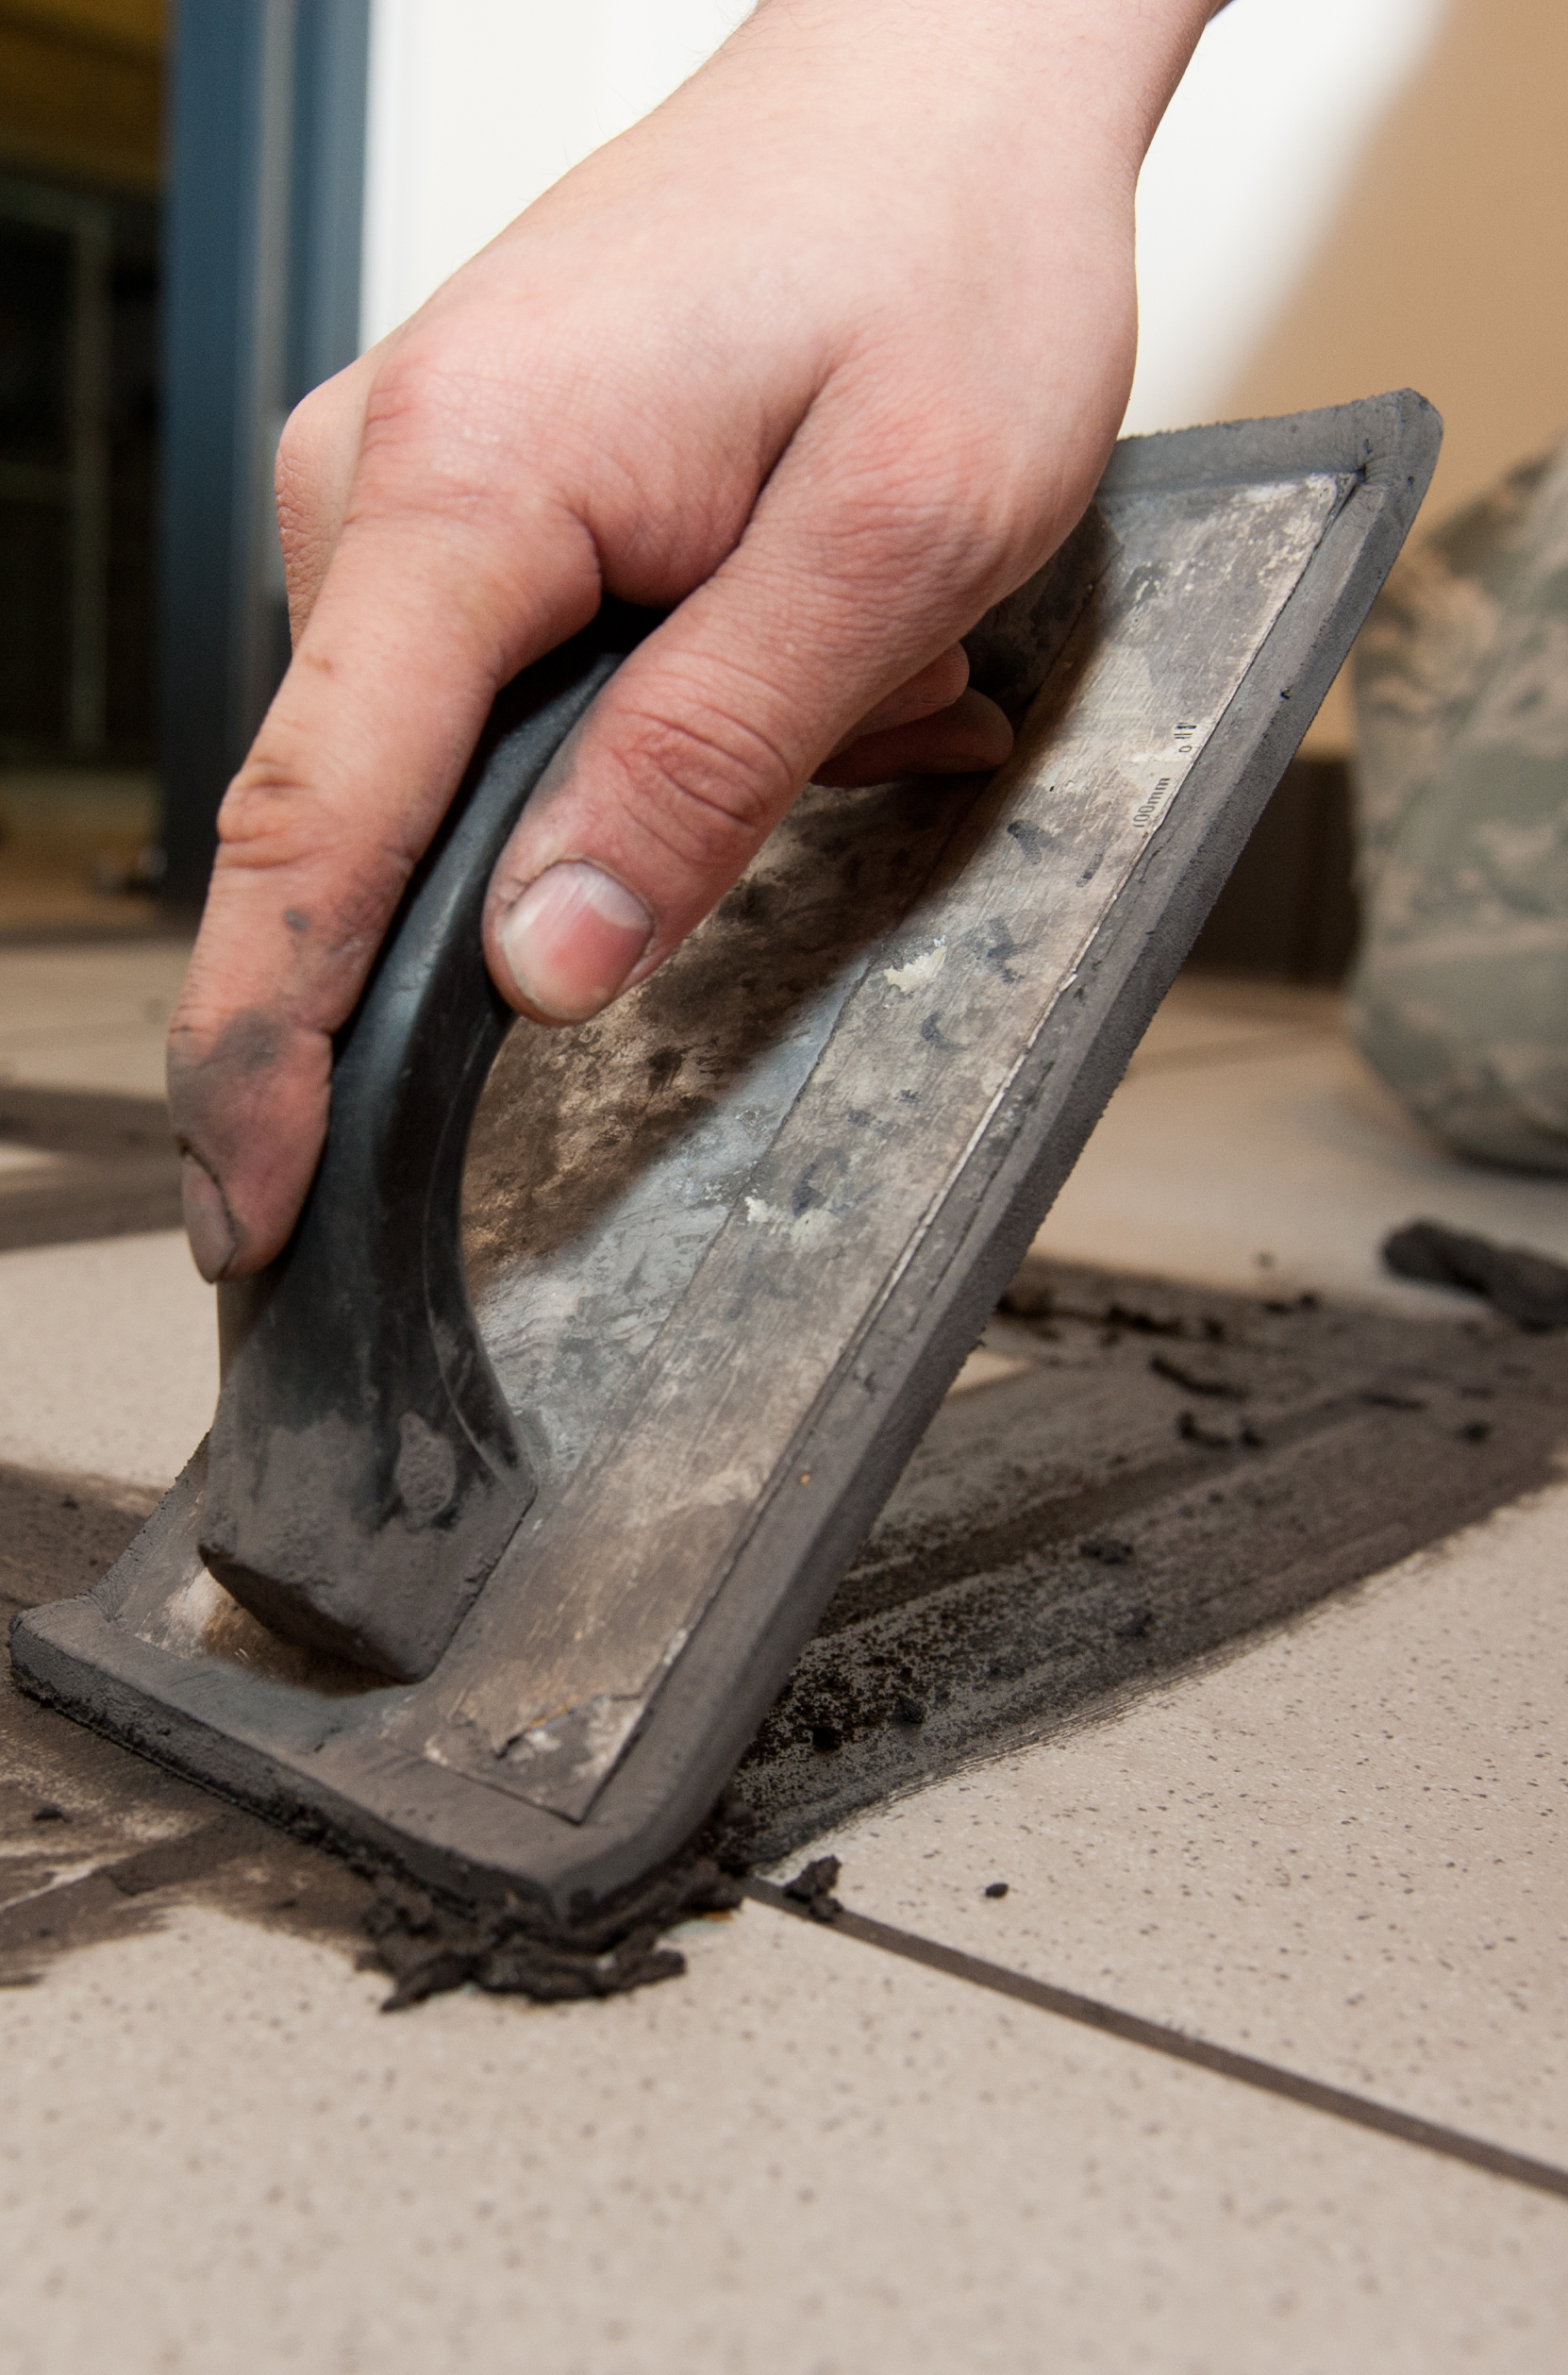
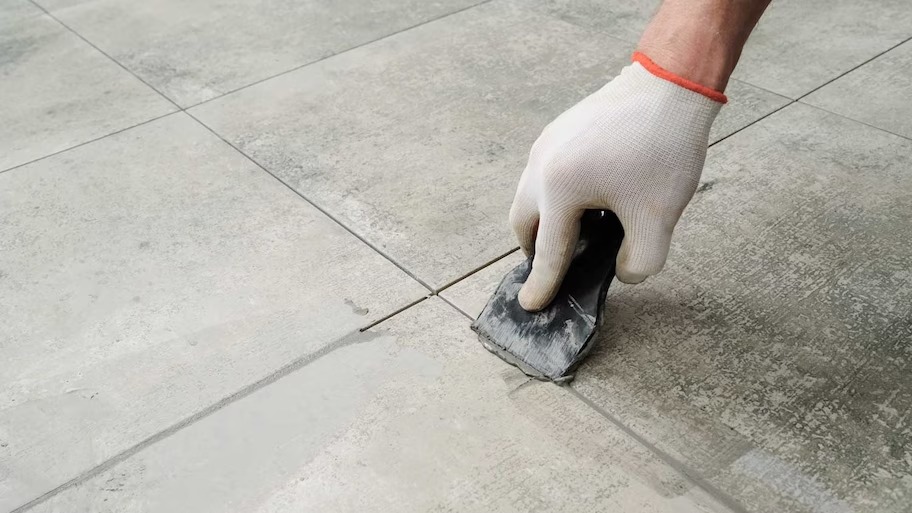
3. Begin Grouting
With the help of a rubber float, apply the mixture to the seams. See that every gap between the tiles is filled properly. Neatly push down the mixture at every seam to ensure consistent leveling. Keep moving the float back and forth or diagonally so that the grout gets into the gaps.
Some people opt for sectional grouting. They divide the whole area into 2-3 sections and work on each section independently. For every section, they apply the grout, clean the excess, and then move on to the next one.
Your way of grouting depends upon what you are most comfortable with. If doing it all at once seems like a good idea to you, go ahead. If it feels hectic, try breaking down your floor into small sections and work on it.
Once the grout is applied equally on the overall surface, it’s time to remove the excess. Use a tiling sponge to remove the excess grout from the tiles. This is a special sponge with a thick and dense texture with a rounded edge.
Be careful that you do not wipe off the grout from the gaps. Gently dip the sponge into the water and only remove the excessive grout from the tiles, not from the gaps.
Always have a bucket of water by your side while doing this process. You will need to clean the sponges frequently during the process. Once you have applied the grout, immerse your float and any other tools in water. The grout must have mistakenly spread to the adjoining walls or any other surrounding areas near the floor.
Observe everything and make sure to clean the grout on the spot. Once the grout dries on any surface, it becomes difficult to remove it. Keep your children away while doing this. They might end up getting dirty and increase your burden. There should be no grout in your home except on the floor with peel-and-stick tiles.
4. Remove the Grout Residue
Once the excessive grout has been removed, it’s time to wait. The waiting time depends upon the instructions given on the packaging. Some people wait for 4-6 hours, while some choose to wait for 1-2 days.
You will get an idea by observing the floor and feeling the grout for peel-and-stick tile. If the grout feels hard and settled, you can proceed with the removal of haze.
Despite cleaning the excessive grout from the tiles, there are chances that you might see some haze on the surface. Whenever the haze is visible, it’s time to do the cleaning again. Grout is a rigid substance that might leave its residue behind.
Thorough cleaning done multiple times will lead to its removal. With a cloth or a sponge soaked in water, you can again clean the tiles until they return to their original color.
5. Use a Grout Sealer
Grouts are open surfaces that come in contact with water and humidity regularly. If there is no layer of protection on the top, it might absorb moisture and become a home for bacteria, dirt, and molds.
Moreover, when this damage exceeds a certain level, the whole grouting process will have to be repeated. This can lead to more cost and work. Thus, using a grout sealer is necessary to create a protective layer over the grouting.
Grout sealers are made with a base of cement, chemicals, and water to cover the gaps. You can directly spray the sealers in the gaps between the tiles and wait for them to dry. Within 10-15 minutes, you can wipe the tiles and clean the surface. After it dries completely, put a few drops of water to test the layer.
If the water is absorbed by the grout, the layer is weak. In such a case, you will need to re-apply the sealer to strengthen the protection. Repeat the process until a strong layer is formed that does not absorb water.
How to Maintain Grout and Peel-Stick Tile?
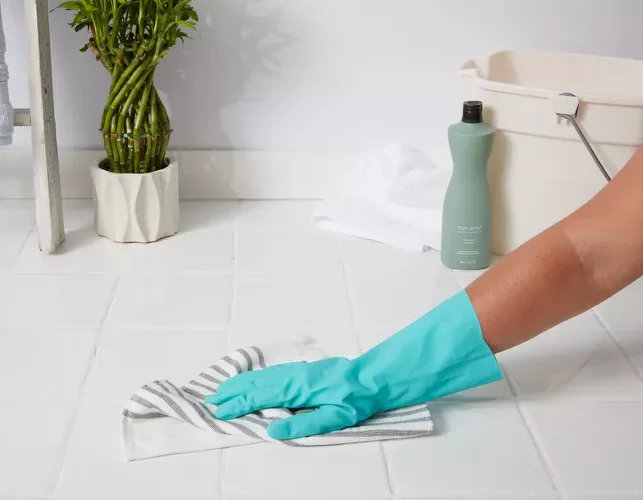
Once you have created a protective layer with grout amidst the tiles, they will last for years. However, it is necessary to take care of the peel-and-stick tiles regularly. Clean the tiles weekly with a bathroom cleaner and sponge to remove any dirt marks.
Make sure not to rub too hard on the grout. For cleaning the grout, use a special cleaner that removes the small dust particles from the gap in between.
If there is any damage in the grout due to any reason, you can use a grout repair kit that can quickly restore the gap. It is always advisable to consider a regrouting process if years have passed since the last grout. However, if you are unable to do that, at least fix the grout with this kit.
Keep observing the floor for any mold or bacteria buildup. Even the slightest amount of build-up can be dangerous for the health of your family. Take immediate action whenever you notice any such abnormalities in the grout or on the tiles.
Get an Authentic Look Using Grout for Peel and Stick Tile
Everyone loves to get a new look in their space. However, the cost of renovation and changes can be a great obstacle. With such tiles, it is easier to change the design and embrace new surroundings. The grout for peel and stick tile helps strengthen this foundation by keeping the tiles together.
Next time you feel like modifying your floor, bring all the materials and spend your weekend working on the process. You will be proud of yourself when you see a new pattern in your space within a few days. If it’s your first time and you are hesitating a little, no worries! Take help from a professional installer near you. They will make the process much easier for you.
Who knows? Maybe, by observing them, you might end up mastering this process of affixing tiles and grouting them.
So, which new design are you going to bring to your home?

Tommy Hardy, an alumnus of the Georgia Institute of Technology with a degree in Mechanical Engineering, has been a go-to figure in residential upkeep and innovation for over 18 years. His career commenced in a leading home appliance manufacturing company, where he mastered the intricacies of household systems. Joining our platform in 2020, Tommy quickly became a reader favorite for his practical and easy-to-follow guides. He took the helm of our DIY section in 2019, consistently delivering content that empowers homeowners. Beyond his professional pursuits, Tommy is a passionate gardener and enjoys woodworking, skills enhancing his hands-on approach to home care.