Your driveway isn’t just a slab of concrete or patch of gravel – it’s the red carpet to your home, setting the stage for that crucial first impression.
It does not matter if you’re pulling in after a long day or welcoming guests; a well-designed driveway boosts your property’s curb appeal and keeps your vehicles happy.
But here’s the thing: installing a new driveway can make your wallet considerably lighter. Many homeowners are rolling up their sleeves and taking the DIY route.
Sure, it requires some elbow grease and know-how, but the savings can be substantial.
Before you grab your tools, you must decide what material is best for your situation. Each option, from budget-friendly gravel to long-lasting concrete, has its personality and demands.
Let’s walk through everything you need to create the perfect driveway for your home.
Planning and Preparation

Starting a driveway project isn’t just about picking materials and diving in – proper planning can save you major headaches.
First, grab your measuring tape, stakes, and string to map out your space. Consider the slope for proper drainage—you don’t want water pooling around your garage!
There are options for materials to fit any budget. Gravel is a budget-friendly choice, though you’ll need to top it up occasionally.
Asphalt costs less than concrete but needs sealing every few years. Concrete’s the tough guy – it’ll last for decades but costs more upfront.
Speaking of budget, remember to factor in the whole picture. Beyond just materials, you’ll need to consider excavation costs, proper drainage installation, and sealants.
A good rule of thumb is to add 10-15% to your estimated budget for unexpected expenses.
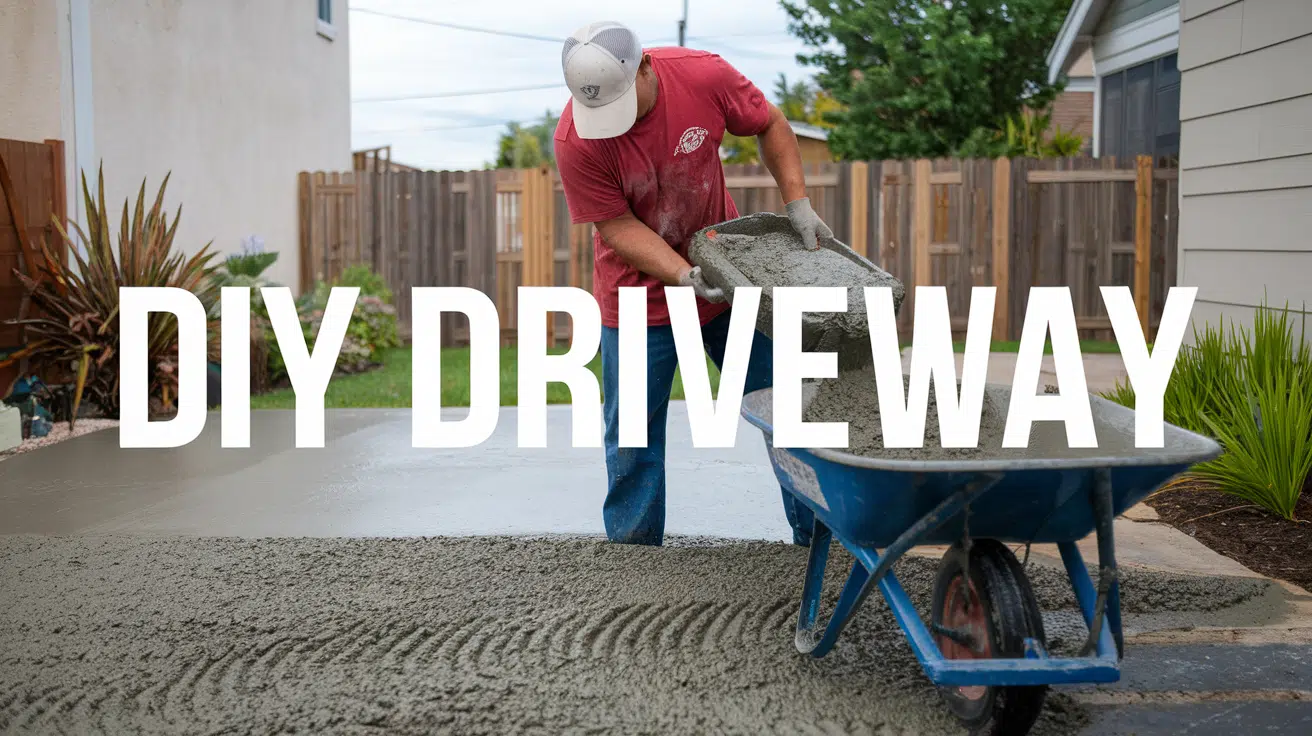
Step-by-Step DIY Driveway Installation

STEP 1: Prepare the Driveway Area
Start by clearing the driveway space and removing any grass, debris, or high spots. Use stakes and a string to mark the slope, ensuring proper water drainage.
Dig out excess dirt and create a level base to prevent pooling. Proper preparation ensures a strong foundation for the concrete slab.
STEP 2: Build and Secure the Forms
Construct sturdy wooden forms using 2×4 boards along the driveway perimeter. Ensure they align with the string level to maintain consistency.
Backfill around the forms with dirt to prevent cement from seeping underneath. This step keeps the structure intact during pouring and shaping.
STEP 3: Reinforce with Wire Mesh
Lay wire mesh across the driveway for added durability, focusing on areas where vehicles will park or drive. This reinforcement helps prevent cracks over time.
For additional strength, slightly overlap the mesh pieces and ensure they are evenly spaced across the slab.
STEP 4: Pour and Level the Concrete
Begin pouring concrete on the sidewalk and work towards the driveway. Use a long 2×4 to screed and level the surface, ensuring an even finish.
On hot days, work quickly to prevent premature drying. Once leveled, smooth the surface using a float for a uniform look.
STEP 5: Finish and Cure the Driveway
Apply a broom finish for texture and slip resistance. Let the concrete cure for at least a week before driving on it. After a few days, remove the forms and level out the surrounding dirt.
To enhance durability, avoid excessive weight until the concrete fully hardens.
Video Tutorial
For more information, check out this video tutorial by SimonSaysDIY.
Maintenance and Longevity Tips

Looking after your driveway isn’t just about keeping it clean – it’s about ensuring your investment lasts for decades. A well-maintained driveway adds value to your property and decreases repair costs.
If your driveway is made of concrete, asphalt, or pavers, regular upkeep prevents major issues from developing and helps it withstand harsh weather and heavy vehicles.
Key maintenance tips:
- Clean regularly with a stiff broom and hose down thoroughly every few months – this prevents debris buildup that can lead to staining
- Deal with stains right away using appropriate cleaners and a pressure washer when needed
- Apply sealer every 2-3 years, which acts like a protective shield against weather damage
- Fix small cracks and holes immediately before they grow into bigger problems
- Avoid using harsh deicing chemicals in winter – stick to sand or calcium magnesium acetate instead
Enhancing Your Driveway’s Appearance

A well-designed driveway provides more than just a parking space – it significantly boosts your home’s curb appeal and overall value.
While many homeowners focus on kitchen and interior renovations, the driveway creates that crucial first impression for visitors and potential buyers.
From classic concrete finishes to advanced paver designs, there are numerous ways to transform your driveway into an attractive property feature. Modern options like exposed aggregate and permeable solutions offer pleasing appeal and practical benefits.
The key is choosing materials and designs that complement your home’s architecture while ensuring durability and longevity.
If you’ve opted for the timeless look of plain concrete or the customized patterns of concrete pavers, proper installation and regular maintenance will keep your driveway impressive for years.
Key points:
- Choose materials that complement your home’s architectural style
- Consider both appearance and functionality when selecting driveway materials
- Explore options like exposed aggregate for unique textures and visual interest
- Add decorative borders or patterns to create visual appeal
- Ensure proper drainage to prevent water pooling and maintain appearance
- Professional installation can enhance the overall look and longevity
- Consider lighting elements to highlight the driveway design
Conclusion
Taking on a DIY driveway project isn’t child’s play, but don’t let that scare you off. With proper planning, the right tools, and a dash of determination, you can create a driveway that’ll make your neighbors double-take – and save a pretty penny while you’re at it.
Before you start, check your checklist one last time: permits secured, materials ordered, weather forecast checked, and helping hands on standby. Remember, Rome wasn’t built in a day, nor will your driveway.
But here’s the thing: whenever you pull up to your home and see that beautiful driveway you built with your two hands, you’ll feel a sense of happiness that no professionally installed driveway can match.
So trust yourself and get started – your dream driveway is waiting to happen.

James McLaren, with a rich background in architecture from the University of Manchester, has been contributing his expertise to the world of creative construction and home innovation for over 20 years. His journey began as a project manager for a leading construction firm, where he honed his skills in bringing complex designs to life. James joined our platform as a freelancer in 2019, quickly becoming a favorite for his insightful and practical advice. He has been a pivotal force to our wing ever since, bringing our readers a blend of technical know-how and creative flair. Beyond his professional life, James is an avid woodworker and enjoys restoring vintage furniture, a hobby that complements his professional insights beautifully.