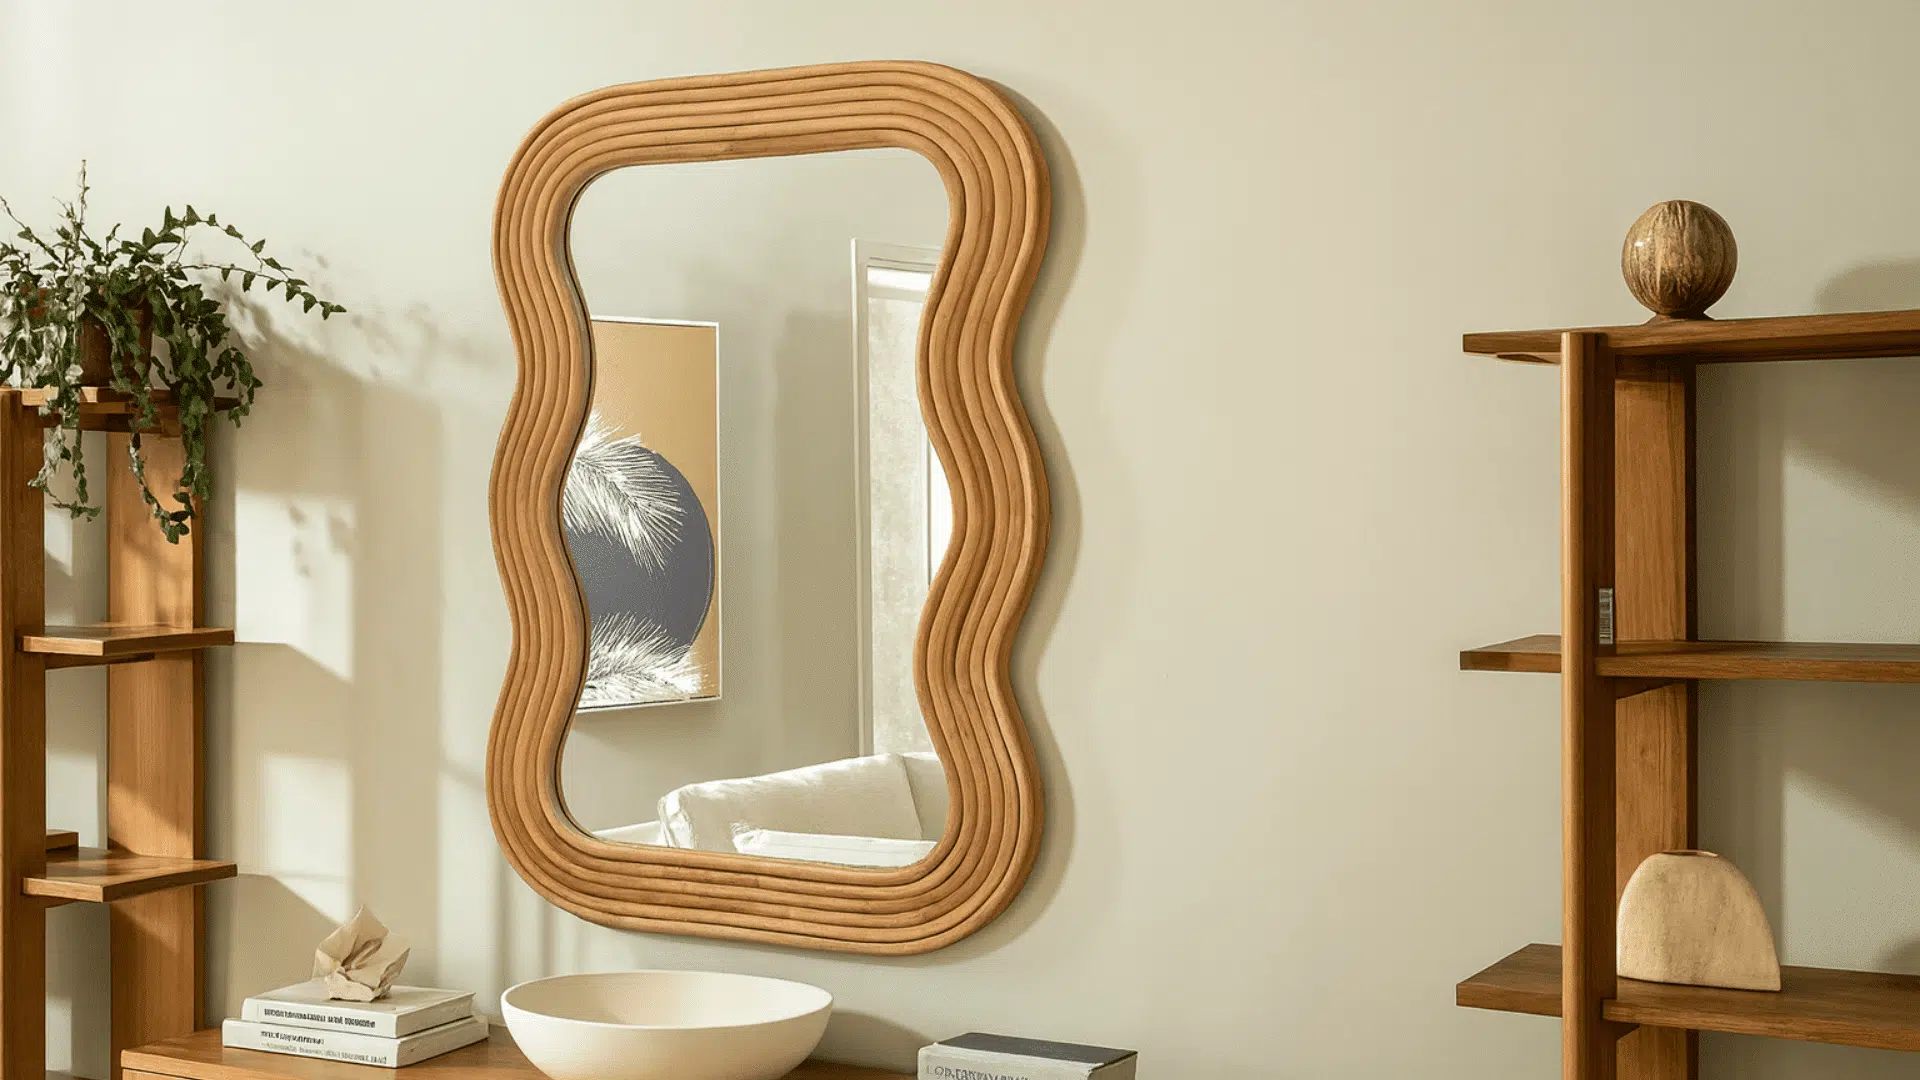
Ever looked at a plain mirror and thought, “This could look so much better”? That’s exactly what happened to me. Instead of buying a new one, I decided to build my own DIY mirror frame, and it completely changed the look of my space.
In this guide, I’ll show you how to frame a mirror step by step using easy materials and basic tools. No fancy skills, no confusing jargon, just a simple project you can finish in one afternoon.
By the end, you’ll have a beautiful, sturdy frame that makes your old mirror look brand new.
Why Frame an Existing Mirror
Framing an existing mirror instantly makes it look more polished and stylish. It’s a quick way to turn a simple piece into something that actually stands out in your space.
A frame doesn’t just look good; it also adds strength and stability. Thin mirrors often bend or feel flimsy, and a solid wood frame keeps them firm and durable.
Another reason I love this project is the cost. It’s far cheaper than replacing a full mirror and still gives that high-end, finished look you see in store-bought designs.
Build Your DIY Mirror Frame: Step by Step
Creating a DIY mirror frame is simple when the process is broken into clear, practical steps. With the right tools and materials, anyone can build a beautiful, sturdy frame in just one afternoon.
Tools & Materials
- Full-length mirror
- ¾-inch plywood (used as the backer)
- 1×3 wood boards (alder used; poplar or select pine works too)
- ¼-inch brass rod (decorative accent)
- DAP Dynagrip adhesive (mirror, marble, and granite formula)
- Pocket hole screws
- Measuring tape
- Kreg track saw
- Kreg pocket-hole jig
- Drill
- Sander
- Caulk gun
Step 1: Measure and Cut

Measure the mirror carefully and mark its dimensions on a sheet of ¾-inch plywood. Cut the plywood to match the mirror’s size using a Kreg track saw.
This backer adds strength and keeps the mirror flat, especially if it’s thin or flexible. Accuracy is essential here to ensure a tight, clean fit later.
Step 2: Build the Frame

Cut four 1×3 boards, two for the sides and two for the top and bottom edges. Drill pocket holes in the top and bottom boards, facing them upward and downward so they remain hidden once joined.
Keep the sideboards running the full height of the mirror to give the frame a balanced, seamless shape. The proper layout helps align all edges perfectly during assembly.
Step 3: Add the Brass Accent

Drill ¼-inch-deep holes about three inches below the top edge on both side boards. Cut a brass rod to length and insert it through the holes for a sleek decorative touch.
This small accent gives the frame character and doubles as a narrow rail for hanging necklaces or lightweight accessories. It blends style with subtle function.
Step 4: Sand and Finish

Sand every frame piece until smooth, removing rough spots and edges. A fine-grit finish helps the stain or paint go on evenly and prevents visible marks later.
Apply stain or finish before assembling to reach every surface. Pre-finishing saves time and gives the wood a professional, even look once the mirror is installed.
Step 5: Assemble the Frame

Attach all four boards using pocket-hole screws, tightening each corner firmly. Keep the frame square and level while joining to ensure a perfect shape.
A precise fit creates a strong structure that can hold the mirror securely. Proper alignment at this stage keeps everything straight once mounted together.
Step 6: Attach the Mirror

Apply DAP Dynagrip adhesive to the plywood in a clean, continuous bead around the edges. Add an “S” pattern through the middle for full coverage and support.
Press the mirror gently but firmly onto the plywood, ensuring it bonds evenly across the surface. A snug hold keeps it from sliding or lifting later.
Step 7: Fit Everything Together

After the adhesive begins to set, place the mirror and its plywood backing inside the finished frame. Make small adjustments to align all sides perfectly.
Let the adhesive cure completely before moving or standing the mirror upright. Once dry, the frame will feel sturdy and look clean and polished.
The steps for this project are directly taken from the YouTube tutorial “Full-Length Mirror Frame DIY” by @rogueengineer. All tools, materials, and methods follow the creator’s original build process.
Community Tips and Proven Advice
Many DIY enthusiasts share small tricks that make this project easier and cleaner. Here are some of the most useful tips to keep in mind:
- Use painter’s tape: Cover the mirror edges before gluing to prevent smudges or stray adhesive marks.
- Test the adhesive first: Try it on a scrap piece to ensure it bonds properly with both wood and glass.
- Apply thin stain coats: Use light, even layers and let each coat dry fully for a smooth, professional finish.
- Align carefully: Double-check the frame corners and edges before tightening screws or adding the mirror.
- Let it cure completely: Give the adhesive enough time to dry before standing or moving the mirror.
Following these simple tips helps create a strong, neat, and long-lasting DIY mirror frame.
Conclusion
Building a DIY mirror frame was one of the most rewarding weekend projects I’ve done. It was simple, budget-friendly, and completely transformed how my mirror looked.
If you’ve been wanting to upgrade your mirror, this is the perfect place to start.
Now that you know how to frame a mirror, gather your tools and take it one step at a time. You’ll end up with a strong, stylish mirror frame that brightens your room and reflects your creativity.
The best part? You built it yourself.

James McLaren, with a rich background in architecture from the University of Manchester, has been contributing his expertise to the world of creative construction and home innovation for over 20 years. His journey began as a project manager for a leading construction firm, where he honed his skills in bringing complex designs to life. James joined our platform as a freelancer in 2019, quickly becoming a favorite for his insightful and practical advice. He has been a pivotal force to our wing ever since, bringing our readers a blend of technical know-how and creative flair. Beyond his professional life, James is an avid woodworker and enjoys restoring vintage furniture, a hobby that complements his professional insights beautifully.