Building a custom home feels overwhelming, doesn’t it? I get it.
The process seems complex, and you’re not sure where to start. It’s actually one of the most personal and creative experiences you’ll ever have.
This blog will give you a clear step-by-step roadmap for building your custom home.
I’ll share expert tips and style inspiration to help you create the home of your dreams. Let’s make this process less scary and more exciting.
Why It’s Worth the Effort Building a Custom Home?
I’ll be honest, custom home building takes more time and effort than buying an existing house. But the rewards make it worthwhile.
You get complete control over your layout, features, and energy efficiency. Want an open kitchen that flows into the family room? Done.
Need extra storage or a home office? You decide. Plus, you can choose energy-efficient windows, insulation, and appliances from the start.
The emotional benefits are huge, too. This is your space, built exactly how you want it. And financially?
Custom homes often have better resale value because they’re designed for modern living. It’s perfect for long-term living and reflects your personality in every detail.
What You Should Know First Before You Break Ground?
Here’s what I wish someone had told me before I started planning:
- Budget for the real costs: Land prices vary wildly by location. Construction runs $100-200 per square foot, but finishes can double that. I always add 20% extra for surprises.
- Check the rules first: Zoning laws control what you can build and where. HOA regulations might limit your design choices. Permits take weeks or months, so factor this into your timeline.
- Be patient with timing: Custom homes take 10-16 months from start to finish. Weather delays happen. Material shortages occur. I’ve learned that rushing leads to mistakes.
- Location matters long-term: Research school districts if you have kids. Consider your daily commute. Look into planned developments nearby that might affect your property value later.
The key is doing your homework before you fall in love with a plan.
Step-by-Step Process to Build Your Dream Custom Home

Building a custom home follows a specific sequence that keeps everything on track.
In this guide on how to build a custom home, I’ll walk you through each phase so you know exactly what to expect and when.
Step 1: Define Your Vision and Must-Haves
Start by separating “must-haves” from “nice-to-haves.” Think about your lifestyle needs:
- How many bedrooms do you really need?
- Do you work from home and need a dedicated office?
- Will you entertain often?
Create inspiration boards and write a simple vision statement. This keeps you focused when making decisions later.
Step 2: Choose and Secure Your Homesite
Finding the right lot is crucial. Work with a realtor who knows local builders and restrictions. Before buying:
- Get a soil test
- Check utilities availability
- Consider the view and sun orientation
- Think about privacy and future development
Drive by at different times to check noise levels and lighting.
Step 3: Pick the Right Builder or General Contractor
This choice makes or breaks your project. Custom builders give you more control but cost more. When interviewing, ask to see recent projects and talk to past clients.
Check their Better Business Bureau rating and ask about warranties, change orders, and budget overruns.
Step 4: Design the Floor Plan and Home Style
Work with architects or your builder’s design team. Focus on natural light, traffic flow, storage needs, and future requirements.
I always recommend thinking about resale value, too. Super unique layouts might hurt when you sell later.
Step 5: Finalize Plans, Contracts & Financing
Construction loans need larger down payments and detailed cost estimates. Contract types include:
- Cost-plus: Pay actual costs plus a fee
- Fixed-price: Set price upfront, but change orders cost extra
Read everything carefully before signing.
Step 6: Get Approvals from Architectural Review Boards
Many communities require plan approval. Submit your plans with exterior materials, colors, and landscaping details. This process takes 2-6 weeks.
Some boards meet monthly, so timing matters. Be prepared for revision requests.
Step 7: Start Building!
Construction phases include:
- Site work – Foundation (4-6 weeks)
- Framing – Walls, roof, windows (6-8 weeks)
- Mechanical – Plumbing, electrical, HVAC (4-6 weeks)
- Interiors – Drywall, flooring, cabinets (8-12 weeks)
Visit regularly, but don’t interfere with workers. Schedule weekly walks with your builder.
Step 8: Final Inspection and Closing
Do a detailed walk-through and create a “punch list” of items to fix:
- Check for scratches on floors or walls
- Test cabinet doors and light switches
- Look for caulk gaps
Don’t close until major issues are resolved. You’ll get your Certificate of Occupancy, sign documents, and receive your keys. The whole process takes 12-18 months, typically.
Cost Breakdown for Building Your Dream Custom Home
Here’s what I typically see for custom home costs. Remember, prices vary widely by location and quality level.
1. Buying Your Land: You’ll spend $50,000 to $200,000 or more on land. The cost per acre changes based on where you build. I recommend budgeting $5,000 to $15,000 extra for site preparation. This covers clearing trees, leveling ground, and testing soil quality.
2. Planning and Permits: Expect to pay $15,000 to $50,000 for design work and permits. Your architectural drawings will cost $8,000 to $30,000. Engineering reports add another $2,000 to $8,000. Don’t forget permits and impact fees, which run $5,000 to $12,000.
3. Building Your Foundation: Foundation work costs $20,000 to $60,000. This includes digging, creating footings, and pouring concrete. If you want a basement instead of a slab, multiply your costs by two or three.
4. Frame Construction: Framing your house runs $30,000 to $80,000. This covers lumber, steel, and labor for walls and roof structure. Remember that material prices change often.
5. Outside Features: Your exterior work costs $40,000 to $100,000 total. Roofing takes $15,000 to $35,000. Siding costs $10,000 to $30,000. Windows and doors add $15,000 to $35,000.
6. Inside Finishing Work: Interior finishes range from $60,000 to $150,000. This includes drywall, floors, paint, cabinets, and countertops. Your choices here can really change your total cost.
7. Home Systems: Mechanical systems cost $35,000 to $70,000. Plumbing runs $12,000 to $25,000. Your heating and cooling system costs $15,000 to $30,000. Electrical work adds $8,000 to $15,000.
8. Builder’s Payment: Your builder charges 10% to 20% of your total project cost. This covers their management work, business costs, and profit. The exact percentage depends on your builder and contract type.
9. Connecting Utilities: Utility connections cost $15,000 to $40,000. This includes septic systems or sewer hookups. You’ll also pay for water lines or wells. Electrical connections and internet setup add to this cost.
10. Outdoor Improvements: Your yard and outdoor spaces cost $20,000 to $60,000. This covers driveways, fencing, patios, grass, trees, and watering systems.
11. Home Equipment and Furniture: Plan $25,000 to $75,000 for appliances and basic furniture. Kitchen appliances, washers, dryers, lights, and starter furniture fit in this category.
12. Emergency Fund: Set aside 10% to 15% of your total project cost for surprises. You’ll need this money for unexpected problems, upgrades, or changes during building.
Total estimated range: $300,000-$800,000+ for a 2,000-3,000 sq ft custom home
I always tell clients to budget on the higher end. It’s better to have money left over than to run short halfway through construction.
Required Approvals and Permits

Getting the right permits can feel overwhelming, but here’s what you’ll typically need:
Before You Start:
1. Land Title Documentation: Proof that you own the land and clearance from local authorities
2. Zonal Clearance: Confirms your land can be used for residential construction
3. Plan Approval: Submit architectural drawings and floor plans to local authorities
4. Layout Approval: Overall site layout gets reviewed and approved
5. Commencement Certificate: Official permission to start building (don’t break ground without this!)
During Construction:
- Building Permits: Separate permits for electrical, plumbing, HVAC, and structural work
- Intimation of Disapproval (IOD): Outlines conditions you must follow during construction
Location-Specific Clearances (if applicable):
- Environmental clearance for sensitive areas
- Forest clearance is near protected land
- Airport height clearance for tall structures
- Coastal zone clearance near water
- Borewell and water extraction permits
- Excavation permits for large projects
Community Requirements:
- HOA Approval: Mandatory if building in a planned community
After Construction:
- Completion Certificate: Confirms building matches approved plans
- Occupancy Certificate: Official permission to move in and live there
I recommend starting the permit process early. Some approvals take months, and you can’t begin construction without them.
Disclaimer: Regulations vary by location, so consult your local building department or a knowledgeable custom home builder to get the exact permits required before starting construction.
Common Pitfalls to Avoid When Building a Custom Home
I’ve seen people make the same mistakes over and over when going through the custom home building process. Learning from these common errors can save you time, money, and stress.
Here are the mistakes I see people make most often:
- Budget 20% more than you think you need. Costs always run higher than estimates.
- Timeline delays are normal; add 3-6 months to whatever your builder tells you.
- Check your builder’s recent references. Don’t just look at their portfolio photos.
- Think about resale value. Super unique designs might hurt when you sell later.
- Pick materials and finishes early. Late decisions cause delays and cost overruns.
- Don’t over-customize everything; some standard features work just fine and cost less.
Timeless Custom Home Design Styles
Choosing a design style early helps you make consistent decisions throughout the building process. Here are five popular styles that stay relevant year after year and work well for custom homes.
1. Modern Farmhouse

Think shiplap walls, barn doors, and farmhouse sinks mixed with sleek countertops. You’ll see exposed ceiling beams, white or gray exteriors, and front porches.
The kitchen often has an oversized island and open shelving. Windows are usually black-framed for contrast.
2. Contemporary Minimalist

Clean lines everywhere. Lots of white, gray, and black. Floor-to-ceiling windows bring in natural light.
You’ll find flat or low-pitched roofs, smooth stucco or wood siding, and minimal landscaping. Inside, there’s plenty of built-in storage to keep spaces clutter-free.
3. Traditional Colonial

Classic brick or wood siding with shutters. The front door sits right in the center with matching windows on each side.
Inside, you’ll find formal dining rooms, crown molding, and hardwood floors. Kitchens often have raised-panel cabinets and granite countertops.
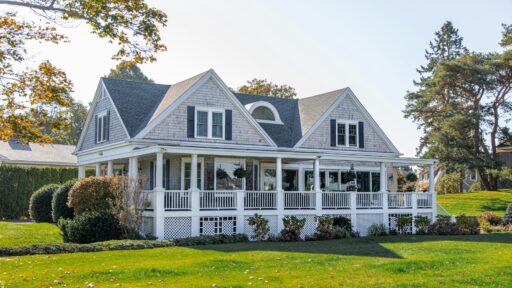
4. Coastal Cottage

Light blue, white, and sandy beige colors. Cedar shingles or board-and-batten siding work well. You’ll see lots of windows, covered porches, and outdoor showers.
Inside, think white-washed wood, nautical touches, and open floor plans that feel relaxed.
5. Industrial Chic

Exposed brick walls, steel beams, and concrete floors. Large factory-style windows and high ceilings make spaces feel open.
You might see ductwork left visible, metal railings, and Edison bulb lighting. Kitchens often have stainless steel appliances and concrete countertops.
Each style works well for custom homes because it offers flexibility while maintaining its core character.
The Bottom Line
Building a custom home is complex, but the rewards make every step worthwhile. You get complete control over your space, from layout to finishes, creating a home that truly fits your lifestyle.
The process takes time and patience, but now you have a clear roadmap to follow.
Start by defining your vision and researching builders in your area. Don’t rush the planning phase; it sets the foundation for everything else.
Have questions about zoning laws, financing, or finding the right builder? Consult with local experts before making major decisions. Your dream home is waiting – it’s time to start planning.

Holding a Master’s in Architecture from the University of Texas at Austin, Emily Rodriguez has dedicated more than two decades to the art and science of building renovation. Starting her journey in historic preservation, she developed a profound respect for blending old with new in building design. Emily became a vital part of our team in 2019, renowned for her insightful and innovative renovation tips. She has been leading our DIY home improvement series since ever since, where she shares her wealth of knowledge in turning outdated spaces into modern havens. When not engaged in writing or consulting, Emily is a passionate advocate for heritage conservation and enjoys exploring vintage architecture, a hobby that complements her professional expertise.