Homeowners often face the frustration of skyrocketing energy bills, chilly rooms in winter, or sweltering spaces in summer. If your home feels uncomfortable or your utility costs are climbing, poor insulation might be the culprit. Blown-in insulation is a popular, cost-effective solution to improve energy efficiency and comfort, but choosing the right type for your home’s size and budget can feel overwhelming. This guide will walk you through the process, from understanding your needs to selecting the best material and ensuring proper installation, so you can make an informed decision that saves money and enhances your home’s comfort.
Why Blown-In Insulation Matters for Home Comfort and Energy Savings
Blown-in insulation is a game-changer for homeowners struggling with inconsistent temperatures, drafts, or noisy environments. It’s a versatile solution that fills gaps and hard-to-reach areas, making your home more energy-efficient and comfortable year-round. Let’s explore why it’s such a powerful tool for addressing common homeowner pain points.
The Hidden Costs of Poor Insulation
Imagine this: it’s a freezing winter evening, and despite cranking up the heater, your living room feels like a walk-in fridge. Or maybe you’re sweating through a summer afternoon while your AC runs nonstop, yet your energy bills keep climbing. These are signs of poor insulation, which lets heat escape in winter and seep in during summer. According to the U.S. Department of Energy, inadequate insulation can account for up to 40% of energy loss in homes, driving up utility costs. Beyond finances, poor insulation can also let outside noise—like traffic or loud neighbors—disrupt your peace, making your home less of a sanctuary.
How Blown-In Insulation Solves These Problems
Blown-in insulation, also known as loose-fill insulation, is blown into attics, walls, or other spaces using specialized equipment. Unlike traditional batt insulation, it conforms to irregular spaces, sealing gaps that cause drafts and energy loss. This makes it ideal for improving thermal performance, reducing energy bills, and even dampening noise. For example, a homeowner in a noisy urban area might notice a quieter home after installing blown-in insulation, while someone in a cold climate could enjoy a cozier winter without over-relying on their furnace. By addressing these issues, blown-in insulation offers both immediate comfort and long-term savings.
Understanding Blown-In Insulation: What Homeowners Need to Know
Before diving into material options, it’s important to understand what blown-in insulation is and how it fits into your home improvement plans. This section breaks down the basics and key factors that influence your insulation choice.
What Is Blown-In Insulation and How Does It Work?
Blown-in insulation consists of loose materials, like cellulose or fiberglass, that are blown into place using a hose and machine. This method allows it to fill nooks and crannies that traditional insulation might miss, creating a seamless barrier against heat loss or gain. It’s especially effective for attics, where uneven surfaces or obstructions like pipes make batt insulation less practical. For homeowners retrofitting older homes or upgrading existing insulation, blown-in insulation is a flexible solution that doesn’t require tearing down walls. Curious about the cost of blown-in insulation per square foot? Costs typically range from $1 to $3 per square foot, depending on material and labor, but a professional assessment can provide a precise estimate for your home.
Key Factors That Affect Your Insulation Choice
Choosing the right blown-in insulation depends on several factors: your home’s square footage, local climate, and budget. For instance, homes in colder regions like Minnesota need higher R-values (a measure of thermal resistance) than those in milder climates like California. Older homes with outdated insulation may require a complete overhaul, while newer homes might only need a top-up. Seasonal timing also matters—insulating before winter can prevent heat loss, while summer installations can keep your home cooler. Balancing these factors with your budget is key to maximizing energy savings without overspending.
Types of Blown-In Insulation: Which Is Right for Your Home?
With several blown-in insulation materials available, each has unique benefits and drawbacks. Let’s explore the most common options to help you decide which aligns with your home’s needs and budget.
Cellulose Insulation: Eco-Friendly and Cost-Effective
Cellulose insulation, made from recycled paper products, is a favorite for eco-conscious homeowners. It’s treated to be fire-resistant and offers excellent thermal performance, making it great for sealing air leaks. Cellulose is often more affordable than other materials, with costs averaging $1.20 to $2 per square foot. For example, a 1,500-square-foot attic might cost $1,800 to $3,000 to insulate with cellulose. However, it can settle over time, slightly reducing its effectiveness, so professional installation is crucial to ensure proper depth and coverage. Homeowners love cellulose for its sustainability and ability to lower energy bills in drafty homes.
Fiberglass Insulation: Durable and Versatile
Fiberglass blown-in insulation, made from tiny glass fibers, is known for its durability and fire resistance. It’s slightly more expensive than cellulose, typically $1.50 to $2.50 per square foot, but it resists settling and maintains its R-value longer. Fiberglass is ideal for larger homes or those with complex attic layouts, as it flows easily into tight spaces. For instance, a homeowner with a 2,000-square-foot home might spend $3,000 to $5,000 for fiberglass insulation but enjoy consistent temperatures year-round. Proper installation is key to avoid gaps that could compromise performance.
Other Options: Mineral Wool and Spray Foam Hybrids
Less common but worth considering are mineral wool and spray foam hybrids. Mineral wool, made from rock or slag, offers excellent fire resistance and soundproofing but costs more, around $2 to $3 per square foot. Spray foam hybrids combine blown-in materials with foam for superior sealing but come at a premium price. These options suit homeowners with specific needs, like noise reduction in urban homes or extreme weather protection. A professional can help determine if these materials make sense for your home’s size and climate.
Calculating Insulation Needs Based on Square Footage
Knowing how much insulation your home needs is critical to avoiding over- or under-insulating. This section helps you estimate requirements and balance coverage with your budget.
How to Measure Your Home’s Insulation Requirements
Start by measuring the square footage of the area you want to insulate, typically the attic, as it’s the most common target for blown-in insulation. For example, a 1,000-square-foot attic requires enough material to achieve the recommended R-value, which varies by climate. The U.S. Environmental Protection Agency suggests R-38 for attics in cold climates, which might mean 10–14 inches of cellulose or fiberglass. Use a tape measure to calculate length and width, and note obstructions like vents or beams that affect coverage. Many homeowners underestimate needs, leading to gaps that reduce efficiency, so a professional assessment is often the best approach.
Balancing Budget and Coverage for Optimal Results
If your budget is tight, prioritize high-impact areas like the attic, where heat loss is most significant. For a 1,500-square-foot home, insulating the attic might cost $2,000 to $4,000, but savings of $200–$500 annually on energy bills can make it worthwhile. Timing your project before peak seasons—like winter in cold climates or summer in hot ones—can maximize immediate comfort. Professionals can help you avoid common mistakes, like skimping on material to cut costs, which can lead to poor performance and higher long-term expenses.
Why Professional Installation Makes a Difference
While DIY insulation might seem tempting, blown-in insulation requires specialized equipment and expertise. This section explores why hiring professionals ensures better results.
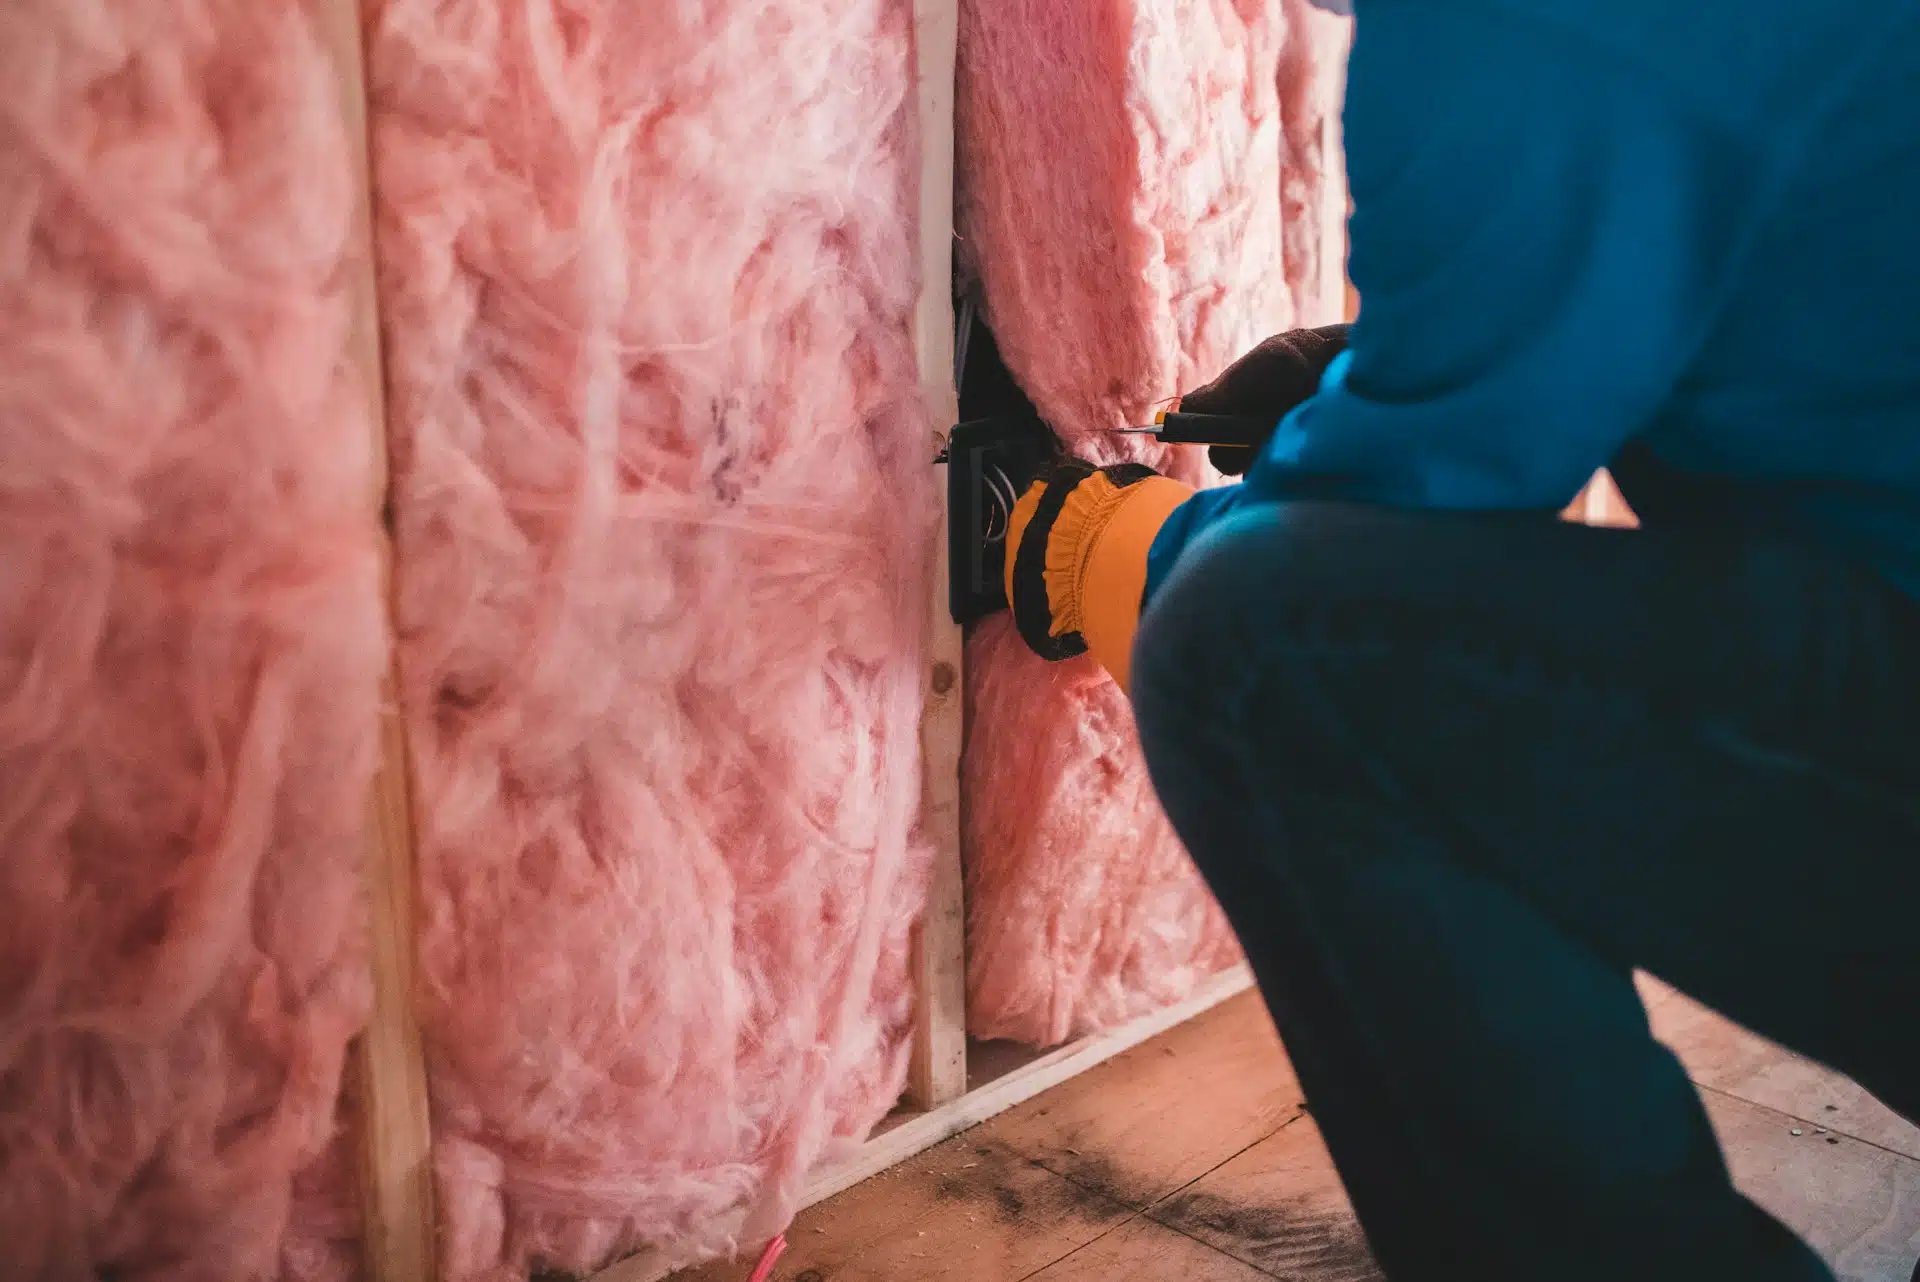
The Risks of DIY Blown-In Insulation
DIY blown-in insulation can save on labor costs, but it comes with risks. Renting equipment and buying materials can cost $500–$1,000 for a medium-sized project, and mistakes like uneven application or insufficient R-value can negate savings. For example, one homeowner tried DIY insulation but ended up with gaps that let cold air seep in, forcing them to hire professionals later. Safety is another concern—handling loose-fill materials without proper gear can expose you to dust or fibers. Professionals have the tools and experience to ensure even coverage and maximum energy efficiency.
TLS Energy Savers: Your Trusted Partner for Insulation Solutions
When it comes to seamless, high-quality insulation, TLS Energy Savers stands out as a trusted expert. With years of experience, they assess your home’s unique needs, recommend the right material for your square footage and climate, and ensure proper installation for lasting comfort. Whether you’re battling drafts in an older home or upgrading a new build, their team delivers tailored solutions that balance budget and performance. Homeowners across the country trust TLS Energy Savers to transform their homes into energy-efficient, comfortable spaces.
Long-Term Benefits of Choosing the Right Blown-In Insulation
Investing in blown-in insulation pays off in more ways than one. This section highlights the lasting advantages for your wallet, comfort, and home value.
Energy Savings and Reduced Utility Bills
Blown-in insulation can cut energy bills by 20–40%, depending on your home’s size and existing insulation. For a 2,000-square-foot home, that could mean $300–$600 in annual savings. By sealing air leaks and improving thermal performance, insulation reduces the strain on your HVAC system, especially during extreme weather. Homeowners often notice lower bills within the first year, with savings compounding over time.
Improved Home Comfort and Noise Reduction
Beyond savings, blown-in insulation creates a cozier, quieter home. It eliminates drafts that make rooms feel chilly and balances temperatures across your house. For urban homeowners, it also reduces outside noise, like traffic or construction, by up to 50%. Imagine enjoying a peaceful evening without hearing every car that passes by—blown-in insulation makes it possible.
Increased Property Value and Future-Proofing
Energy-efficient homes are in high demand. Proper insulation can boost your home’s resale value by appealing to buyers who prioritize low utility costs and comfort. It also protects your home from seasonal wear, like moisture damage in winter or heat stress in summer. With professional installation, blown-in insulation requires minimal maintenance, ensuring decades of performance.
Next Steps: Getting Started with Blown-In Insulation
Ready to improve your home’s comfort and efficiency? Here’s how to take the first steps toward installing blown-in insulation.
How to Get an Accurate Quote for Your Home
Contact a professional for a detailed quote based on your home’s square footage and insulation needs. A thorough energy audit can pinpoint problem areas, like a drafty attic, and recommend the best material. Most contractors, like TLS Energy Savers, offer free consultations to help you plan. Be sure to ask about material options, R-value requirements, and any local rebates for energy-efficient upgrades.
Preparing Your Home for Insulation Installation
Before installation, clear your attic of stored items and ensure easy access for the crew. Professionals handle the rest, using specialized equipment to blow insulation evenly. The process typically takes 1–2 days for an average home, with minimal disruption. Post-installation, you’ll notice improved comfort almost immediately, especially if you time the project before peak seasons.
FAQs About Blown-In Insulation for Homeowners
How much does blown-in insulation cost per square foot?
Costs range from $1 to $3 per square foot, depending on material (cellulose, fiberglass, etc.) and labor rates in your area. Factors like attic accessibility or existing insulation can affect pricing. A professional quote ensures accuracy.
How long does blown-in insulation last?
Cellulose lasts 20–30 years, while fiberglass can last 50+ years with proper installation. Professional installers like TLS Energy Savers ensure optimal depth to prevent settling and maintain performance.
Can blown-in insulation be added to existing insulation?
Yes, it’s often used to top up existing insulation. A professional can assess compatibility to avoid issues like over-insulating, which can trap moisture and reduce effectiveness.
What’s the ROI on blown-in insulation?
Homeowners typically recoup costs within 2–5 years through energy savings. For a $3,000 project, annual savings of $500 could yield a full return in as little as six years.
Is blown-in insulation safe for my home and family?
Blown-in insulation is safe when installed correctly. Materials like cellulose and fiberglass are treated for fire resistance, and professionals ensure proper ventilation to prevent moisture issues.

Holding a Master’s in Construction Management from Purdue University, William Ray has dedicated more than two decades to studying and applying construction principles. His professional journey includes a tenure with a prominent construction firm, where he specialized in project management and building technologies. William brought his knowledge to our team, providing in-depth insights into practical construction techniques. As the leader of our beginner’s guide to building since 2019, he has a knack for breaking down intricate processes into easily digestible content. When not involved in writing or onsite consultations, William enjoys woodworking and volunteering in community building projects, which aligns with his passion for hands-on construction and community service.