
Measuring an interior door might sound tricky, but it’s easier than you think.
If you’re swapping an old one or adding a new style, the right size makes all the difference.
One small mistake can lead to squeaky hinges, awkward gaps, or a door that just won’t shut.
That’s why learning how to measure interior doors the right way is key.
You don’t need fancy tools—just a tape measure, a step stool, and a few minutes.
Ready to make your door fit like a glove?
Let’s measure like a pro (without breaking a sweat)!
Why Measuring Your Interior Door Is Important?
Ever tried forcing a puzzle piece that almost fits?
That’s what happens when door measurements are incorrect! Getting exact measurements is like having a superpower for three big reasons.
- Functionality first: Perfect measurements mean your door swings smoothly without sticking or leaving gaps. No more wrestling with stubborn doors!
- Visual magic: Well-fitted doors make rooms look professional and polished. It’s the difference between “wow” and “what happened here?”
- Money saver: Accurate measuring prevents costly do-overs. Nobody wants to buy the same door twice!
Your turn: Have you ever dealt with a poorly fitted door?
Tools Required to Measure Your Door

You don’t need fancy equipment to measure a door; a simple measuring tape suffices.
A ladder and flashlight can make the job easier and more accurate.
If you’re short, you may need a ladder to reach the top measurements, and working at night requires a hand-held flashlight for clear visibility.
Essential tools for door measurement:
- Measuring tape: Choose a 25-foot tape for reaching all door dimensions easily
- Pencil and paper: Record measurements immediately to avoid forgetting important numbers
- Level: Check if the door frame is straight and identify any adjustments needed
- Flashlight: Provides better visibility in dark areas or poorly lit spaces
- Ladder or step stool: Helps reach the top of tall doors safely
- Calculator: Double-check measurements and convert between different units if needed
Having the right tools ready makes measuring faster and reduces the chance of errors.
Step-by-Step Guide to Measure Your Interior Door
Here’s a step-by-step guide to measure your door accurately and avoid common measurement mistakes.
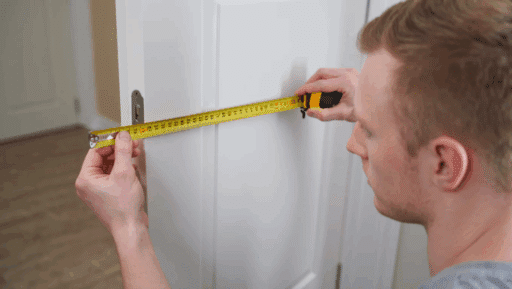
Step 1: Measure Door Width

Measure the door width at three different points: top, middle, and bottom.
Use the smallest measurement as your door width.
Plans should account for any frame irregularities or settling.
Record measurements in inches and write them down immediately.
Double-check by measuring twice at each point.
Step 2: Measure Door Height

Measure from the floor to the top of the door frame on both sides.
Take measurements at the left side, center, and right side of the opening.
Use the smallest height measurement for ordering your new door.
Plans ensure the door fits even if the floor isn’t perfectly level.
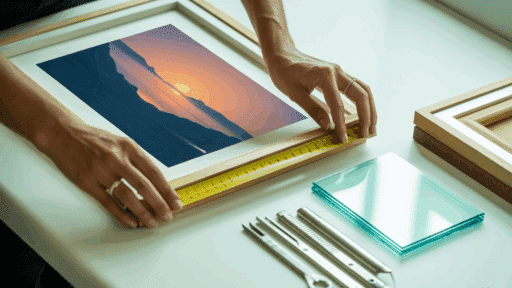
Step 3: Measure Door Thickness

Measure the thickness of your existing door if replacing a slab door.
Standard interior doors are usually 1-3/8 inches thick.
Open the door slightly and measure from one side to the other.
Plans determine what type of hinges and hardware you’ll need for installation.
Step 4: Check the Rough Opening

Stand with your back against the door’s hinge side.
If the door opens to your right, it’s a right-hand door; to your left, it’s a left-hand door.
Then, measure the rough opening if you are installing a pre-hung door.
Plans include the entire frame opening before trim installation.
Measure the width and height of the actual opening in the wall.
Add these measurements to your notes for reference when shopping for doors.
Step 5: Measure Frame Depth

Measure how deep the door frame extends into the wall.
Plans help determine trim requirements and installation complexity.
Use your measuring tape to check the distance from the finished wall surface to the back of the frame opening.
Step 6: Document Everything

Write down all measurements clearly and label each one, including the date and location of measurement for each door.
Take photos of the door and frame for reference while shopping, and keep these records safe until your door project is complete.
Double-Check Your Work
Always measure twice: Take each measurement at least twice to catch any errors before placing your order.
Use the smallest measurement: When measurements vary, always use the smallest number for proper fit.
Verify Frame Accuracy
Check for square frames: Measure diagonally across the door opening to ensure the frame is square.
Account for flooring changes: Consider future flooring installations that might affect door height requirements.
Document Hardware Details
Measure existing hardware: Note hinge locations, lock positions, and handle heights for replacement doors. Take photos while measuring: Visual references help when discussing options with suppliers or contractors.
Plan for Door Operation
Consider door swing direction: Measure the clearance space needed for the door to open fully without obstacles.
Get Professional Results
Following these expert tips ensures you get professional-quality measurements without hiring a contractor.
Common Mistakes to Avoid

Learning from common measurement errors helps you avoid expensive mistakes and project delays.
Avoid these frequent door measurement mistakes:
- Assuming all doors are standard size: Interior doors come in various sizes, so measure each door individually
- Measuring with a warped tape: Bent or damaged measuring tapes give false readings and cause ordering errors
- Forgetting about door swing clearance: Doors need space to open without hitting walls or furniture
- Not writing measurements down: Relying on memory leads to confusion and wrong door purchases
- Measuring over existing trim: Remove or account for trim thickness to get accurate opening dimensions
- Skipping the thickness check: Different door thicknesses require different hinges and installation methods
- Ignoring uneven walls or floors: Check for level issues that affect door fit and operation
Avoiding these mistakes saves time and money, ensuring your door project’s success.
Final Notes
Measuring interior doors is easier than you think!
Start by measuring the door width from jamb to jamb at the top, middle, and bottom.
Next, measure the height from the floor to the top of the frame on both sides.
Don’t forget the thickness – measure the depth of the door from front to back.
Always use the smallest measurement if numbers differ slightly.
This ensures your new door fits perfectly without gaps or sticking.
Take your time and double-check everything!
Ready to alter your space with the perfect door fit?
Share your measuring experience in the comments below.
What challenges did you face?
Explore more door and trim installation tips in our DIY home improvement section.

James McLaren, with a rich background in architecture from the University of Manchester, has been contributing his expertise to the world of creative construction and home innovation for over 20 years. His journey began as a project manager for a leading construction firm, where he honed his skills in bringing complex designs to life. James joined our platform as a freelancer in 2019, quickly becoming a favorite for his insightful and practical advice. He has been a pivotal force to our wing ever since, bringing our readers a blend of technical know-how and creative flair. Beyond his professional life, James is an avid woodworker and enjoys restoring vintage furniture, a hobby that complements his professional insights beautifully.