Are you thinking about changing your home’s main living area? Adding or removing walls between kitchens and living rooms is one of the most impactful projects homeowners undertake.
Creating separation for privacy or opening a load-bearing wall between the kitchen and living room for a more modern feel can dramatically alter your daily living experience.
These structural changes affect more than just appearance—they influence traffic patterns, light distribution, temperature control, and property value.
This guide covers the essential information you need before starting this major renovation project—from identifying load-bearing elements and securing proper permits to understanding the advantages and disadvantages of different design options.
With proper planning and expert help, you can reshape your living spaces to match your lifestyle needs better.
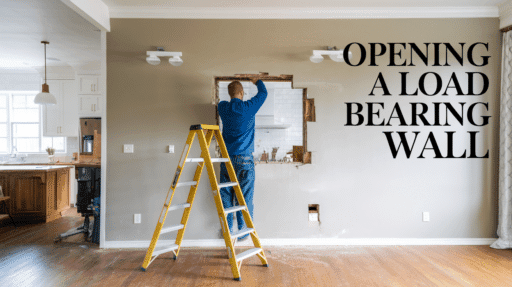
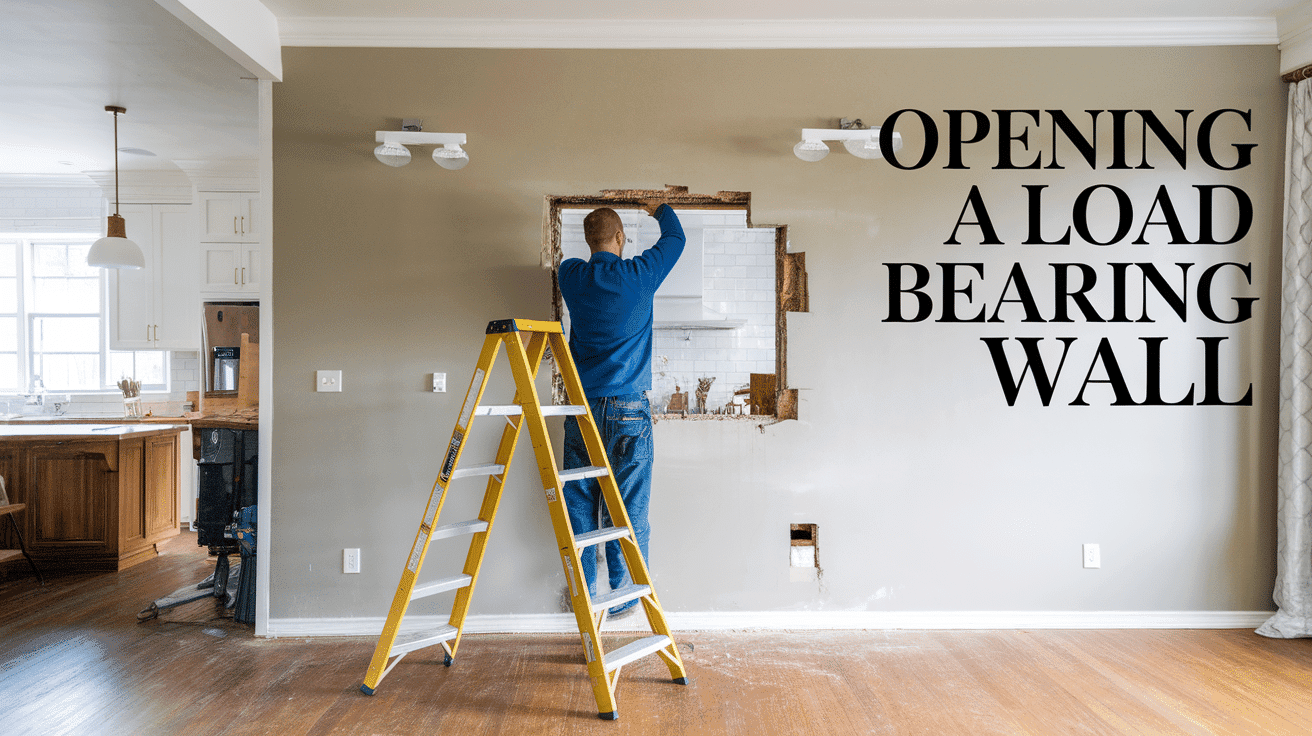
Can You Add a Wall Between the Kitchen and Living Room?
Yes, you can add a wall between your kitchen and living room, but structural considerations are essential. First, determine if the area involves load-bearing elements by checking for beams, posts, or alignment with walls above or below.
If the wall is load-bearing, you’ll need professional engineering input and permits. The process is simpler for non-load-bearing walls but still requires careful planning.
Identify any electrical, plumbing, or HVAC (Heating, Ventilation, and Air Conditioning) systems in the area that might need rerouting.
Consider how the new wall will affect natural light, traffic flow, and the overall feel of your space. When building, use proper framing techniques with appropriate studs (typically 16 inches on center), secure anchoring to existing structures, and finish with drywall and matching trim for a seamless look.
Remember that even seemingly simple modifications can impact your home’s functionality and value, so consult professionals when in doubt.
Steps to Build a New Wall in a Load-Bearing Area
Adding a wall in a load-bearing area requires careful planning and execution to maintain structural integrity.
Following these steps will help ensure your project is safe, compliant with building codes, and achieves your desired outcome. Professional guidance is strongly recommended throughout this process.
Step 1: Determine the Purpose of the Wall

Decide if you need full separation or a partial barrier like a half-wall or glass partition. Consider how the wall will serve your lifestyle needs—for privacy, noise reduction, or defining separate living spaces.
Think about traffic patterns, light flow, and how family members will interact between spaces once the wall is installed. The right choice depends on balancing separation with connectivity in your home’s overall design.
Step 2: Check Structural Implications

Understanding the structural impact when adding a wall in a load-bearing area is critical. Look for signs like central placement, alignment with upper floors, or large beams. Hire a structural engineer to assess whether your new wall requires additional support structures.
They’ll determine if temporary support is needed during construction and design appropriate header beams to distribute weight properly. This step is non-negotiable for ensuring your home remains structurally sound.
Step 3: Obtain Necessary Permits and Follow Building Codes

Contact your local building department to secure proper permits before starting construction. Most municipalities require approval for structural modifications, especially in load-bearing areas.
Building inspectors will check your work at various stages to ensure compliance with safety codes. Pay special attention to regulations regarding electrical outlets, HVAC modifications, and fire safety measures. Skipping this step can result in fines or the removal of non-compliant work.
Step 4: Choose the Right Materials

Select materials that balance structural needs with your visual preferences. For load-bearing walls, 2×6 supports provide more stability than standard 2×4s. If noise reduction is important, consider soundproofing insulation like rock wool or foam panels.
Standard drywall offers versatility for finishes, while decorative options like shiplap, reclaimed wood, or integrated glass panels can add character. Remember that heavier finishes may require additional structural reinforcement.
Step 5: Frame and Install the Wall

Begin by marking floor, ceiling, and adjacent wall locations. Install the bottom plate and secure it to the floor, then attach the top plate to the ceiling joists. Place vertical supports 16 inches in the center, with additional reinforcement around doorways using proper headers.
For load-bearing walls, double up end supports and headers. After framing inspection, install insulation, then hang and finish drywall on both sides. Complete with molding, paint, and any decorative elements to match your existing décor.
Cost Considerations for Adding a Separation Wall
Adding a separation wall typically costs between $1,000 and $5,000, depending on several factors. Material quality significantly impacts price—standard drywall remains the most economical, while decorative options like glass panels or custom woodwork increase expenses.
Labor costs vary by location, with structural modifications requiring specialized contractors commanding higher rates. Permit fees range from $100 to $500, depending on your municipality.
For budget-conscious homeowners, consider more affordable alternatives like room dividers, curtains, or partial walls that don’t require extensive structural work.
DIY installation can reduce expenses, but professional help remains essential for load-bearing areas to ensure safety and compliance with building codes. Hidden costs may include electrical rewiring, HVAC rerouting, and potential floor or ceiling repairs needed to integrate the new wall seamlessly.
How to Remove a Load-Bearing Wall?

Removing a load-bearing wall is a complex renovation that requires careful planning and professional expertise. Begin by confirming the wall’s structural role through blueprint analysis or professional assessment—walls near your home’s center or those running perpendicular to ceiling supports often bear weight.
Before any demolition, secure proper building permits and consult a structural engineer who will design appropriate replacement support systems.
Safety demands installing temporary support structures on both sides of the target wall before removal begins. Your engineer will specify the proper beam type (LVL, steel, or wood) based on your home’s specific needs and the opening’s span.
After installing the permanent beam and support posts, complete the project with proper framing, drywall finishing, and any necessary electrical or HVAC modifications. A final inspection ensures everything meets building codes.
Pros & Cons of Opening a Load-Bearing Wall
Adding a structural wall between your kitchen and living room is a significant renovation that impacts your home’s function and feel.
While it creates the separation many homeowners desire, it also presents structural challenges that require careful planning. Before making this investment, consider both the daily lifestyle benefits and long-term implications.
Pros
Creating a wall establishes distinct zones that enhance functionality and privacy. Cooking noises, odors, and messes remain contained in the kitchen area, creating a cleaner living environment.
The separation helps control temperature differences between spaces, potentially improving energy efficiency.
Wall space provides additional opportunities for cabinetry, artwork display, or furniture placement. Defined spaces also allow for different design styles in each room.
Cons
Adding a wall eliminates the open-concept feel popular in modern homes, potentially decreasing resale value. Natural light becomes restricted, creating darker interiors that may require additional lighting fixtures.
The renovation requires significant investment in professional structural engineering, permits, and construction costs.
Traffic flow becomes more restricted, which can make entertaining more challenging. Smaller separated spaces might feel more cramped than one larger open area.
Summing It up
Adding a wall or opening a load-bearing wall between the kitchen and living room represents a major change that impacts your daily home experience. These renovation projects require careful consideration of both practical needs and structural requirements.
Before starting, connect with structural engineers and contractors who can assess your specific home and provide expert recommendations. Remember that securing proper permits and following building codes isn’t optional—they’re essential for safety and maintaining property value.
While design preferences shift over time, successful renovations balance current styles with long-term functionality.
By weighing the pros and cons, understanding costs, and respecting structural limitations outlined in this guide, you’ll be better equipped to make decisions that enhance your living spaces and serve your family’s needs for years to come.

Alex Guerrero, a graduate with a Fine Arts degree from the Rhode Island School of Design, has been a visionary in the world of color and design for over 15 years. His professional journey began in the heart of the fashion industry in Milan, where he developed an acute sense for color harmonies and trends. Alex joined our team in 2018, offering fresh and innovative perspectives on color utilization in various spaces. Renowned for his ability to blend contemporary trends with timeless elegance. Outside of work, Alex is an accomplished painter and a volunteer art therapist, his artistic talents further enriching his professional insights.