Sealing butcher block countertops is like giving your wooden surfaces a protective shield against everyday kitchen dangers.
Without proper sealing, your beautiful countertops can quickly become stained, warped, or even harbor harmful bacteria.
Nobody wants that!
The good news is that with the right materials and a little know-how, you can seal your butcher block yourself and save hundreds of dollars.
If you’re installing new counters or refreshing old ones, sealing creates a barrier that keeps spills on the surface where you can wipe them away.
Plus, sealed wood shows off those gorgeous natural patterns that make your kitchen special.
Ready to give your butcher block the protection it deserves?
Let’s get started with this simple guide!
Why Sealing Butcher Block is Essential?
Think of sealing your butcher block like putting a raincoat on your wood.
Without it, spills soak right in, leaving ugly stains that won’t come out.
Worse, moisture can make bacteria grow, which isn’t something you want near your food!
A good seal creates a barrier that keeps liquids on top, where you can wipe them away.
Sealing also helps your butcher block last much longer.
Protected wood won’t crack, warp, or dry out the way unsealed wood does.
Plus, the right sealer brings out those gorgeous natural wood patterns and gives your counter a warm glow.
Your kitchen deserves that extra care.
Types of Sealers for Butcher Block
Not all sealers are created equal! Your butcher block needs different protection depending on how you use it.
Here’s a simple breakdown of your options.
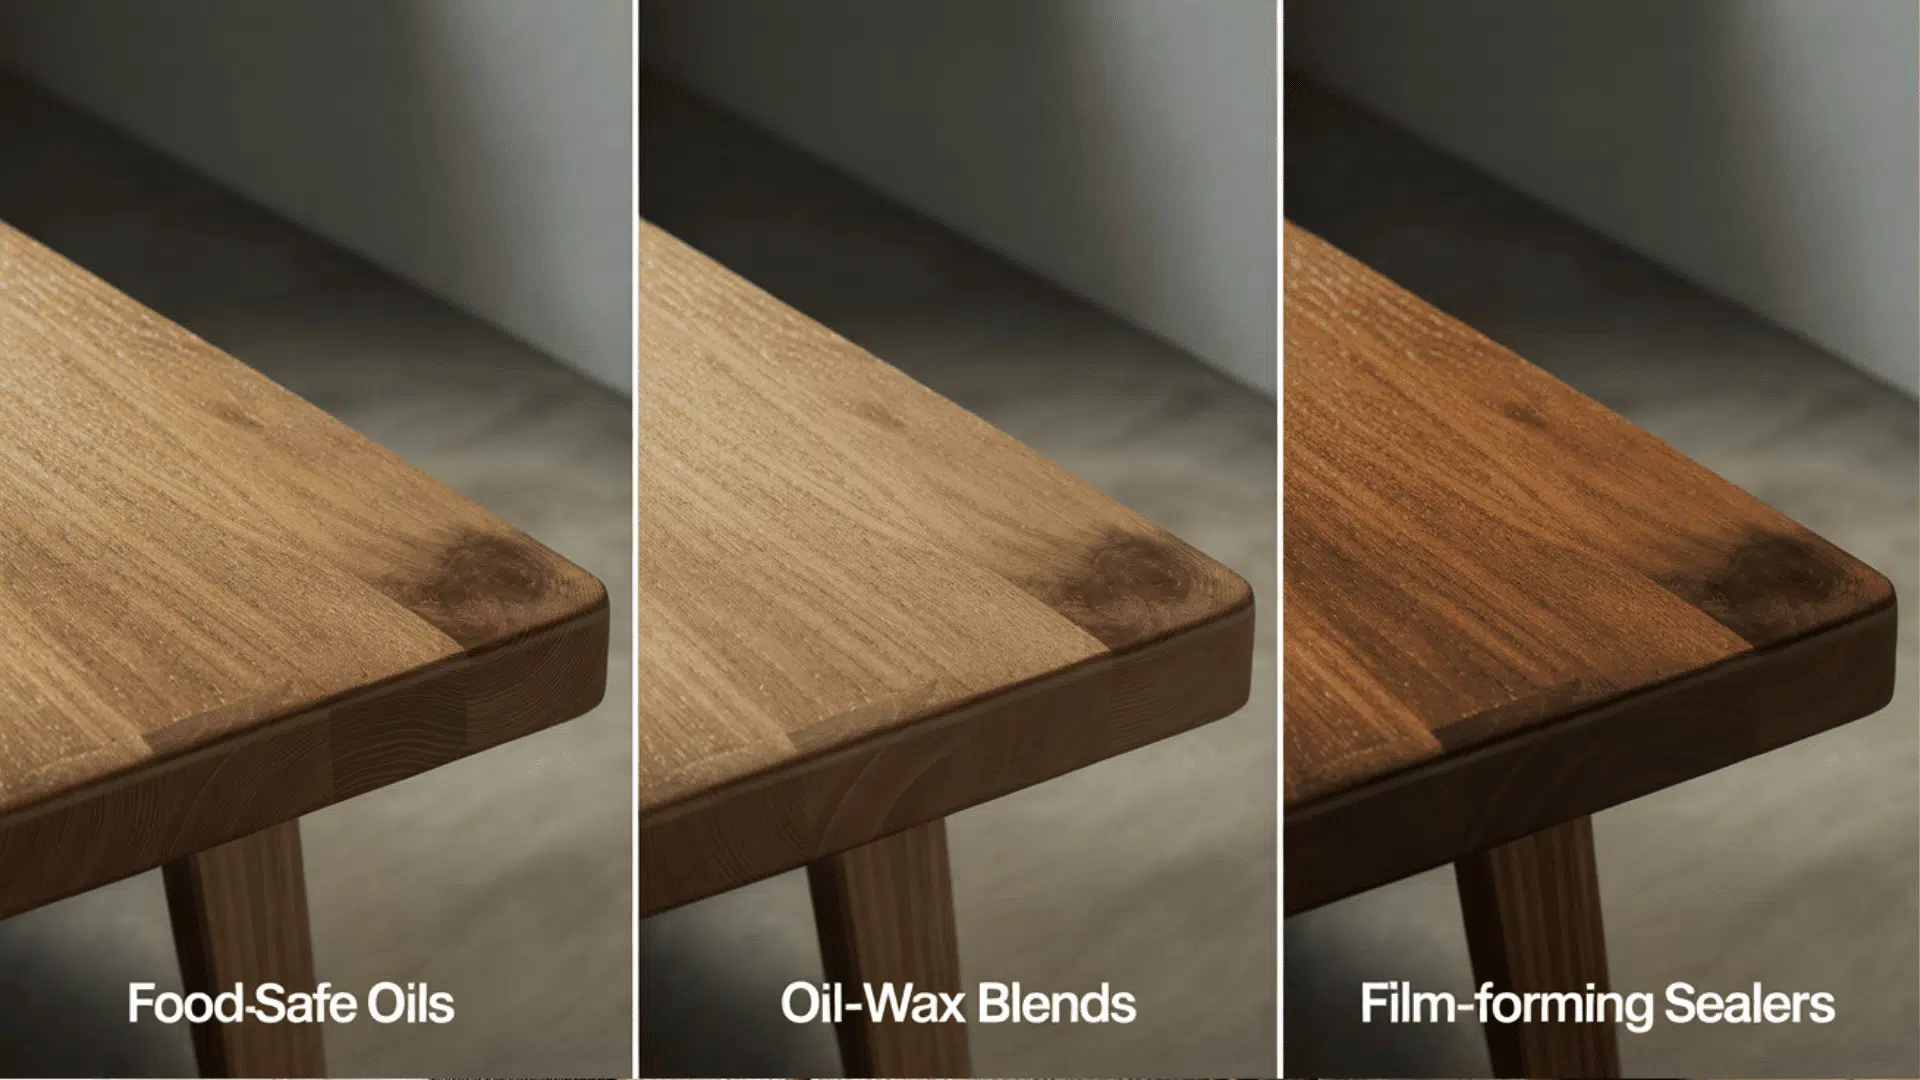
| SEALER TYPE | DESCRIPTION |
|---|---|
| Food-safe oils | Mineral or tung oil, safe for food contact, prevents cracking and nourishes the wood. |
| Oil-wax blends | Combination of oil and wax, providing a protective, matte finish and water resistance. |
| Film-forming sealers | Polyurethane or varnish forms a hard protective layer, offering durability and a glossy finish. |
Many DIYers start with mineral oil because it’s affordable and easy to find.
Whatever you choose, make sure it matches how you’ll use your butcher block every day.
What All You’ll Need to Get Work Started!
Getting the right stuff for your butcher block project helps it turn out great.
You’ll need to pick a good sealant and gather all your tools before you start.
Picking the Right Sealant
Consider your countertop’s location and use before selecting a sealant.
Kitchen prep surfaces need food-safe options, while other areas have different requirements.
- Mineral Oil: Simple and safe for food preparation areas.
- Polyurethane: Provides better protection but isn’t food-safe for cutting surfaces.
- Beeswax: A Natural and food-safe option that enhances wood’s appearance.
Select the sealant that matches your butcher block’s purpose for best results and longevity.
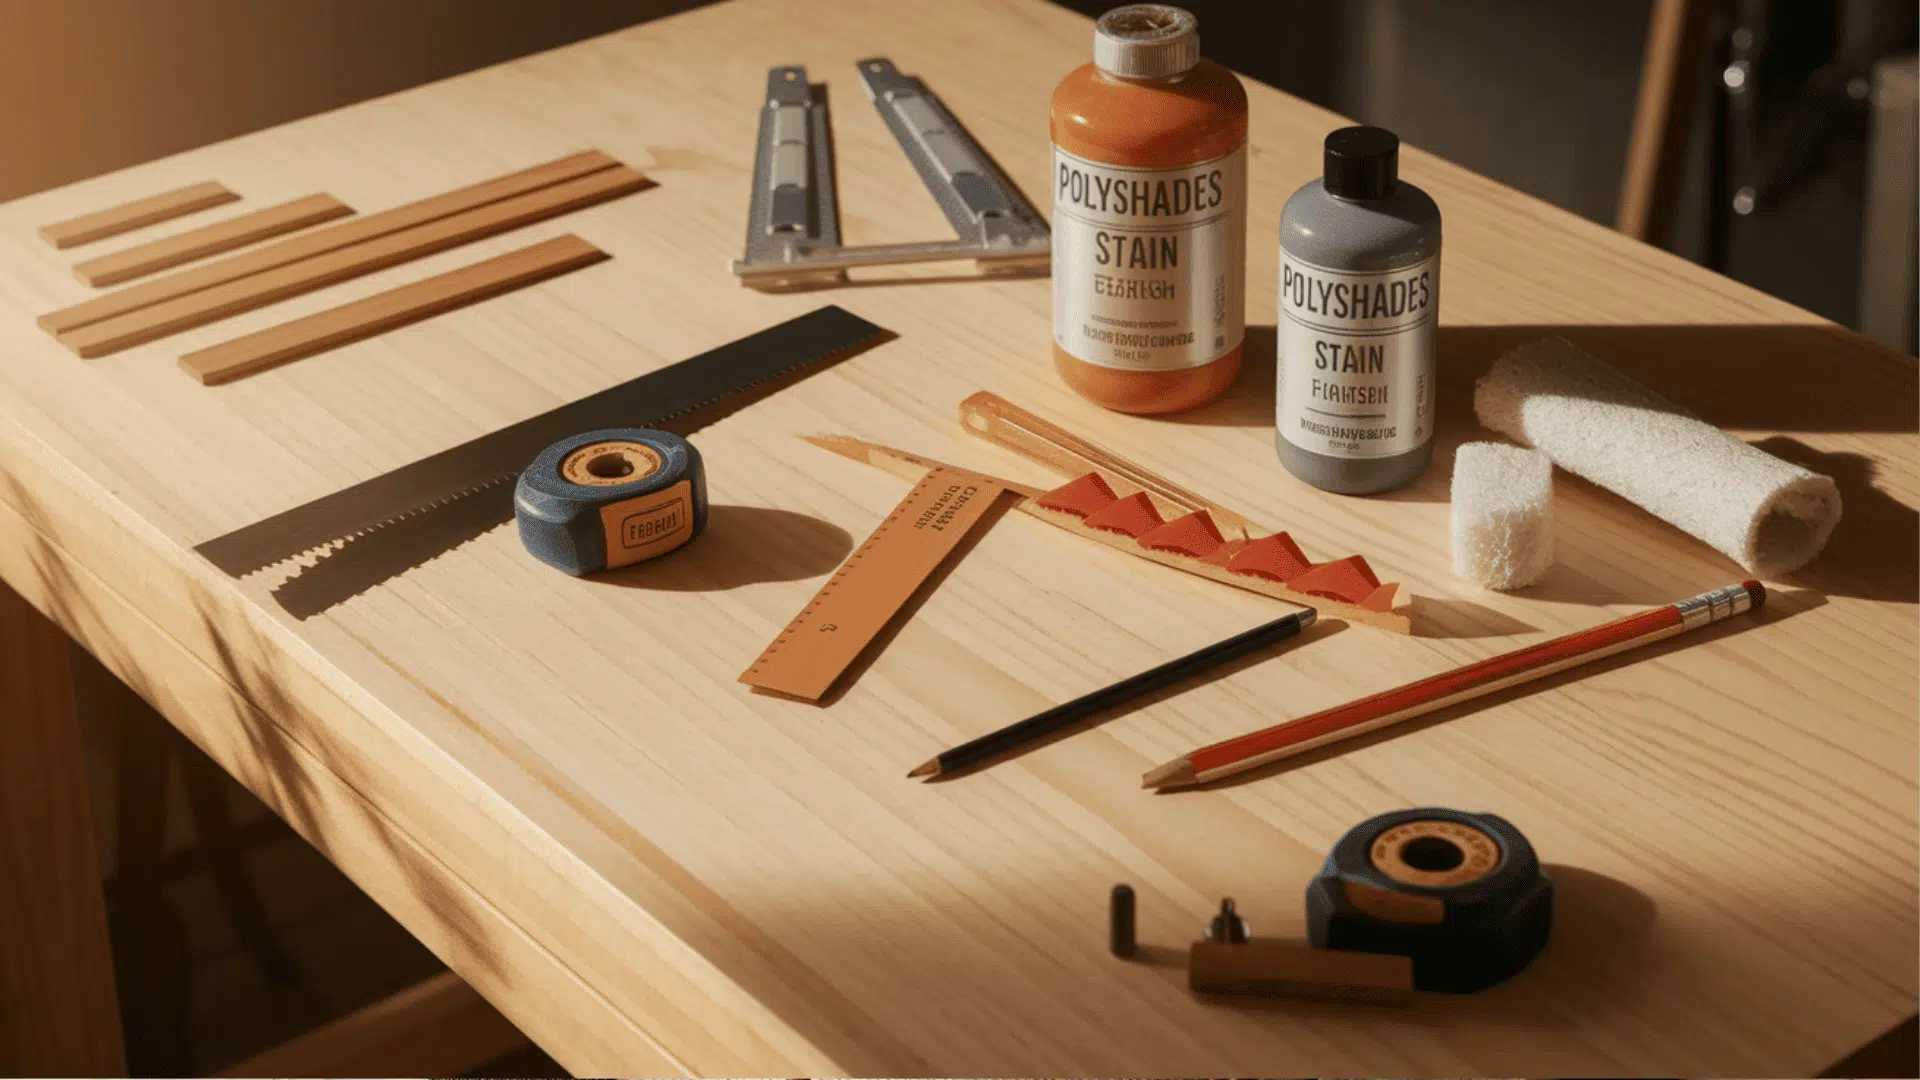
Tools and Materials Required
Here’s what you’ll need to buy for your project.
Prices may change depending on where you shop and the quality you choose.
| MATERIAL | ESTIMATED COST RANGE (USD) |
|---|---|
| Solid unfinished Birch Butcher Block | $180 – $250 |
| Saw (for cutting) | $15 – $60 |
| Measuring tape & pencil | $5 – $10 |
| Sandpaper (120, 180, 220 grits) | $6 – $12 |
| Tack cloth | $5 – $15 |
| Pre-stain conditioner (1 qt) | $13 – $18 |
| Stain & finish in one (PolyShades, ½ pt) | $12 – $15 |
| Steel wool (8-pack) | $4 – $8 |
| Wipe-on polyurethane (1 qt) | $18 – $25 |
| Shims (for leveling) | $3 – $8 |
| Cabinet brackets & screws | $6 – $15 |
| Total Estimated Cost Range: | $267 – $436 |
You might already have some of these tools at home, which can help lower your costs.
Check what you have before heading to the store to avoid buying things twice.
Step-By-Step Guide for Sealing Butcher Block Countertops
Sealing your butcher block isn’t hard if you follow these steps in order.
You’ll need to measure, cut, sand, stain, and install your countertop carefully to get great results that last for years.
STEP 1: Measure and Cut Your Butcher Block
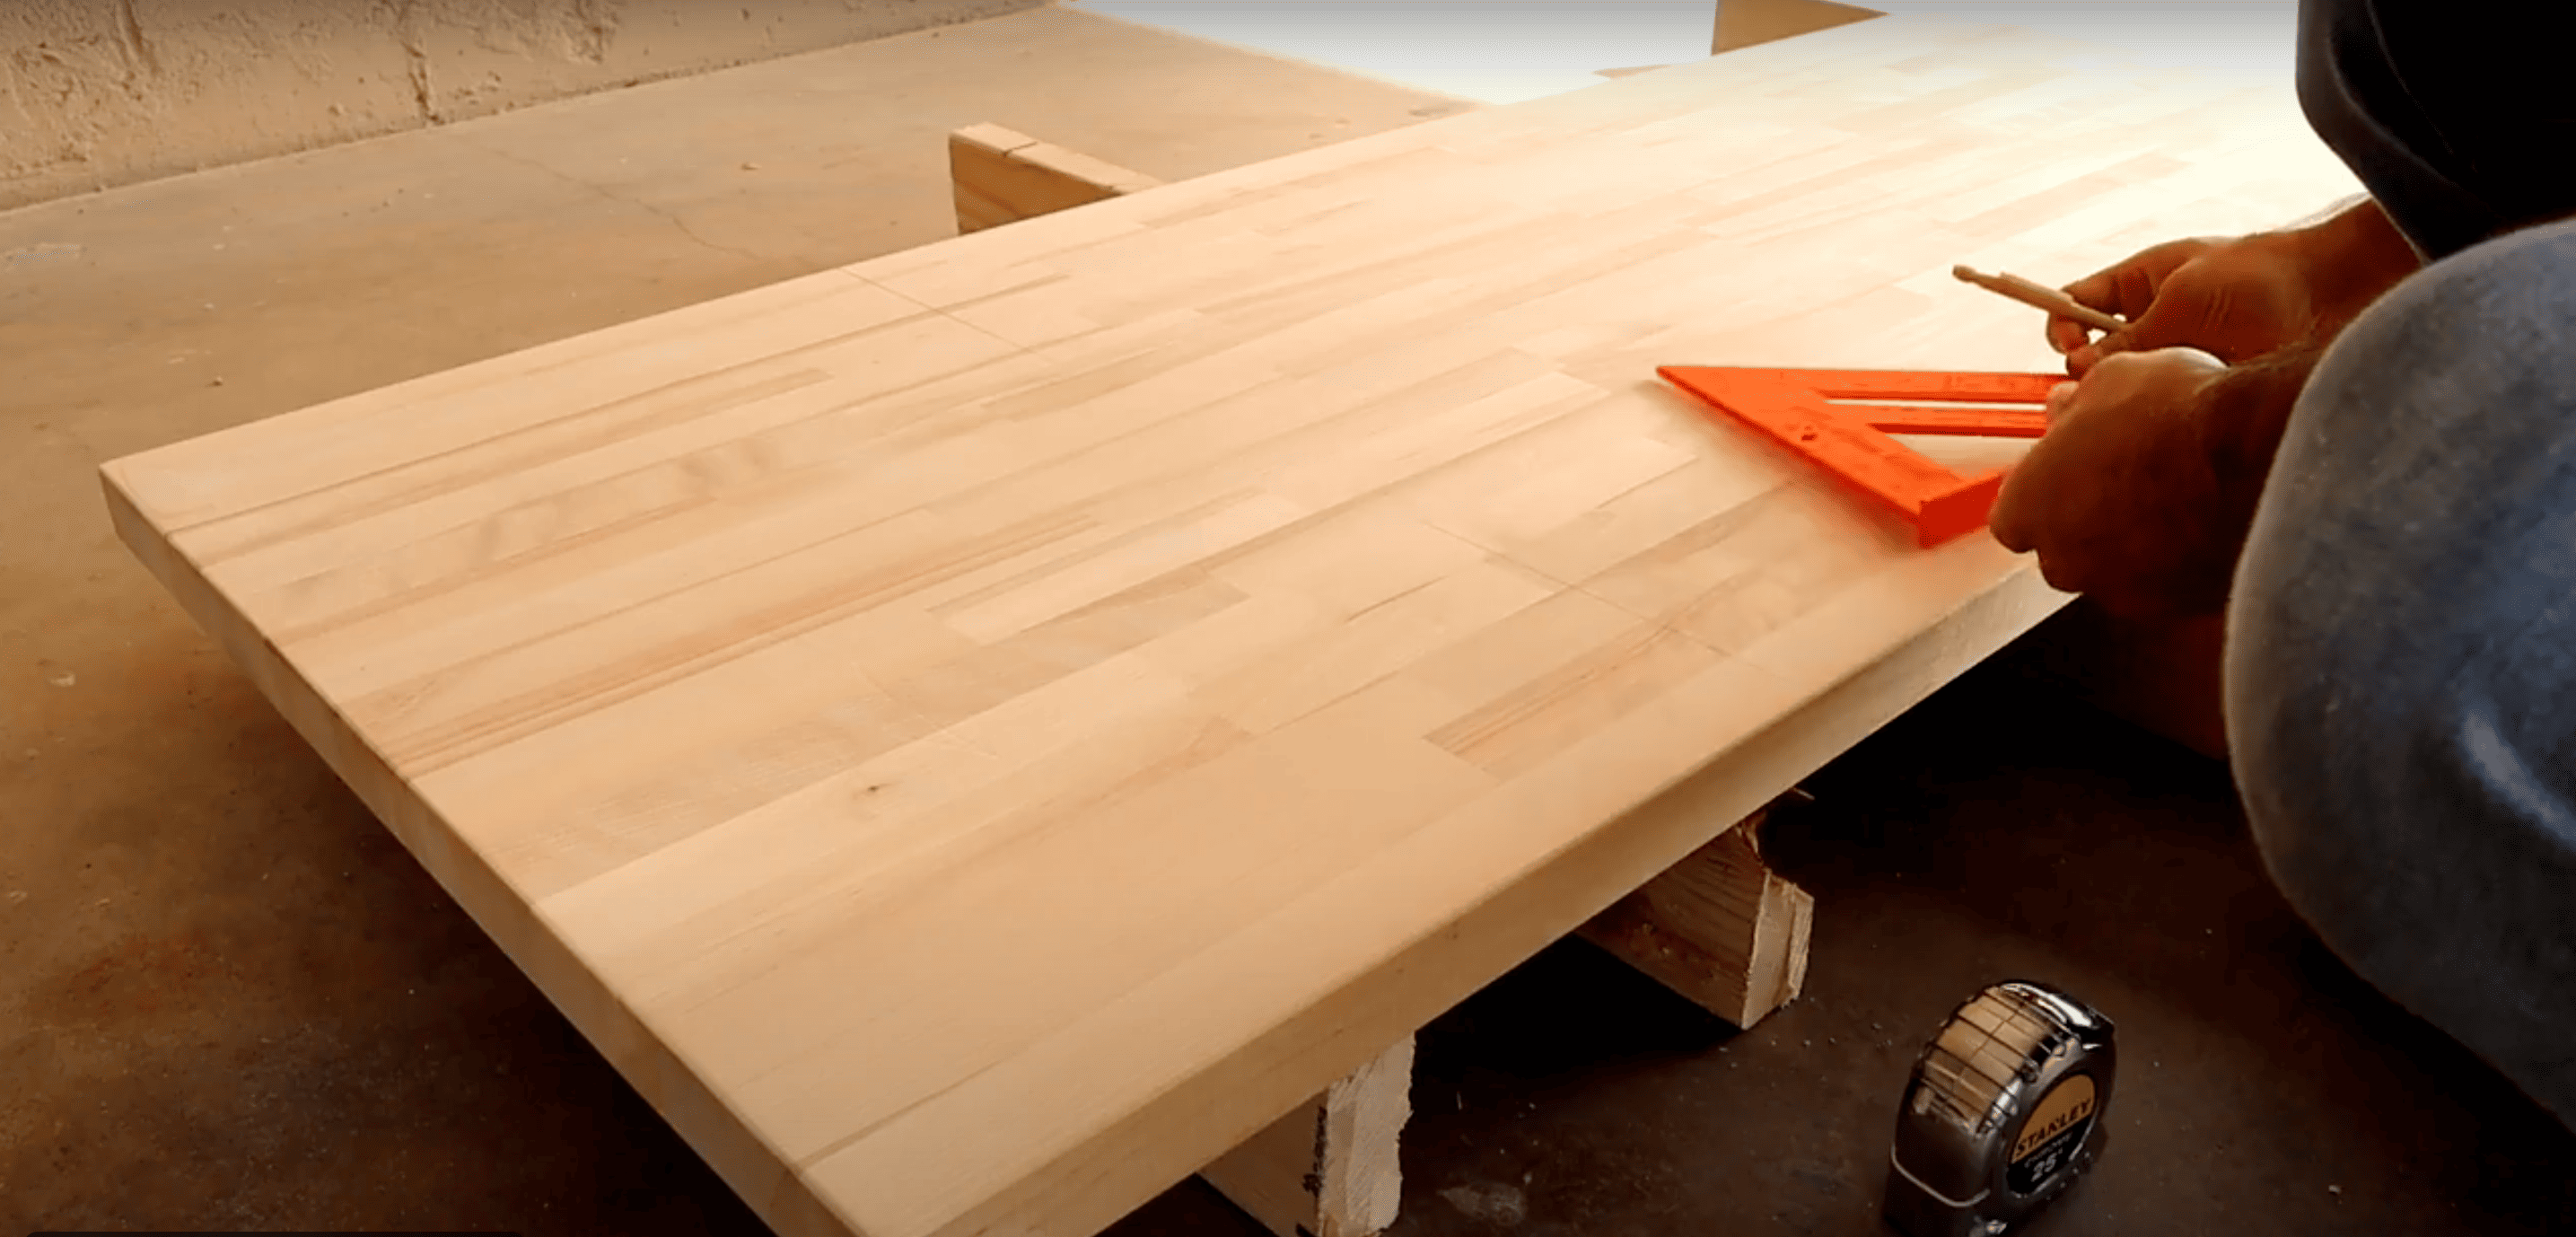
Begin by carefully measuring the space where you intend to install the countertop.
Use a tape measure to mark the length on the butcher block.
Once marked, use a saw to cut along the line, ensuring the cut is accurate for a perfect fit.
Double-check your measurements before cutting to avoid any errors.
This initial step is key to ensuring your butcher block fits perfectly in the space.
Insider Insights:
- Use a saw guide to ensure a straighter cut.
- Check the measurements twice before cutting.
- Allow a little extra length for adjustments during installation.
STEP 2: Notch Out for Face Frames
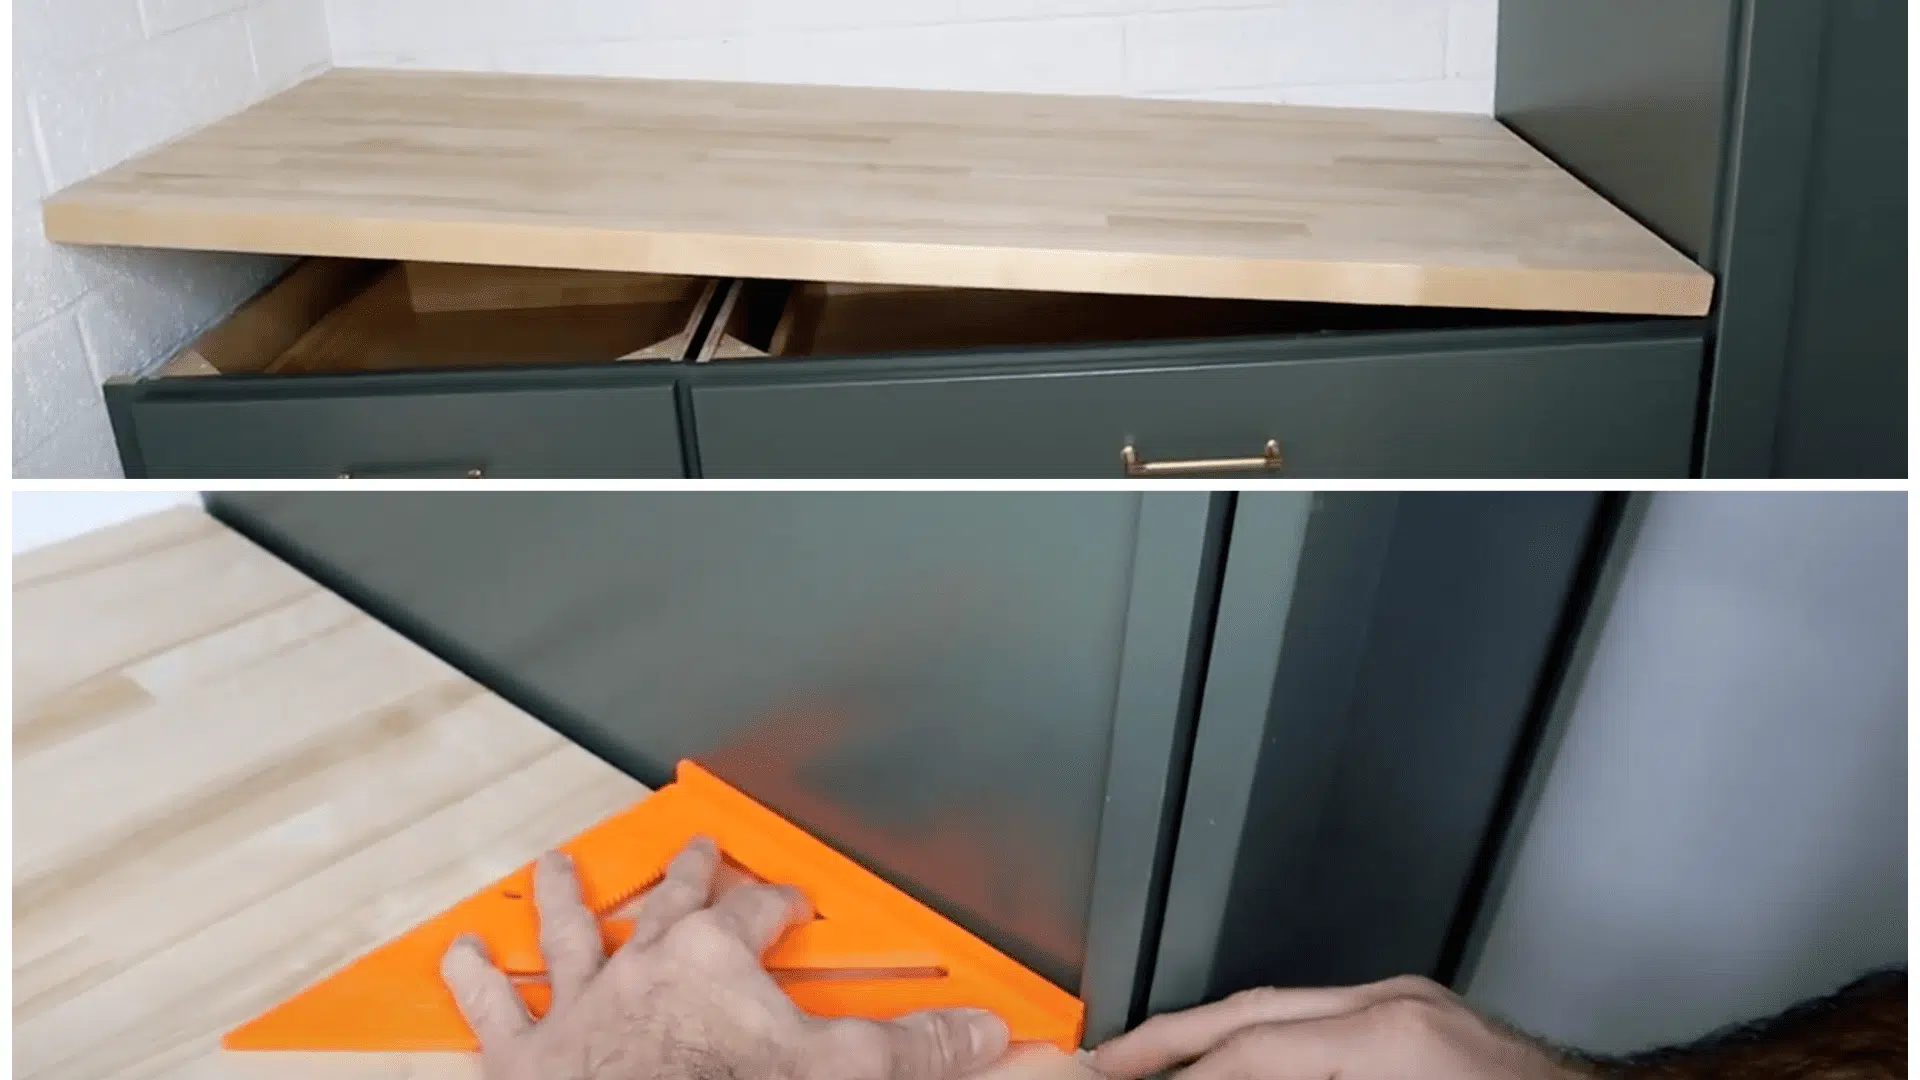
If your cabinets’ face frames protrude slightly, measure and notch out the necessary groove on the butcher block to accommodate this.
This step ensures the countertop sits flush against the wall and aligns properly with the base cabinets.
A simple notch ensures no overhang, giving the installation a clean and professional appearance.
Precise cuts are essential so the countertop fits flawlessly.
Insider Insights:
- Measure the face frame before cutting the notch.
- Make small cuts, checking the fit as you go.
- Test the fit of the countertop before securing it in place.
STEP 3: Sand the Butcher Block
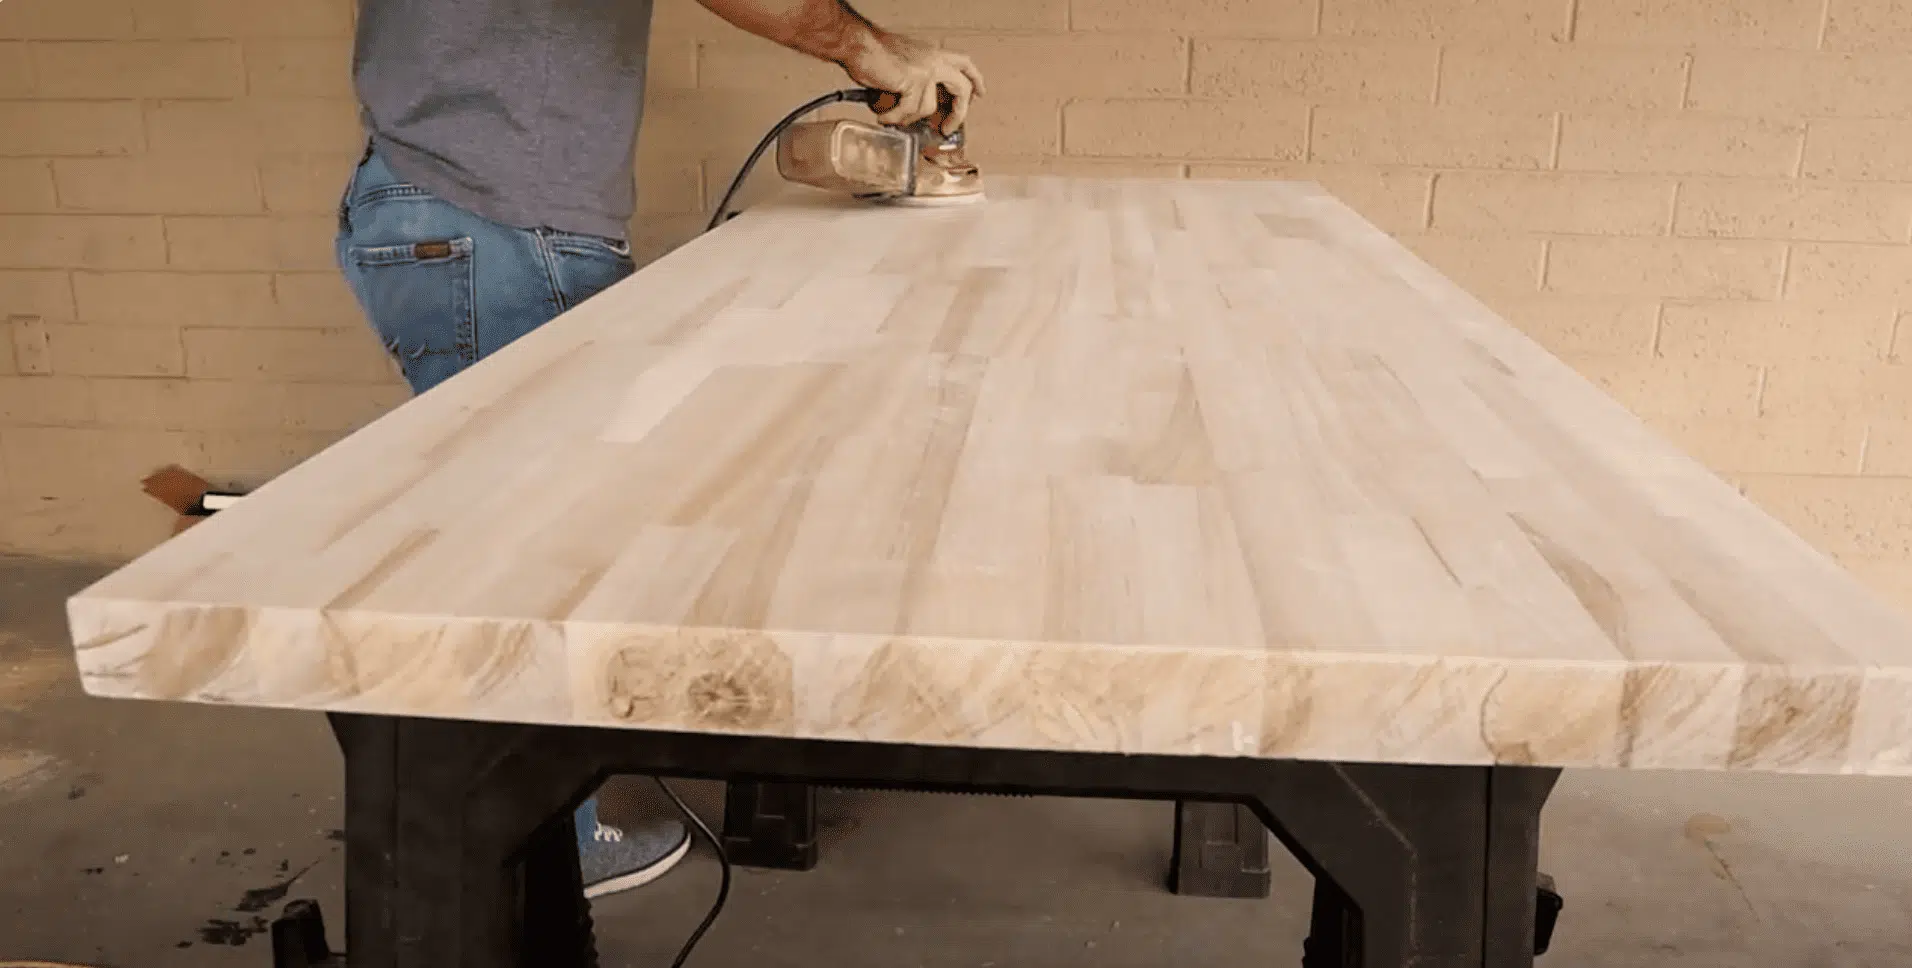
Once the butcher block is cut to size and the notches are in place, start sanding with 120-grit sandpaper to smooth out any rough edges and surfaces.
Afterward, move to 180-grit and finally 220-grit sandpaper for a fine, smooth finish.
Sand the top, sides, and all edges thoroughly to prepare for the stain.
This sanding process ensures a smooth surface for a professional finish.
Insider Insights:
- Always sand in the direction of the wood grain.
- Don’t press too hard on the sander; let it do the work.
- Wipe off dust after each sanding stage with a tack cloth.
STEP 4: Apply Pre-Stain and Stain
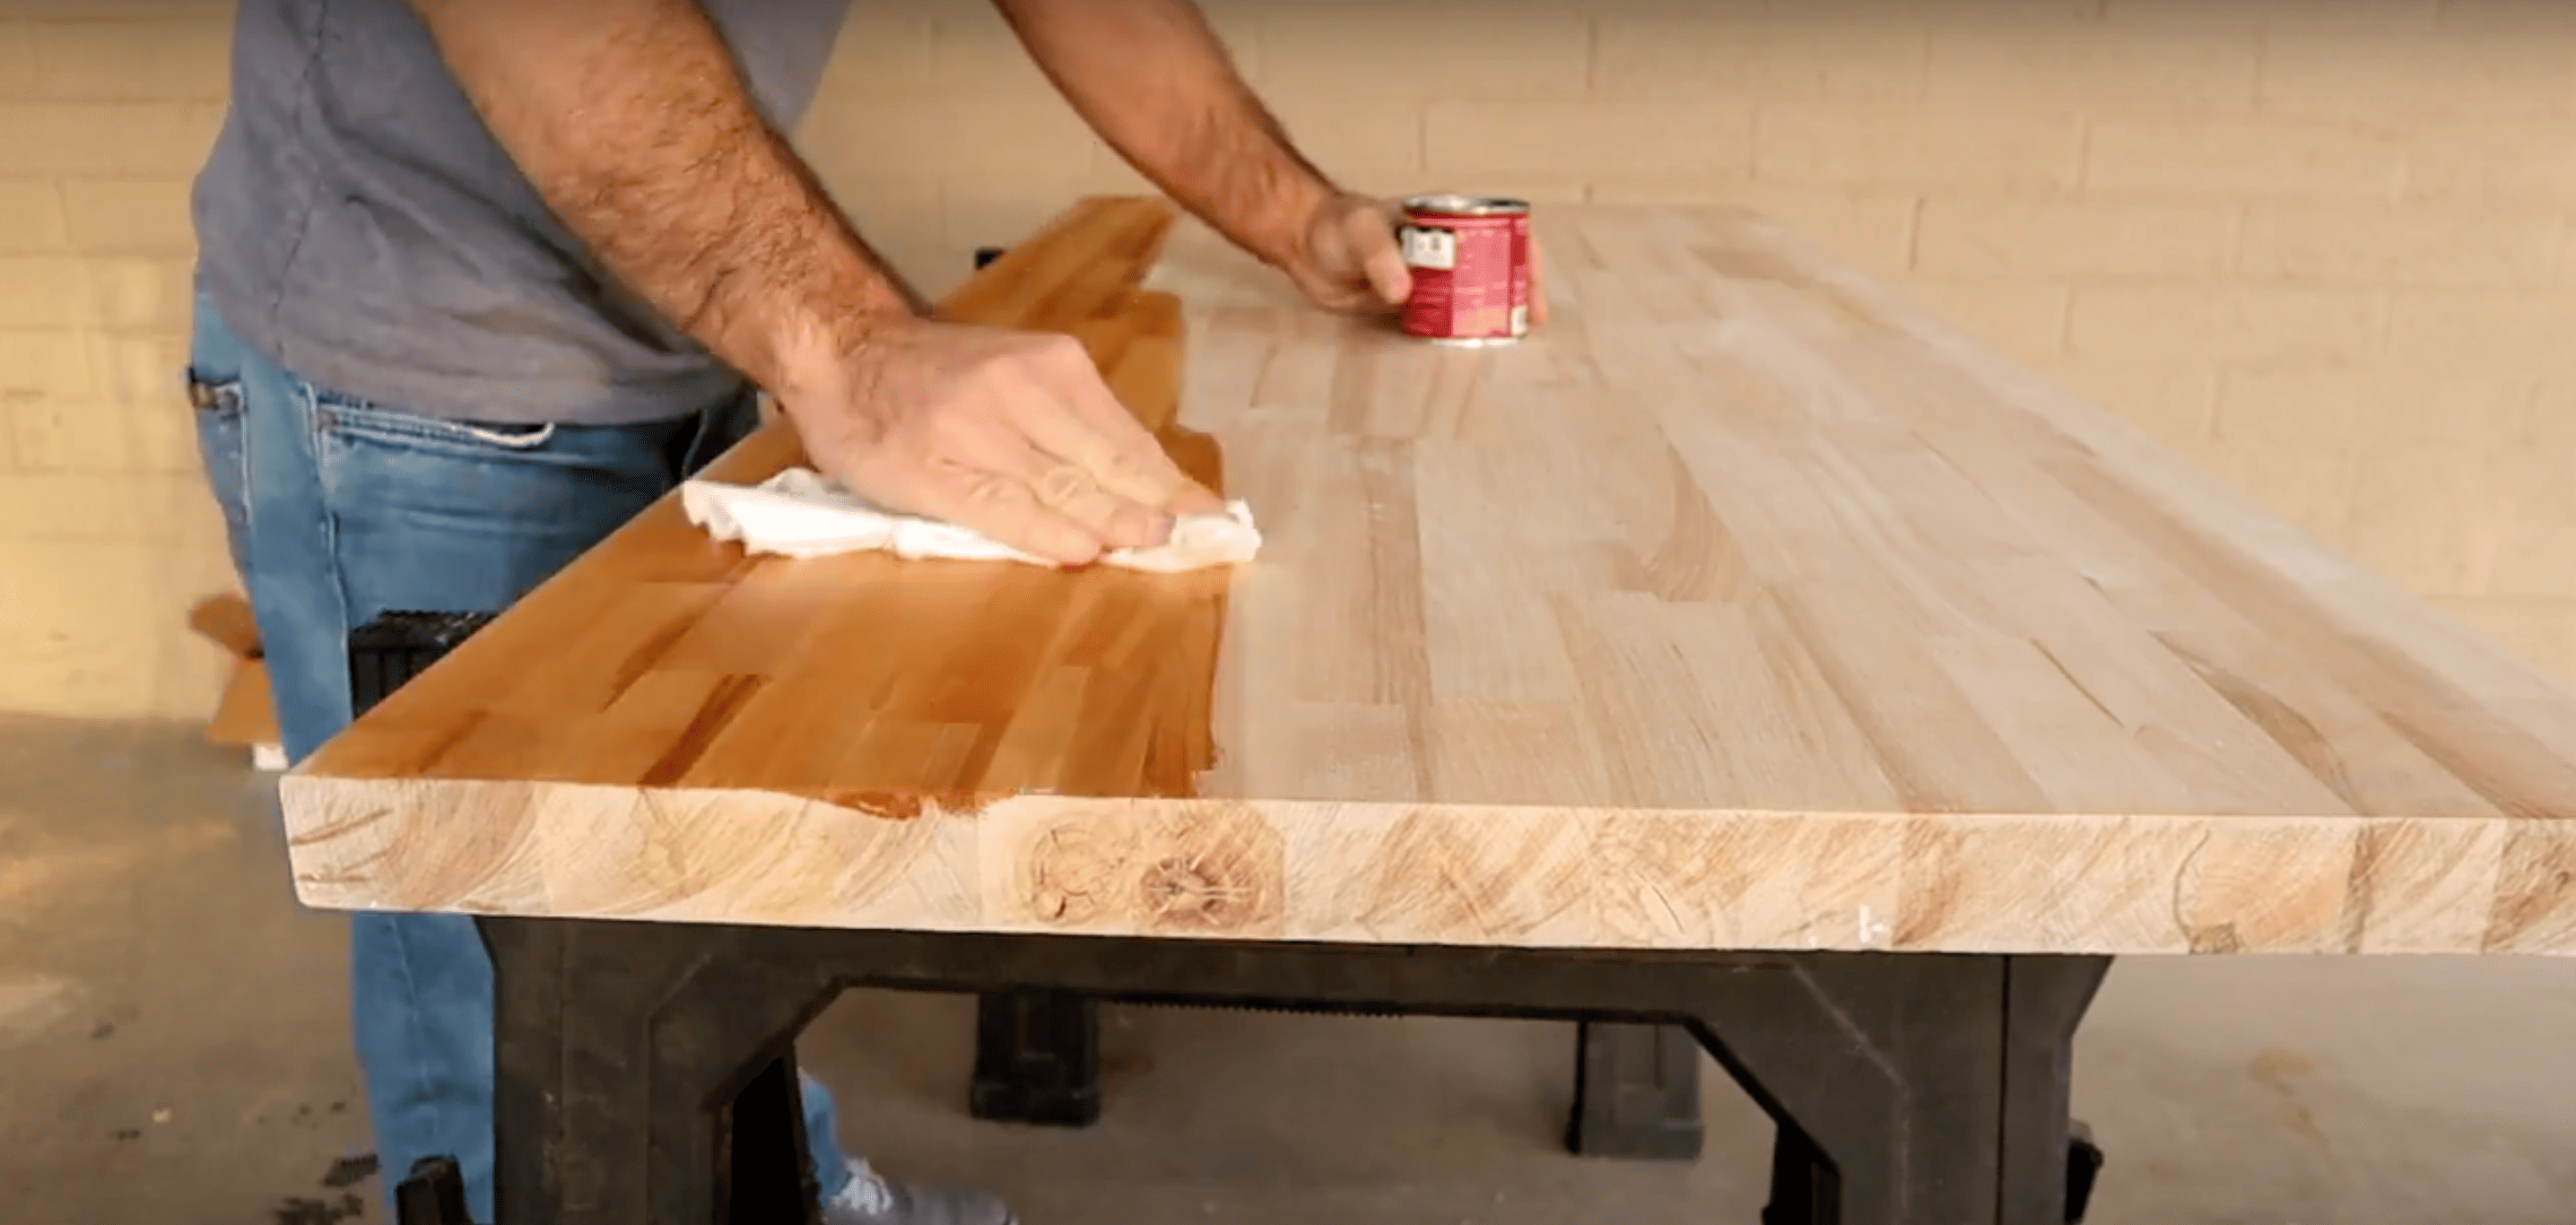
Before applying stain, apply a pre-stain conditioner to the wood.
This helps the stain to apply evenly across the butcher block.
Use a rag to apply the conditioner, working it into the wood and allowing it to soak in.
Afterward, apply your stain of choice, moving in sections.
Apply multiple coats for a deeper, richer color, sanding lightly between each coat for a smoother finish.
Insider Insights:
- Test the stain on a small, hidden area first.
- Let the pre-stain dry before applying the stain.
- Use a clean cloth for even stain application and wipe off excess.
STEP 5: Install the Countertop

Once you are satisfied with the staining and finishing, it’s time to install the countertop.
Use shims to adjust the height and ensure the butcher block is level.
Position the countertop carefully, then secure it to the cabinet brackets with screws.
Double-check alignment before fully tightening.
The countertop should fit snugly, with no gaps, and be properly aligned with your base cabinets.
Insider Insights:
- Use a level to ensure the countertop is perfectly aligned.
- Secure the butcher block with screws, not just adhesive.
- Leave a small gap from the wall for expansion if needed.
Watch How it’s Done: Sealing Butcher Block Countertops
For more information, check out this video tutorial by Remodel With Robert
Butcher Block Maintenance Schedule
Keeping your butcher block looking good isn’t hard if you stay on top of it.
Here are some simple ways to care for your countertop so it lasts for years.
- When you’re done using your countertop, clean it with a slightly wet cloth, then dry it right away so water doesn’t soak in and harm the wood.
- Watch for spots that look pale and dry or places that have lost their shine—this means your butcher block is thirsty and needs more oil.
- For quick touch-ups, rub mineral oil on dry areas, but to ensure maximum protection, completely reseal every few months.
- Got stains? Mix lemon juice with salt, gently scrub the spot, rinse it off, dry thoroughly, and then add a little oil to that area.
- Always use cutting boards instead of chopping directly on your butcher block to prevent knife marks that can collect food bits and bacteria.
Remember, a little regular care saves you from big repairs later.
Just a few minutes each week will keep your butcher block looking great and working well for your family.
Common Mistakes to Avoid
Even DIY experts make mistakes when sealing butcher block.
Knowing what not to do can save you time and money, and help you get better results the first time.
- Don’t use regular furniture polish or cooking oils like olive oil on your countertop, they can go rancid and smell bad over time.
- Skipping proper sanding or not cleaning dust off before sealing can cause your finish not to stick well and might look bumpy or peel later.
- Too much sealer makes a sticky mess, while too little will not protect your wood. Aim for thin, even coats using long strokes.
- Rushing between coats or using countertops prematurely damages your finish, as most sealants require a full 24-hour drying period.
Take your time and follow the directions on your sealer.
A little patience during the sealing process will give you a beautiful countertop that will withstand daily use for years to come.
Summing It Up
Sealing butcher block countertops isn’t just a weekend project; it’s an investment in your kitchen’s future.
When done right, your sealed countertops will resist stains, fight off moisture, and stay beautiful for years.
The secret is taking your time and choosing the right sealant for your needs.
Don’t rush or skip maintenance!
A quick wipe-down after use and fresh oil every few months keeps your butcher block looking great.
Avoid common mistakes like using cooking oils or hurrying between coats.
Your patience will pay off with countertops that not only look amazing but also withstand daily kitchen life.
With these simple steps, your butcher block will remain the star of your kitchen for many happy years of cooking and gathering!
If you are interested in more informational DIY projects content, feel free to click here and explore other blogs you might enjoy.

Stephanie Grace, a graduate with a degree in Fine Arts from the Savannah College of Art and Design, has been inspiring DIY enthusiasts with her creative and practical guidance for over 14 years. Her career in design and crafting began in a small artisan workshop, where she developed a passion for transforming everyday materials into beautiful and functional items. Stephanie joined our website in 2018, rapidly gaining popularity for her easy-to-follow DIY tutorials and innovative project ideas. Since then, she has been the creative mind behind our DIY section, helping readers bring their artistic visions to life. Outside her professional pursuits, Stephanie enjoys pottery and urban gardening, hobbies that showcase her love for hands-on creativity and nature.