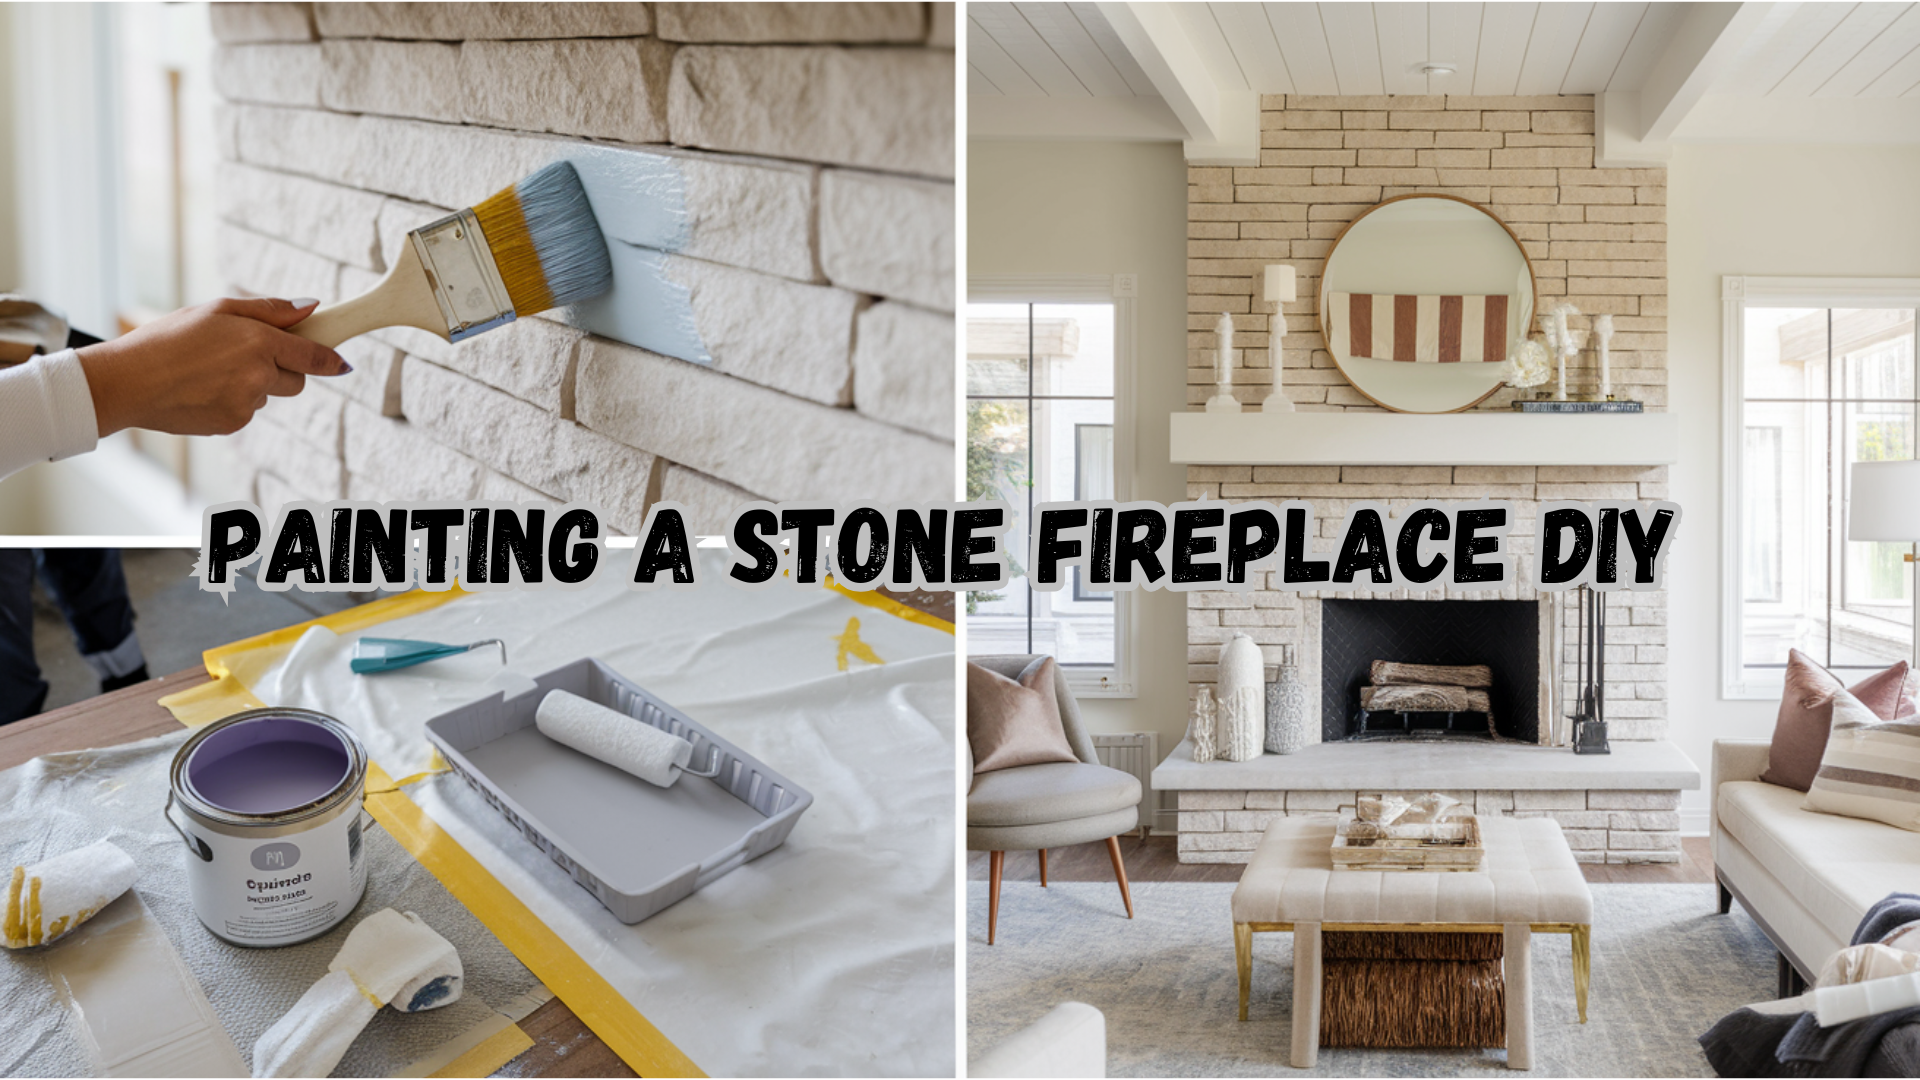
Ready to give your outdated stone fireplace a fresh new look? A coat of paint can be the perfect solution to modernize this focal point of your home without the hassle and expense of a complete renovation.
While requiring patience and attention to detail, this DIY project is both budget-friendly and achievable for most homeowners.
On the weekend, you can convert your dark, outdated stone into a bright, contemporary feature that complements your home’s style.
From choosing the right paint to achieving the perfect finish, this DIY guide will walk you through every step of painting your stone fireplace. Get ready to fall in love with your fireplace all over again!
Why Should You Paint Your Stone Fireplace Yourself?

Painting your stone fireplace yourself is a budget-friendly DIY project that can instantly update your space without expensive renovations.
You can achieve a professional look while customizing the color to match your style by choosing the right paint, sealer, and techniques.
Whether you prefer a soft whitewash or bold accent tones, DIY painting gives you full control over the final outcome.
Plus, proper preparation and sealing ensure long-lasting results, making it a cost-effective way to refresh your home’s interior and increase its appeal.
Essential Materials and Tools
Gather the right materials before painting your stone fireplace to ensure smooth application and lasting results.
Since stone absorbs more paint than brick, multiple coats may be needed. This project takes 6-8 hours, so prepare ahead for a hassle-free process.
1. Cleaning Supplies
- Basic household cleaner or brick-specific cleaner
- Old rags for wiping down surfaces
- Brush for deep cleaning
2. Paint Materials
- Buttercream paint (or your chosen color)
- Water for creating a 50/50 paint mixture
- Chip brush or masonry brush
- Small brush for detail work
- Slick Stick primer (for glossy surfaces)
- Additional paint colors for layering (if desired): French Linen, Gravel Road, Various gray shades
3. Surface Protection
- Painter’s tape
- Drop cloths or rags for floor protection
- Sandpaper (for glossy surfaces)
4. Finishing Materials
- Matte or satin polyacrylic sealer (recommended)
Remember to gather all the materials before starting, as this project can take 6-8 hours and may require multiple sessions to complete. The stone surface will absorb more paint than brick, so ensure you have enough paint for various coats.
Planning and Preparation

Thorough preparation ensures professional results before painting your stone fireplace. Start by cleaning the surface with a brick cleaner (or household cleaner) and an old rag to remove all dirt and grime.
Protect your workspace by taping off the fireplace box opening and laying down rags or drop cloths – this project gets messy! Mix your chosen color with water in a 50/50 ratio for paint preparation.
The consistency should be quite watery, so test small batches to get it right. For glossy surfaces like tiles, rough them with sandpaper, then apply Slick Stick primer. Let it dry completely before painting.
Remember that stone surfaces are highly absorbent so that proper prep will save you time and touch-ups later.
A Step-by-Step Guide to Paint Your Stone Fireplace
Step 1: Thoroughly Clean the Fireplace

Start by thoroughly cleaning the fireplace using a brick cleaner or degreaser to remove dirt, soot, and grime. Use an old rag or sponge to scrub the surface. Allow it to dry completely.
Apply painter’s tape around the firebox, mantel, and surrounding areas. Lay drop cloths on the floor to protect against drips.
Step 2: Apply Base Paint

Mix 50% water and 50% paint (Buttercream) to create a thin, absorbent paint mixture. Using a chip brush or masonry brush, apply the paint in dabbing and brushing motions to cover the stone’s texture.
Since stone is porous, expect two coats for full coverage. Allow the first coat to dry before applying the second.
Step 3: Paint Hearth and Tiles

If the hearth or tiles are glossy, lightly sand the surface for better adhesion. Apply one coat of Slick Stick primer and let it dry. Paint the hearth using French Linen with a brush or roller.
Don’t worry about perfect grout lines at this stage, as they will be touched up later.
Step 4: Add Gray Accents

Select stones to paint in darker grays (Gravel Road and a lighter gray) for depth. Use a wet-brush technique, dipping your brush in water first, then paint for a soft, blended look.
Apply dark gray first, then blend with lighter shades using a dry cloth or sponge for a natural effect.
Step 5: Touch Up and Seal

Refine the grout lines and edges using buttercream paint to give them a polished finish. Use a small brush to clean up over-painted areas.
Once satisfied, seal the fireplace with matte or satin polyacrylic using a foam brush or lint-free cloth. Allow 24-48 hours to fully cure before decorating.
Video Tutorial
For more information, check out this video tutorial by Shayna Robinson Repurposing.
Post-Painting Care & Maintenance Tips

A freshly painted stone fireplace can completely transform a room, but proper care is essential to keep it looking pristine and long-lasting.
Simple maintenance practices will help prevent chipping, discoloration, and wear over time. Here are some key post-painting care tips to maintain its beauty and durability:
- Allow 24-48 hours for the paint to dry before using the fireplace or placing decorations fully.
- Use a soft, damp cloth for dusting and mild soap with water for deeper cleaning. Avoid harsh chemicals or abrasive sponges.
- Use a matte or satin polyacrylic sealer to prevent stains, dust accumulation, and chipping.
- Avoid placing heavy objects or sharp items on the mantel that could scratch or damage the paint.
- High humidity can cause paint to peel or bubble, so monitor for moisture buildup and use a dehumidifier if necessary.
Key Takeaways for a Lasting Finish!

A painted stone fireplace can stay beautiful for years with the right care. Let each coat dry fully, use heat-resistant paint for functional fireplaces, and seal with matte or satin polycrylic for protection.
Blend accent colors smoothly, test shades before committing, and increase with soft lighting for warmth. Keep extra paint for touch-ups to maintain a fresh look over time.
Wrapping It Up
Updating your stone fireplace with paint is a rewarding DIY project that can dramatically refresh your living space.
While the process requires patience and attention to detail, following these steps will help you achieve professional-looking results.
Each stage is crucial for a lasting finish, from thorough preparation to the final protective seal. Remember that the key to success is proper surface cleaning, using the right paint consistency, and taking time between coats.
Don’t rush the process – good things take time. With proper maintenance and care, your newly painted stone fireplace will remain a beautiful focal point in your home for years.
Whether you chose classic buttercream or experimented with gray accents, your refreshed fireplace, will bring new life to your room.
Frequently Asked Questions (FAQs)
What kind of paint do you use on a stone fireplace?
Acrylic latex paint is a great option for a stone fireplace as it provides excellent coverage, is easy to apply, and has a low odor since it is water-based.
How to clean a stone fireplace before painting?
Mask surrounding areas with painter’s tape, protect the floor with drop cloths, scrub the stone with water and an all-purpose cleaner, then let it dry completely.
Does a stone fireplace increase home value?
Yes, a stone fireplace can increase home value by 6-12%, according to the National Association of Real Estate Appraisers.

James McLaren, with a rich background in architecture from the University of Manchester, has been contributing his expertise to the world of creative construction and home innovation for over 20 years. His journey began as a project manager for a leading construction firm, where he honed his skills in bringing complex designs to life. James joined our platform as a freelancer in 2019, quickly becoming a favorite for his insightful and practical advice. He has been a pivotal force to our wing ever since, bringing our readers a blend of technical know-how and creative flair. Beyond his professional life, James is an avid woodworker and enjoys restoring vintage furniture, a hobby that complements his professional insights beautifully.