Your front entry takes the first hit from every forecast – sideways rain, grit from the street, summer sun, winter gusts. If that zone is thought through, you feel it every day: fewer drafts, drier floors, hardware that doesn’t rust, and a calmer first step inside. If it isn’t, you’ll notice sticky latches, peeling paint, cupped boards near the door, and energy bills that creep up for no clear reason. The fix isn’t exotic. It’s a handful of sensible upgrades done in the right order.
Where the Problems Really Start
Most issues trace back to two things: water that reaches the threshold and air slipping through tiny gaps. Splashback from steps can pool against the sill; wind compresses tired weatherstripping and sneaks in at the hinge or latch side; UV cooks finishes until hairline cracks open. Add grit and meltwater, and the first few feet of flooring take a beating. Before you buy another gallon of paint, plan to block water and seal air – the rest builds on that.
Put a Roof Over the Door – and Move Water Away
Shelter is the first defense. Even a modest canopy or shallow roof extension changes everything, keeping hardware dry and stopping most wind-driven rain before it hits the slab. If you have room, extend returns at the sides; those few inches make storms less dramatic and give parcels a dry landing. Underfoot, install a proper sill pan so stray water drains outward, and upgrade to a thermally broken threshold that seals tightly without creating a cold bridge.
When you want a bigger jump in comfort and cleanliness, consider enclosing the stoop so you gain a true buffer between outside and in; many households find a well-sized front porch enclosure turns wet arrivals into routine ones by combining shelter, storage for boots and coats, and a dry place for deliveries.
Seal the Air Leaks and Steady the Temperature
Air sealing looks simple but pays back immediately. Replace flattened weatherstripping with fresh compression gaskets, add a quality door sweep, and adjust hinges so the slab seats evenly against the stop. On sidelights and transoms, move to insulated low-E units so the foyer stops acting like a freezer in January and a greenhouse in July. If you add a small vestibule, insulate the lid and short walls, and break the thermal bridge at the floor so you’re not standing on a cold plate all winter.
Five fixes you can schedule for a weekend
- Swap in new weatherstripping and a snug sweep; use the “paper test” to confirm even contact.
- Level and secure the threshold; add a sill pan to send water out, not in.
- Seal hairline gaps where casing meets wall with flexible, paintable caulk.
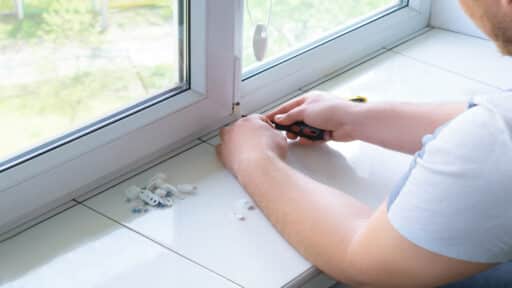
- Tighten glass stops; upgrade nearby glass to insulated units as budget allows.
- Lubricate and, if needed, replace corroded hinges and latches with hardware rated for wet exposure.
Choose Materials and Details That Can Live Outdoors
Protection shouldn’t look bolted on. Match the pitch and proportion of any overhang to your home’s style, echo existing trim profiles, and keep metal finishes consistent across hinges, numbers, mailbox, and lighting so the facade reads as one design. In the splash zone, pick materials that shrug off water and UV: factory-finished doors, fiber-cement or PVC trims, and weather-resistant jamb extensions cut repaint cycles to years, not months.
Lighting matters on stormy nights. Shielded sconces and a covered overhead fixture improve visibility without glare, and a dimmer keeps things comfortable after dark. If accessibility is a priority, use shallow risers, a grippy landing, and a sturdy handrail so the entry stays safe year-round.
Everyday Payoffs You’ll Notice
A weather-smart entrance is easier to live with. Packages land under cover instead of in a puddle. Groceries can pause in the dry while you find keys. Mud and meltwater stay in a manageable zone instead of tracking into the hall. On the utility side, your HVAC runs less because the leakiest seam in the building isn’t leaking anymore. Hardware corrodes more slowly, paint lasts longer, and the first row of flooring doesn’t need constant touch-ups. If you plan to sell, buyers read a dry, comfortable threshold as proof the house has been looked after.
How To Phase the Work Without Wasting Money
Treat the entry as a system, not a single “miracle” product. Start outside and stop bulk water first: add coverage, correct the pitch at the sill, and make sure downspouts aren’t splashing back toward the door. Next, chase the air leaks – fresh gaskets, a better sweep, hinge and strike adjustments, and a bead of caulk where trim meets wall. After that, upgrade glass near the door if it’s a constant hot or cold spot. When the basics are under control, move to larger steps – a roof extension, side returns, or a compact enclosure – so the new work supports the tight envelope you just created.
If budget is tight, prioritize the pieces that protect materials: a sill pan and weatherstripping usually beat “one more coat of paint.” If time is the bottleneck, schedule the weekend list first, then plan a canopy or enclosure once you’ve watched a few storms and know how water behaves at your facade.
You don’t need fancy gadgets to make the entry hold up against the elements. You need thoughtful shelter, tight seals, durable finishes, and details that suit the house you already have. Do that, and the door area stops losing the daily fight with weather – and starts acting like a proper welcome: dry, quiet, and comfortable through spring showers, summer heat, autumn storms, and the sharpest winter mornings.


