

Do you want to make something that looks fancy but doesn’t require culinary school?
This peach tart is your new best friend. Trust me, it’s way easier than it looks, and here’s the best part – you can make it with canned peaches from your pantry! I love this recipe because it’s super flexible.
You’ll have something amazing if you’ve got fresh peaches from the farmers’ market or a trusty can in your cupboard.
It takes about 45 minutes to prep and an hour to bake, serving eight lucky people (or fewer, if you’re really into peaches!).
Don’t worry if fresh peaches aren’t in season – canned peaches work like a charm. They’re often more consistent for baking and just as delicious when the magic happens in the oven.
Plus, you can whip this up any time of year without waiting for peach season!
Ingredients and Products Required
For Filling:
- 3 cans peach slices (drained)
- 1/3 cup sugar
- Juice from 1/2 lemon
- 1 tsp vanilla extract
For Crust:
- 1 1/3 cup all-purpose flour
- 1/4 cup sugar
- 1/2 tsp salt
- 10 tbsp melted butter
For Topping:
- 1 tbsp sugar
- 2 tbsp butter (cubed)
- Melted apricot preserves
Essential Tools:
- A tart pan with a removable bottom
- Mixing bowls
- Whisk
- Spatula
Step-by-Step Cooking Instructions:
STEP 1: Prepare the Tart Dough
- In a mixing bowl, combine 100g of soft butter, 100g of powdered sugar, and a pinch of salt.
- Mix for a minute or two until smooth.
- Add one egg yolk and mix until just combined.
- Gradually add 200g of sifted flour and mix until a dough forms.
- Wrap the dough in plastic wrap and refrigerate for 2 hours.
The dough needs time to chill and firm up, making it easier to roll out and shape. This step ensures a flaky, well-structured tart crust that holds the filling perfectly while baking.
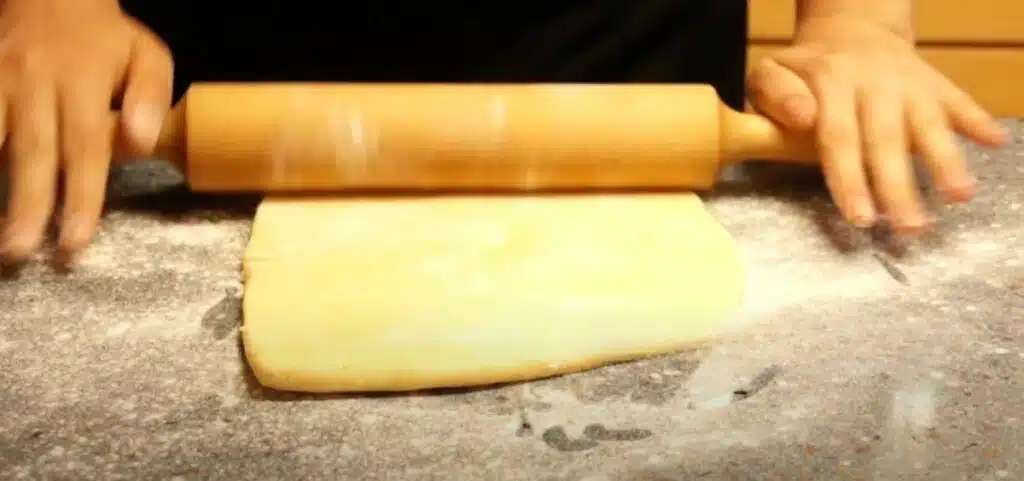
STEP 2: Roll and Bake the Crust
- Dust the work surface with flour and roll the dough into a 27 cm circle.
- Press it into a 25 cm tart pan, ensuring an even thickness.
- Trim excess dough by rolling a pin over the top edge of the pan.
- Prick the base with a fork to prevent puffing.
- Line with parchment paper and fill with 500g of dry beans.
- Bake at 180°C for 15 minutes, then remove the beans and let the crust cool.
Baking the crust partially before adding the filling helps maintain its crispness and structure. The dry beans act as weights, preventing the dough from rising and ensuring a smooth, even base.
STEP 3: Prepare the Custard Filling
- In a saucepan, bring 220ml of cream to a boil.
- Whisk together five egg yolks, 50g of sugar, and 10g of vanilla sugar in a separate bowl.
- Stir continuously while gradually adding the hot cream to the egg mixture.
- Strain the mixture to remove any lumps.
This custard filling provides a rich and creamy texture, balancing the sweetness of the peaches. Straining ensures a silky-smooth consistency, making each bite of the tart indulgent.
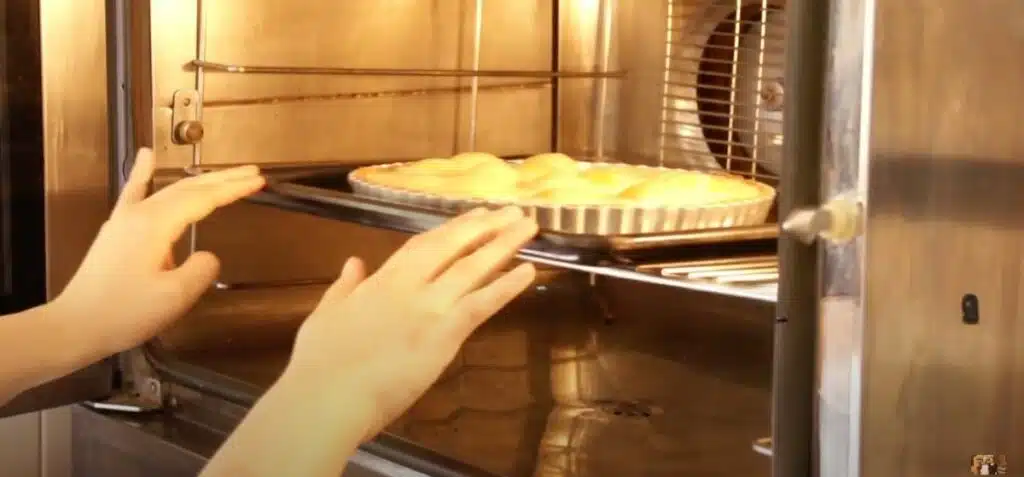
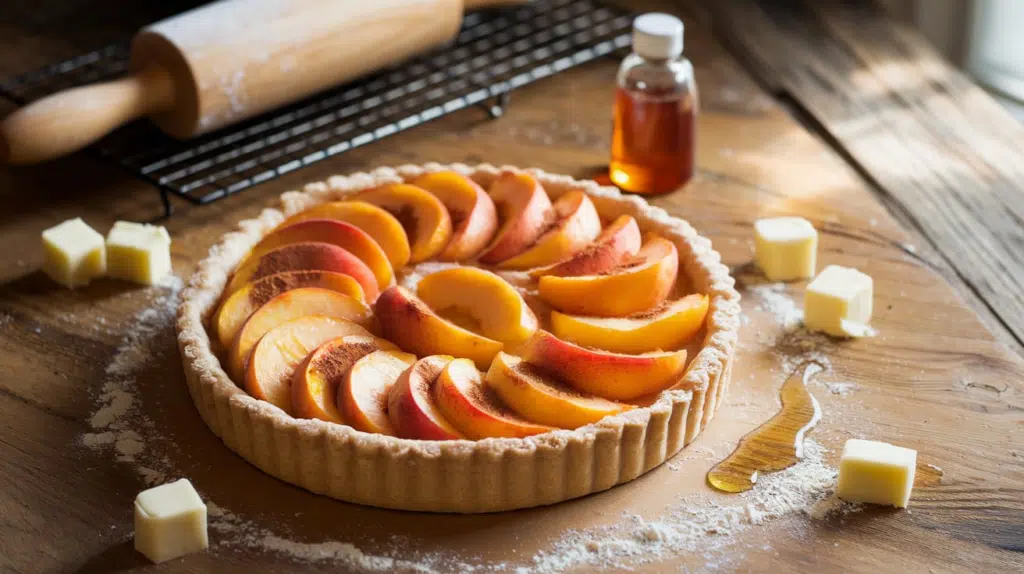
STEP 4: Assemble the Tart
- Spread 80g of apricot jam evenly over the cooled tart crust.
- Arrange drained canned peach slices neatly on top.
- Pour the prepared custard over the fruit, ensuring even distribution.
- Bake at 170°C for 20 minutes until the custard sets.
- Remove from the oven and let the tart cool completely before unmolding.
The apricot jam acts as a flavor enhancer, preventing the crust from becoming soggy. Baking the custard allows it to firm up, creating a smooth, velvety texture.
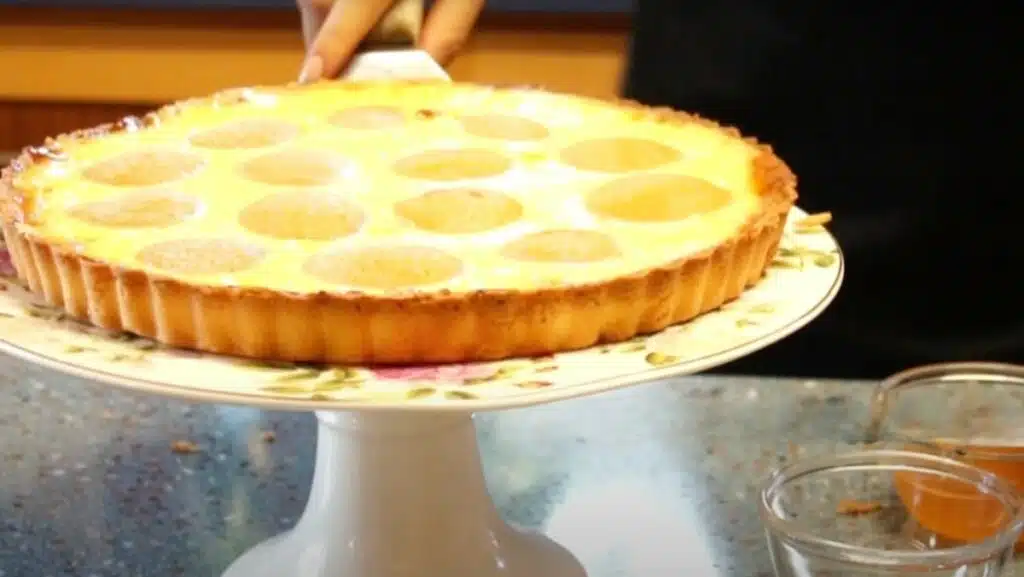
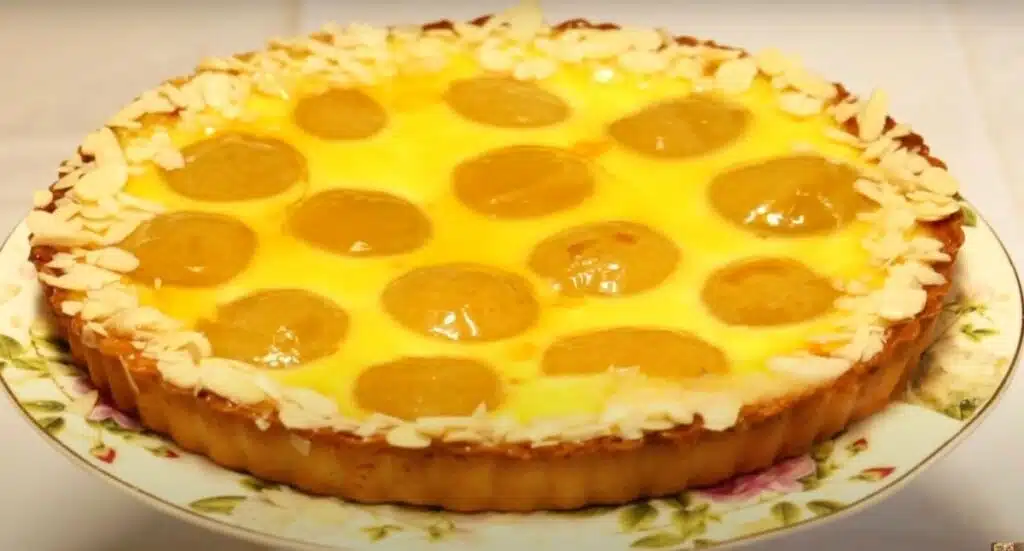
STEP 5: Glaze and Serve
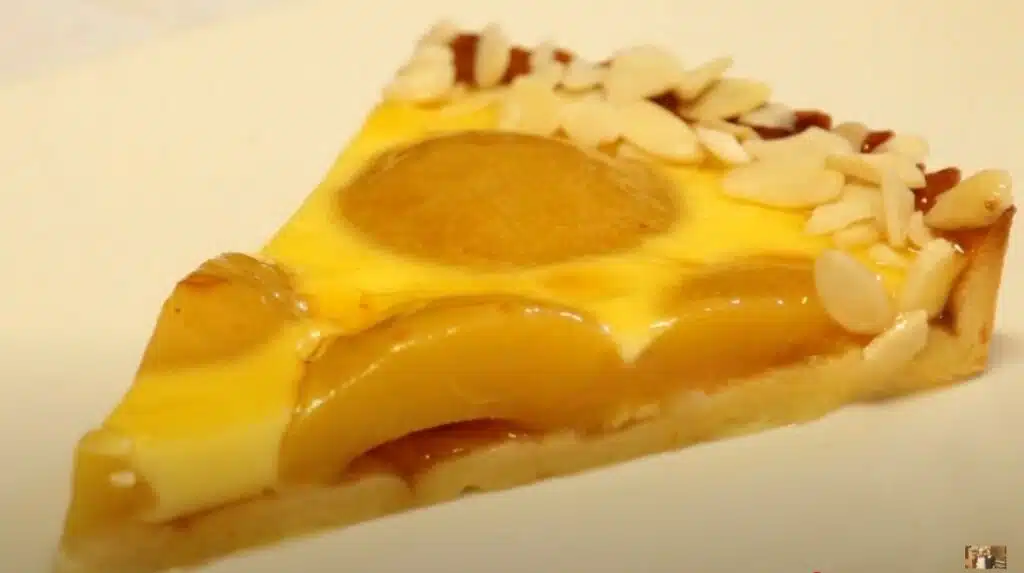
- Heat 80g of apricot jam in a small saucepan with one tablespoon of hot water.
- Stir until smooth, then strain to remove any chunks.
- Brush the warm glaze over the tart for a glossy finish.
- Decorate the edges with sliced almonds if desired.
The apricot glaze adds a beautiful shine, enhances the tart’s sweetness, and prevents the fruit from drying out. The almond slices provide a crunchy contrast to the creamy filling.
For more information, check out this video tutorial by VideoCulinary.com
Pro Tip For Your Peach Tart Recipe
Making a peach tart is easy, but small tricks can make it even better. Drain your peaches well so the crust stays crisp, and use a tart pan with a removable bottom for easy slicing.
Let it cool before cutting—trust me, it’s worth the wait! A little patience makes a big difference.
Want to Change Things Up? Try Adding:
- A sprinkle of cinnamon to the filling
- A few drops of almond extract
- A drizzle of honey before baking
- For the flakiest crust, ensure your butter is cold, and don’t overwork the dough – less is more here!
Here’s How to Serve and Store Your Peach Tart:

- Add a generous scoop of vanilla ice cream or a fluffy cloud of whipped cream on top.
- Perfect for bringing to backyard BBQs in summer, but honestly? It’s a hit at any gathering, any time of year.
- If you somehow have leftovers (it happens!), just tuck them away in an airtight container in the fridge. They’ll stay good for about 3 days.
- To reheat, skip the microwave and go for the oven instead – 300°F for 10minutes does the trick. This keeps the crust nice and crispy, just like when fresh out of the oven.
Wrapping It Up
There you have it – a peach tart recipe that will become your go-to dessert! If you are baking for a special occasion or craving something sweet, this tart delivers on looks and taste.
Remember, you can make this tart a few hours before your gathering, and it’ll sit happily at room temperature. It’s one of those desserts that gets better as the flavors meld together.
So go ahead, give it a try! And when your friends ask for the recipe (trust me, they will), you can tell them it’s way easier than it looks. Happy baking, and don’t forget to share your creations with us!