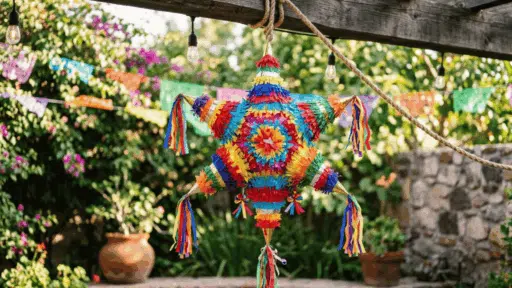

Planning a party and looking for something fun that everyone will remember?
Learning how to make a pinata at home is a great place to start.
This blog walks you through the process in a clear and relaxed way, so you can create one that looks good and holds up well during the fun.
Why Making a Pinata at Home is Worth It
Making your own pinata adds a personal touch to any celebration while giving full control over design, colors, and fillings. It also turns into a fun activity that creates memories before the party even starts.
- Customize the shape, size, and theme exactly how you want
- Enjoy a fun group activity with kids, friends, or family
- Choose better, more exciting fillings for guests
- Reuse the idea for birthdays, holidays, or small gatherings
Tools and Materials Required
Before starting, gather everything in one place to keep the process smooth and stress-free.
| Category | Items |
|---|---|
| Basic Tools | Scissors, paintbrush, mixing bowl |
| Adhesives | Masking tape, white craft glue |
| Structure Base | Balloon (star or round), 5 party hats |
| Paper Materials | Newspaper (cut into strips), tissue/crepe paper (assorted colors) |
| Paper Mache Mix | 1 cup flour, 1.5 cups water |
| Finishing | String, cardboard piece |
| Optional | Skewer (for threading string), decorative paper strips |
How to Make a Pinata at Home
Making a colorful star pinata at home is easier than it looks and can be a fun hands-on project for any celebration. Now that the tools and materials are gathered, let’s jump into the detailed steps on how to make a star pinata.
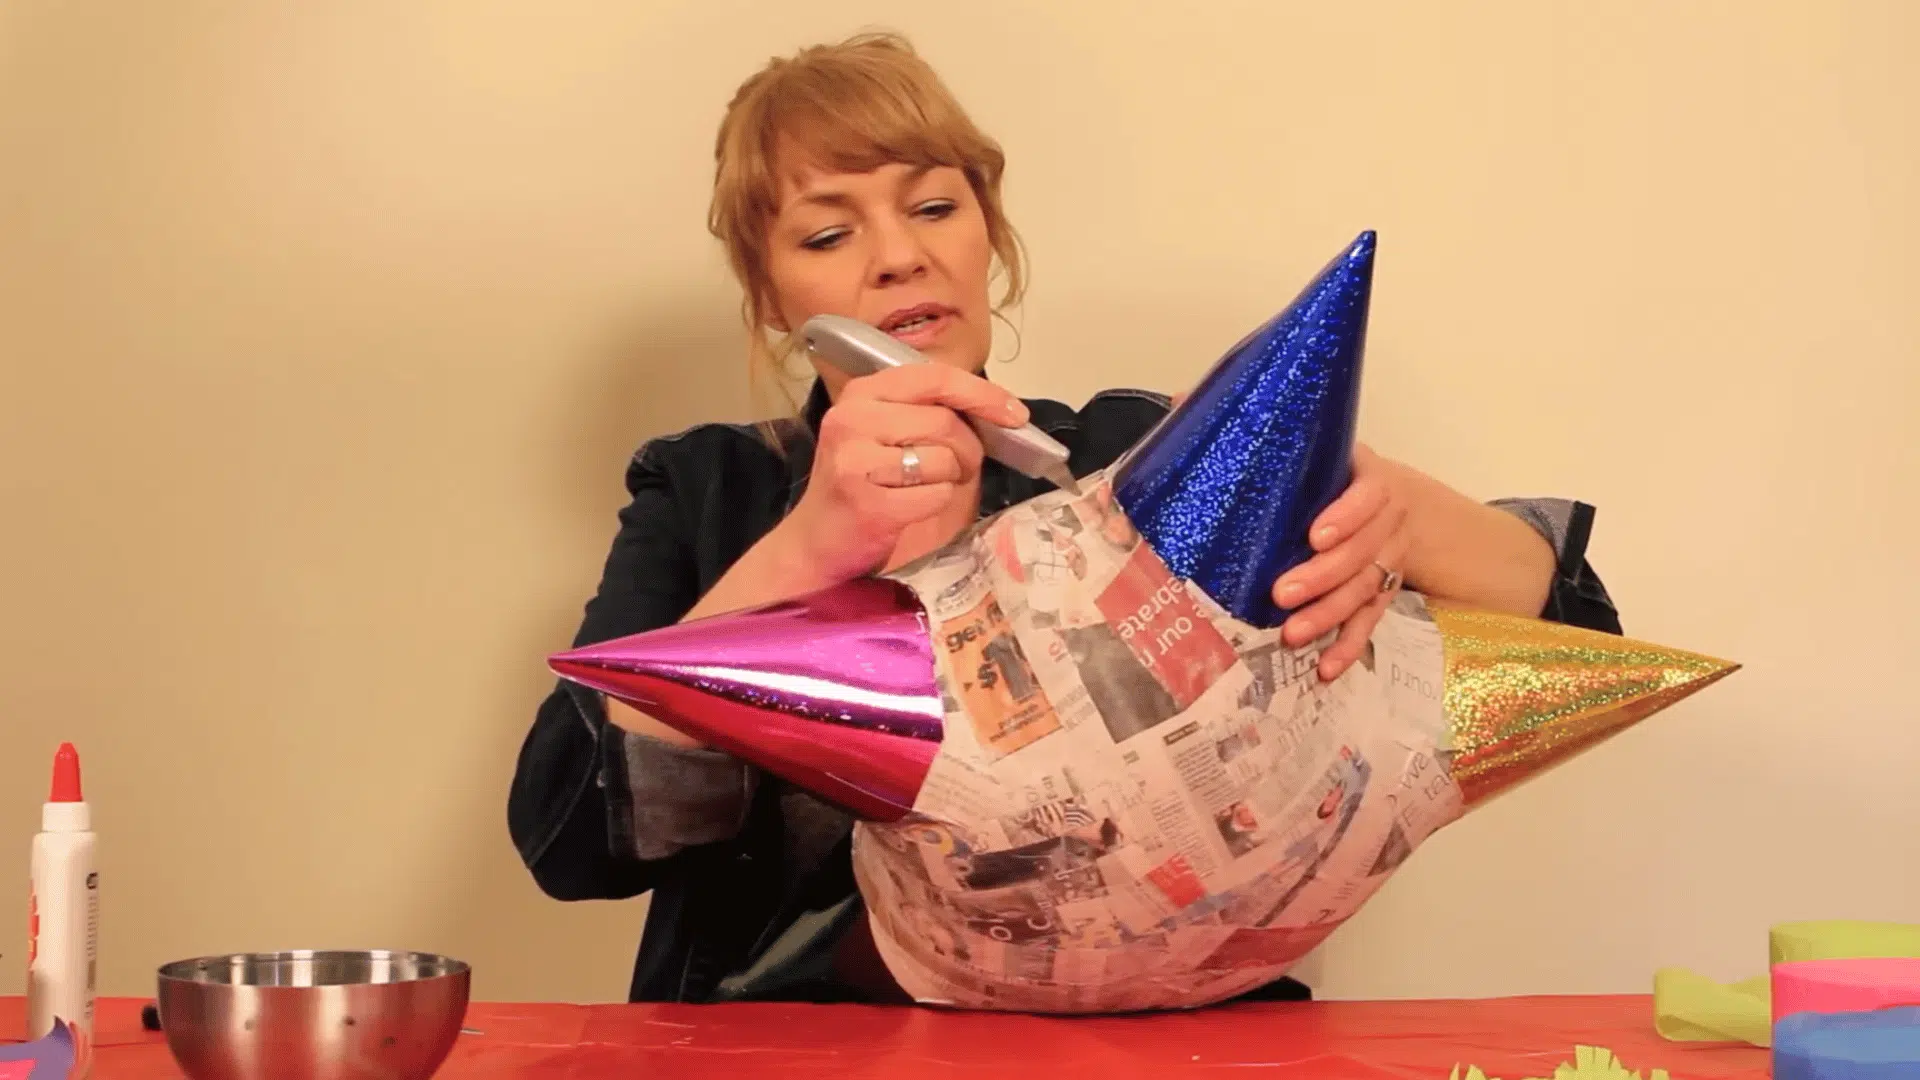
Step 1: Create the Base Shape
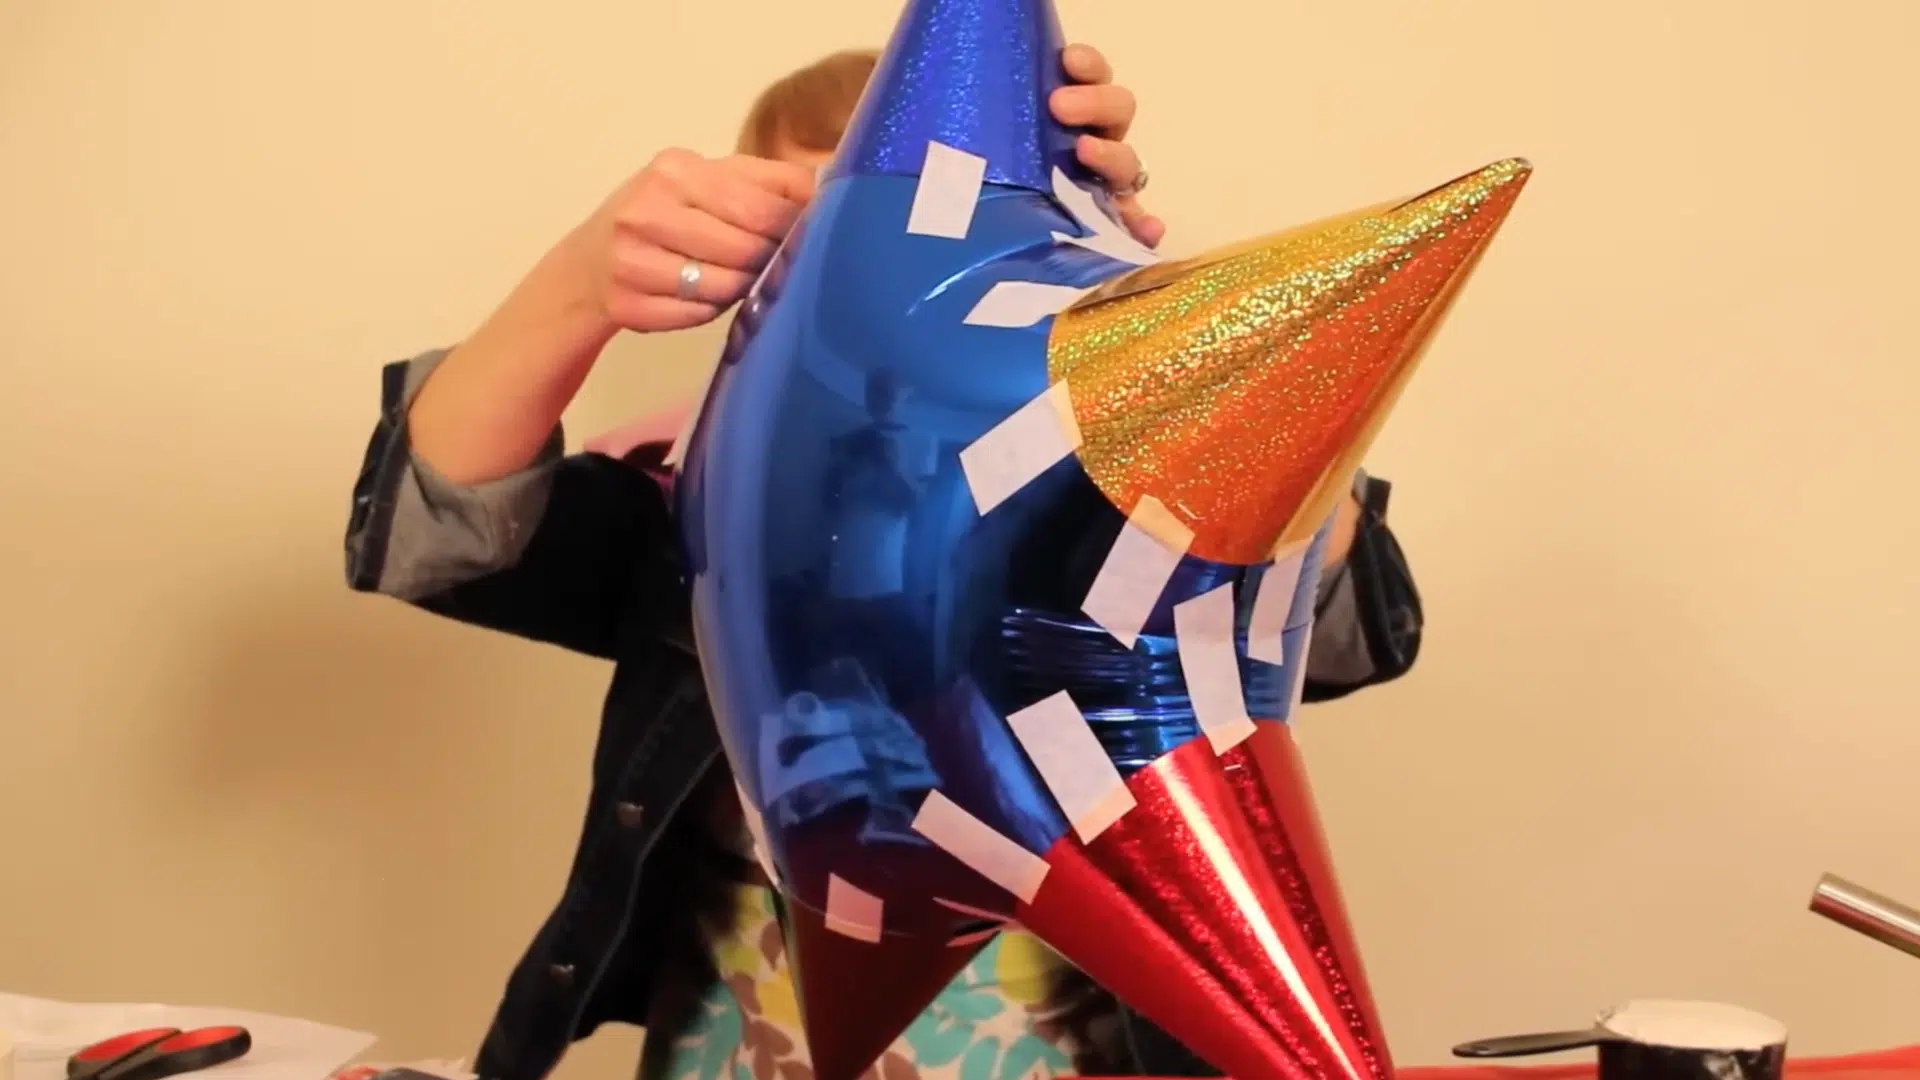
Inflate the balloon to your desired size. Place a party hat over each pointed section to form the star shape, then secure them with masking tape without covering too much color.
This builds the base structure. Make sure everything feels stable and balanced before moving forward, as a strong base helps the rest of the process go smoothly.
Step 2: Prepare the Paper Mache Paste
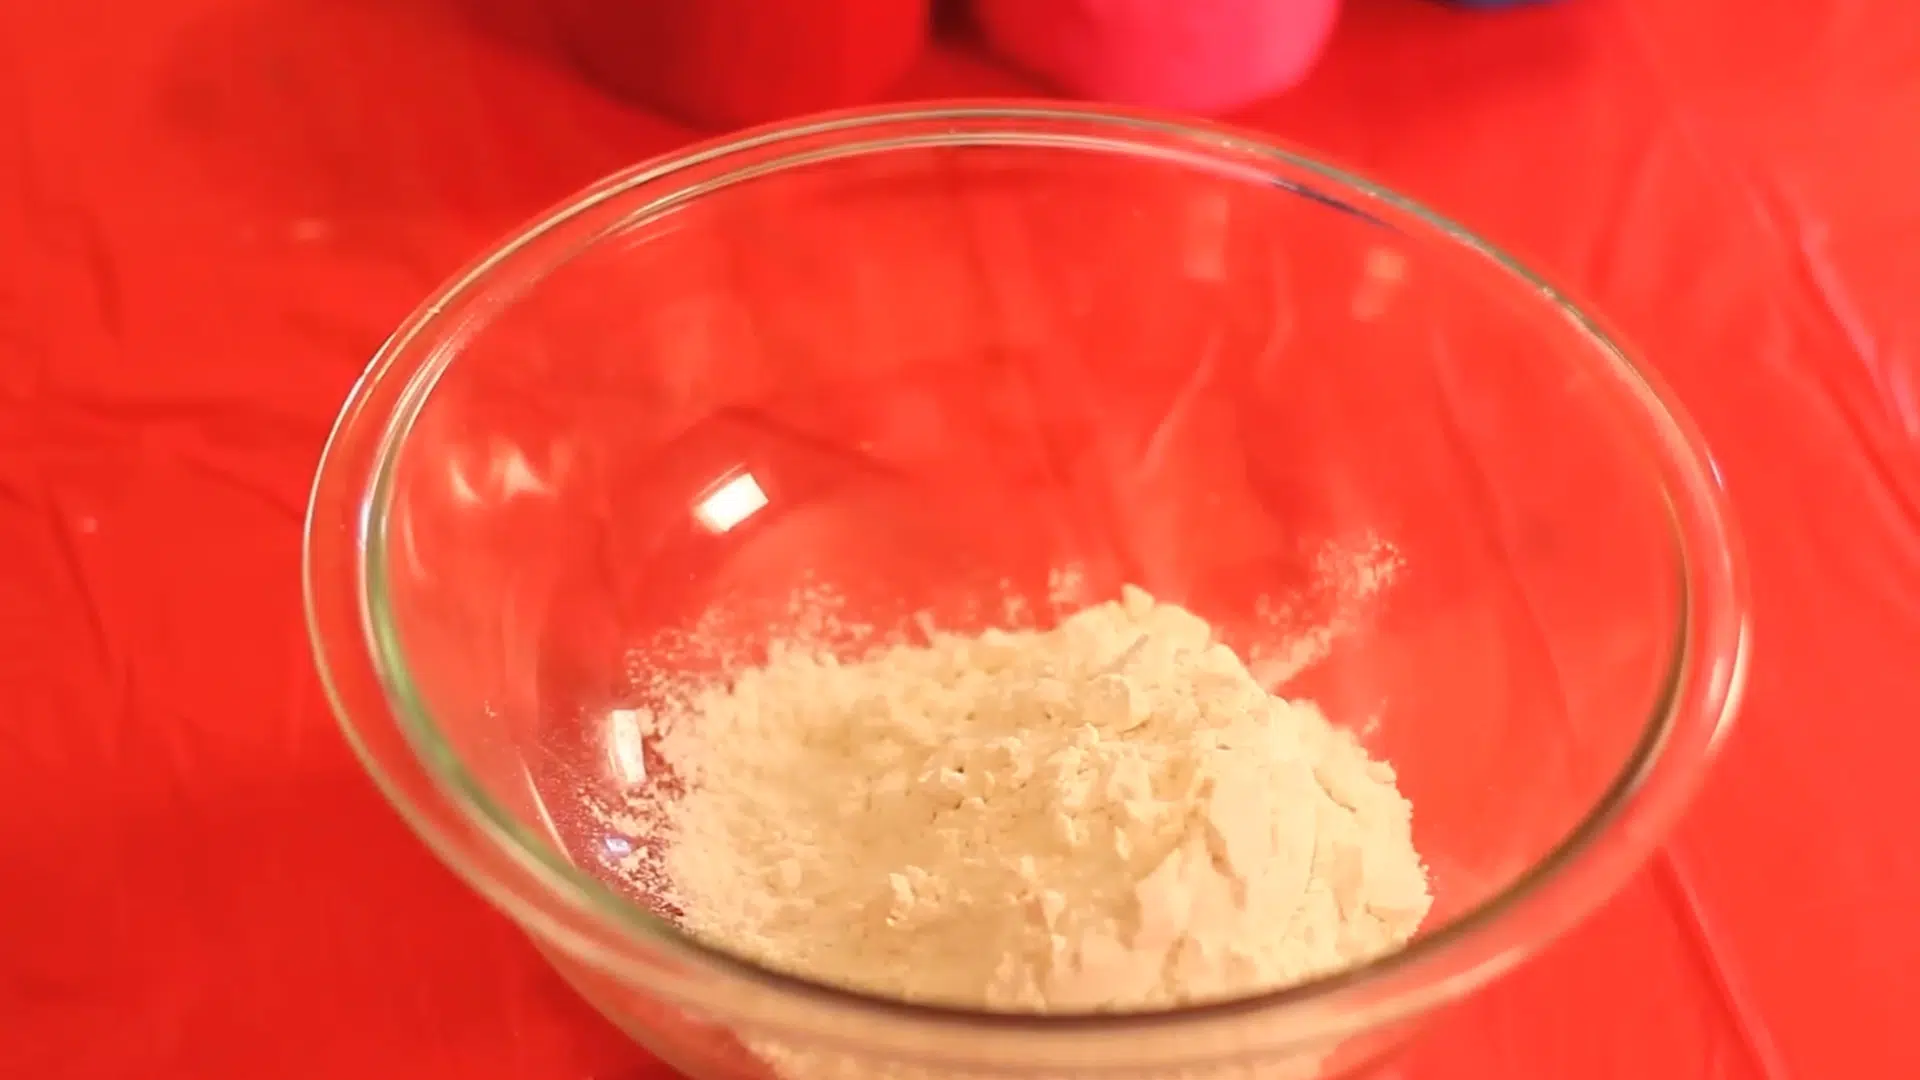
In a mixing bowl, combine 1 cup of flour with 1.5 cups of water. Whisk until the mixture becomes smooth and free of lumps.
The texture should be slightly thick but easy to spread. If it feels too runny or too thick, adjust slightly. A well-mixed paste ensures the paper layers stick properly and dry evenly.
Step 3: Apply the First Paper Mache Layer
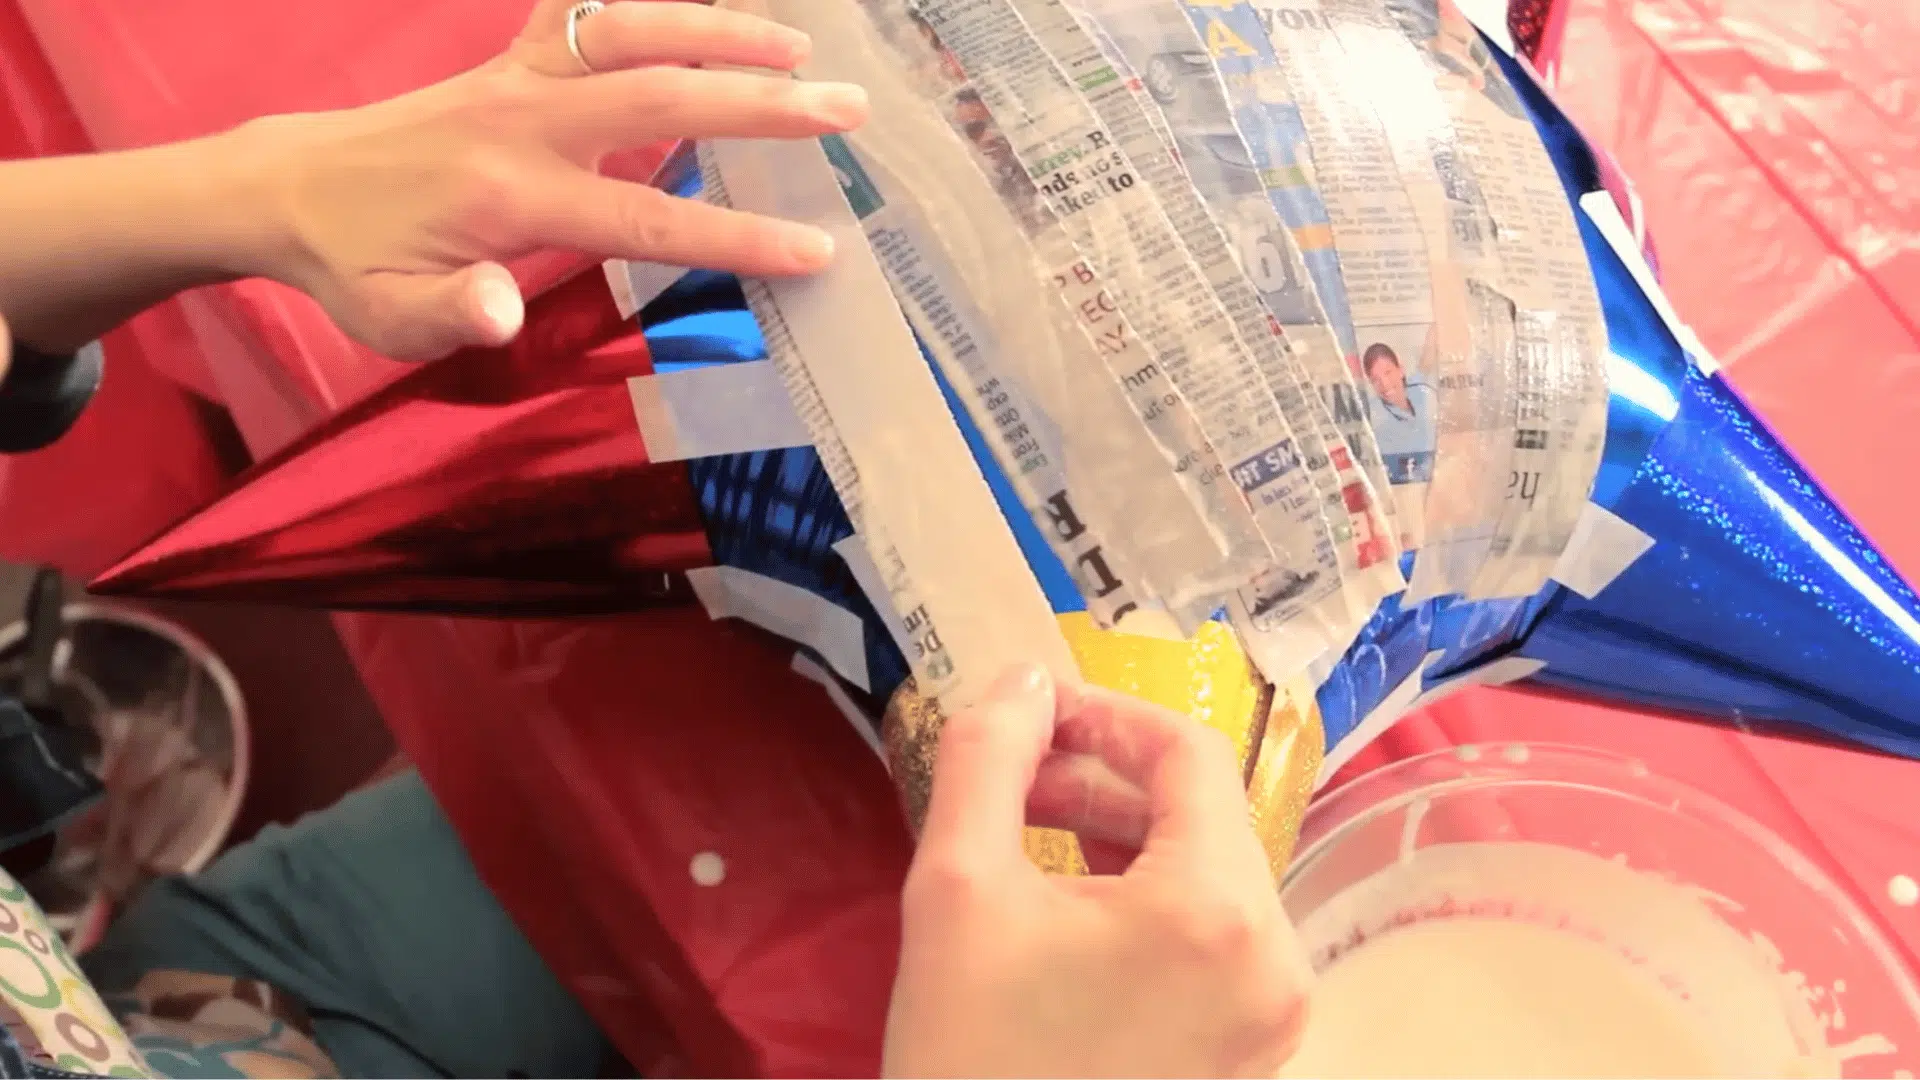
Cut newspaper into strips about 2 inches wide. Dip each strip into the paste, then gently remove excess using your fingers.
Lay the strips onto the balloon, slightly overlapping each piece for full coverage. Cover both the balloon and attached hats evenly. Let the pinata sit upright on a stand or jar so it can dry without losing shape.
Step 4: Build Strong Layers
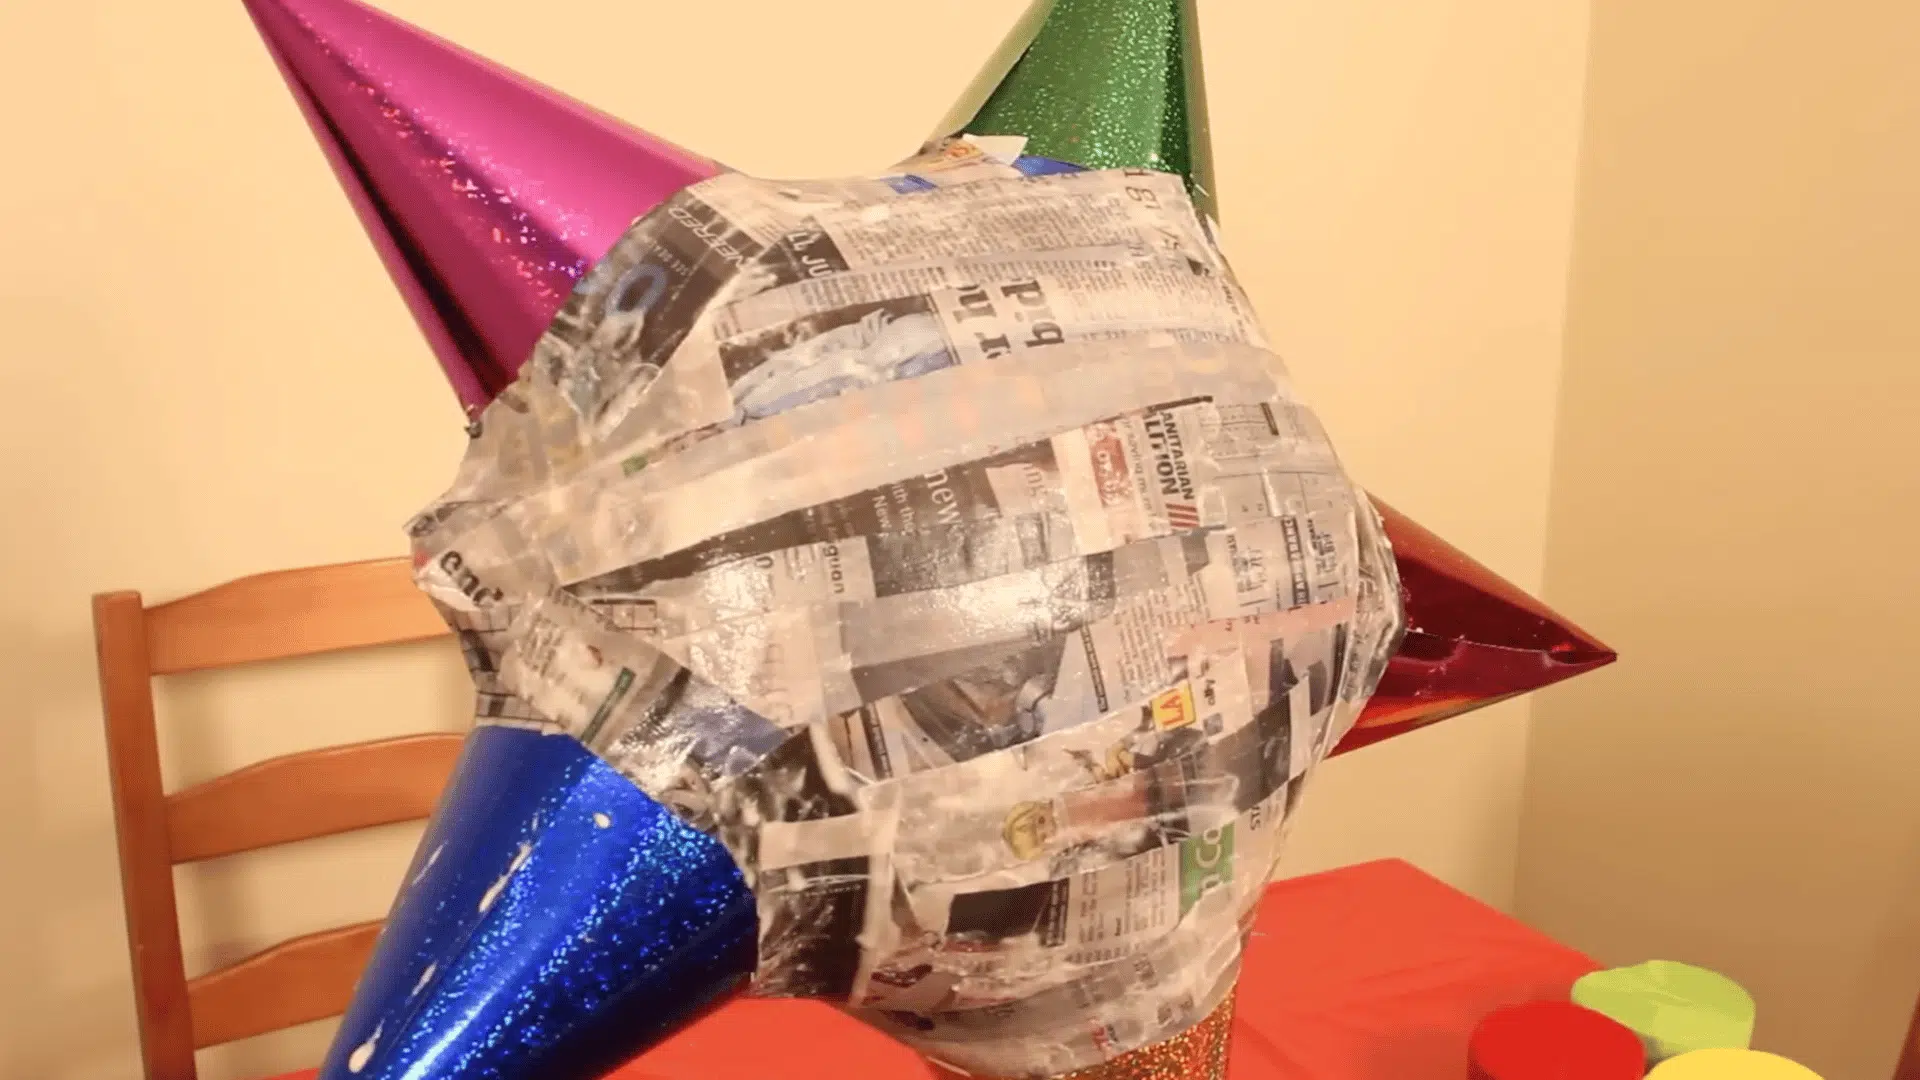
Repeat the same layering process until you have 3–4 layers of papier-mache. Let each layer dry fully, which usually takes around 6 hours.
Use smaller strips around corners and edges to neatly cover tricky areas. These layers are what make the pinata strong enough to hold candy and withstand use.
Step 5: Cut the Opening and Prepare for Filling
Once completely dry, carefully cut a small opening using a sharp tool. The hole should be large enough to add candy later.
Before sealing, insert a string through the top using a skewer or similar tool. This string will allow you to hang the piñata securely once it is finished.
Step 6: Decorate with Fringe Paper
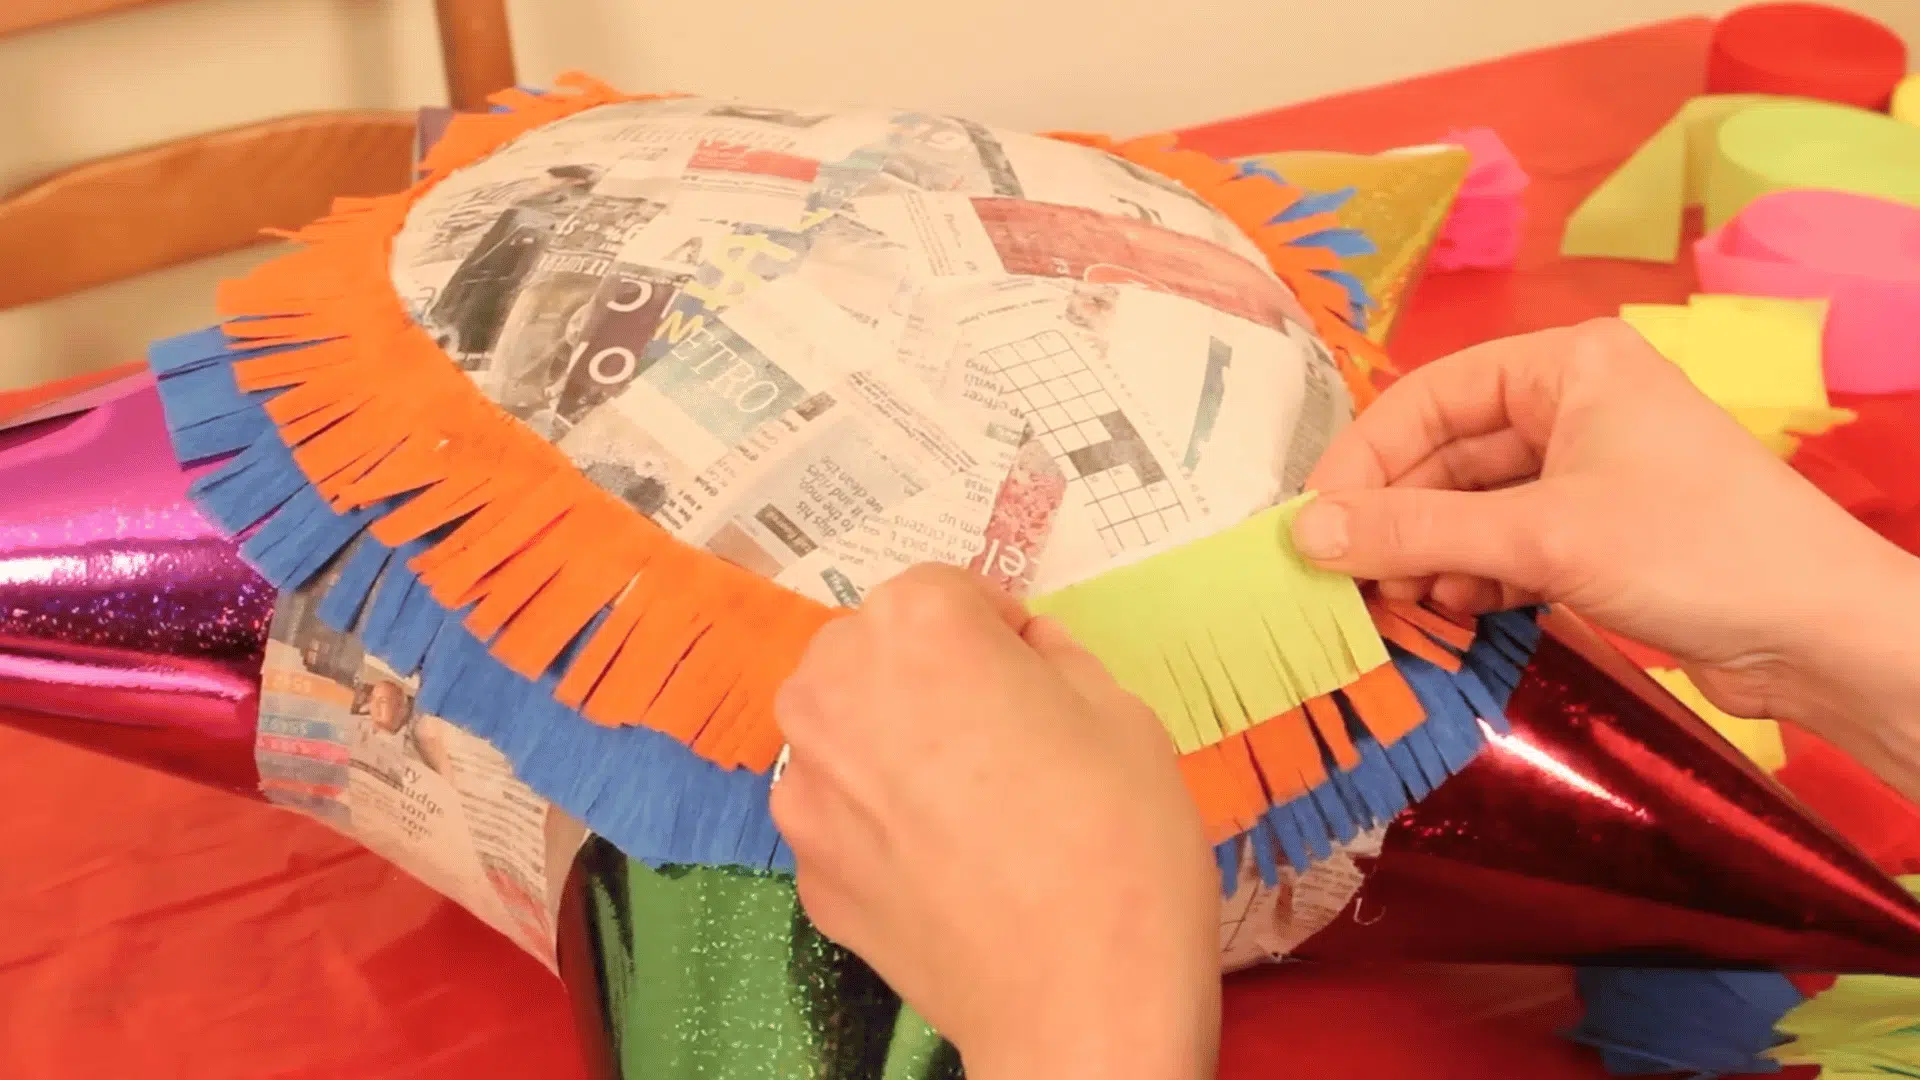
Fold tissue or crepe paper into strips about 3 inches wide and cut small slits along one edge to create fringe. Mix the glue with a little water for easier application.
Brush glue onto the surface and attach the fringe from the bottom up. Slightly overlap each layer to create a full and colorful look.
Step 7: Fill, Seal, and Finish
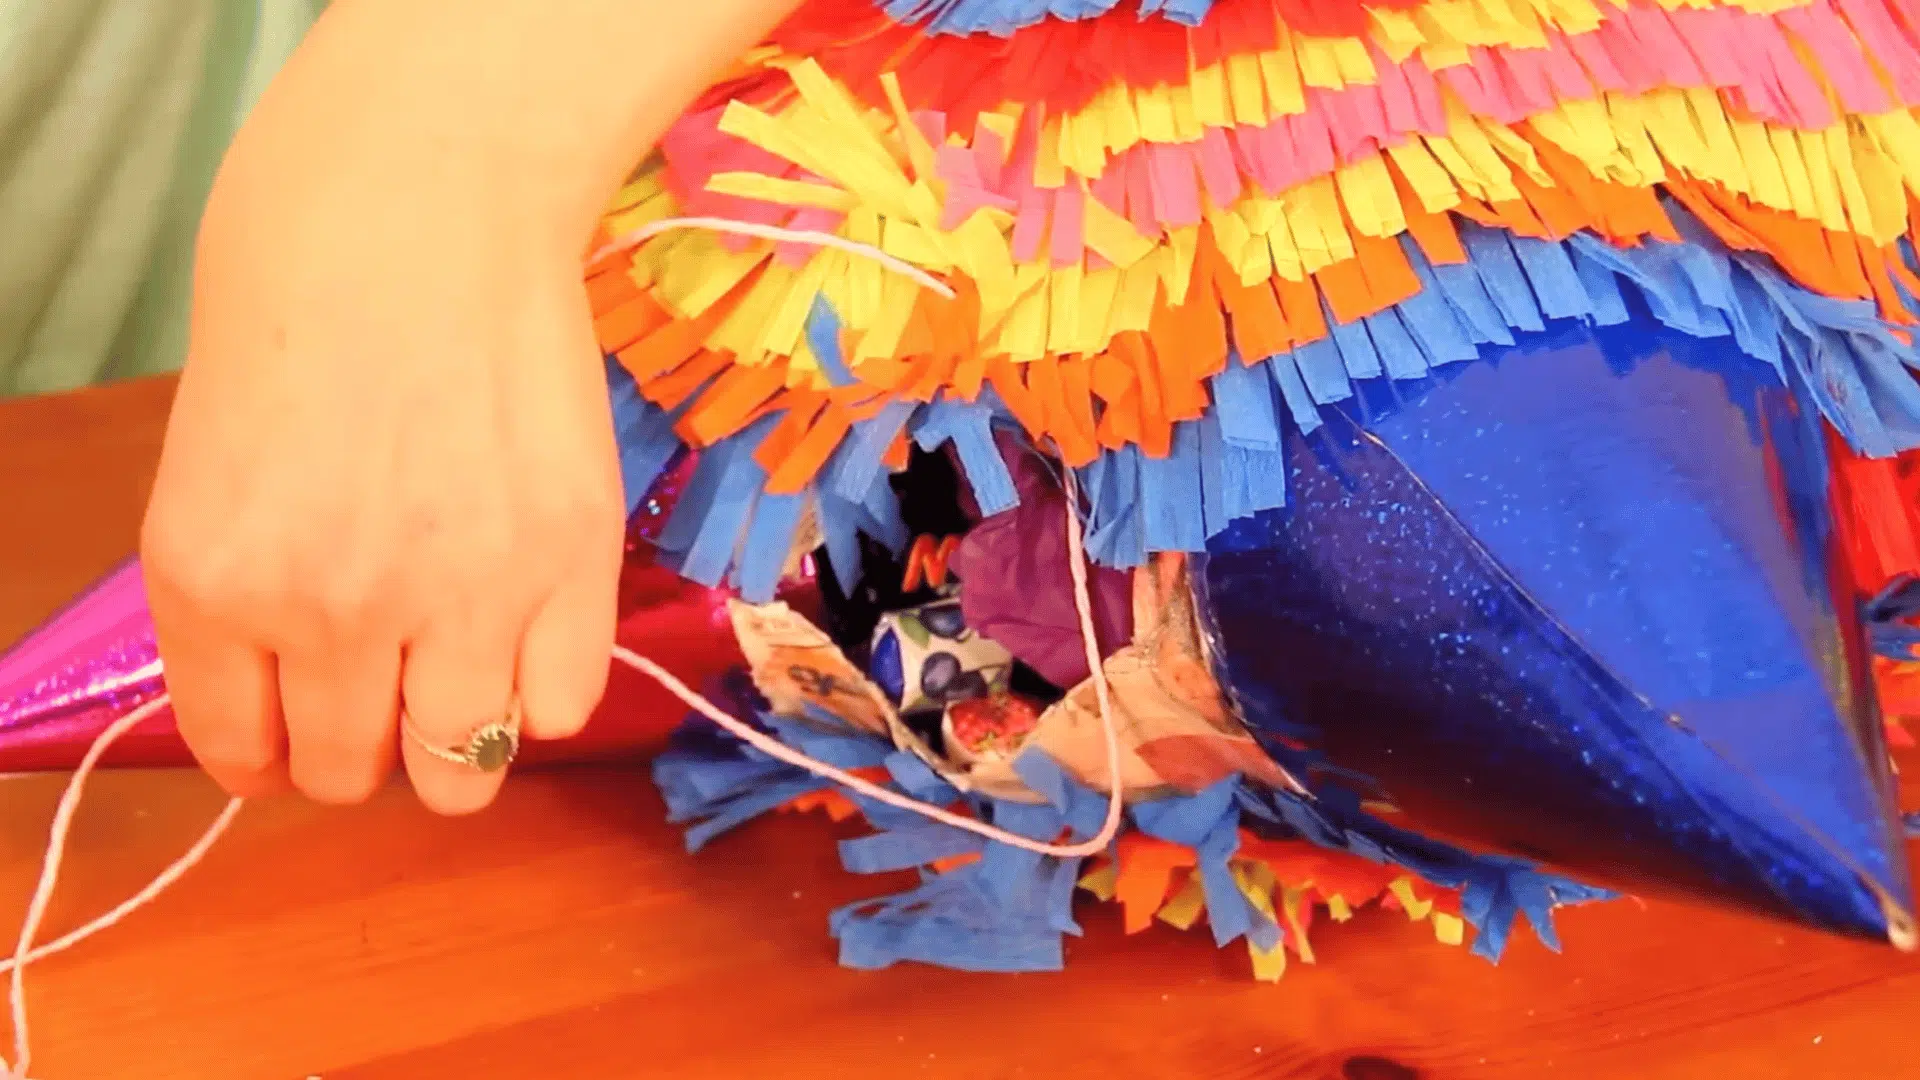
Add wrapped candies through the opening. Cover the hole using a piece of cardboard and secure it with tape. Hide this area with more fringe paper to blend in neatly.
For a fun final touch, attach decorative paper strips to the ends of the cones. Your pinata is now ready to hang and enjoy.
Watch the full video here:
Other Pinata Designs You Can Try
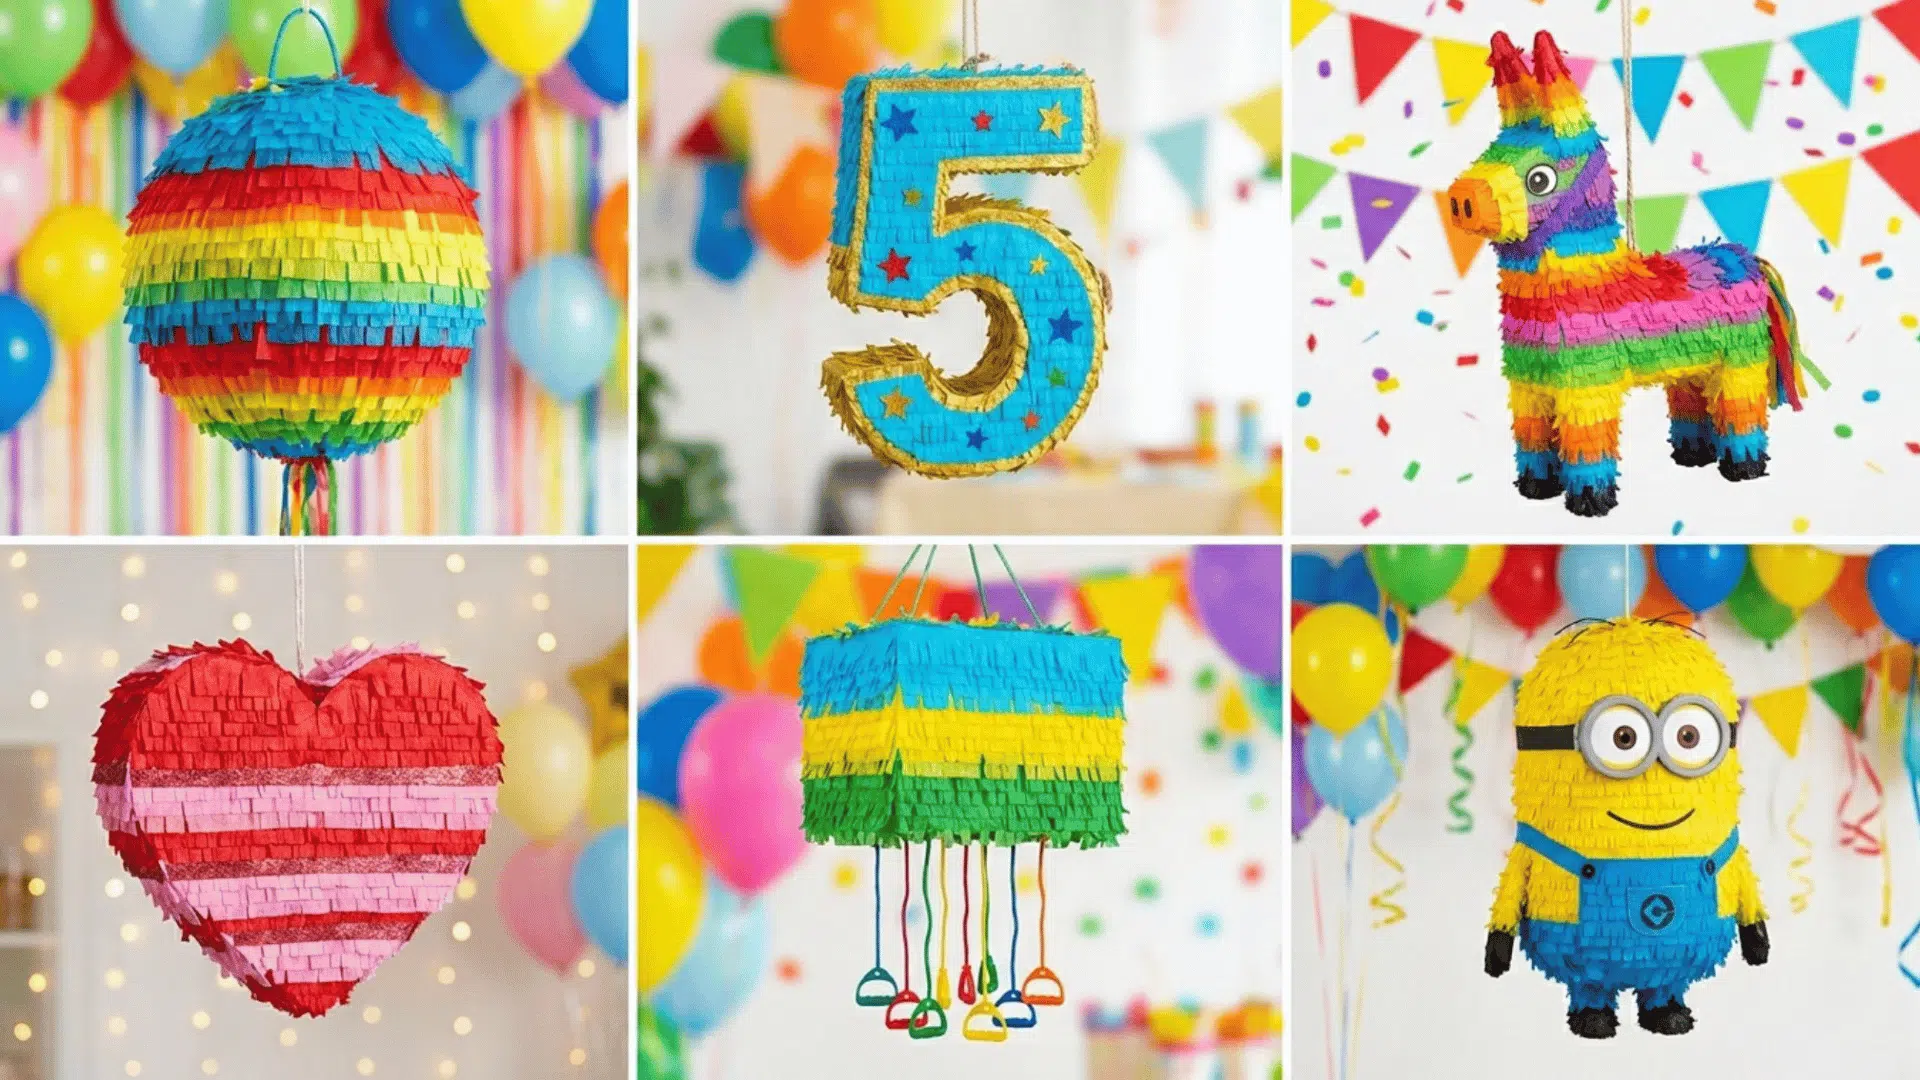
If you want to try something different, there are plenty of fun piñata styles beyond the classic star shape.
1. Round Balloon Pinata
A round piñata is one of the easiest options for beginners. Start with a balloon and cover it with 3–4 layers of papier-mache.
Once dry, cut a small opening, insert the candy, and seal it. Decorate with colorful fringe or paint. You can keep it simple or turn it into a themed design like a smiley face or ball.
2. Number Pinata
A number piñata is great for birthdays and adds a personal touch. Cut the number shape from cardboard, create depth with side strips, and seal the edges.
Add a flap for filling candy. Cover the structure with paper or fringe in layers. Use bright colors or patterns that match the party theme and clearly highlight the number.
3. Animal-Shaped Pinata
To make an animal piñata, start with a balloon or cardboard base and build features like ears or legs using paper or cones.
Cover everything with paper mache and let it dry fully. Paint or add fringe to bring the animal to life. Choose simple shapes like a donkey or a unicorn for easier results.
4. Heart-Shaped Pinata
For a heart shape, cut two heart pieces from cardboard and connect them with strips along the edges to form a box.
Leave a small opening for candy. Cover the surface with paper mache or apply fringe layers directly. Use red, pink, or mixed colors to give it a soft and festive look for special occasions.
5. Pull-String pinata
A pull-string piñata is a safer option for younger kids. Create a box-style pinata from cardboard, then attach multiple strings beneath it. Only one string should open the flap.
Decorate the outside with fringe paper. When it’s time, kids pull the strings one by one until the candy drops out.
6. Character Pinata
A character pinata takes a bit more effort, but looks fun. Start with a round or box base, then shape features like eyes, ears, or hats using paper or cardboard.
Cover with paper mache and let it dry. Paint details or add colored fringe to match the character. Keep the design simple for better results.
Tips to Make Your Pinata Strong and Long-Lasting
A few small tips can help your pinata last longer and look better.
- Let each papier-mache layer dry completely before adding the next one
- Apply strips in different directions for better strength and coverage
- Keep the paste balanced, not too watery or too thick
- Add extra layers around the top where the string will hold weight
- Use a strong string or rope to avoid tearing while hanging
- Make sure edges and corners are fully covered with smaller strips
- Avoid filling too much candy to prevent the structure from breaking
Conclusion
Learning how to make a pinata brings a different kind of joy, especially when you see everyone enjoying something you created. It’s not just about the final look, but the effort and fun that go into each step.
Once you get the hang of it, you can try new shapes and ideas for future events. You can even pair it with thoughtful choices like healthy snacks for kids to keep the celebration balanced and fun.
Give it a try, take your time, and enjoy the process. Start your first piñata today and make your next party feel a little more special.

James McLaren, with a rich background in architecture from the University of Manchester, has been contributing his expertise to the world of creative construction and home innovation for over 20 years. His journey began as a project manager for a leading construction firm, where he honed his skills in bringing complex designs to life. James joined our platform as a freelancer in 2019, quickly becoming a favorite for his insightful and practical advice. He has been a pivotal force to our wing ever since, bringing our readers a blend of technical know-how and creative flair. Beyond his professional life, James is an avid woodworker and enjoys restoring vintage furniture, a hobby that complements his professional insights beautifully.