Old furniture can start to look dull, scratched, or worn after years of use. The good news is that you do not always need to replace it. With the right steps, you can refinish furniture at home and give it a fresh, clean look again.
Learning how to refinish furniture is a useful skill that can help you save money and make better use of pieces you already own.
The process may seem like a lot of work at first, but it is easier than many people think. With some basic tools, a little patience, and the right finish, you can make an old table, chair, dresser, or cabinet look much better.
In this article, you’ll learn the key steps to refinish furniture, from preparing the surface to applying the final protective coat.
Why Refinish Furniture Instead of Replacing It?
If a piece of furniture is still sturdy, refinishing it is often a better choice than replacing it.
Scratches, faded color, water marks, and worn finishes can make furniture look old, but these problems usually affect only the surface. Refinishing helps restore the appearance without the cost of buying something new.
Another benefit is that many older furniture pieces are made from solid wood, which can last for decades when properly cared for.
Refinishing also gives you the freedom to change the color, stain, or finish to match your current style and décor.
For many homeowners, refinishing is a budget-friendly DIY project that can make tables, dressers, chairs, and cabinets look refreshed again. With a little time and effort, you can extend the life of your furniture and keep it looking great for years.
Is Your Furniture Worth Refinishing?
Before you gather supplies, take a few minutes to assess the piece. Refinishing is labor-intensive, and not every item justifies the effort. Here’s what I check first on every project:
- Solid wood vs. veneer: Solid wood handles repeated sanding well. Thin veneer can be sanded through in seconds, especially with a power sander.
If the veneer is already cracked, bubbled, or lifting, refinishing is risky. - Structural condition: Loose joints and wobbly legs can be re-glued, but deep cracks in load-bearing parts may make the piece unsafe no matter how good the finish looks.
- Depth of damage: Surface scratches and light water rings sand out. Deep black water stains, burns, and gouges often won’t, and may only look worse under a fresh clear coat.
- Value: If you suspect a piece is a genuine antique, get it appraised before touching it. Refinishing can significantly lower the value of collectible furniture.
What You’ll Need to Refinish Furniture
Before you begin, gather the necessary tools and materials. Having everything ready can help the project go more smoothly and save time during the refinishing process.
Tools
- Coarse-, medium-, and fine-grit sandpaper
- Power sander (optional)
- Putty knife
- Paint brushes
- Tack cloth
- Microfiber cloth
- Safety goggles
- Gloves
Materials
- Paint or varnish stripper
- Wood filler
- Sanding sealer or wood conditioner
- Wood stain or paint
- Polyurethane or another protective finish
How to Refinish Furniture: Step-by-Step
Refinishing furniture may seem like a big project, but it becomes much easier when you break it down into simple steps.
Step 1: Clean and Inspect the Furniture

Start by cleaning the furniture well. Use a soft cloth, mild dish soap, and warm water to remove dust, dirt, grease, and sticky spots. After cleaning, dry the piece with a microfiber cloth.
Once the surface is clean, inspect it closely. Check for loose parts, cracks, dents, scratches, or weak joints.
Fixing these issues early will help the final finish look smoother and last longer.
Tip Corner: Do not skip cleaning. Sanding over dirt or grease can push grime deeper into the wood and affect the final finish.
Step 2: Remove the Old Finish
Next, remove the old paint, stain, or varnish. You can do this with sandpaper, a sanding block, or a paint and varnish stripper. If you use a chemical stripper, apply it as directed on the label and let it sit until the old finish softens.
Then, gently scrape it away with a putty knife. Work slowly so you do not damage the wood.
Tip Corner: Always wear gloves and safety goggles when using chemical strippers. Work in a well-ventilated area.
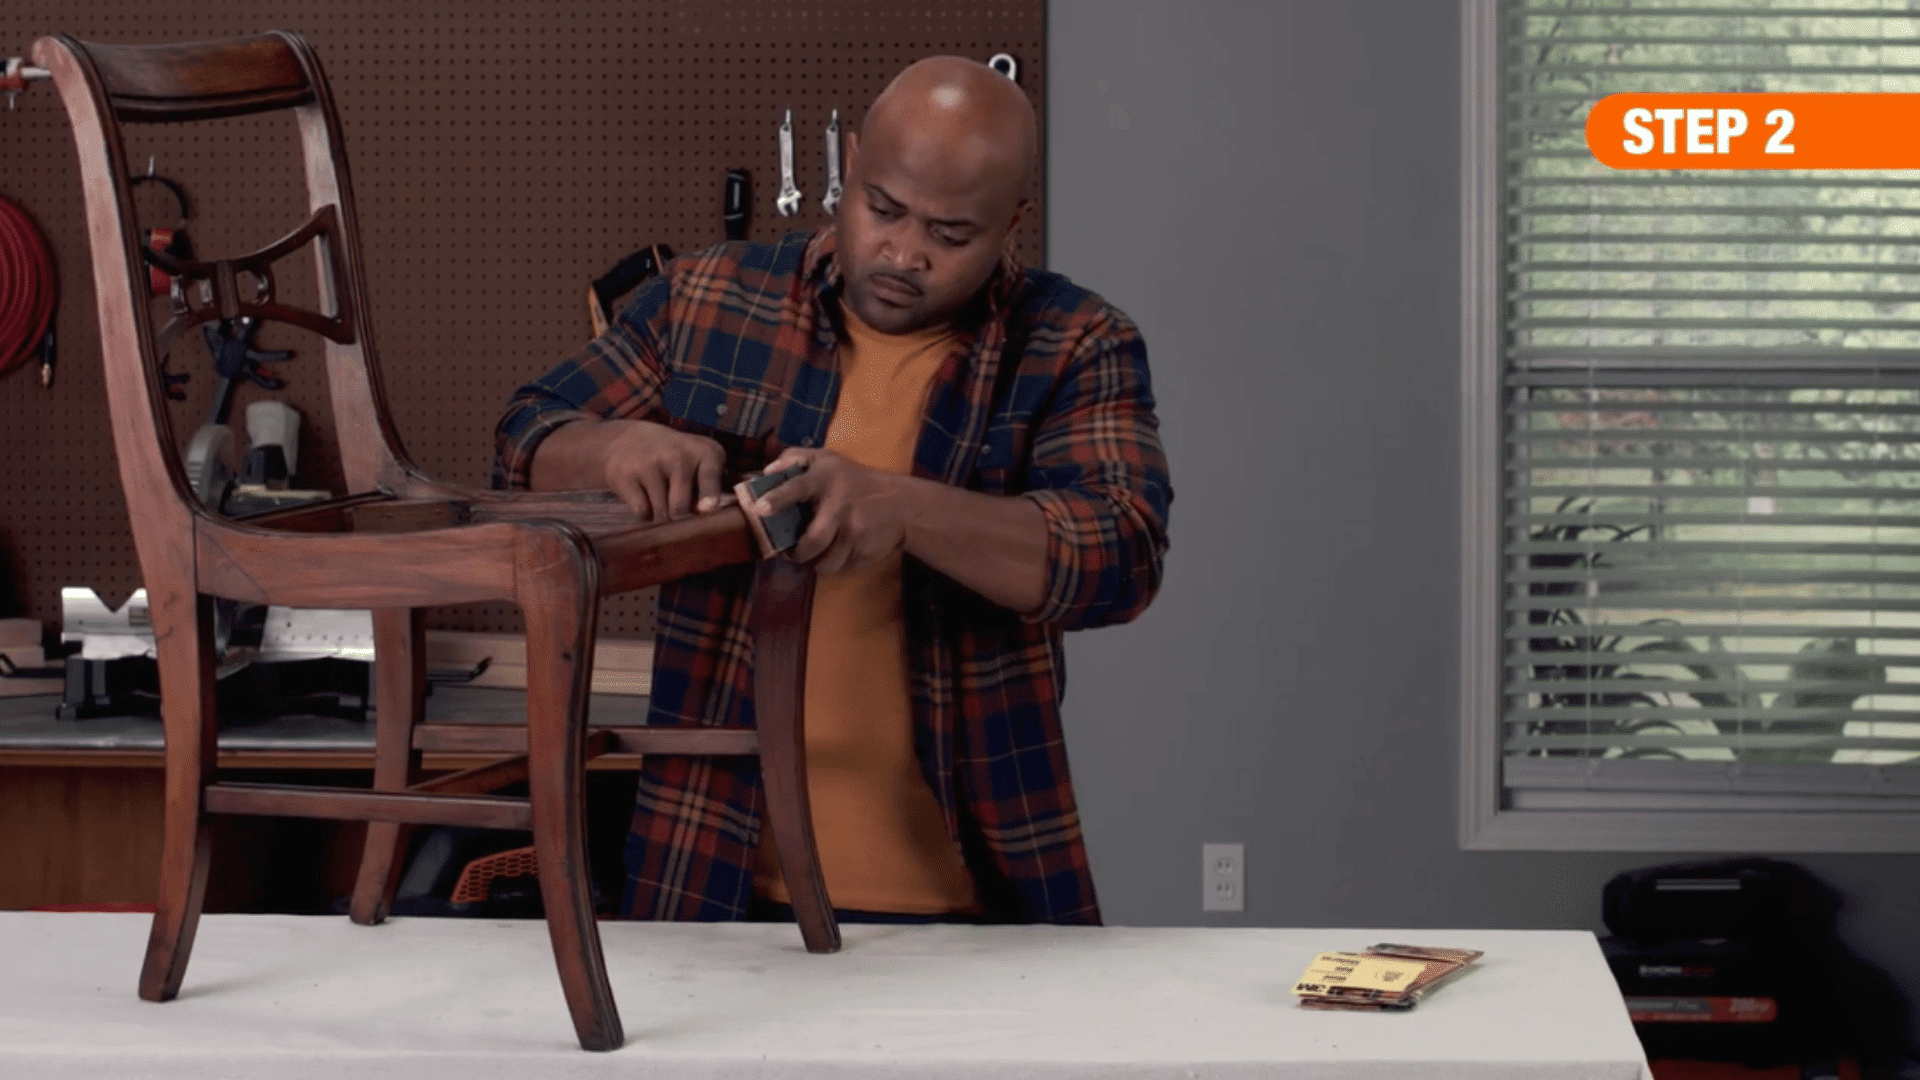
Step 3: Sand the Surface Smooth
After removing the old finish, sand the furniture until the surface feels smooth. Start with medium-grit sandpaper to remove leftover finish, then use fine-grit sandpaper for a cleaner surface.
Sand in the direction of the wood grain, not against it. This helps prevent scratches and uneven marks.
Tip Corner: Wipe away sanding dust with a tack cloth before moving to the next step. Dust can make paint or stain look rough.
Step 4: Prime and Paint the Wood
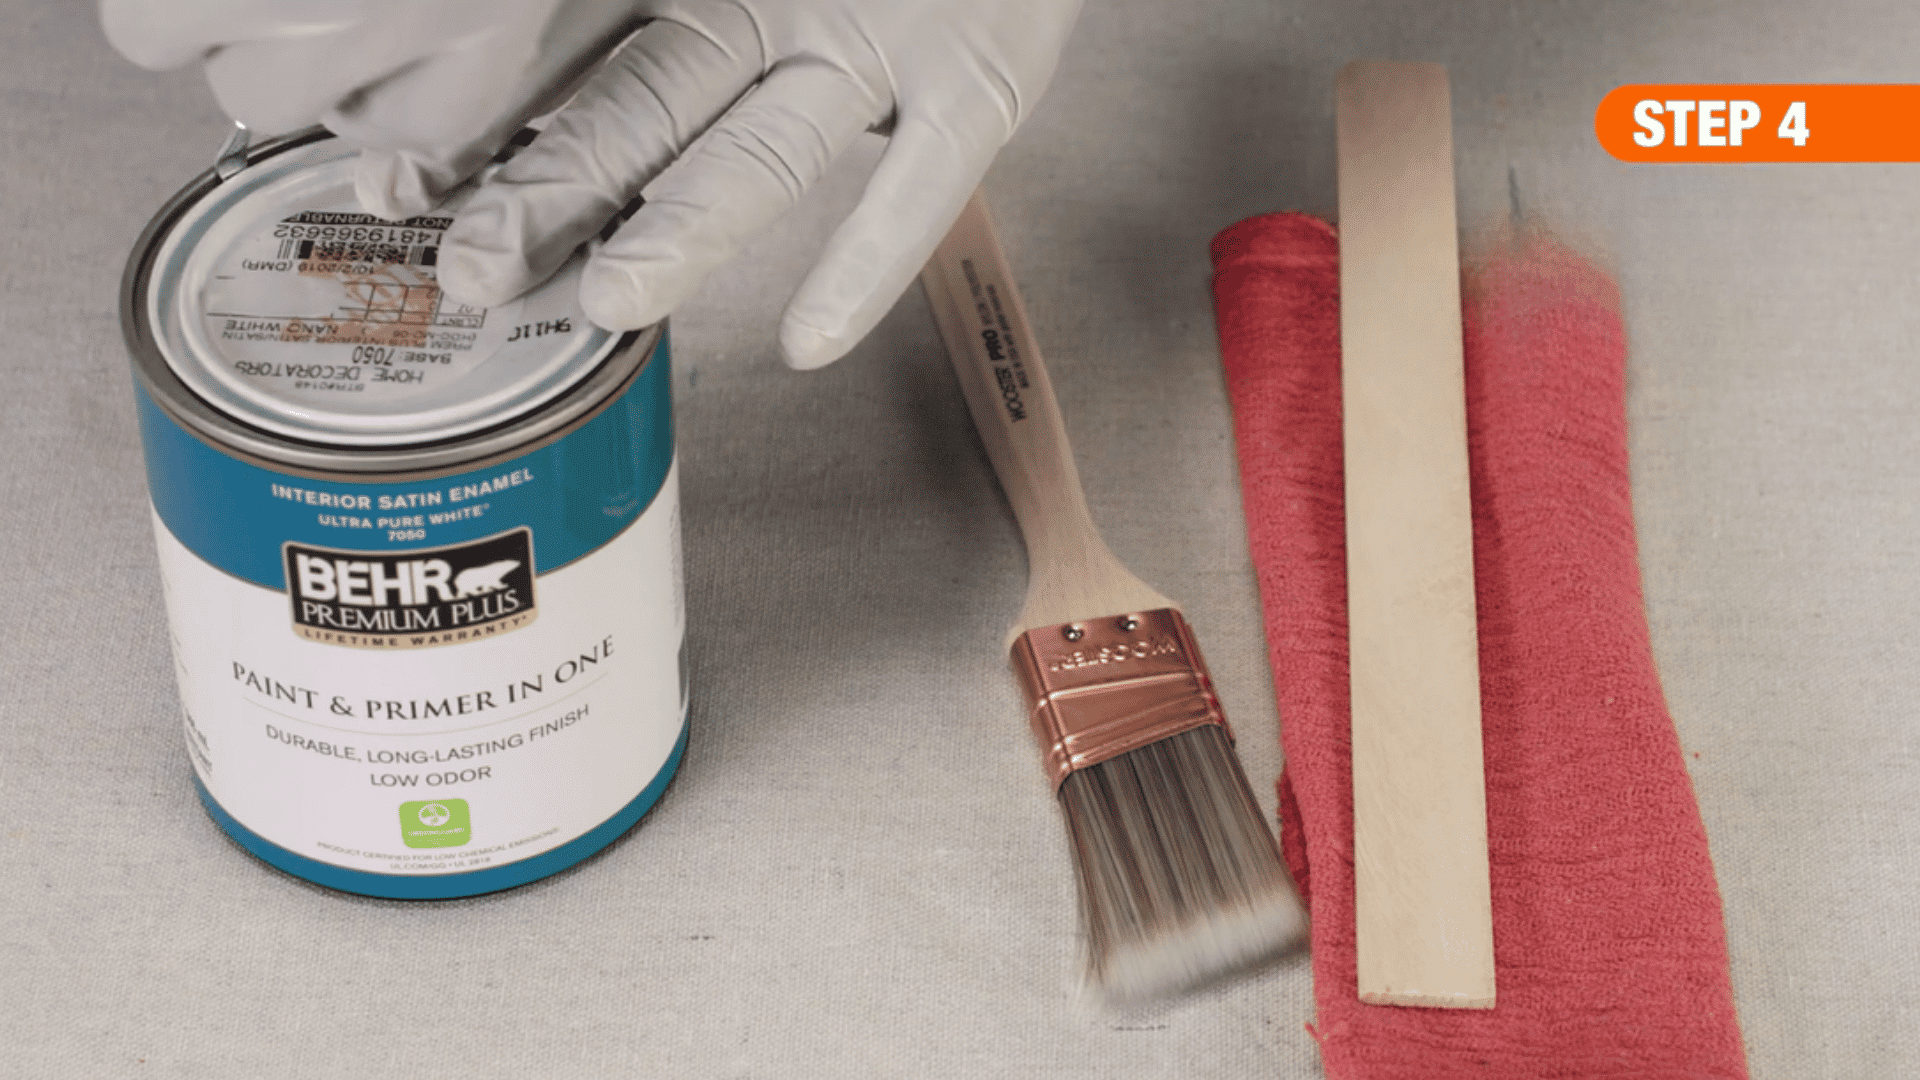
If you want to paint the furniture, apply primer first. Primer helps the paint stick better and gives you a more even color.
Once the primer dries, apply paint with a clean brush using thin, even coats. Let each coat dry before adding another one. This gives the furniture a smoother and cleaner finish.
Tip Corner: Do not apply thick coats of paint. Thin coats dry better and help reduce brush marks.
Step 5: Apply a Sealant Finish
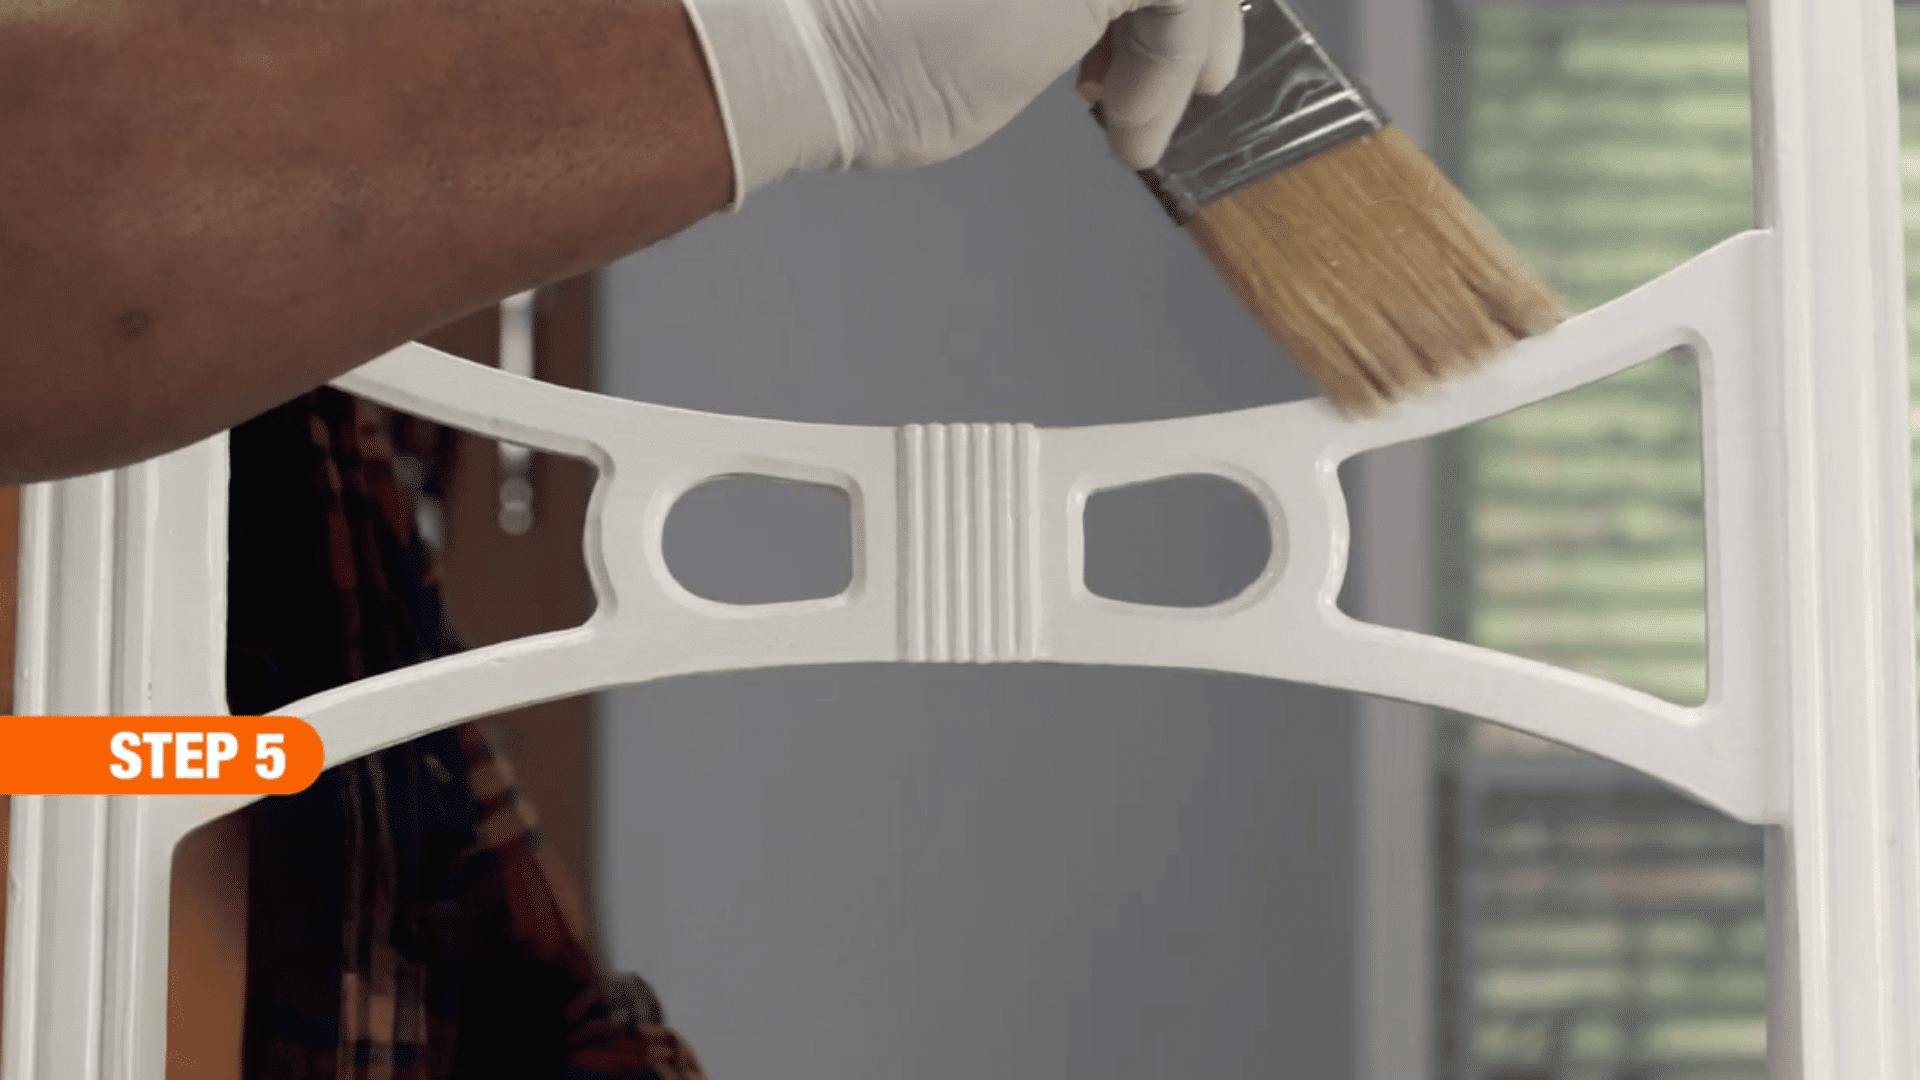
Once the paint or stain is dry, protect the furniture with a clear sealant. A sealant finish helps guard the surface against scratches, moisture, and daily use.
Use a brush to apply a thin, even coat. Let it dry fully before using the furniture. Add a second coat if the piece will get heavy use.
Tip Corner: Let the sealant cure properly before placing items on the furniture. Using it too soon can leave marks on the surface.
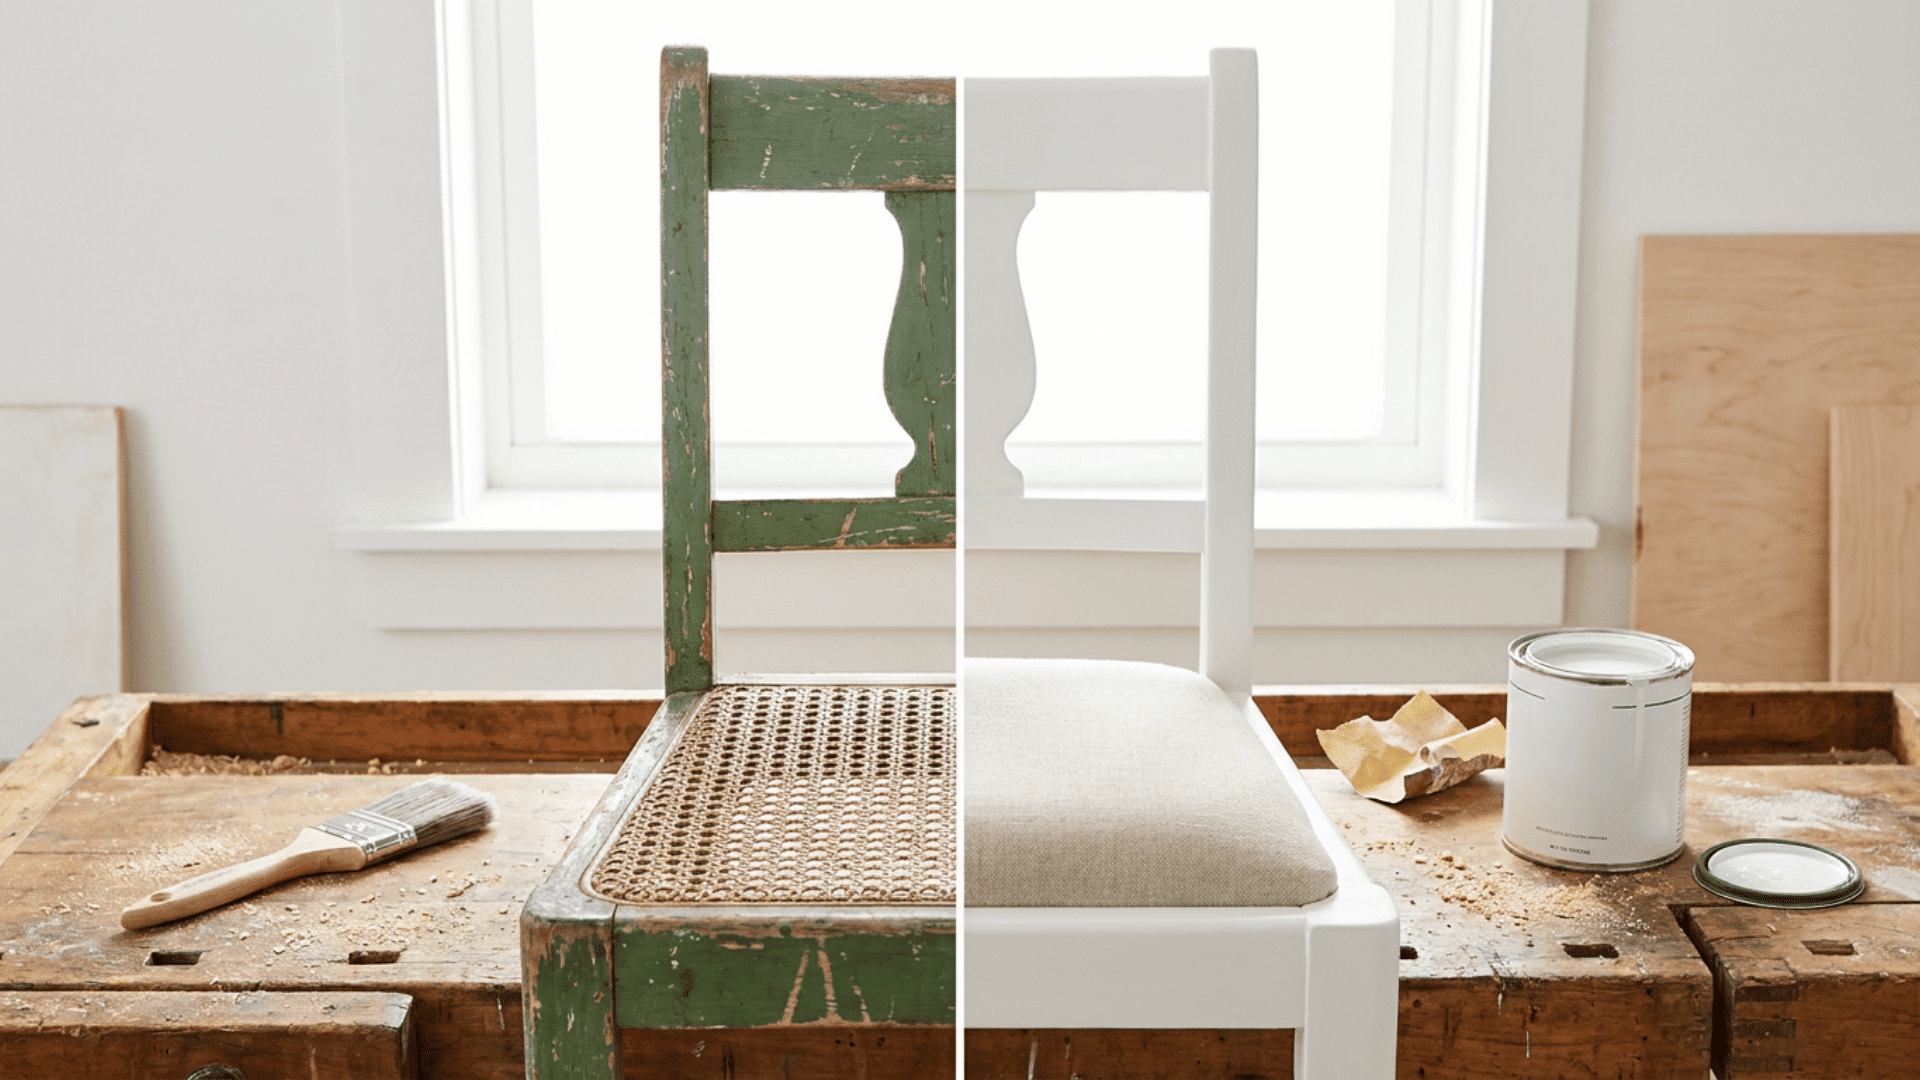
Your Refinished Furniture is Ready
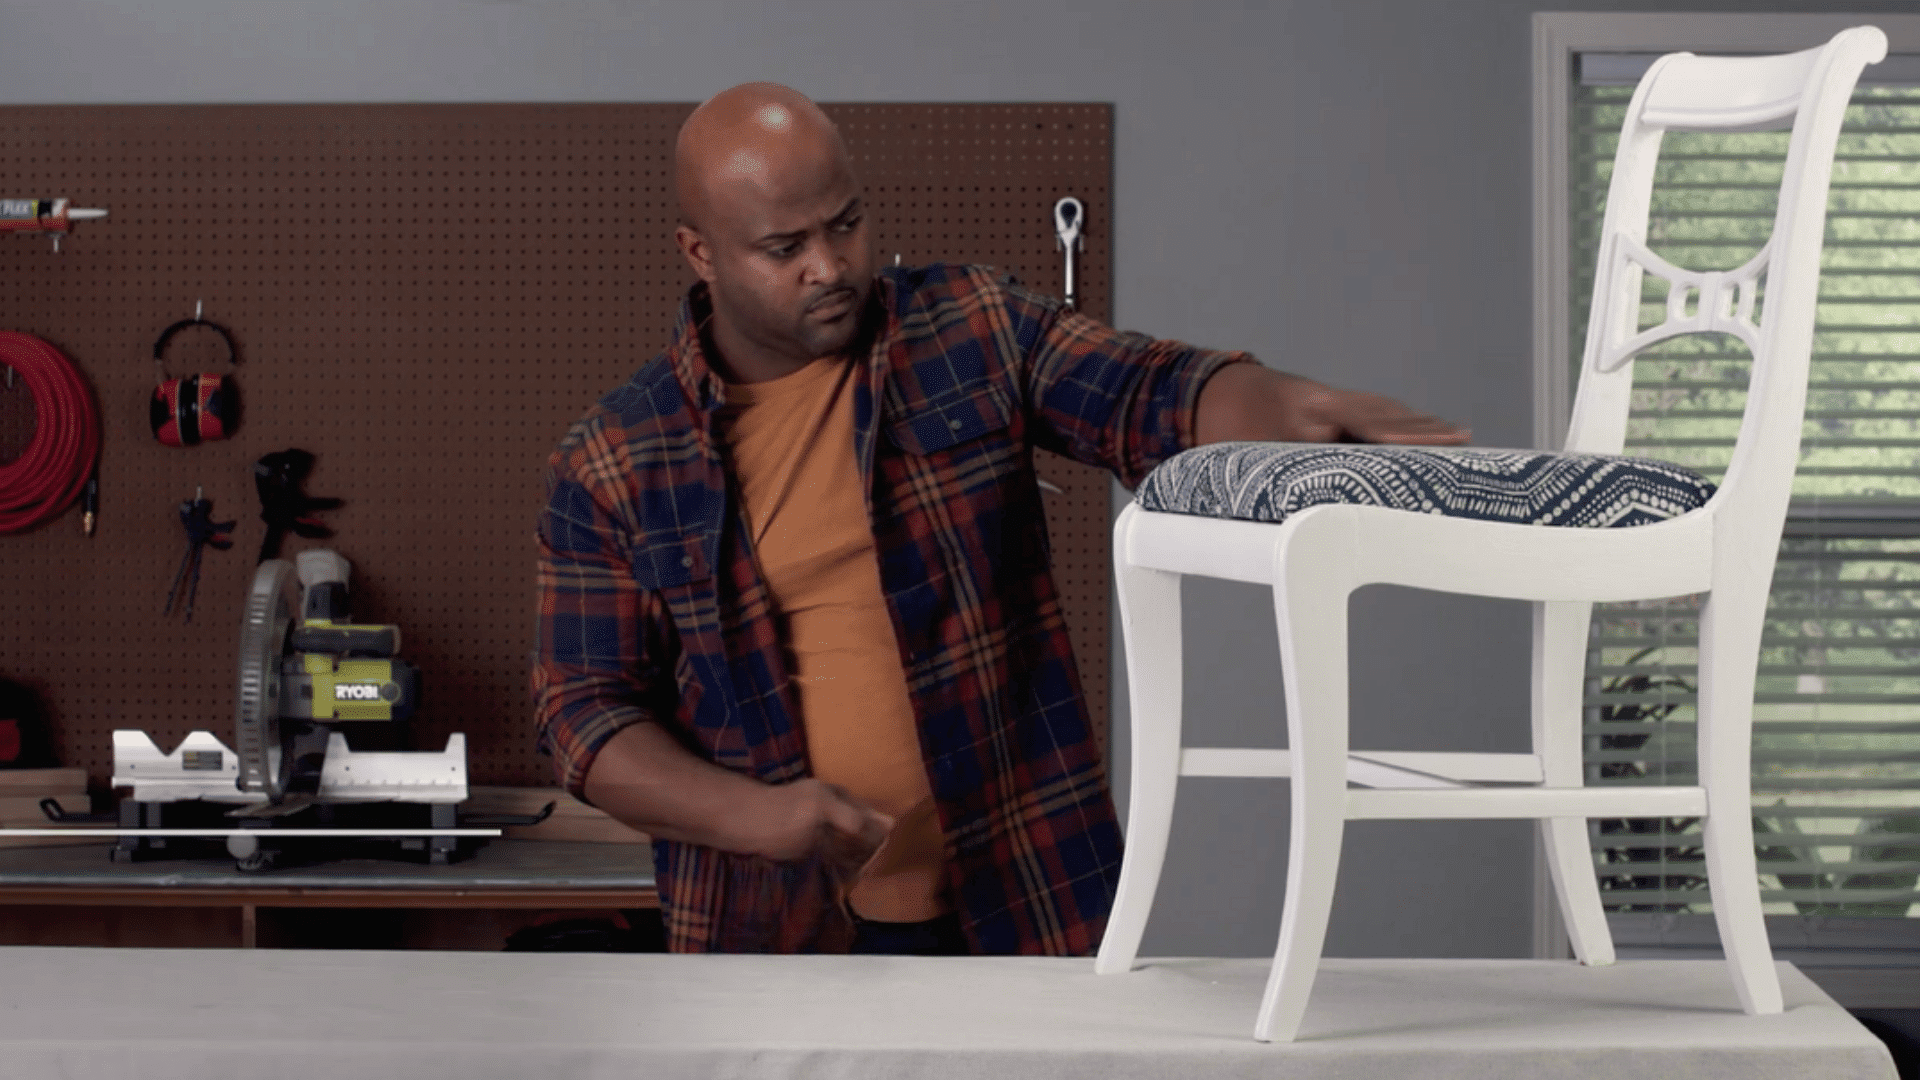
After the sealant has dried, your furniture is ready to use. The refinishing process can help remove signs of wear and give old furniture a cleaner, refreshed appearance.
In this example, the chair went from a worn wood finish to a smooth painted surface with an updated seat cushion.
Taking the time to clean, sand, paint, and seal the furniture helps create a finish that looks better and holds up to everyday use.
Tip Corner: Wait until the finish has fully cured before placing heavy items on the furniture or using it regularly. This helps prevent scratches, dents, and other surface marks.
Before you begin, watch the video below by The Home Depot to see the refinishing process in action. It provides a helpful visual overview of the steps covered in this guide.
Common Mistakes to Avoid When Refinishing Furniture
Refinishing furniture is a fairly simple project, but a few common mistakes can affect the final result. Keep these points in mind before you begin:
- Skipping surface preparation: Dirt, grease, and dust can prevent paint, stain, or sealant from sticking properly.
- Using the wrong sandpaper grit: Very coarse sandpaper can leave deep scratches, while very fine sandpaper may not remove the old finish effectively.
- Applying thick coats of finish: Thick coats take longer to dry and can lead to drips, streaks, or an uneven appearance.
- Not allowing enough drying time: Rushing between coats can trap moisture and affect the durability of the finish.
- Sanding against the wood grain: This can leave visible scratches that may show through the final finish.
- Forgetting to remove sanding dust: Dust left on the surface can create a rough texture after painting or sealing.
How to Choose the Right Finish for Furniture
The table below compares some of the most common options to help you decide which one best fits your project.
| Finish Type | Best For | Benefits |
|---|---|---|
| Polyurethane | Tables, desks, dining furniture, and other frequently used pieces | Highly durable, resists scratches and moisture, available in different sheen levels |
| Water-Based Finish | Indoor furniture where you want to keep the wood’s natural color | Dries quickly, has less odor, easy soap-and-water cleanup, does not yellow over time |
| Lacquer | Furniture requiring a smooth, polished appearance | Fast drying, durable finish, creates a clean and professional-looking surface |
| Oil Finish | Decorative furniture, antiques, and pieces where the wood grain should stand out | Enhances the natural beauty of the wood, easy to apply, simple to maintain and repair |
At the End
Learning how to refinish furniture can help you make the most of pieces you already own. Instead of getting rid of a worn chair, table, or dresser, you can restore its appearance with a few basic tools and some patience.
From cleaning and sanding to painting and sealing, each step plays an important role in creating a smooth and long-lasting finish. The process may take a little time, but the results are often worth the effort.
Start with a small project if you’re new to furniture refinishing, and build your confidence as you go. Ready to get started? Gather your supplies, follow the steps in this guide, and give your old furniture a fresh new look today.
Frequently Asked Questions
Can You Refinish Furniture Indoors?
Yes, but ensure good ventilation, especially when using chemical strippers, stains, or protective finishes.
What Type of Wood is Easiest to Refinish?
Solid wood is usually easiest to refinish because it can handle sanding and accepts stain or paint well.
How Many Times Can Furniture be Refinished?
Most solid wood furniture can be refinished multiple times if the wood remains in good condition.
Do You Need to Remove Hardware Before Refinishing?
Yes, removing handles, knobs, and hinges helps create a cleaner finish and makes sanding and painting easier.

Holding a Master’s in Architecture from the University of Texas at Austin, Emily Rodriguez has dedicated more than two decades to the art and science of building renovation. Starting her journey in historic preservation, she developed a profound respect for blending old with new in building design. Emily became a vital part of our team in 2019, renowned for her insightful and innovative renovation tips. She has been leading our DIY home improvement series since ever since, where she shares her wealth of knowledge in turning outdated spaces into modern havens. When not engaged in writing or consulting, Emily is a passionate advocate for heritage conservation and enjoys exploring vintage architecture, a hobby that complements her professional expertise.