
Are you staring at a sad, squished Christmas tree that barely resembles the lush evergreen shown on the box? Don’t worry – learning how to fluff a fake Christmas tree is easier than you think!
This often overlooked step is actually the magic trick that converts compressed plastic branches into a natural-looking holiday masterpiece.
In just minutes, you can change your artificial tree from flat and obviously fake to full and festive. The steps below provide simple, practical changes that will dramatically improve your tree’s appearance.
No special tools or skills are required – just a little patience and the right technique. Find out the secrets to creating a beautifully shaped tree that provides the perfect backdrop for your holiday memories this season!
Why Is Fluffing Important?
Fluffing your fake Christmas tree isn’t just a decorative step—it’s essential for creating a beautiful holiday centerpiece. When you take your artificial tree out of storage, the branches are typically compressed and flattened.
Proper fluffing converts your tree from a sparse, obviously fake decoration into a lush, natural-looking evergreen.
By carefully spreading out each branch and adjusting the individual tips, you create the fullness and dimension that mimics a real tree.
This process eliminates awkward gaps where the central pole might show through and ensures ornaments hang evenly with proper support. Fluffing also improves your tree’s stability by properly distributing the weight of decorations around the structure.
While it might seem tedious, this simple step makes a dramatic difference in your tree’s appearance—turning a flat, compressed collection of branches into a realistic, photo-worthy Christmas tree that becomes the perfect backdrop for your holiday celebrations.
Materials You’ll Need to Fluff Christmas Tree
Before starting your tree fluffing project, gather everything you’ll need for a successful decorating session. Having all materials ready makes the process smoother and more enjoyable, saving you from interruptions once you begin.
- Artificial Christmas tree (pre-lit or not)
- Fresh boughs (optional, for a pine scent)
- Lights (extra sparkle recommended)
- Ornaments (for decorating)
- Wire (already present in most artificial trees)
- Time and patience for fluffing
Total Estimated Cost Range
- For basic lights, ornaments, and boughs to fluff a tree: $35 – $100
- If you need a new tree or premium decorations: $200 – $600
With these items prepared, you’ll be ready to convert your compressed tree into a beautiful holiday centerpiece. Remember that patience is perhaps the most important tool on this list. Proper fluffing takes time but yields impressive results.
Step-by-Step Guide to Fluff a Fake Christmas Tree
Fluffing a fake Christmas tree requires patience but yields beautiful results. Follow these simple steps to turn your compressed tree into a gorgeous holiday centerpiece. With the right technique, you’ll have a tree that looks full, natural, and ready for decorating.
Step 1: Fluff the Tree
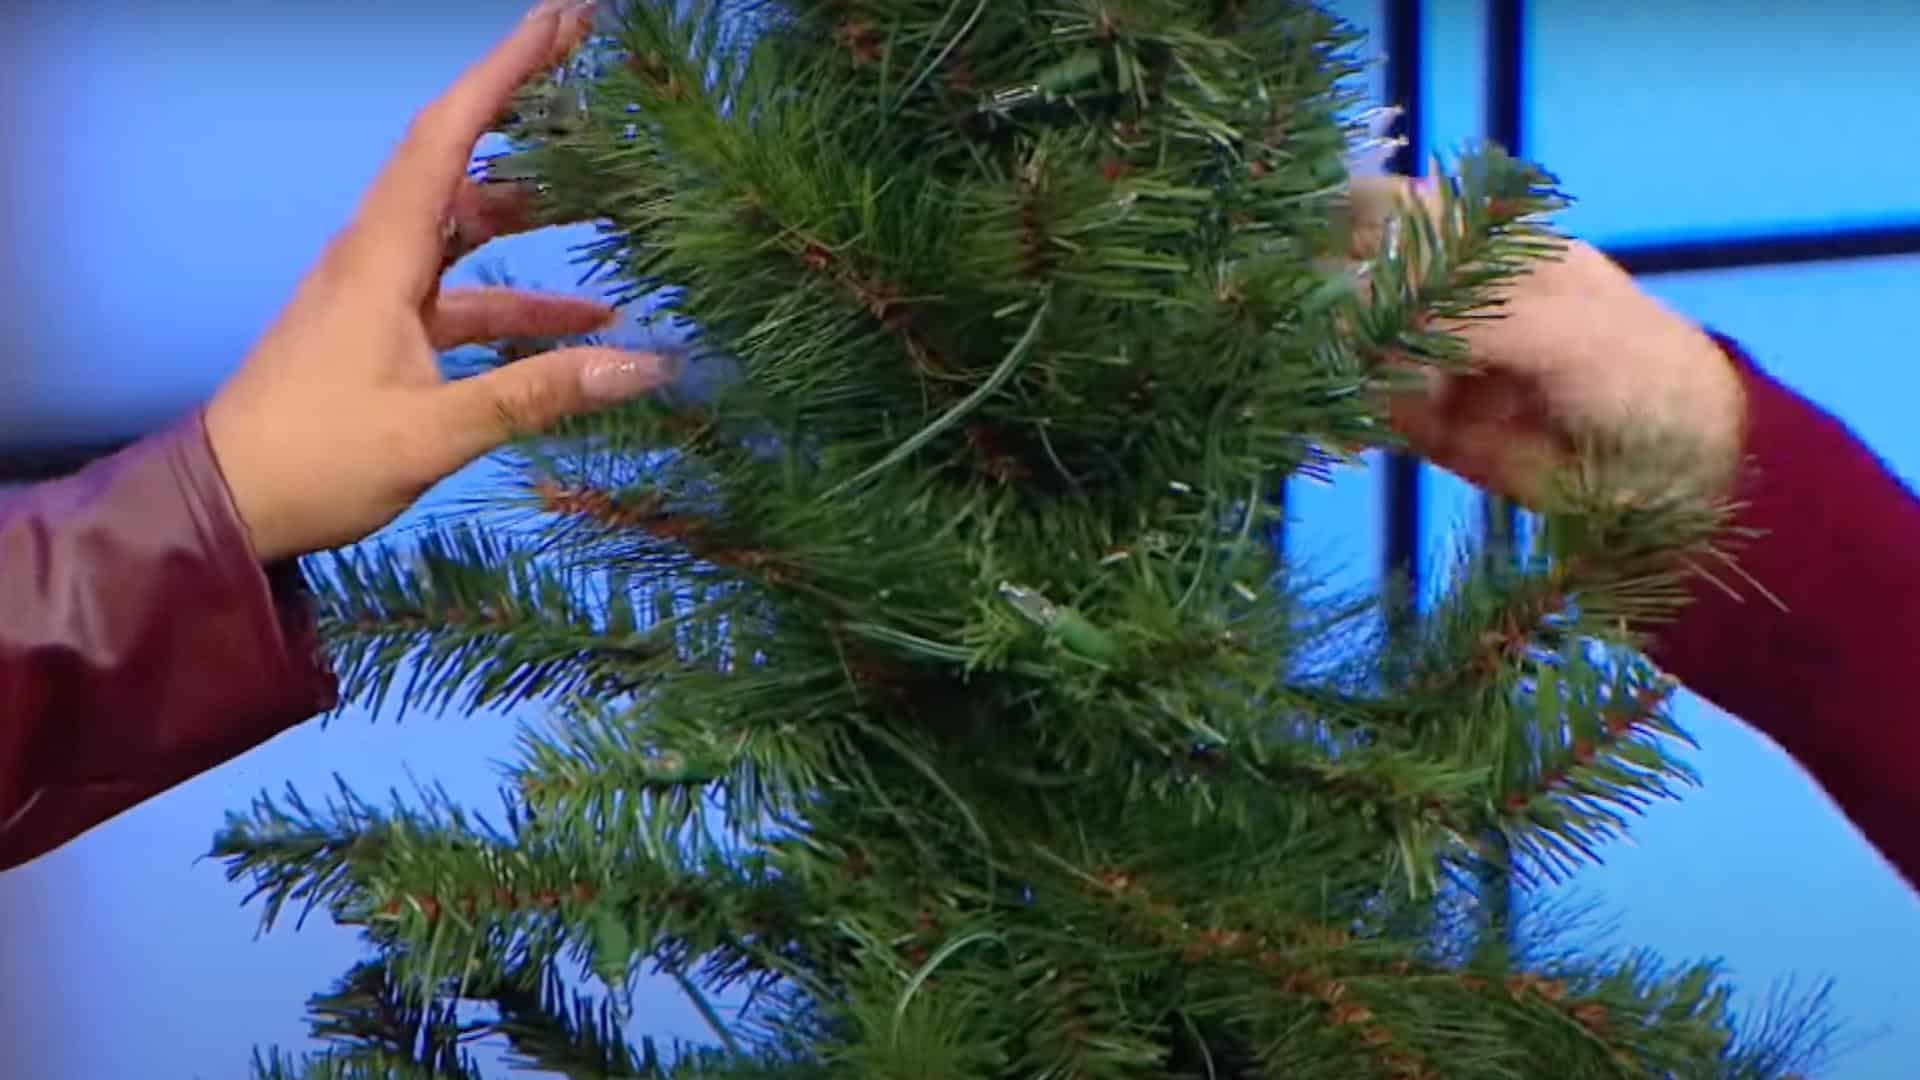
When you first set up your artificial tree, each branch needs individual attention. Take your time gently bending and spreading the smaller branches on each main stem, focusing on creating a natural, fan-like appearance.
The wire inside each branch is designed to hold whatever position you place it in, so use this to your advantage. Work from the inside, near the trunk, outward to the tips, making sure to separate and position each small branch in different directions.
This careful spreading creates depth and eliminates the flat, compressed look that artificial trees have when first unpacked from storage.
Step 2: Work on Each Section
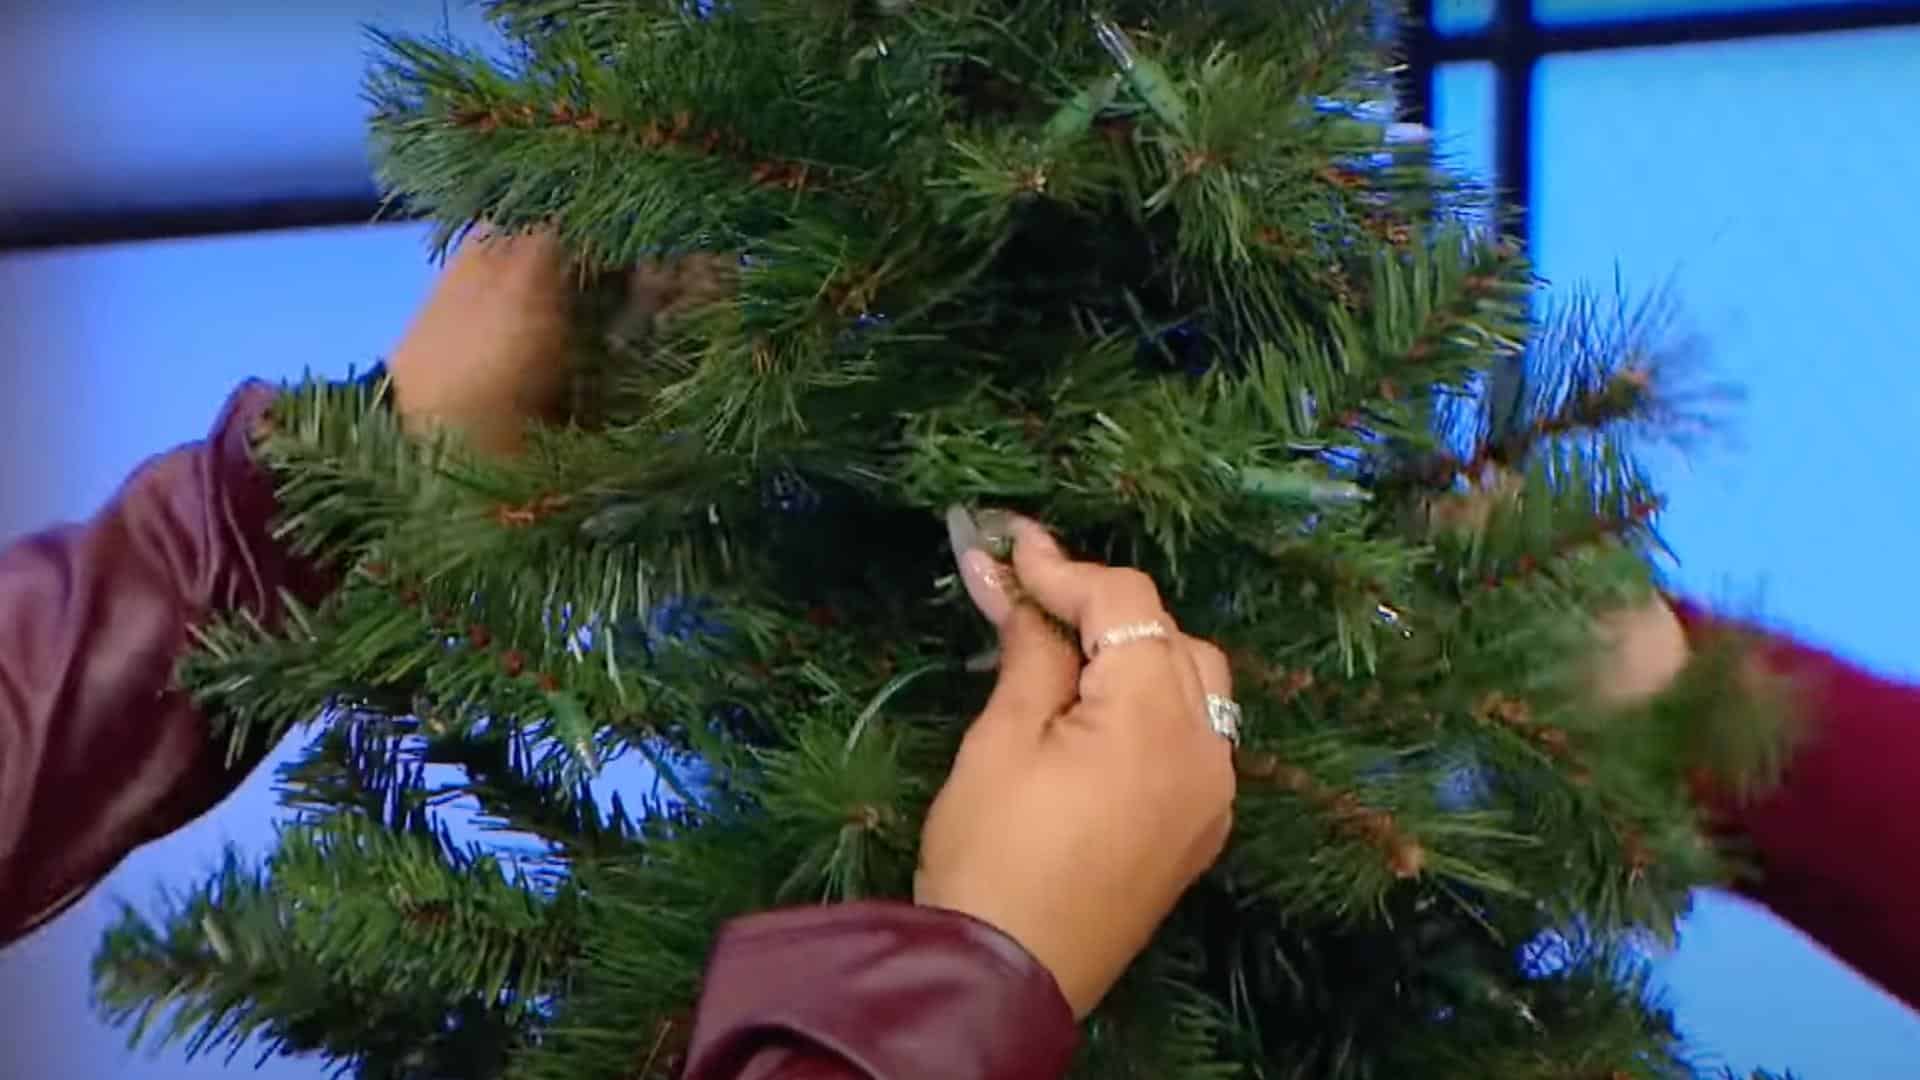
Tackling your tree in sections makes the fluffing process more manageable and ensures consistent results. Start with the bottom tier of branches, completely fluffing that section before moving up to the next level.
This methodical approach helps you maintain an even look throughout the tree and prevents missing any sections.
Give equal attention to all sides of the tree, even the back if it will be visible. As you move upward, step back occasionally to check your progress and identify any areas that need additional attention.
Remember that the top sections are usually more visible, so take extra care to make them look especially full.
Step 3: Add Extra Lights
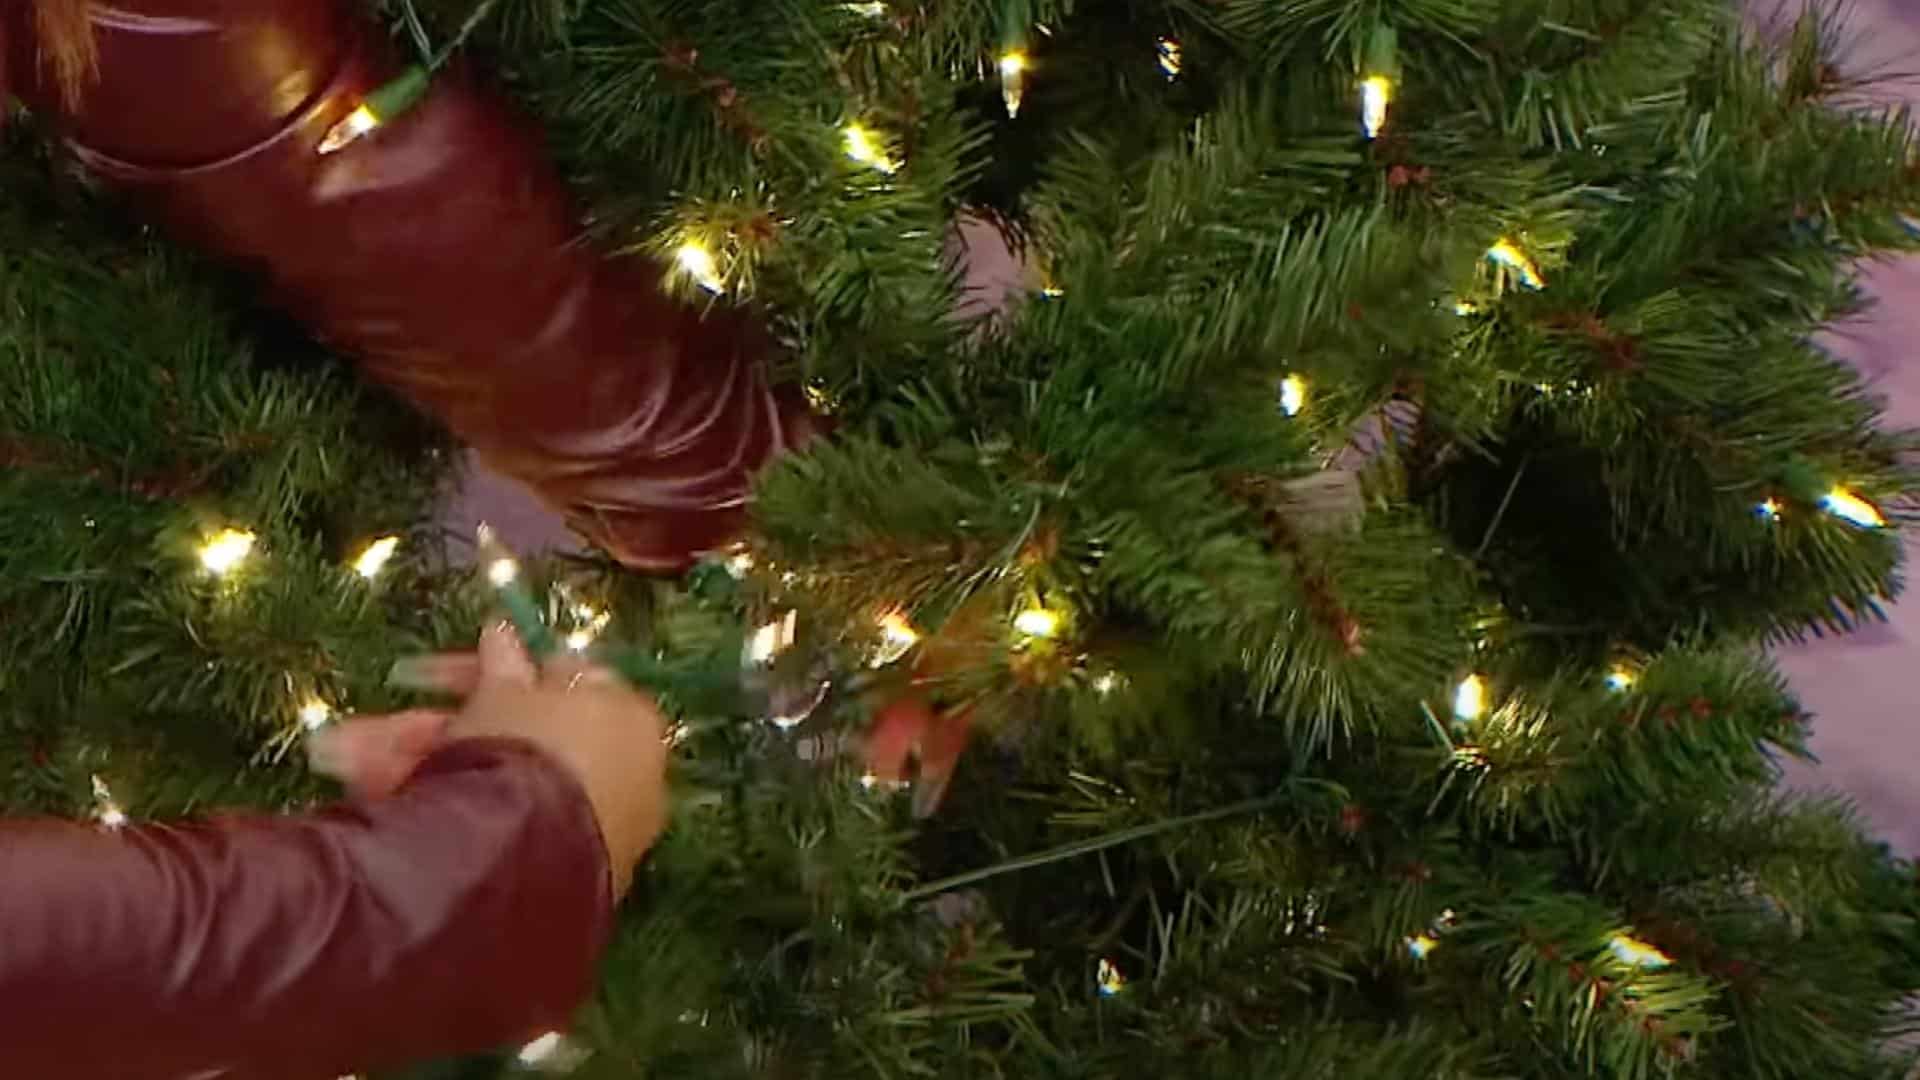
Even pre-lit trees can benefit from additional lighting to create a truly magical display. When adding lights, avoid the common mistake of simply wrapping them around the outside of the tree.
Instead, tilt lights in and out of the branches, starting from the trunk and working outward. For a standard 6-foot tree, consider using at least 100 extra lights to achieve that warm, glowing effect.
Position lights at different depths within the branches to create dimension and ensure the inner portions of the tree are illuminated.
This technique creates a tree that appears to glow from within rather than just on the surface.
Step 4: Use the “Hand” Technique

The “hand” technique is a professional decorator’s secret for achieving a natural-looking tree. Imagine your tree branches as fingers on a hand – they should spread out in different directions rather than pointing straight out.
As you position each branch, gently bend some upward, some straight out, and others slightly downward to mimic the natural growth pattern of a real evergreen.
This variation in direction creates a realistic dimension and provides more places to hang ornaments. Apply this technique consistently throughout the tree, paying special attention to areas that appear flat or uniform.
Step 5: Enjoy the Fuller, Sparkling Tree

Once your fluffing and lighting are complete, take a step back to appreciate your handiwork. A properly fluffed tree looks complete and beautiful even before adding ornaments.
Examine the tree from different angles and in different lighting to catch any missed spots that need additional attention. Make final adjustments as needed, focusing on creating an even, natural silhouette.
This is also the perfect time to decide if you want to add a tree topper or any special decorative elements to enhance your display before moving on to ornaments and other decorations.
Video Tutorial
For more information, check out this video tutorial by Rachael Ray Show
Common Mistakes to Avoid
Even experienced decorators can make errors when fluffing their artificial trees. Taking note of these common pitfalls will help you achieve better results and protect your investment. A little awareness goes a long way in creating that perfect holiday tree.
- Rushing through the fluffing process instead of being patient.
- Working on random sections rather than following a methodical approach.
- Focusing only on the front of the tree when it should look good from all angles.
- Pulling branches too forcefully can damage the internal wiring.
- Ignoring the inner branches near the trunk, making the tree look hollow.
- Fluffing all branches in the same direction creates an unnatural appearance.
- Trying to complete the entire tree at once rather than taking breaks.
With these mistakes in mind, you’ll be able to avoid common frustrations and achieve a more beautiful result. Remember that tree fluffing is as much about the process as the outcome, so take your time and enjoy converting your artificial tree into a holiday showpiece.
How to Maintain Your Tree for Next Year
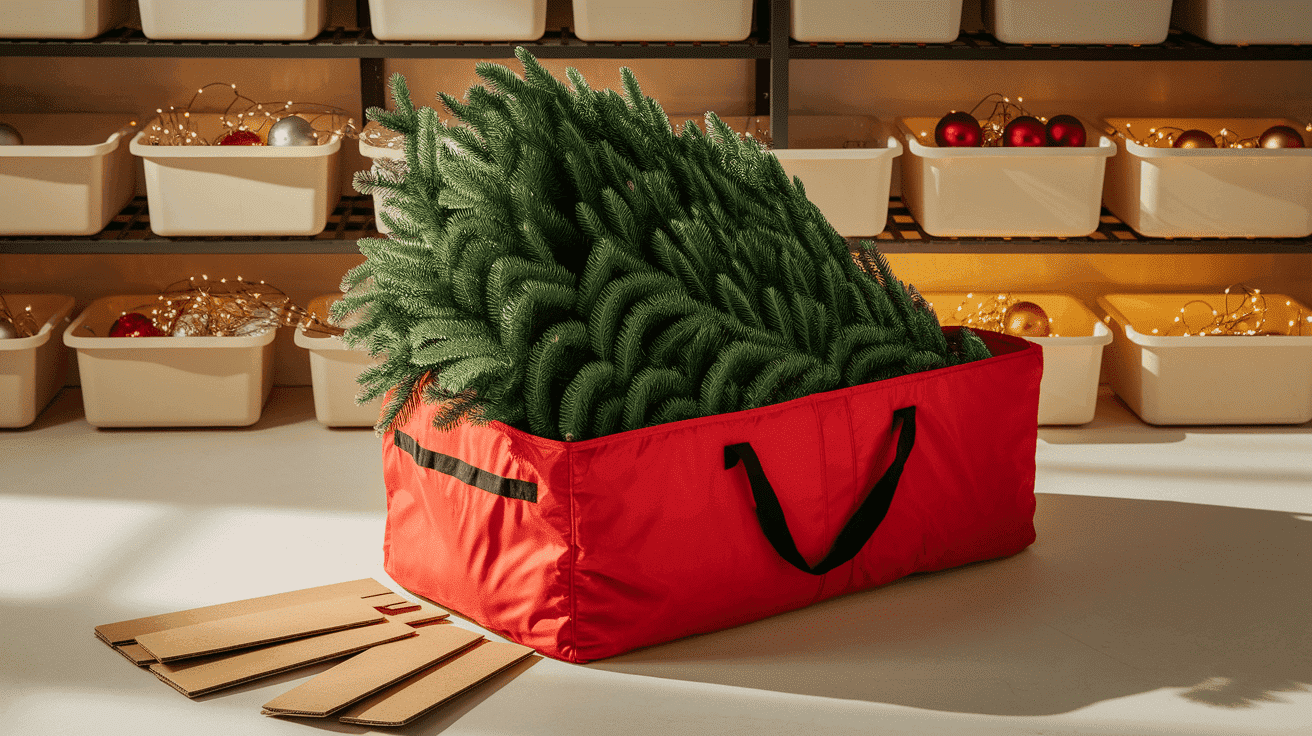
Proper storage is the secret to minimizing next year’s fluffing efforts. When the holiday season ends, please resist the urge to compress your tree and stuff it back in its original box quickly.
Instead, carefully remove ornaments and lights, then gently compress branches starting from the top and working downward. Use the original cardboard inserts if you have them, as they help maintain the branch shape.
Consider investing in a specialized Christmas tree storage bag with sturdy handles and durable material to protect against moisture and pests.
Store your tree in a cool, dry place away from extreme temperatures that could damage the branches or cause color fading. Avoid stacking heavy items on top of your stored tree, as this can crush branches and create permanent deformations.
With these simple storage practices, you’ll significantly reduce next year’s fluffing time and extend the life of your artificial tree for many holiday seasons to come.
Wrapping It Up
Mastering how to fluff a fake Christmas tree converts your holiday decorating from ordinary to extraordinary.
The difference between a light, obviously artificial tree and a lush, natural-looking centerpiece comes down to these simple fluffing techniques.
Taking the time to shape each branch properly creates a beautiful backdrop for your ornaments and lights that will delight family and friends throughout the season.
The best part? With the right storage methods, each year becomes easier as your tree maintains more of its shape.
No matter what style or size of artificial tree you own, these fluffing tips help you get the most value and enjoyment from your holiday investment. Happy decorating, and enjoy your beautifully fluffed tree all season long!
If you’re interested in more DIY projects for your home, feel free to click here and explore our collection of easy weekend makeovers and step-by-step renovation tutorials.

Stephanie Grace, a graduate with a degree in Fine Arts from the Savannah College of Art and Design, has been inspiring DIY enthusiasts with her creative and practical guidance for over 14 years. Her career in design and crafting began in a small artisan workshop, where she developed a passion for transforming everyday materials into beautiful and functional items. Stephanie joined our website in 2018, rapidly gaining popularity for her easy-to-follow DIY tutorials and innovative project ideas. Since then, she has been the creative mind behind our DIY section, helping readers bring their artistic visions to life. Outside her professional pursuits, Stephanie enjoys pottery and urban gardening, hobbies that showcase her love for hands-on creativity and nature.