
Tiling over a brick fireplace is one of the easiest ways to give your home a fresh, updated look. I decided to take on this project when my old brick started looking dull and worn out.
At first, it seemed a little intimidating, but once I broke it down into manageable steps, it became simple. You don’t need fancy tools or extensive experience to achieve a great result. With a little time and patience, you can create a fireplace that looks brand new.
In this guide, I’ll walk you through each step I followed, sharing the tips that helped me and the mistakes you can avoid. If your brick fireplace feels outdated, tiling over it might be the perfect solution. Let’s get started and bring some new life to your space!
Why Tile Over a Brick Fireplace?

Tiling over a brick fireplace is a smart and easy way to give your living space a fresh, new look. Old brick can sometimes make a room feel dark, outdated, or even dirty. By adding tile, you can brighten up the space and make it feel cleaner and more modern.
One big reason to tile over brick is style. Tile comes in many colors, shapes, and patterns. You can choose something that suits your home perfectly, whether you prefer a cozy, rustic style or a sleek, modern look.
Another reason is maintenance. Brick is rough and can collect dust and soot over time. It can also be hard to clean. Tile has a smooth surface that wipes down easily with a cloth, saving you time and effort.
Finally, tile can cover damage. If your brick is cracked, chipped, or stained, tiling over it hides all the flaws. You get a fresh start without needing to tear down the old fireplace.
Overall, tiling is a simple way to refresh your fireplace, add value to your home, and create a space you enjoy.
Tools and Materials You Will Need

A list of the basic tools and materials you should have:
- Tile of your choice
- Tile adhesive (mastic)
- Notched trowel
- Tile spacers
- Level
- Measuring tape
- Pencil or chalk
- Tile cutter or wet saw
- Grout
- Grout float
- Sponge
- Bucket of water
- Thin-set mortar (optional for uneven surfaces)
- Backer board (optional)
- Construction adhesive (optional)
- Safety glasses
- Work gloves
Having all your tools ready before you start will save you time and stress.
Picking the Right Tile

Choosing the right tile is important:
- Size: Large tiles can make the job faster. Small tiles are good for detailed looks.
- Material: Ceramic and porcelain tiles are easy to clean. Stone tiles give a natural look.
- Color: Lighter colors make the fireplace feel bigger. Darker colors add a cozy feel.
- Texture: Smooth tiles are easier to clean. Textured tiles give more character.
Pick a style that fits the rest of your room.
Preparing the Brick Surface
Before you start tiling, you must get the brick ready:
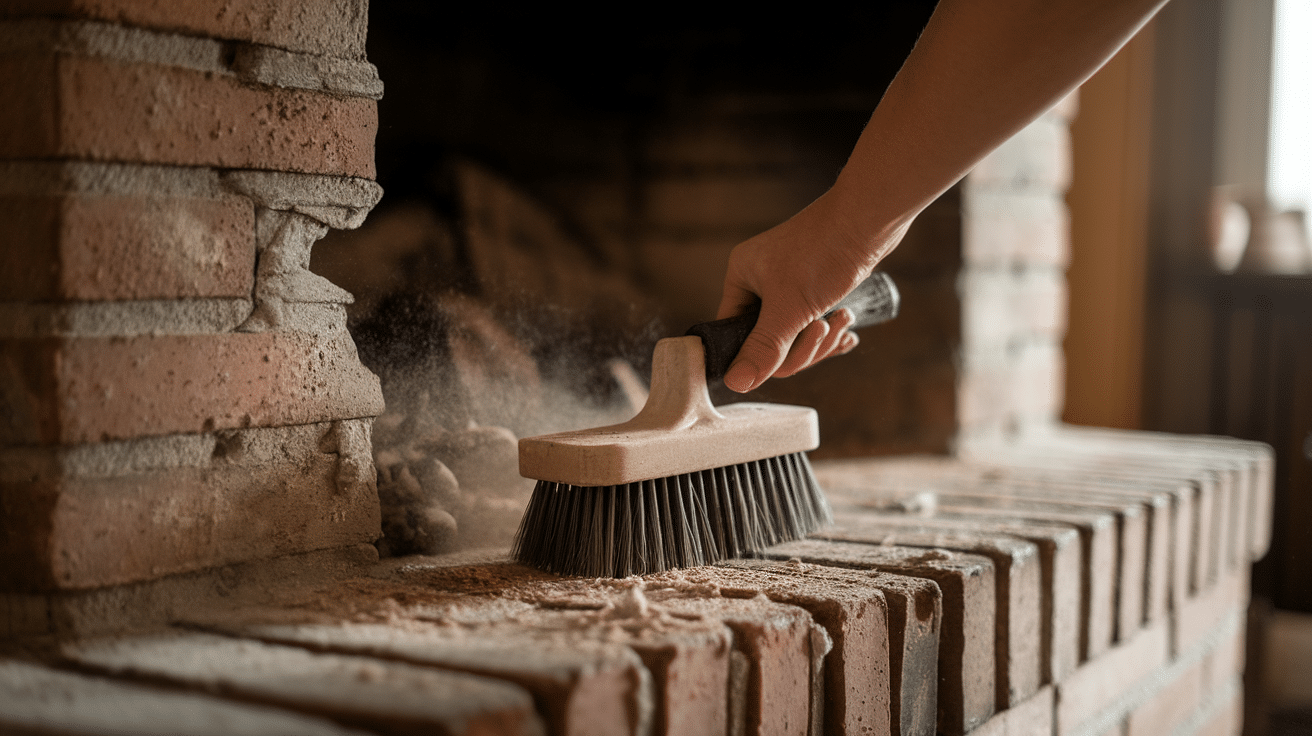
1. Clean the Brick: Use a wire brush to scrub the brick. Remove any dirt, dust, or soot. Wipe it down with a damp cloth and let it dry.
2. Check for Loose Bricks: Tap on the bricks. If any feel loose, you will need to fix them with mortar. Let it dry before tiling.
3. Level the Surface: The brick is rough and bumpy. If the surface is very uneven, you have two options:
- Apply a skim coat: Use thin-set mortar to smooth it out.
- Attach backer board: Glue it with construction adhesive and screw it into place.
A flat surface makes tiling easier and helps the tiles stick better.
Planning Your Tile Layout
Before you stick any tiles, plan the layout:
- Find the center of the fireplace and mark it with chalk.
- Lay a row of tiles across the bottom.
- Use spacers to see how the tiles will fit.
- Adjust as needed so you don’t have tiny cuts on the ends.
Taking time to plan will help you avoid mistakes.
How to Tile Over a Brick Fireplace
Now that you are ready, here are the steps to tile your fireplace:
1. Apply the Adhesive
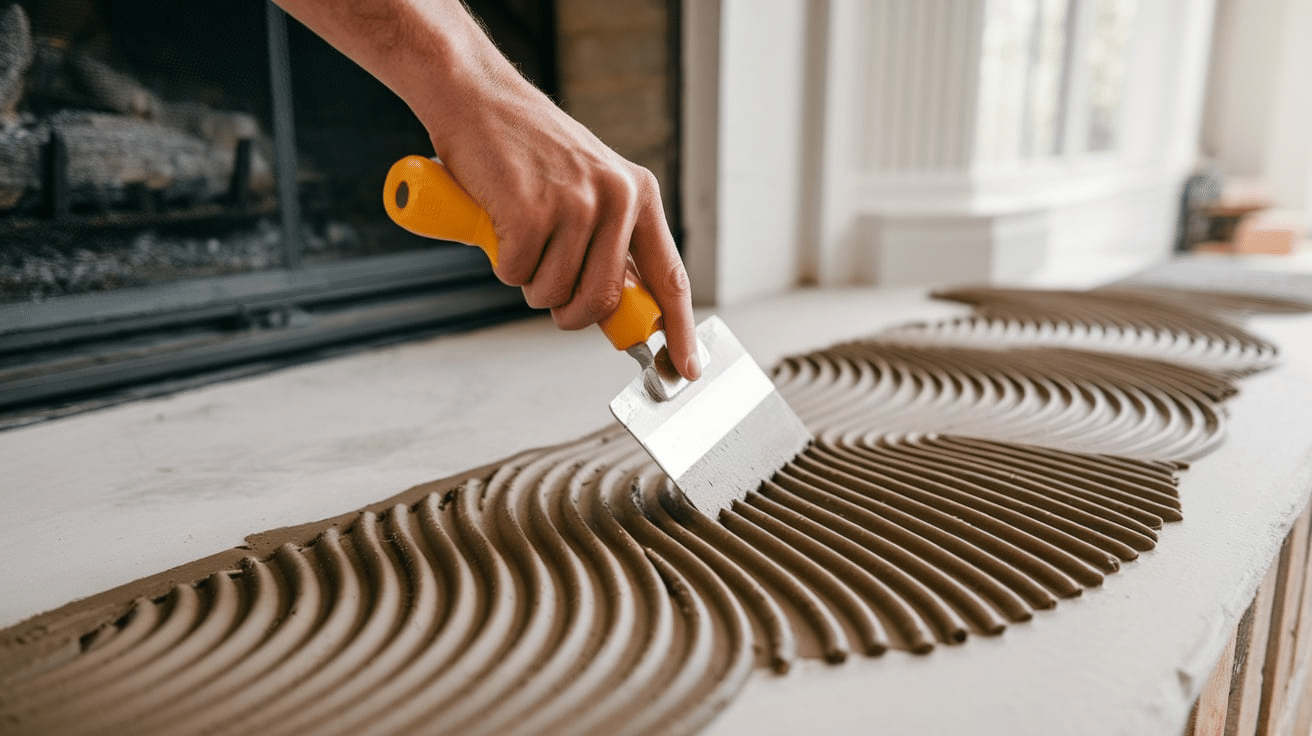
Start by using a notched trowel to spread the tile adhesive onto a small section of the fireplace. Hold the trowel at a 45-degree angle and move it across the adhesive. This creates even grooves in the adhesive that help the tile stick better.
Make sure the layer of adhesive is thick enough to hold the tile but not so thick that it squeezes out when you press the tile down. Always work in small sections so the adhesive doesn’t dry before you place the tiles.
2. Place the Tiles
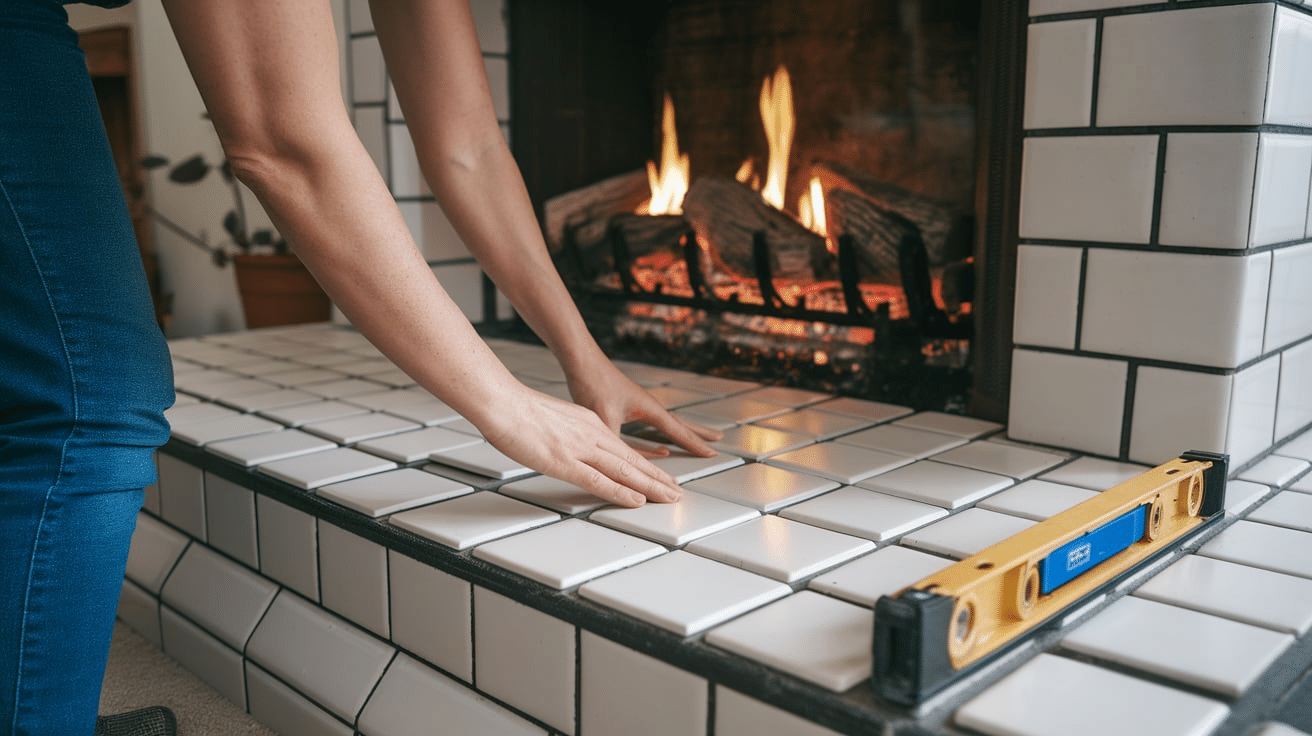
After spreading the adhesive, press the first tile firmly into place. Push it down a little and wiggle it slightly to make sure it grips the adhesive well. Then add a spacer next to the tile to keep the grout lines even.
Continue placing tiles one by one, always using spacers. Every few tiles, use a level to make sure your tiles are straight and even. Step back often and look at the tiles to catch any problems early.
3. Cut Tiles as Needed

When you reach the edges or tight spots, you will need to cut the tiles to fit. Measure the space carefully and mark the cut line on the tile with a pencil. Use a tile cutter or wet saw to make the cut.
Always wear safety glasses when cutting tiles to protect your eyes from flying pieces. Make sure your cuts are clean so the edges look neat when placed next to the other tiles.
4. Let the Adhesive Dry
Once all your tiles are in place, allow the adhesive to dry completely. Follow the instructions on the adhesive container, but most adhesives need about 24 hours to dry properly.
Don’t rush this step! Moving too fast can cause the tiles to shift or fall off. Let the fireplace sit undisturbed so the adhesive can cure and hold the tiles firmly in place.
Grouting the Tiles

After the tiles are set and the adhesive is dry, it’s time to grout.
1. Mix the Grout: Follow the directions on the grout package. Mix until it is smooth and easy to spread.
2. Apply the Grout: Use a grout float to press the grout into the spaces between the tiles. Hold the float at a 45-degree angle.
3. Clean the Tiles: Wipe off extra grout with a damp sponge. Rinse the sponge often. Be careful not to pull grout out of the spaces.
4. Let the Grout Cure: Allow the grout to dry completely. This typically takes between 24 and 48 hours.
5. Sealing the Grout (Optional): Sealing the grout can help protect it from stains and water. After the grout has fully cured, apply a grout sealer with a small brush or spray. Follow the instructions on the sealer bottle.
Best Tile Styles for a Fireplace

Some popular tile ideas are:
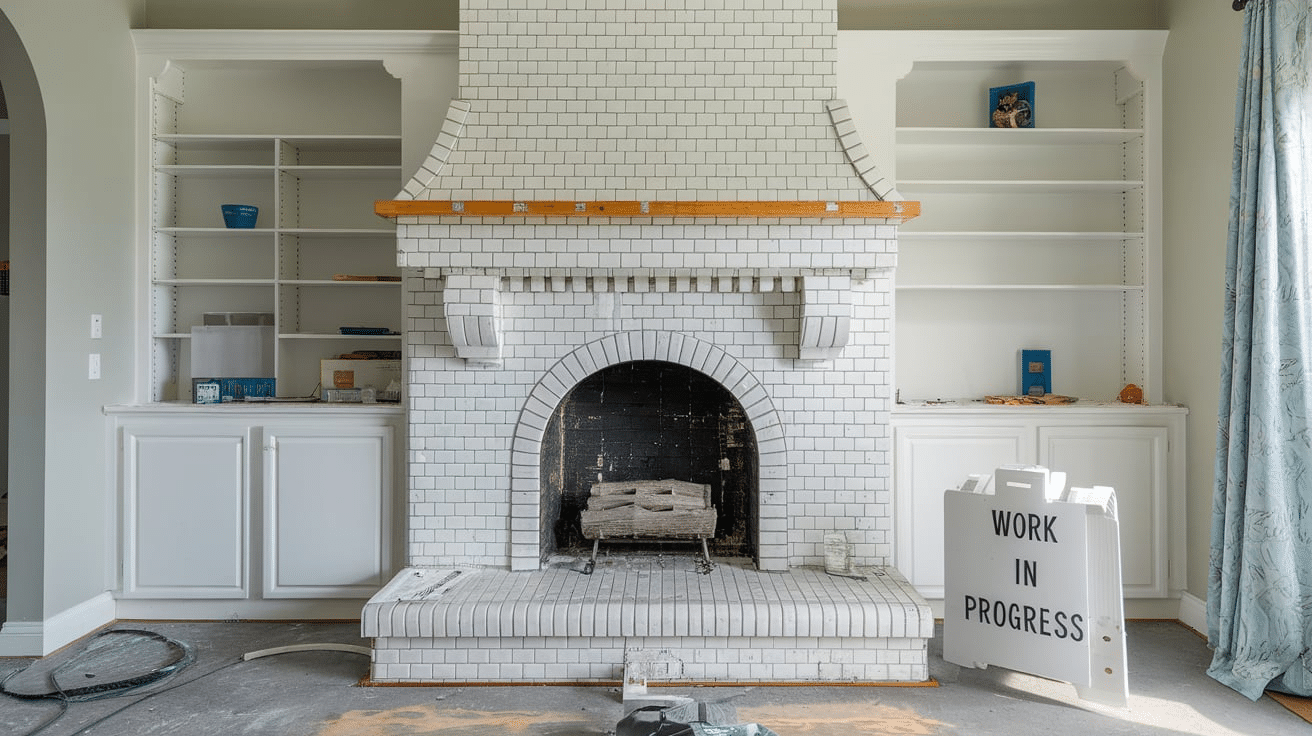
Subway Tile: Classic and clean.
Stone Look Tile: Adds a rustic feel.
Large Format Tile: Fewer grout lines, resulting in a sleek appearance.
Mosaic Tile: Adds texture and color.
Select a style that suits the look you desire.
Can You Tile Over Painted Brick?
Yes, you can tile over painted brick. Just make sure:
The paint is not peeling.
The surface is clean and rough enough for adhesive.
Sand the surface lightly if it’s too smooth.
Proper prep is even more important with painted brick.
What to Do About the Fireplace Opening
You can tile around the fireplace opening with care. Make sure you:
Use heat-resistant tile near the firebox.
Leave a small gap between the tile and the firebox metal.
Use caulk rated for high heat around the firebox.
This keeps the area safe and neat.
How Long Does It Take to Tile a Fireplace?
The time it takes can vary:
Cleaning and prep: 1-2 hours
Surface leveling: 2-4 hours (plus drying time)
Tiling: 4-8 hours
Grouting: 2-4 hours
Drying time: 24-48 hours
Plan to spread the project over a few days.
How Much Does It Cost?
The cost will depend on the tile you choose and if you need extra supplies. Here is a rough estimate:
Tile: Approx $50-$300
Adhesive and grout: Approx $50
Tile tools (if needed): Approx $50-$100
Doing it yourself saves a lot compared to hiring someone.
How to Maintain Your Tiled Fireplace
Here’s how to keep your new fireplace looking good:
Wipe down with a damp cloth regularly.
Use mild soap if needed.
Check the grout once a year for cracks.
Reseal grout every 1-2 years.
Good care will keep it looking fresh for years.
Tips for a Great Finish
Here are a few extra tips to make your project easier:
Work in small sections so the adhesive doesn’t dry too fast.
Wipe tiles often while grouting to avoid a haze.
Start tiling from the bottom and work up.
Take your time measuring and cutting tiles.
Use painter’s tape to mark cuts on tiles.
A little extra care can make a big difference in the final look.
Common Mistakes to Avoid
Here are some mistakes I learned to watch out for:
Skipping surface prep: Dirty or loose brick will not hold tile well.
Using too much adhesive: It can squeeze out between tiles.
Not using spacers: Your lines will look messy.
Rushing: Take your time for better results.
Being patient is key to a good-looking fireplace.
Conclusion
Tiling over a brick fireplace is a project that can truly change the look of a room. It may seem like a lot of work at first, but once you break it down step by step, it becomes easier to manage. You don’t need to be an expert or invest in expensive tools. With a little patience and a careful plan, you can create a fireplace that feels fresh, clean, and new.
Taking the time to prep the surface and lay out your tiles carefully makes a big difference. It helps everything go smoothly and keeps the result looking neat. Even small details, like using spacers and maintaining a level nearby, can save you a lot of trouble later.
If you have an old brick fireplace that feels out of place, tiling over it is a smart solution. It gives your space new life without the cost of a full rebuild. Plus, it’s something you can proudly say you did yourself.

With a Master in Architectural Studies from University of Pennysylvania, Marwa Haydar has pioneered living spaces since 2005. Her expertise, initially honed in a prestigious architectural firm, is evident in her approach to creating environments. Marwa became part of our team in 2019 and has since been a driving force in our home improvement section, known for her practical yet stylish solutions. She’s been spearheading our design workshops since then, infusing her passion for teaching into her work. In her leisure time, Marwa enjoys exploring historic architecture and is an enthusiastic pottery hobbyist, further enriching her understanding of form and texture.